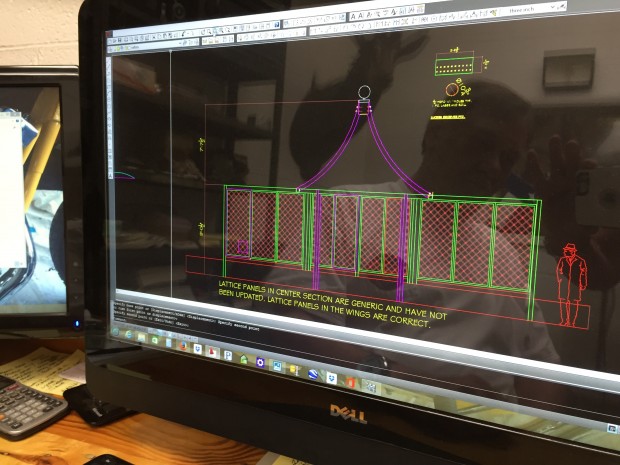
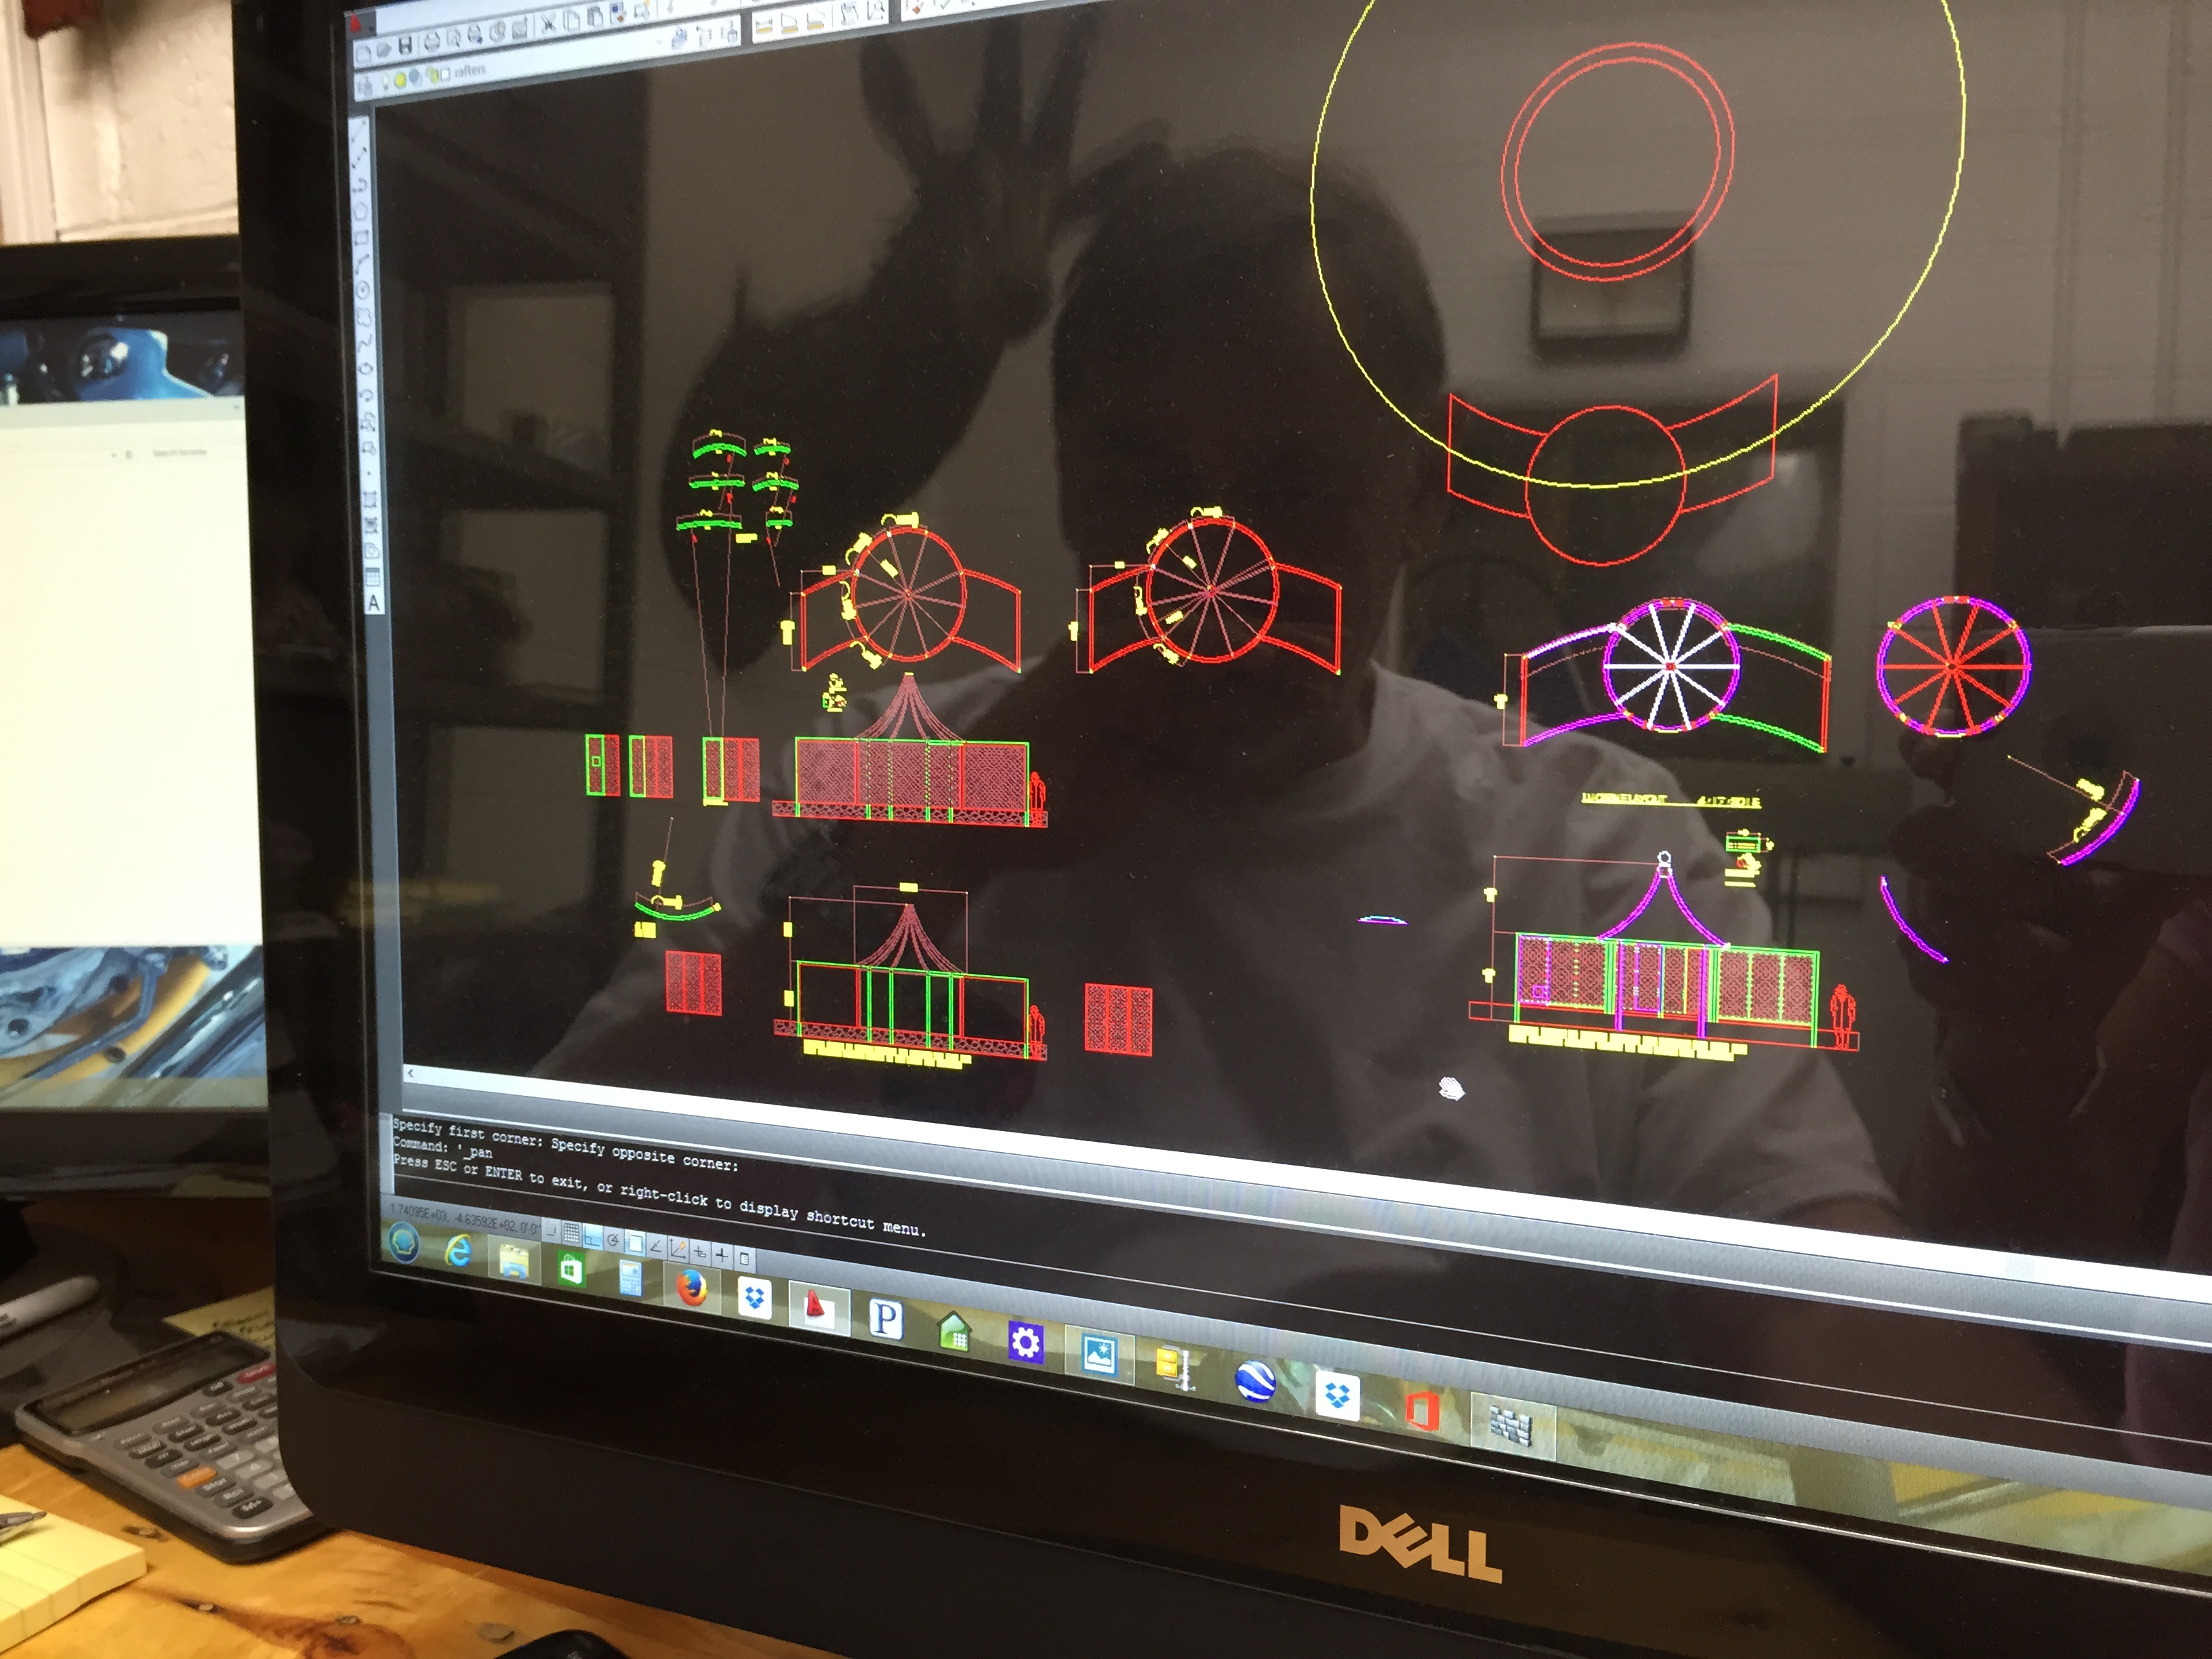
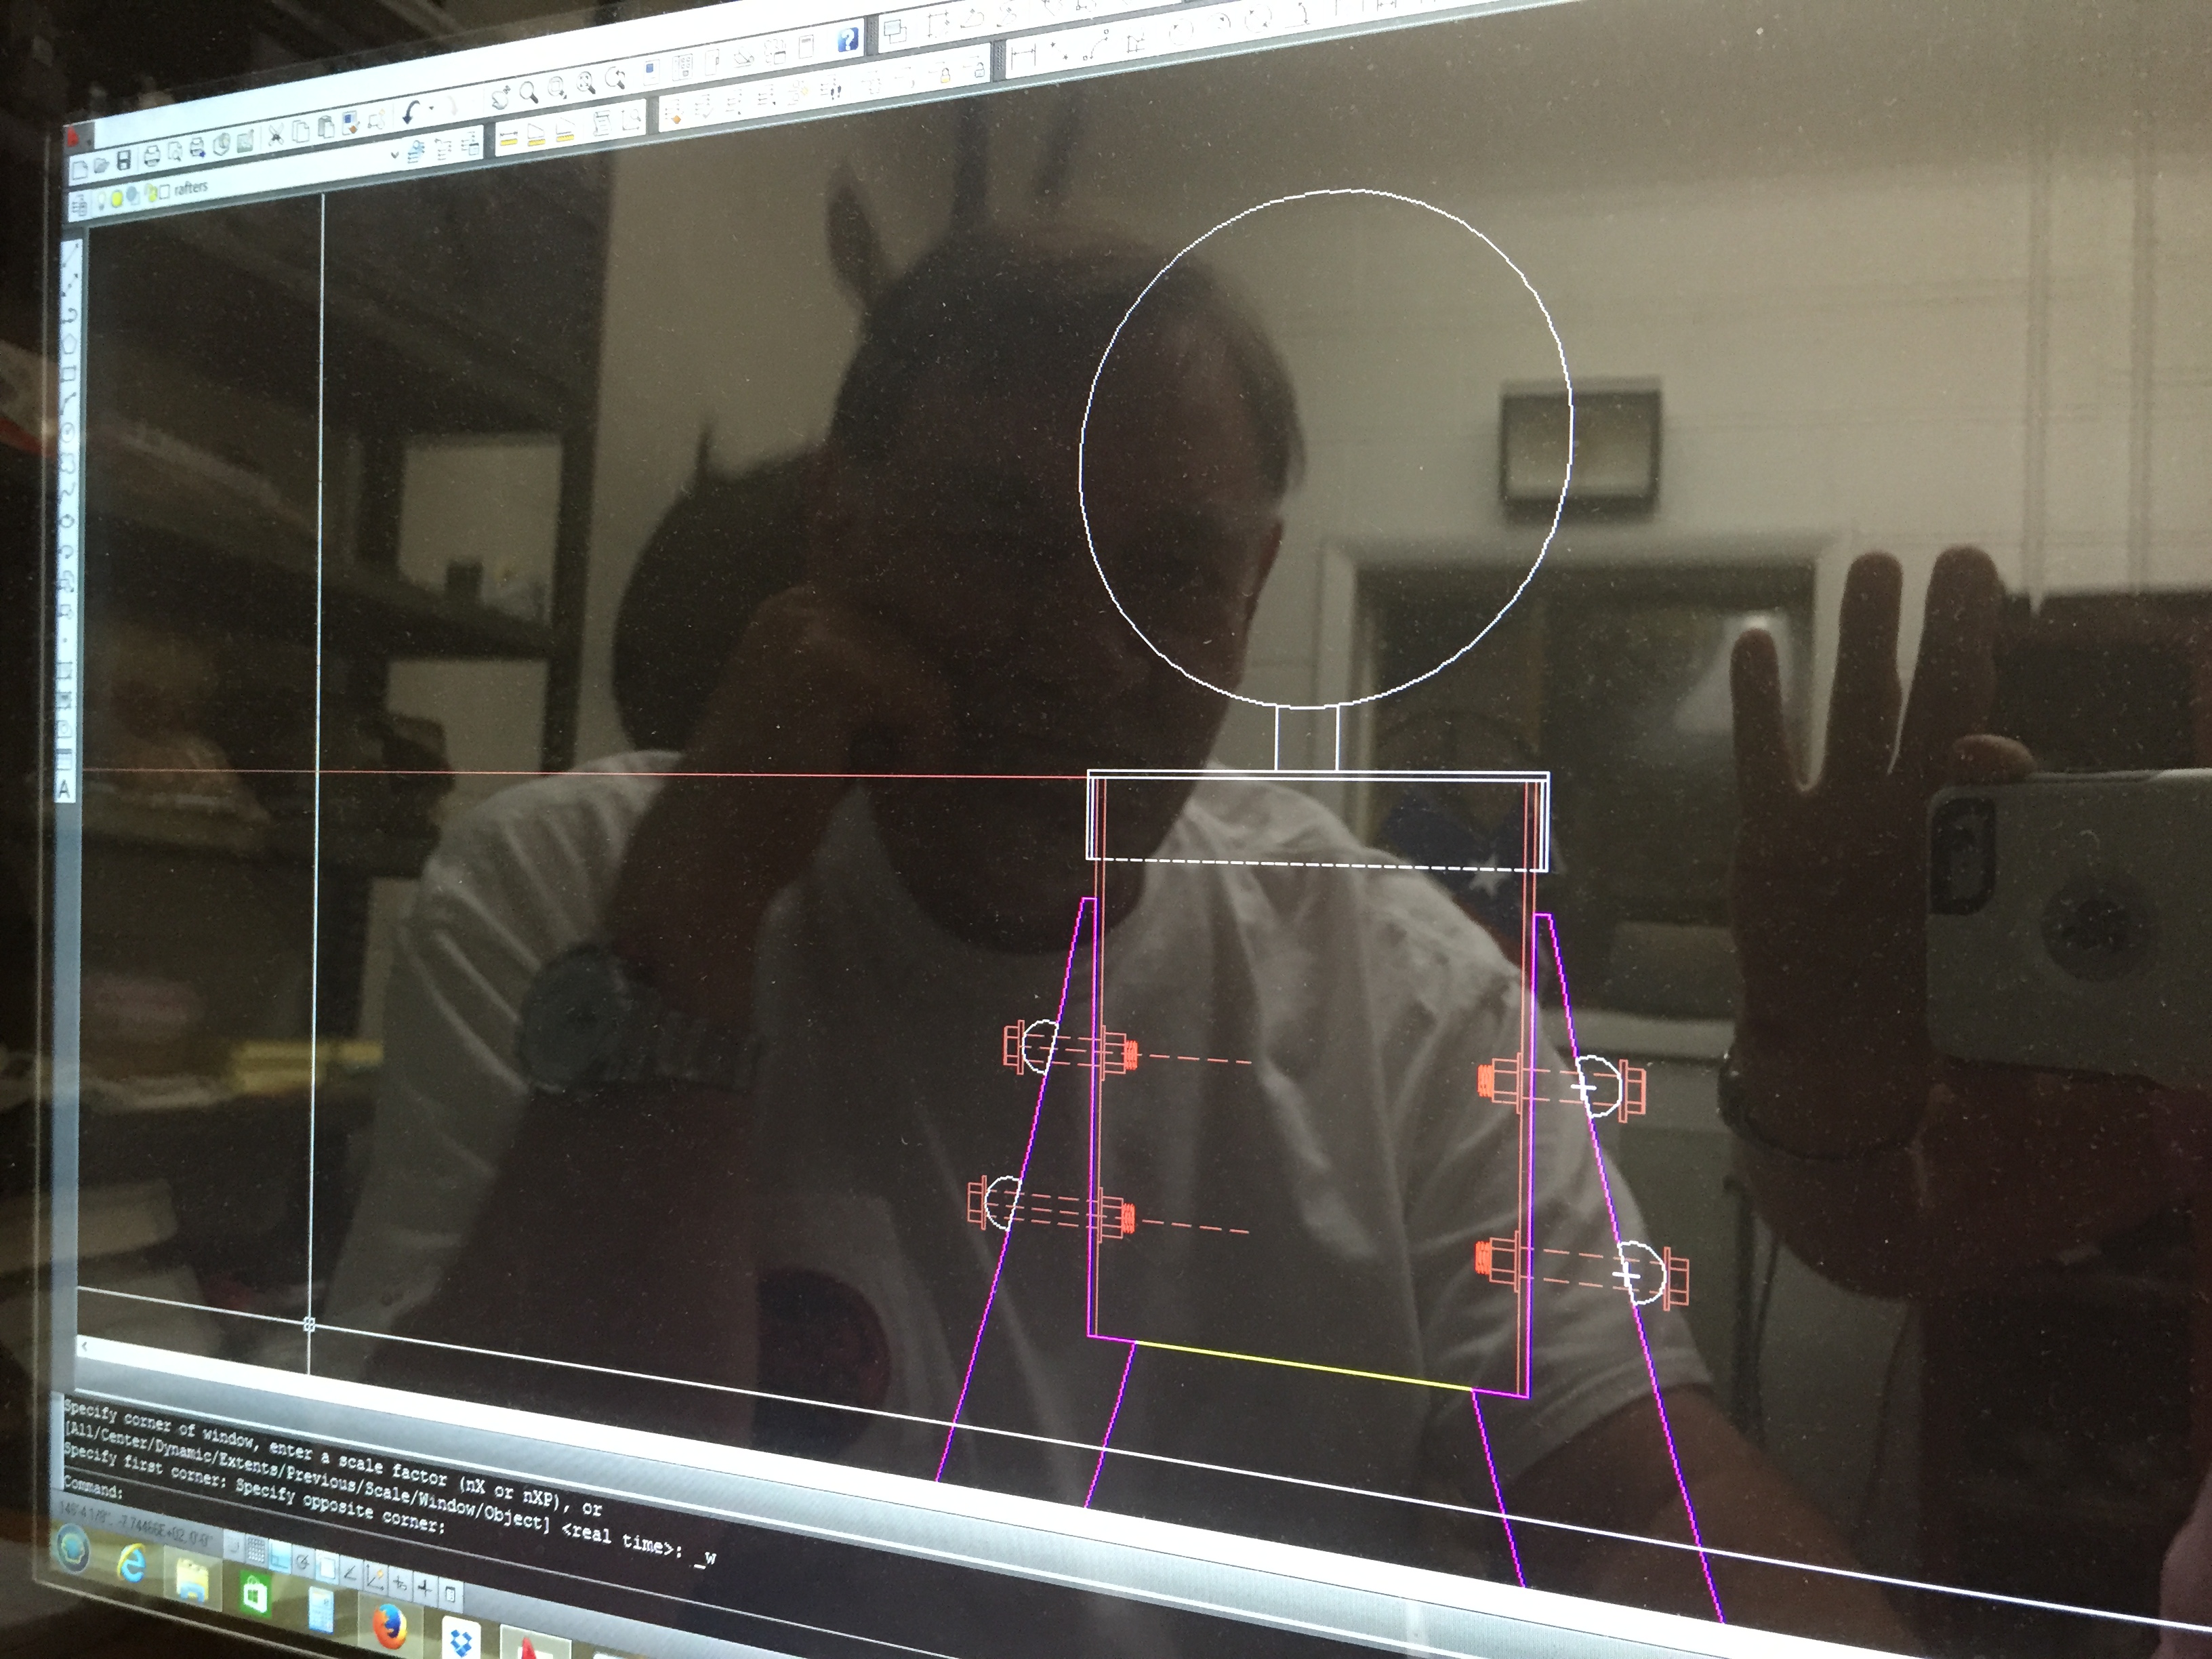
 Phase 1: Design, engineer, and build Once Buck had my sketch for the pergola, there were a lot of drawings that would need to be done. The CAD drawings would indicate the angles, the rolling radiuses, and the exact sizes of every piece of steel that would be necessary to fabricate the piece. Buck constructed the pergola full size – down to the last bolt hole – in the computer.

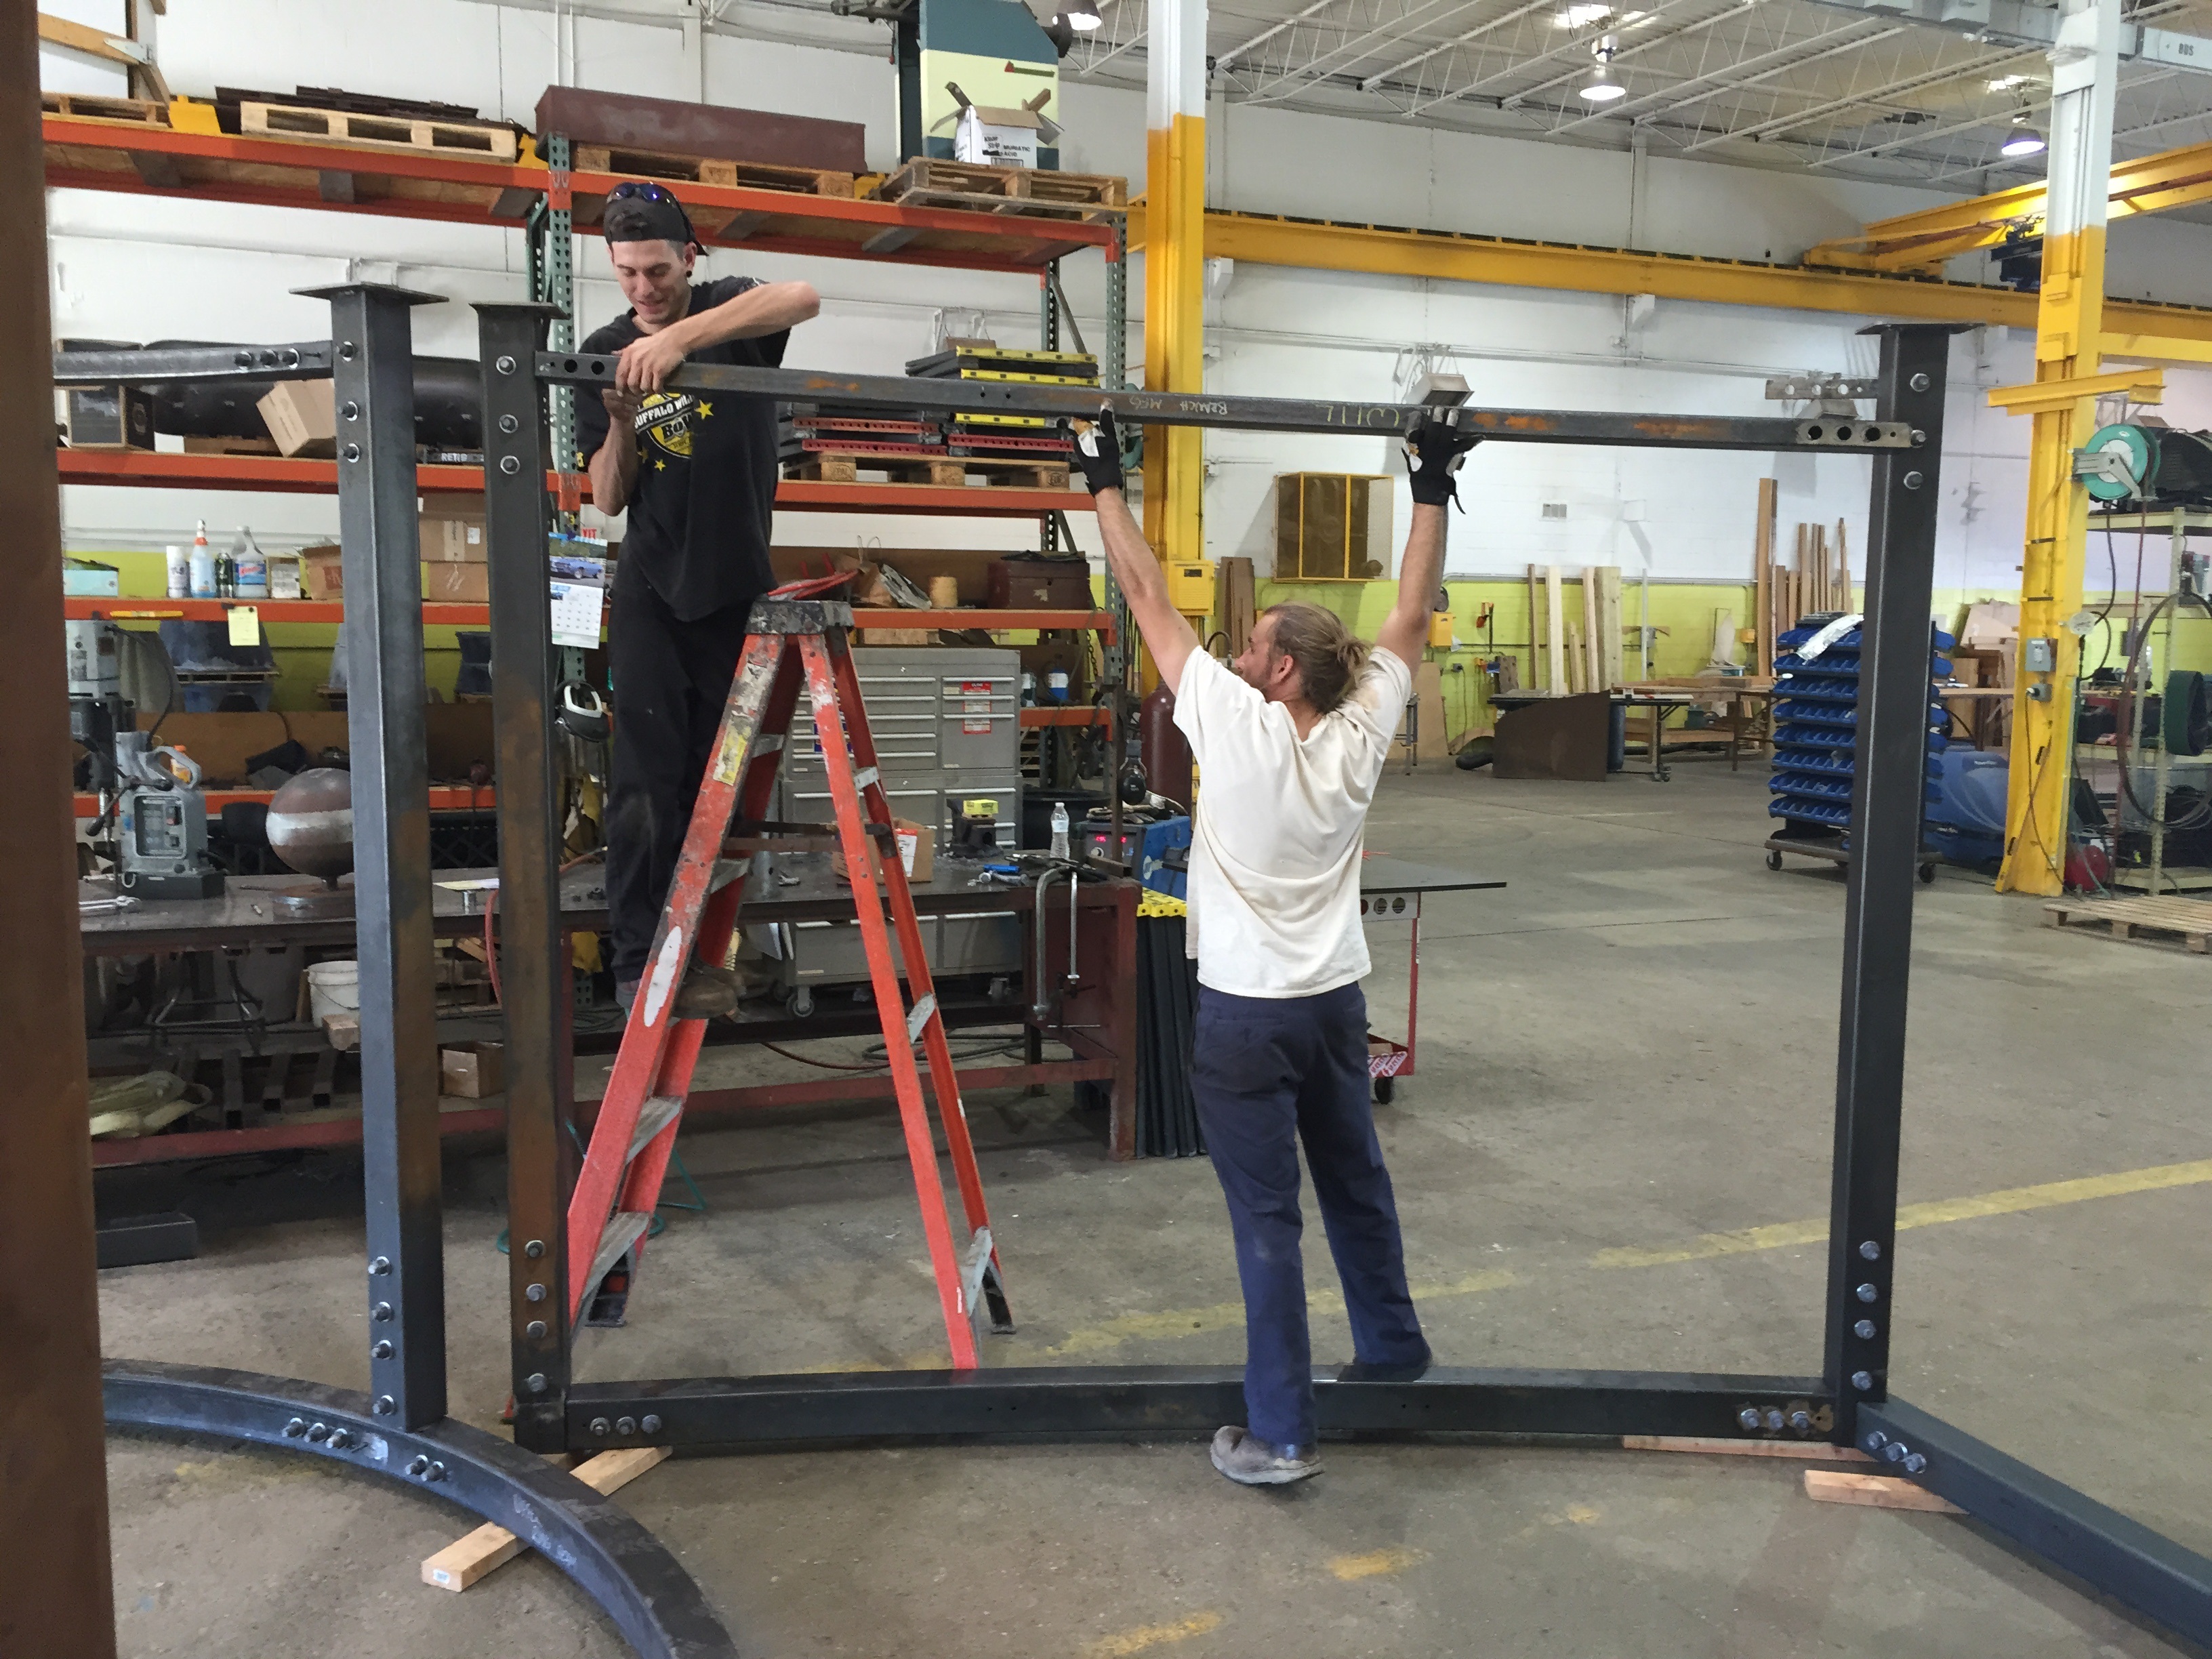
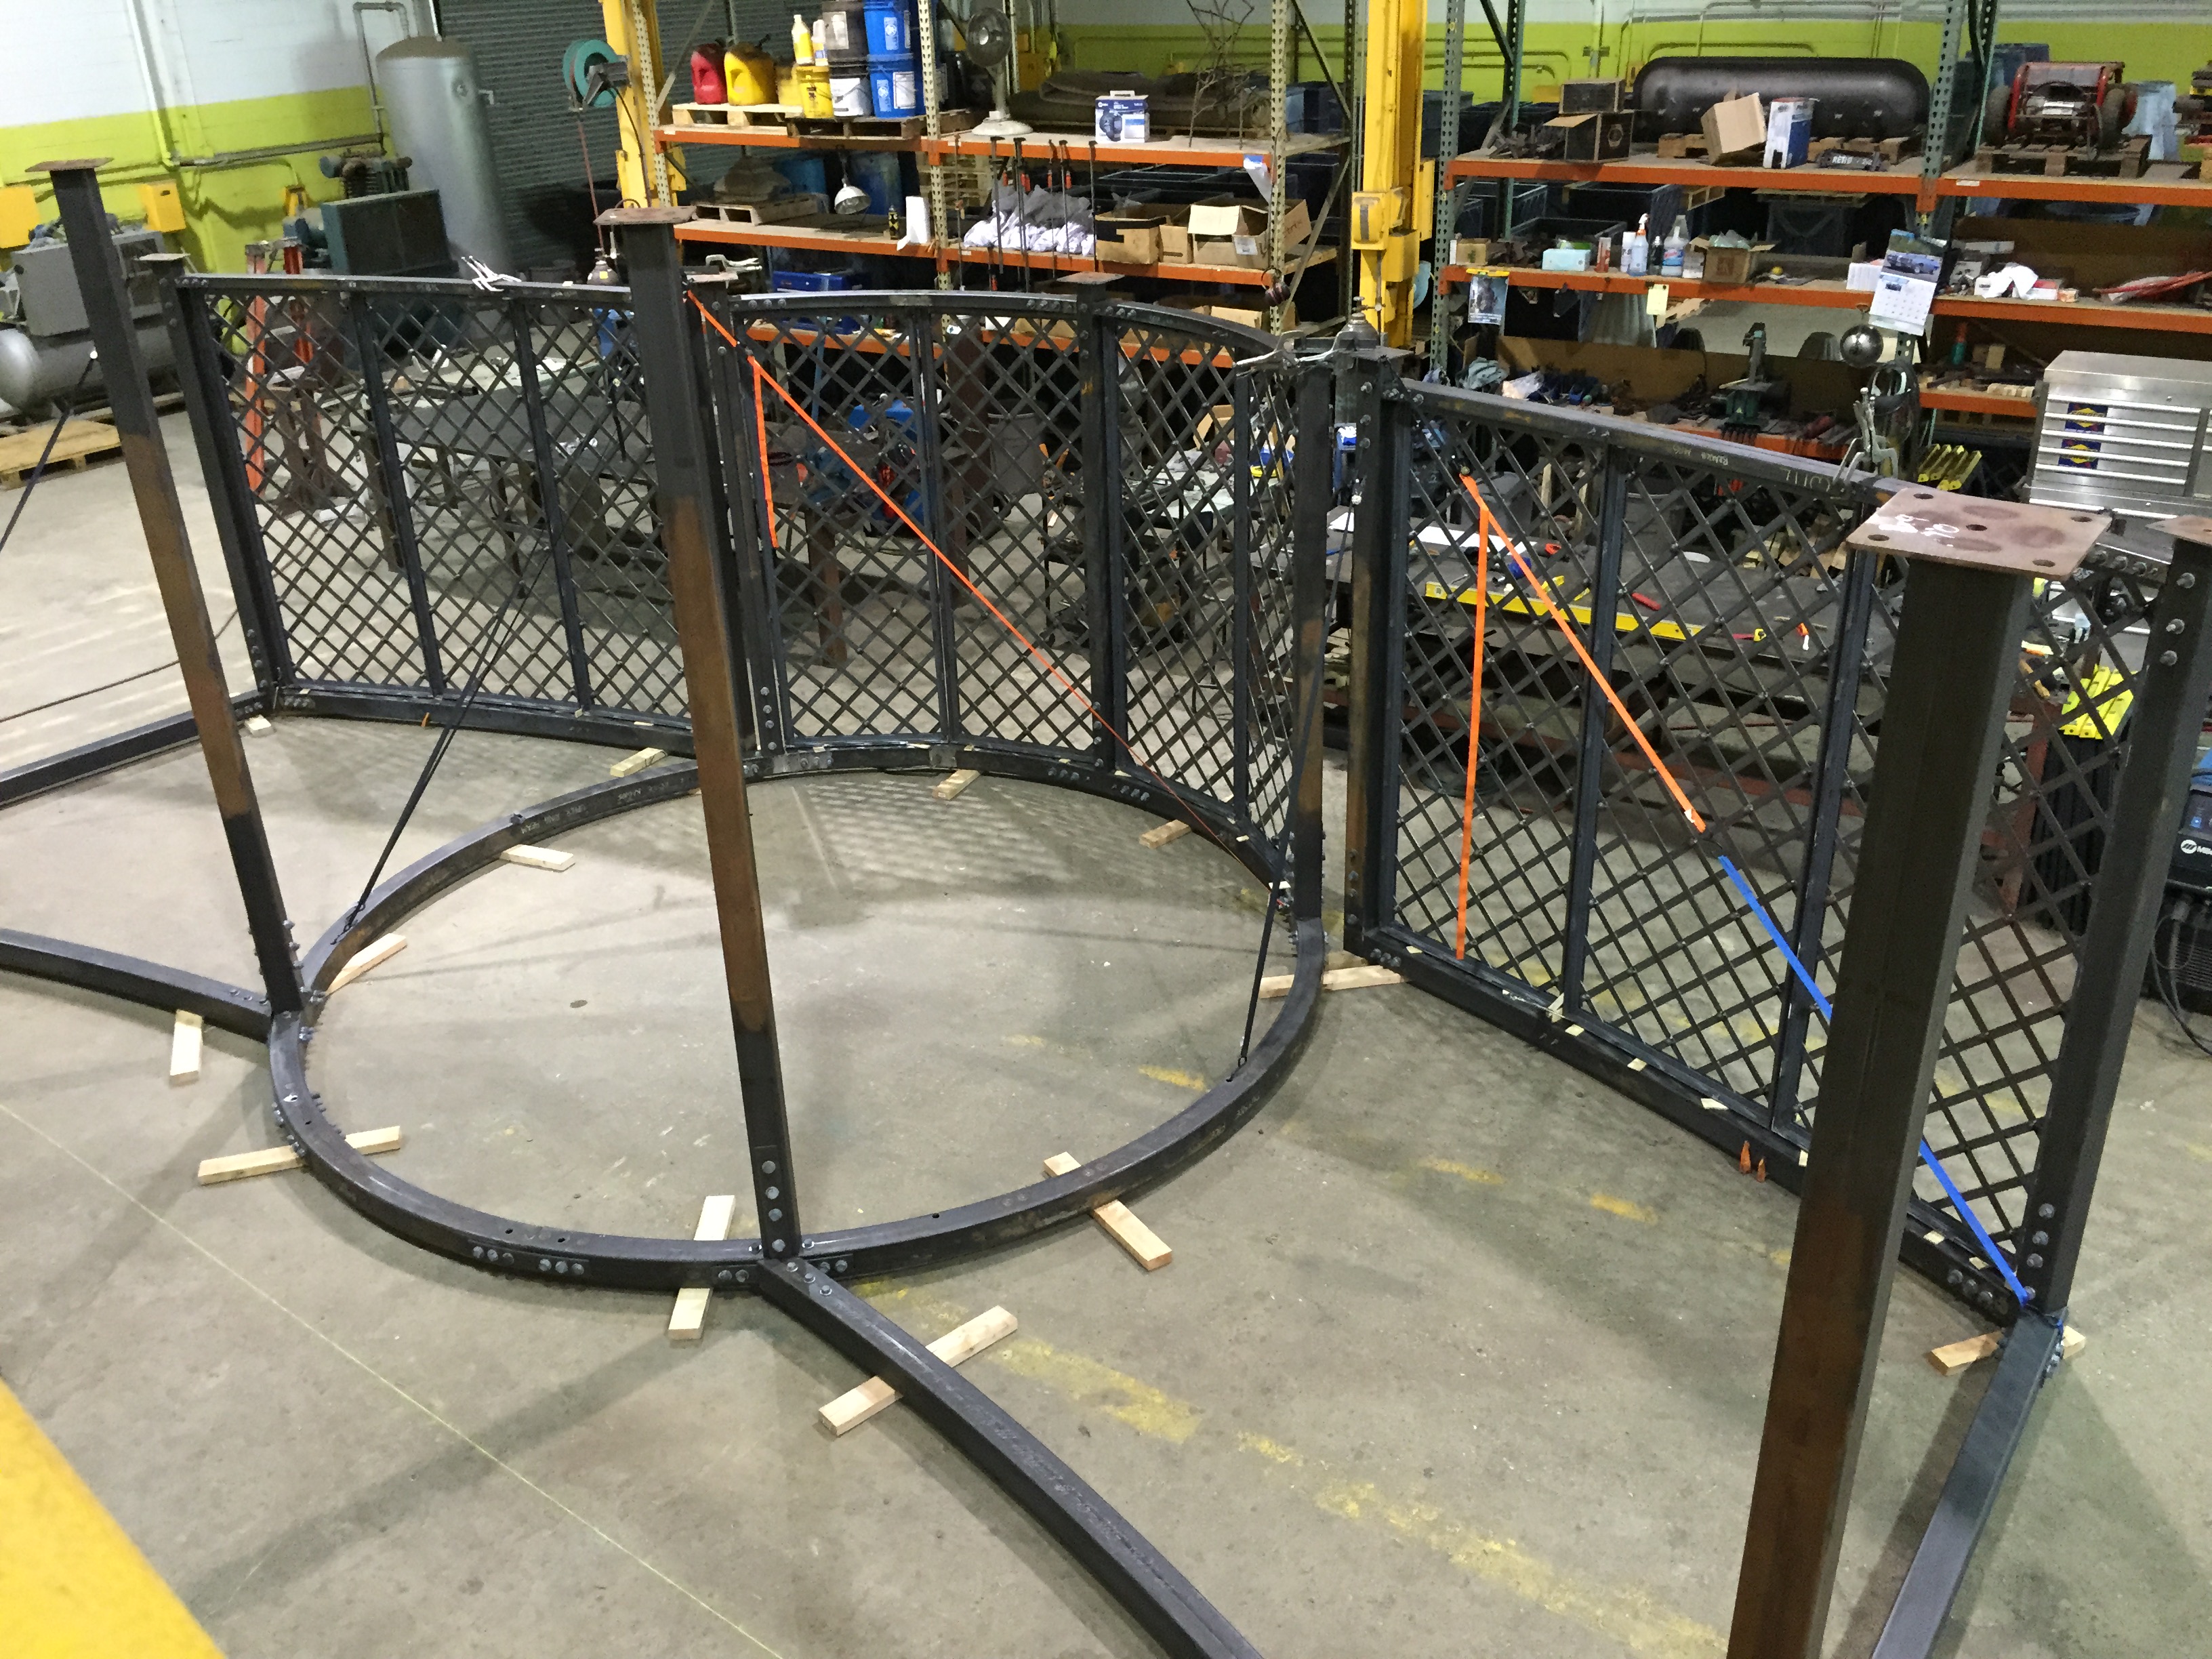 Buck’s crew put the base of the pergola together up side down, to be sure every piece fit together properly. Owen was the lead fabricator on the project, with help from Adam, Riley, Sal, LaBelle, and Buck.
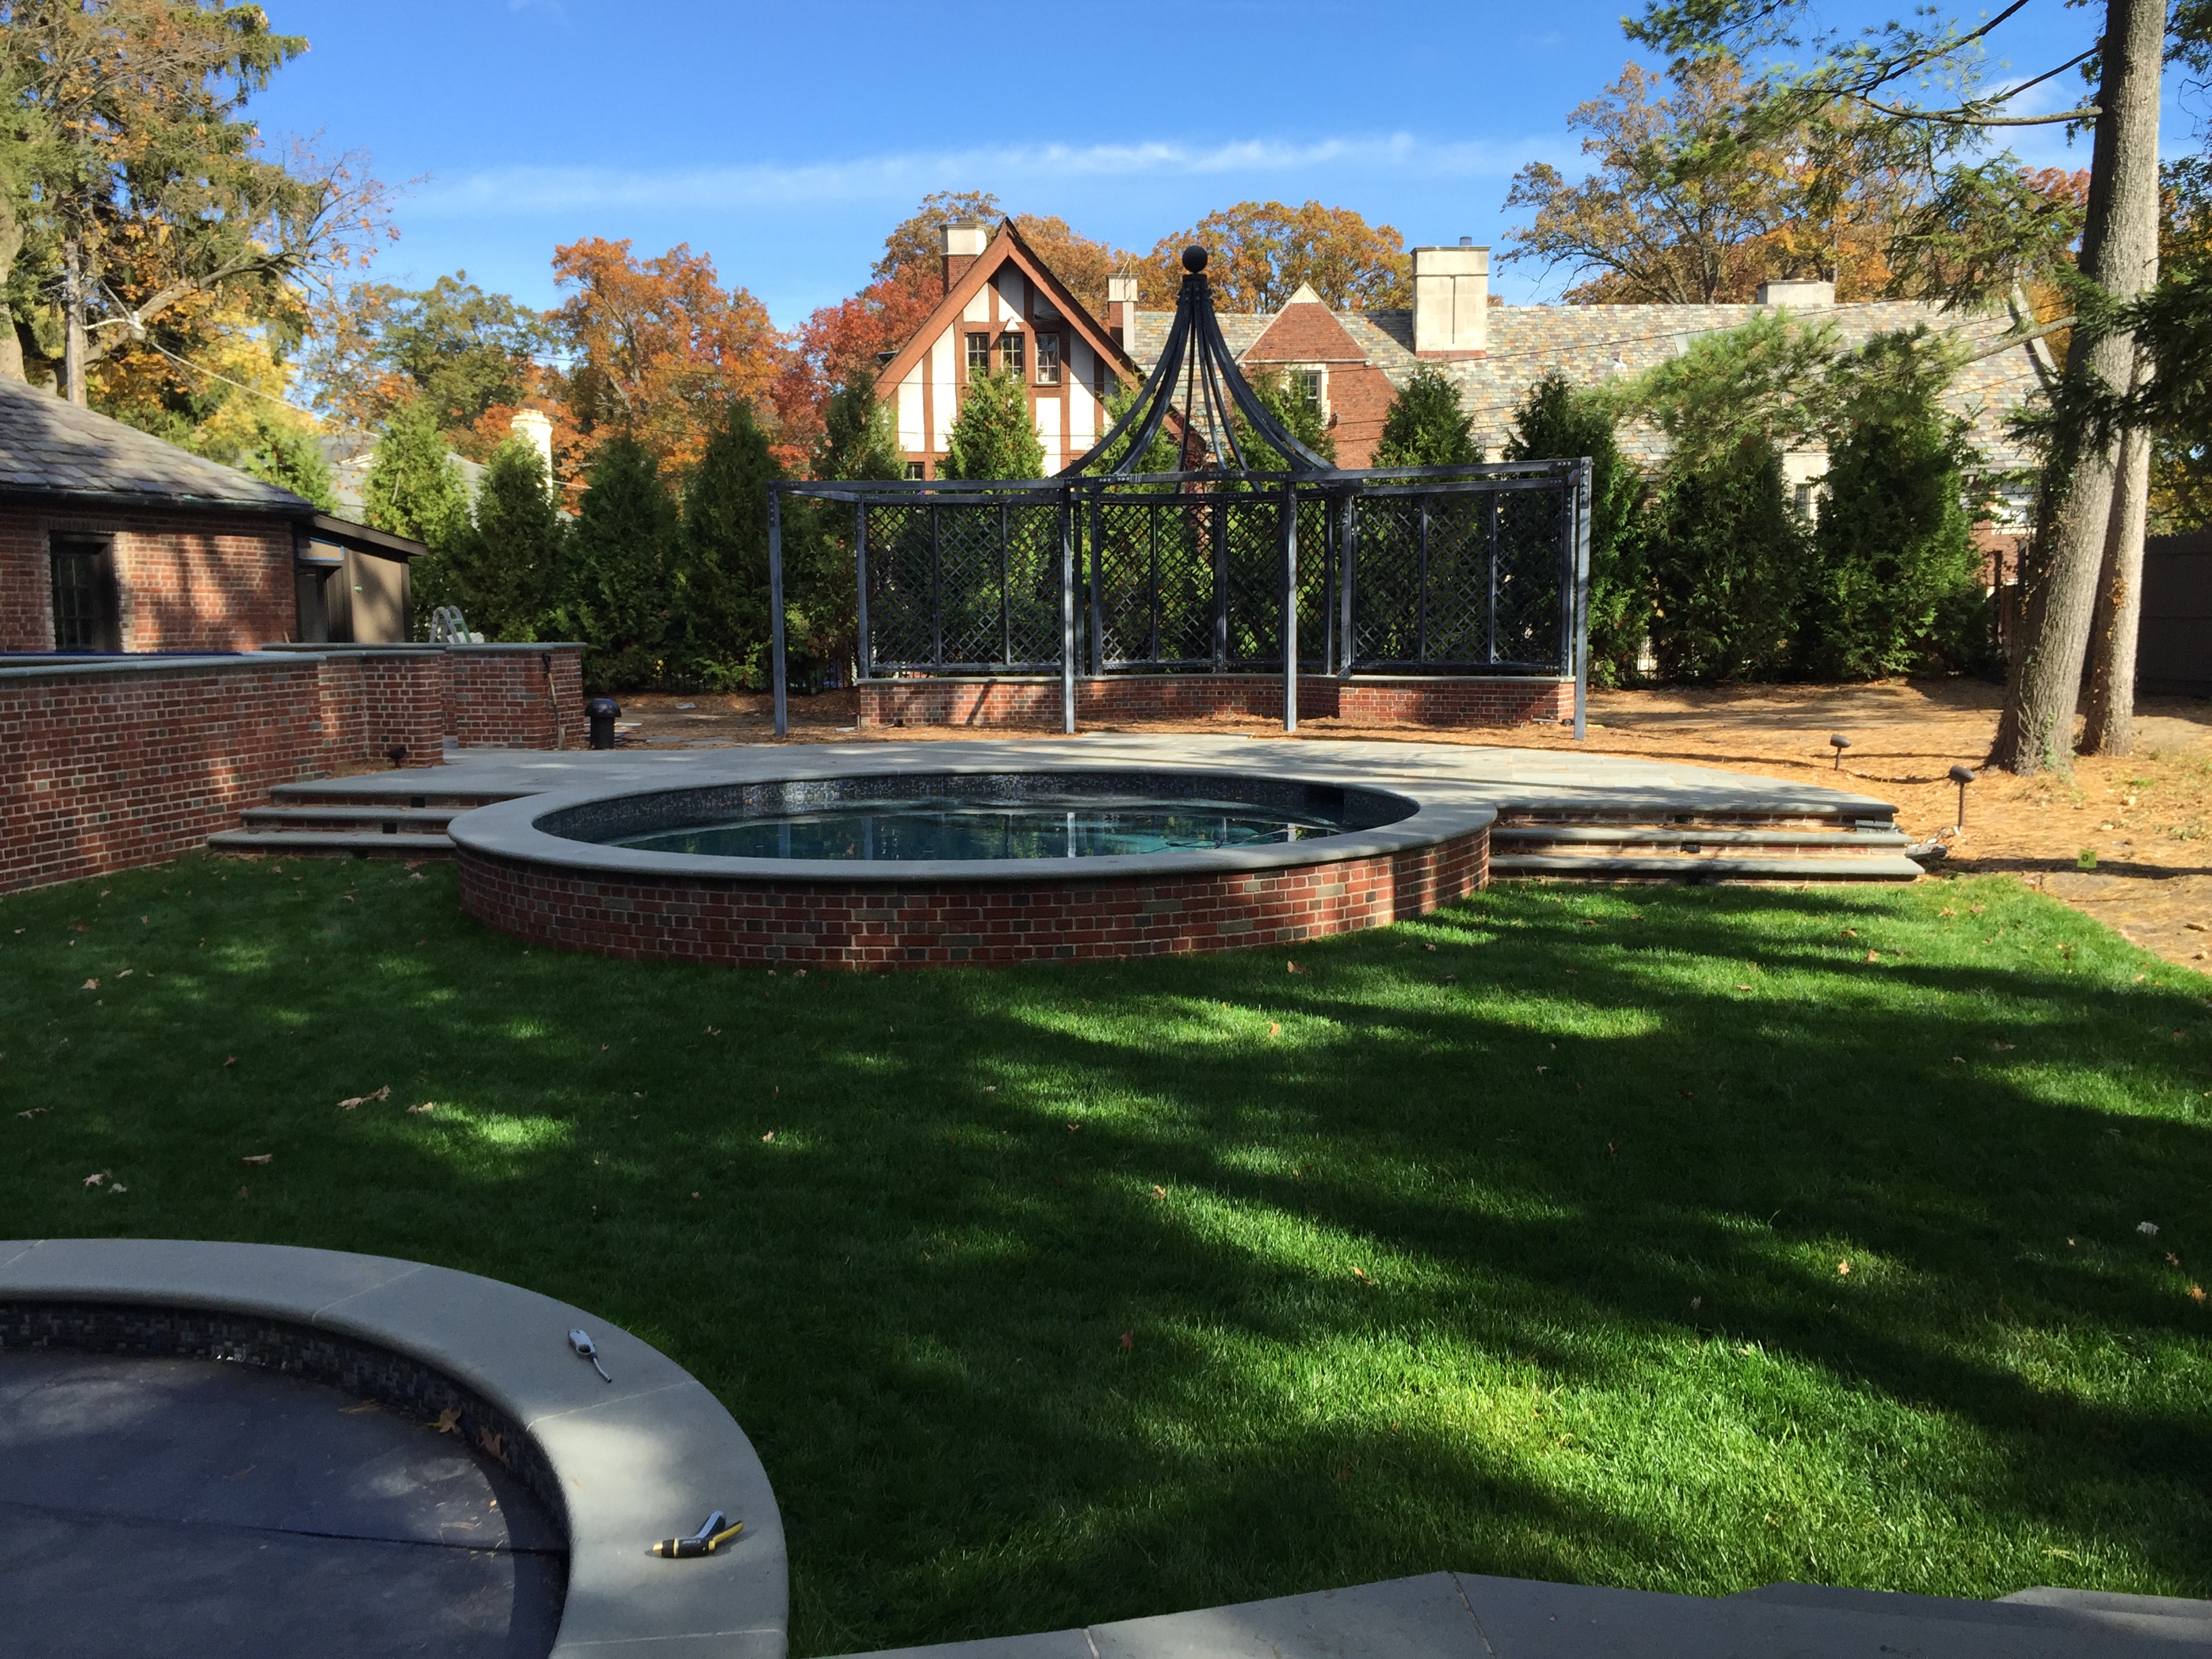
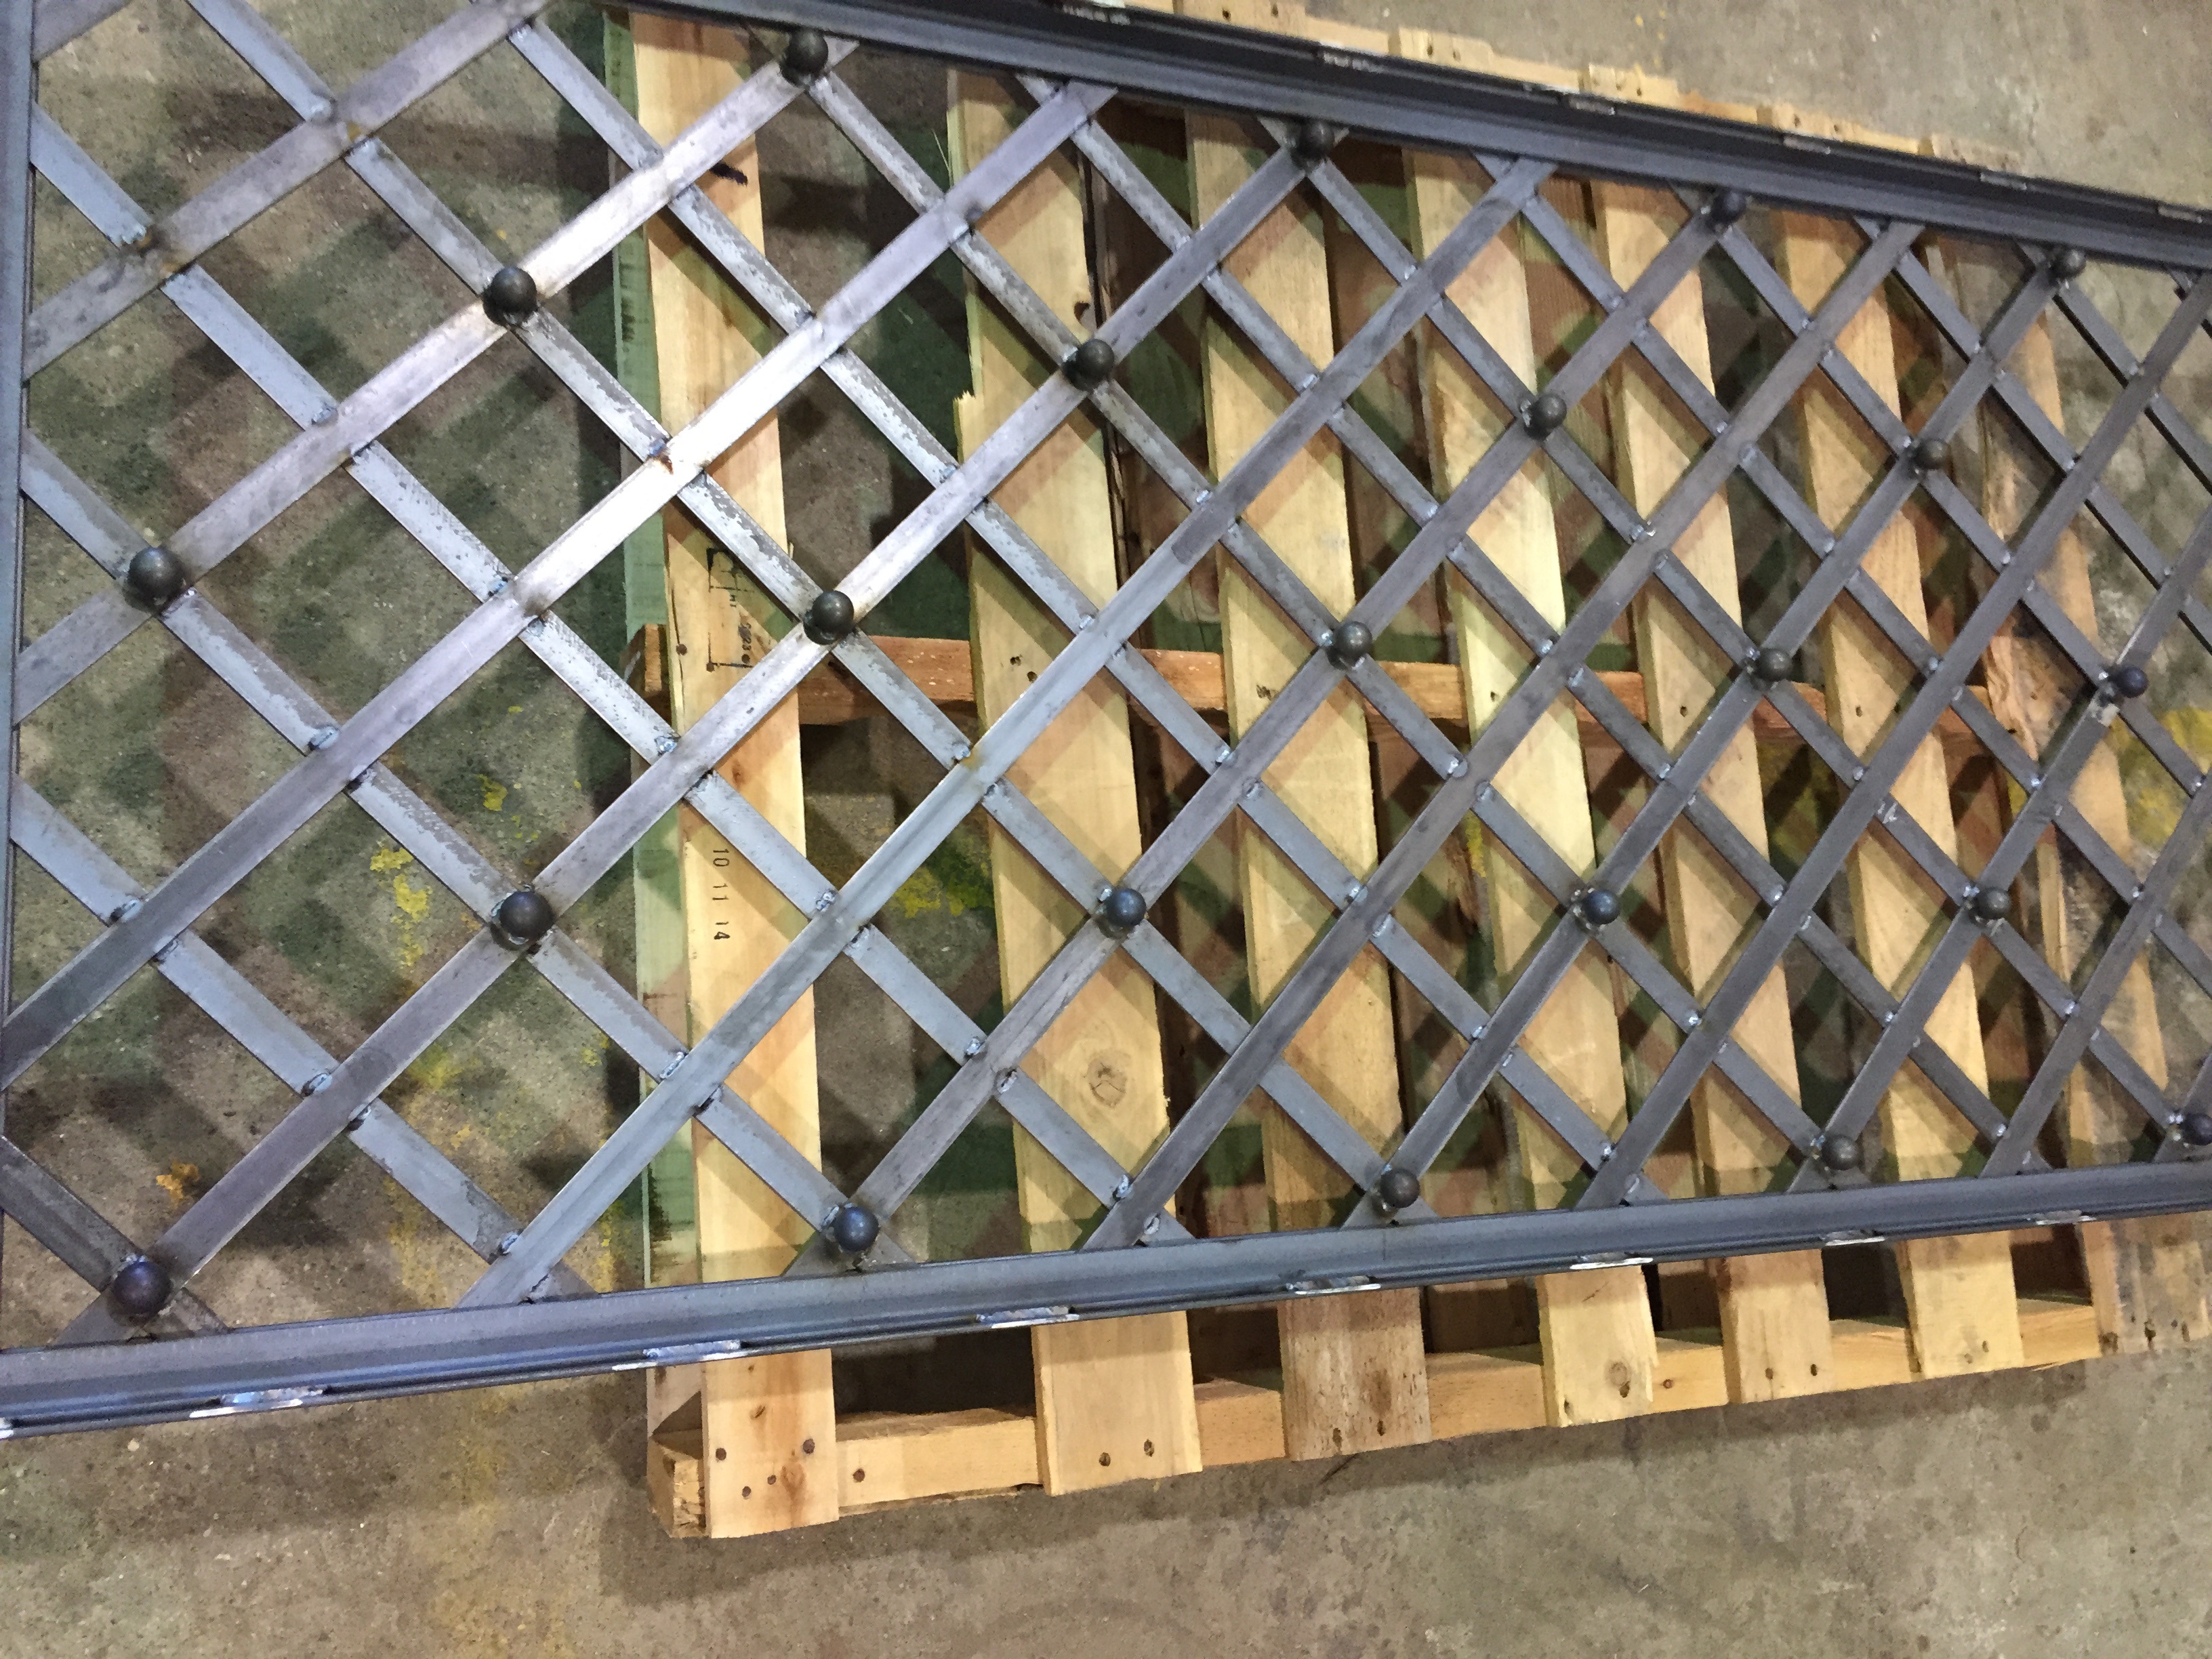 Lattice panels were designed and fabricated as an open wall for the back of the pergola, and feature a steel ball detail.
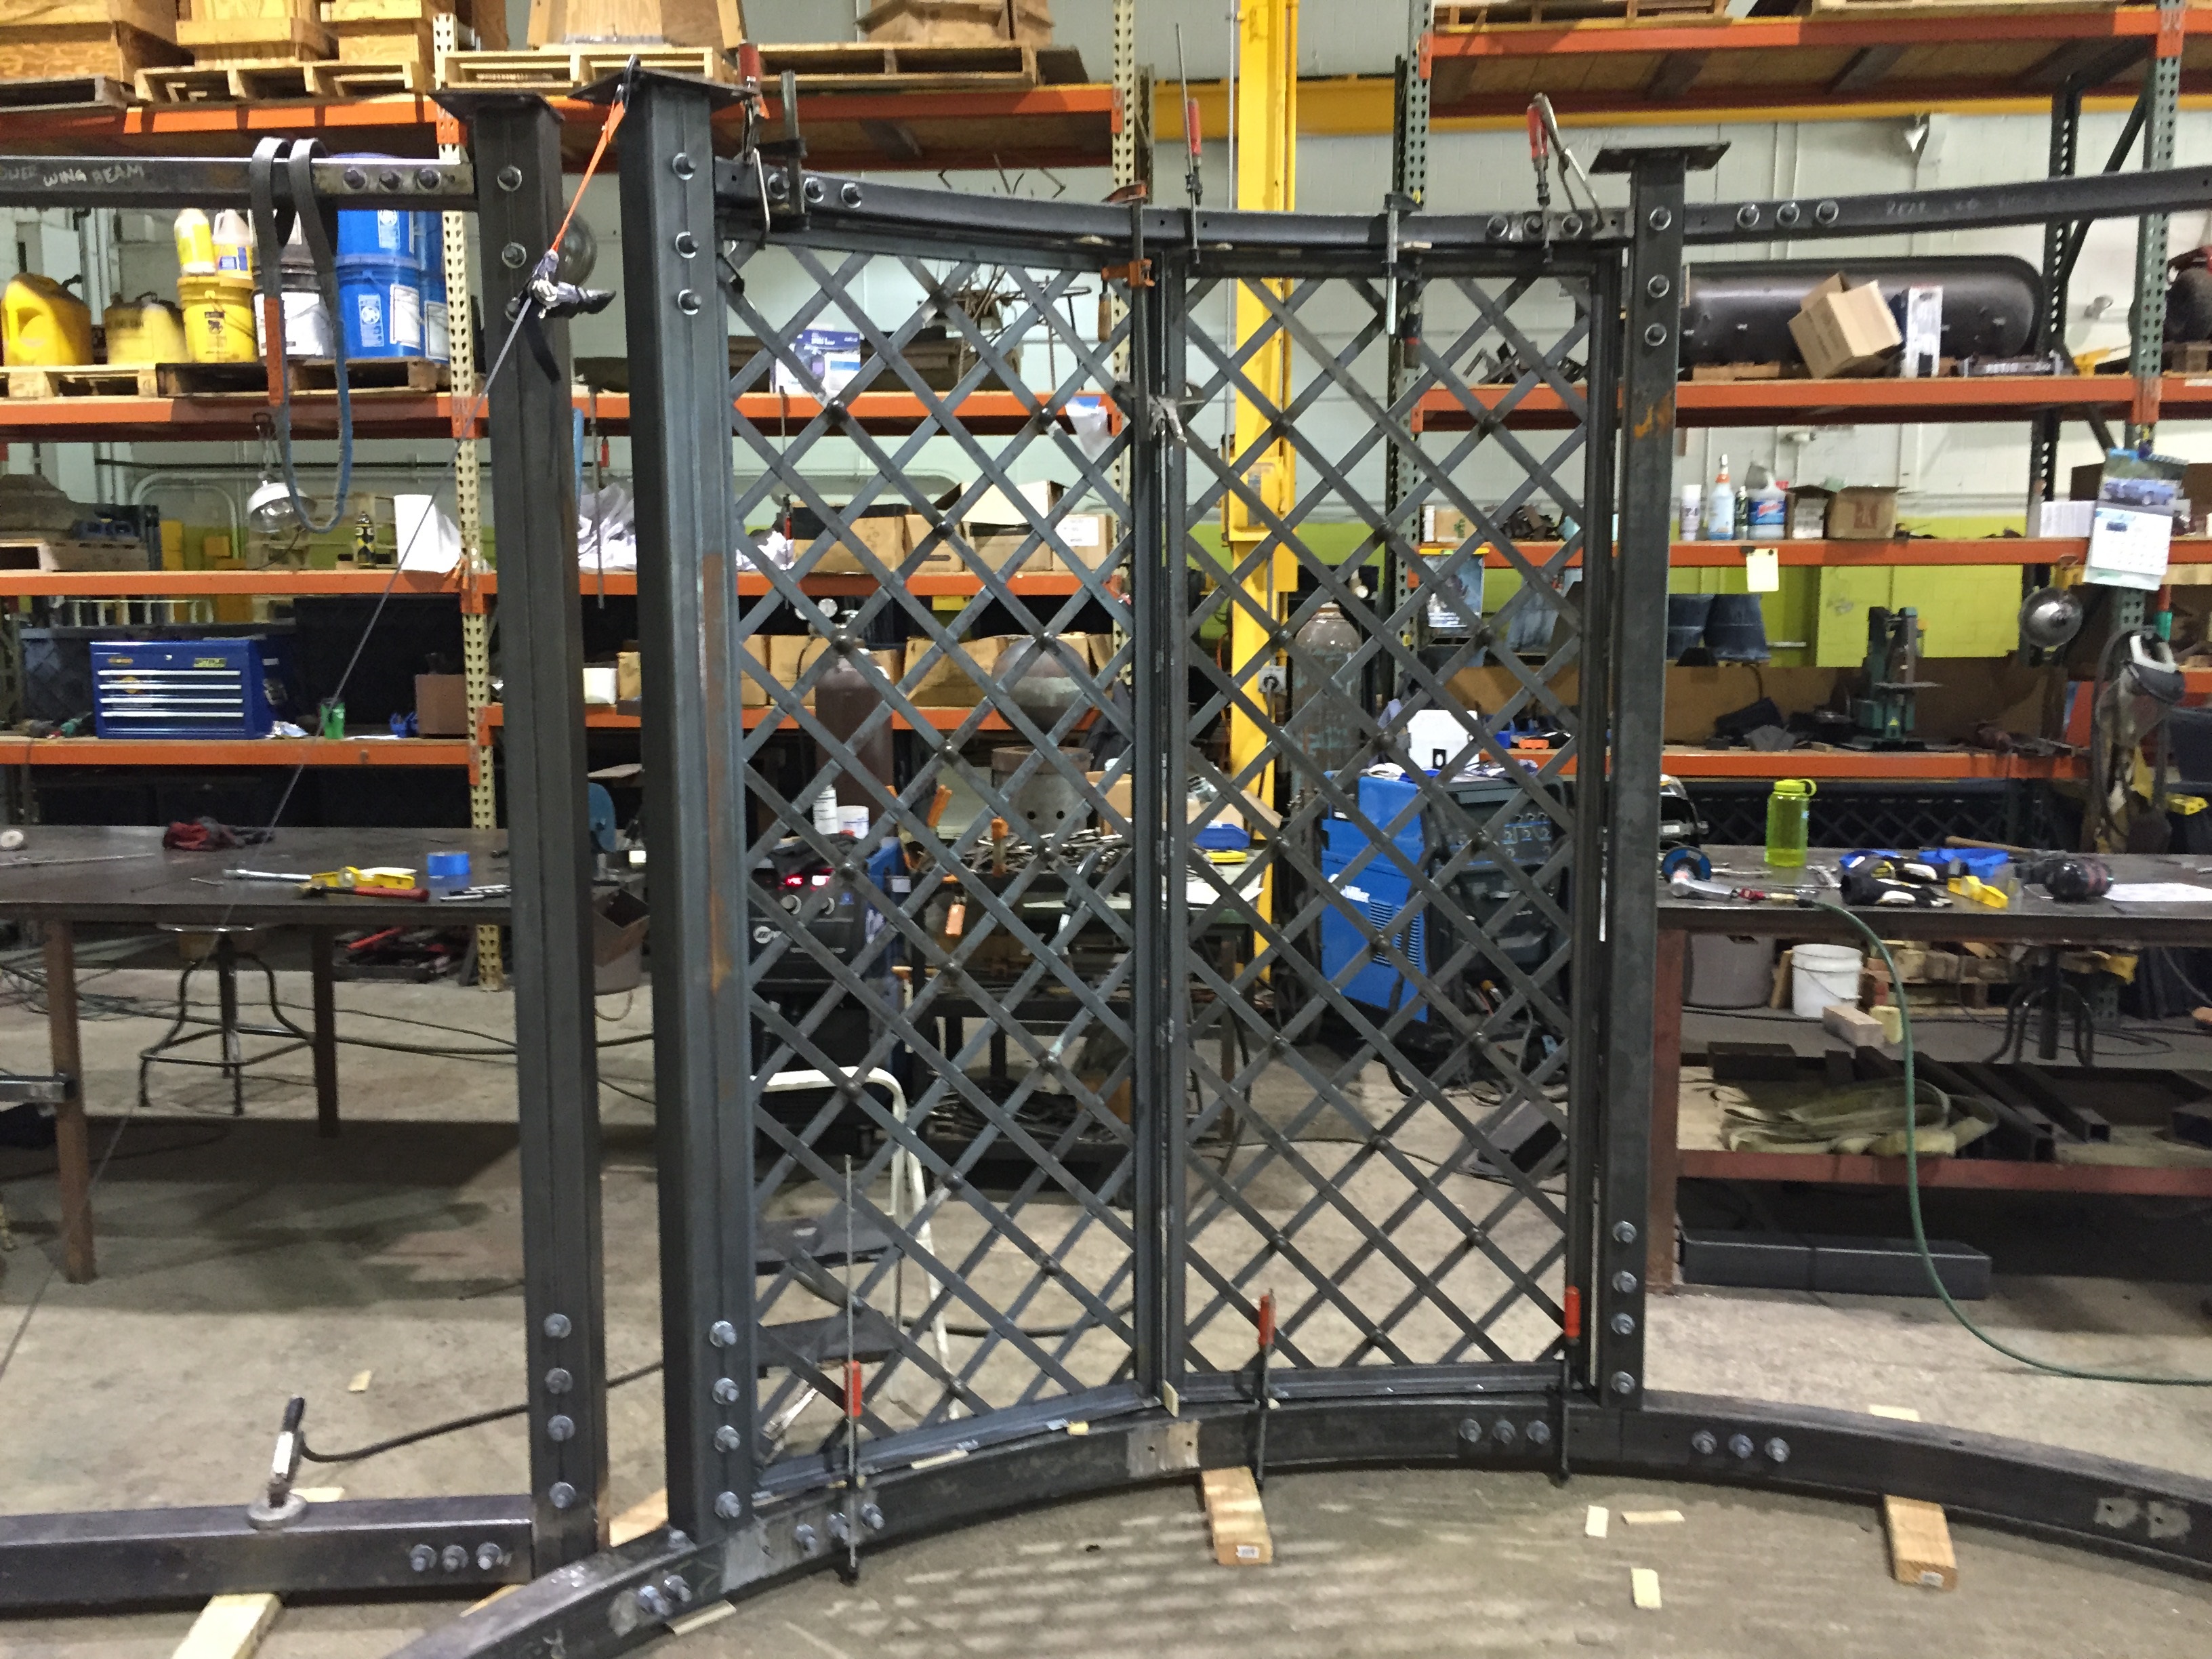 Each of nine panels were hand fabricated and fitted to each opening.
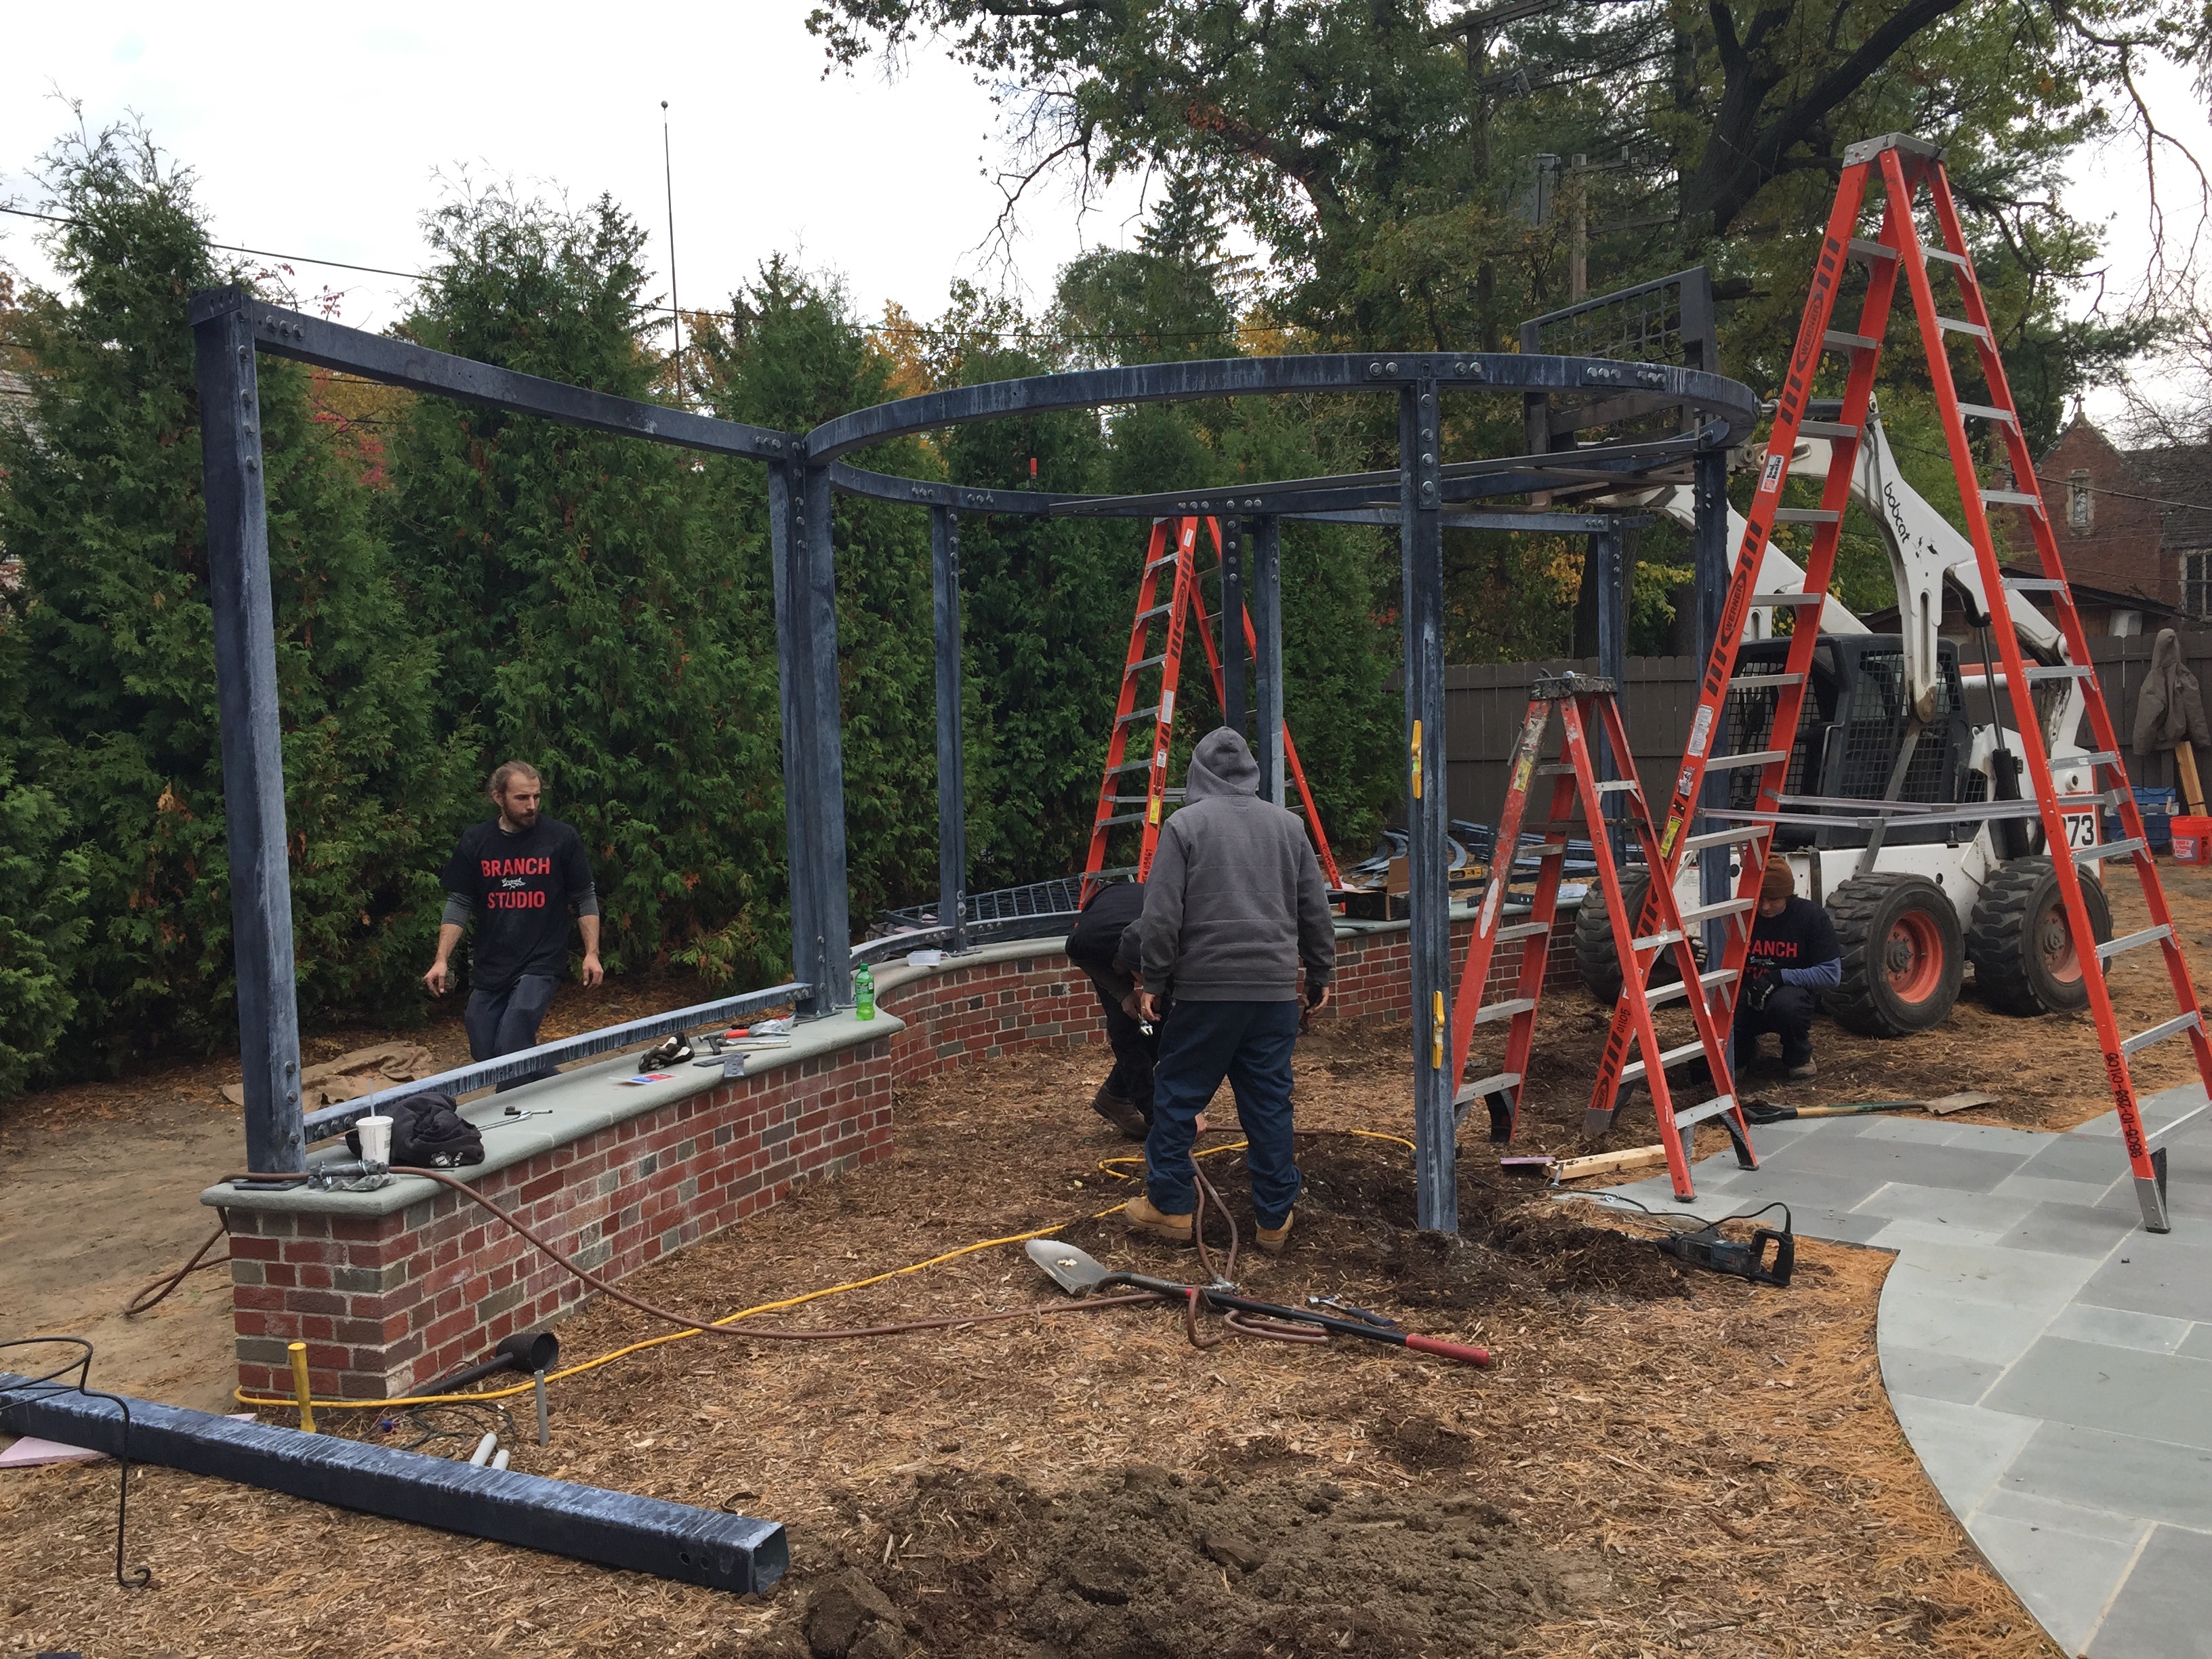
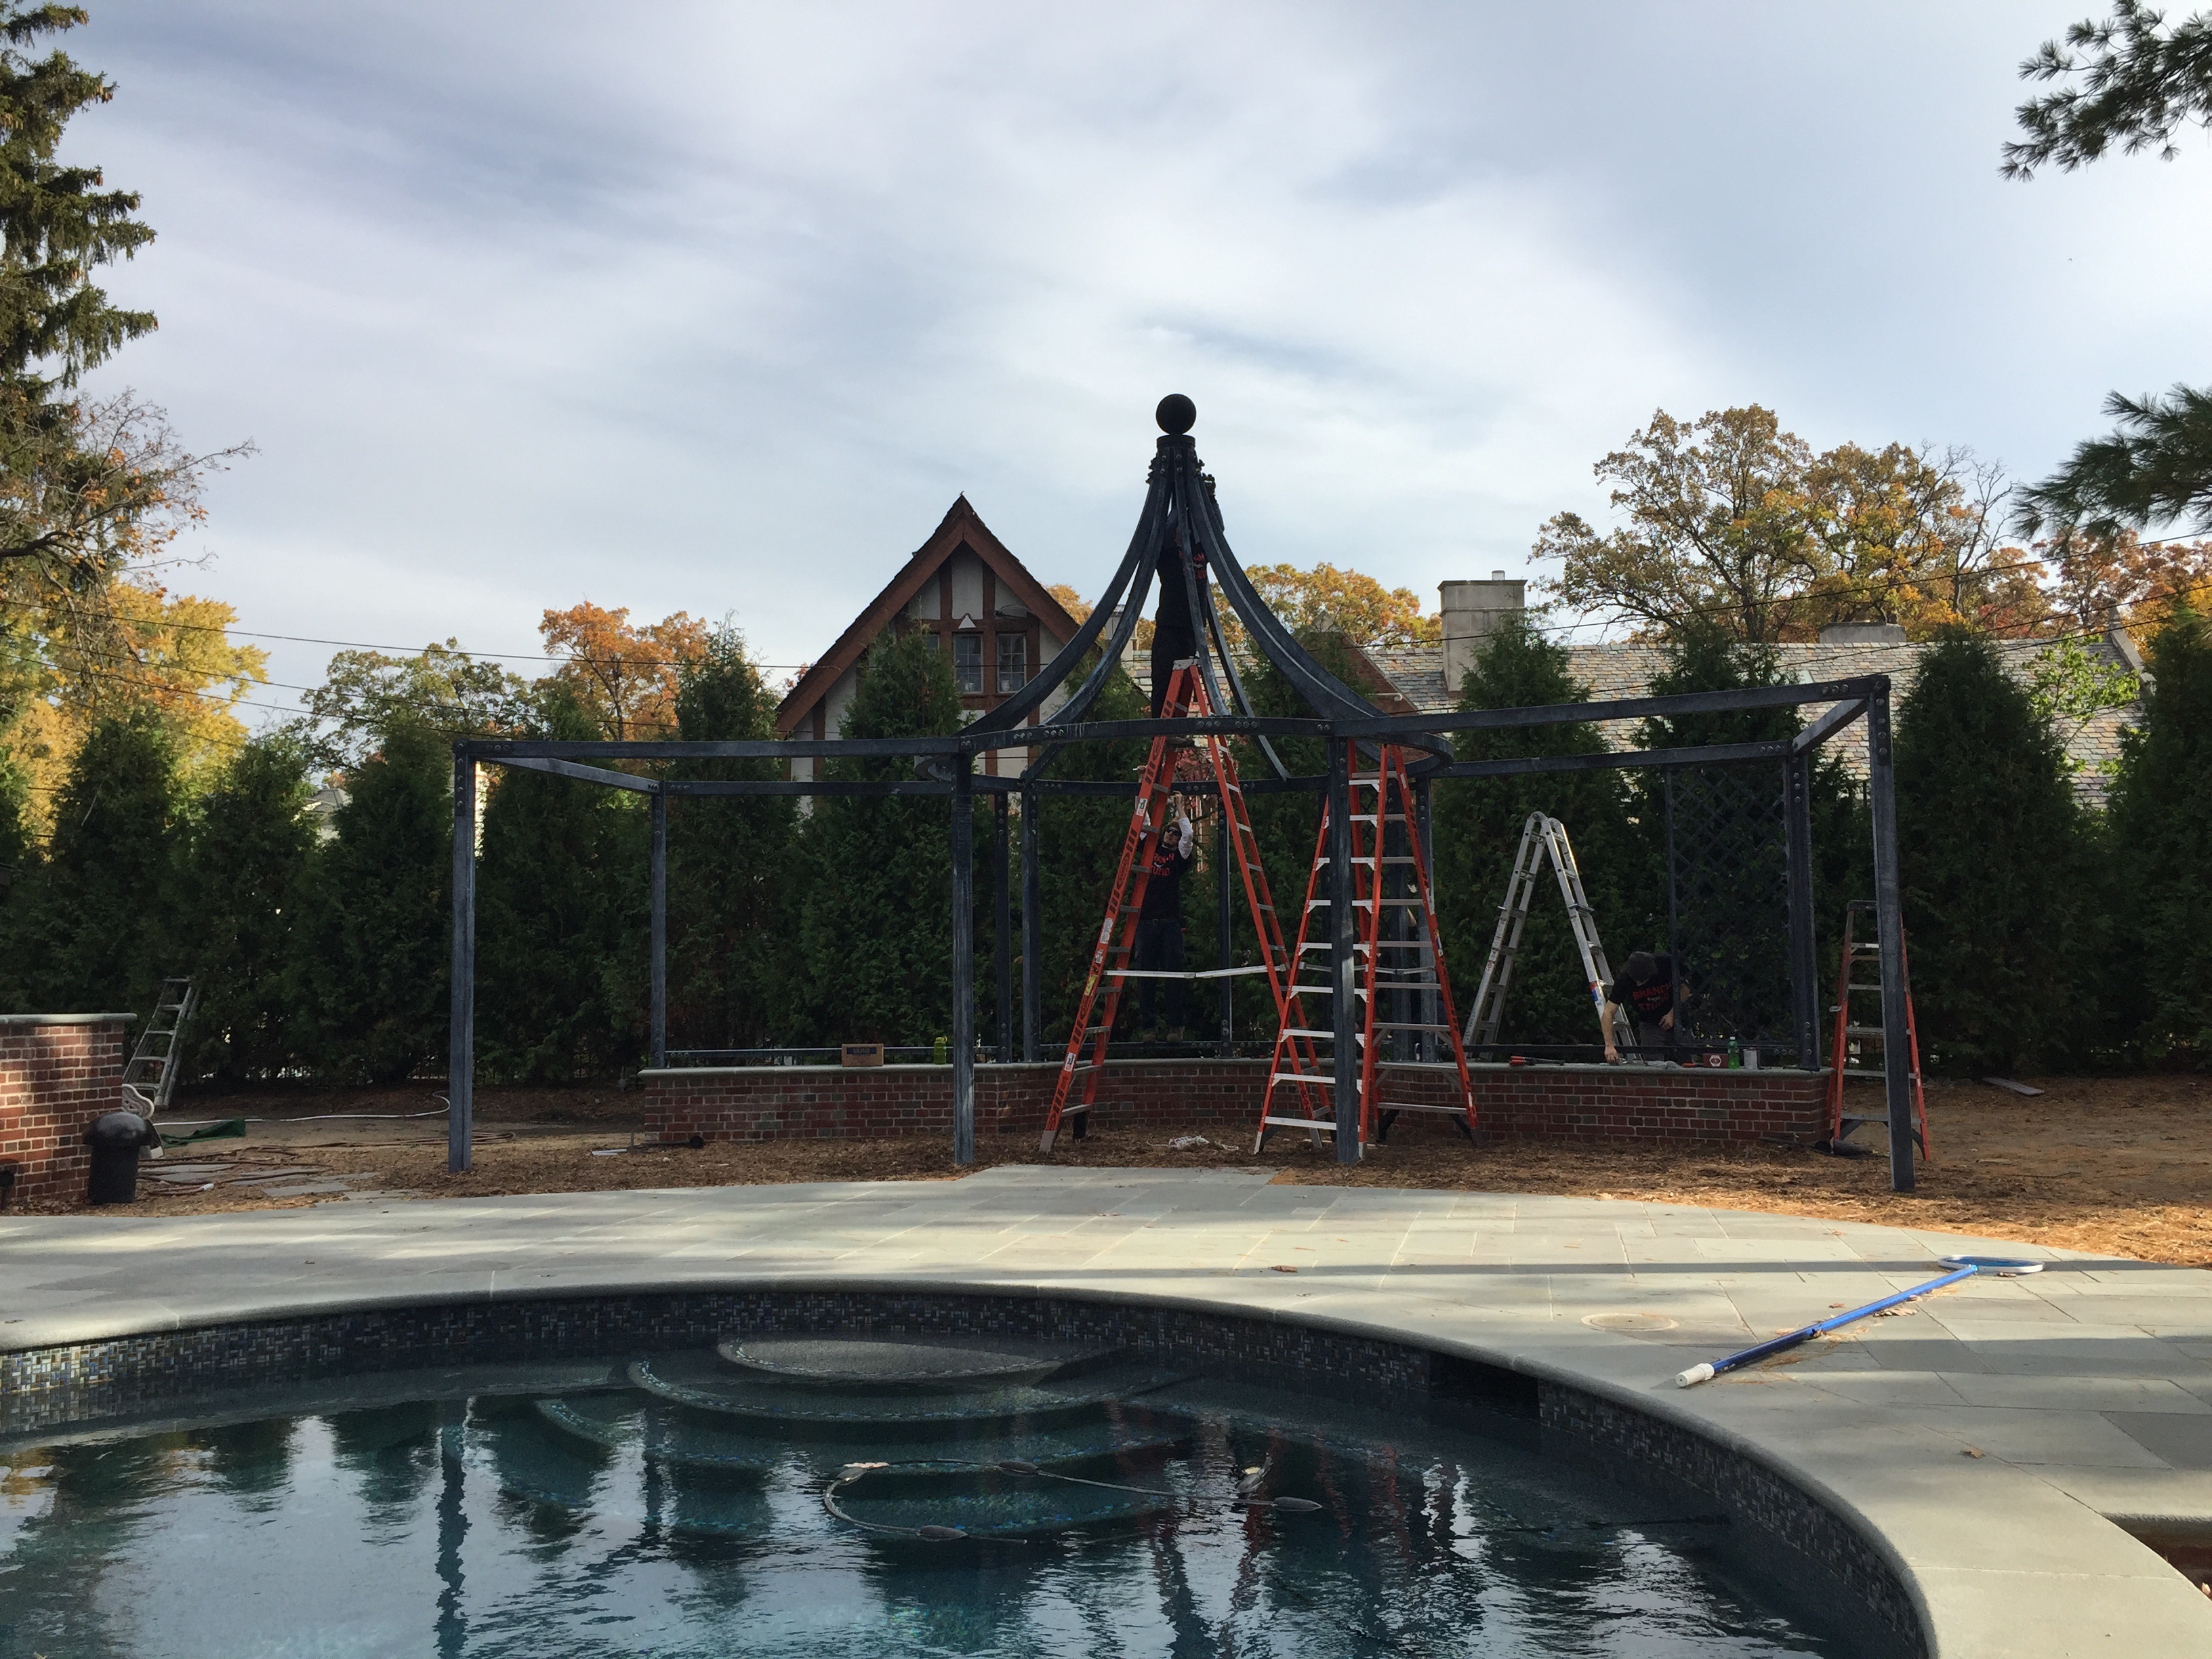
 The installation: setting the structure. The bottom of the pergola was bolted in the rear to a seat wall of brick, through the bull nosed blue stone coping.

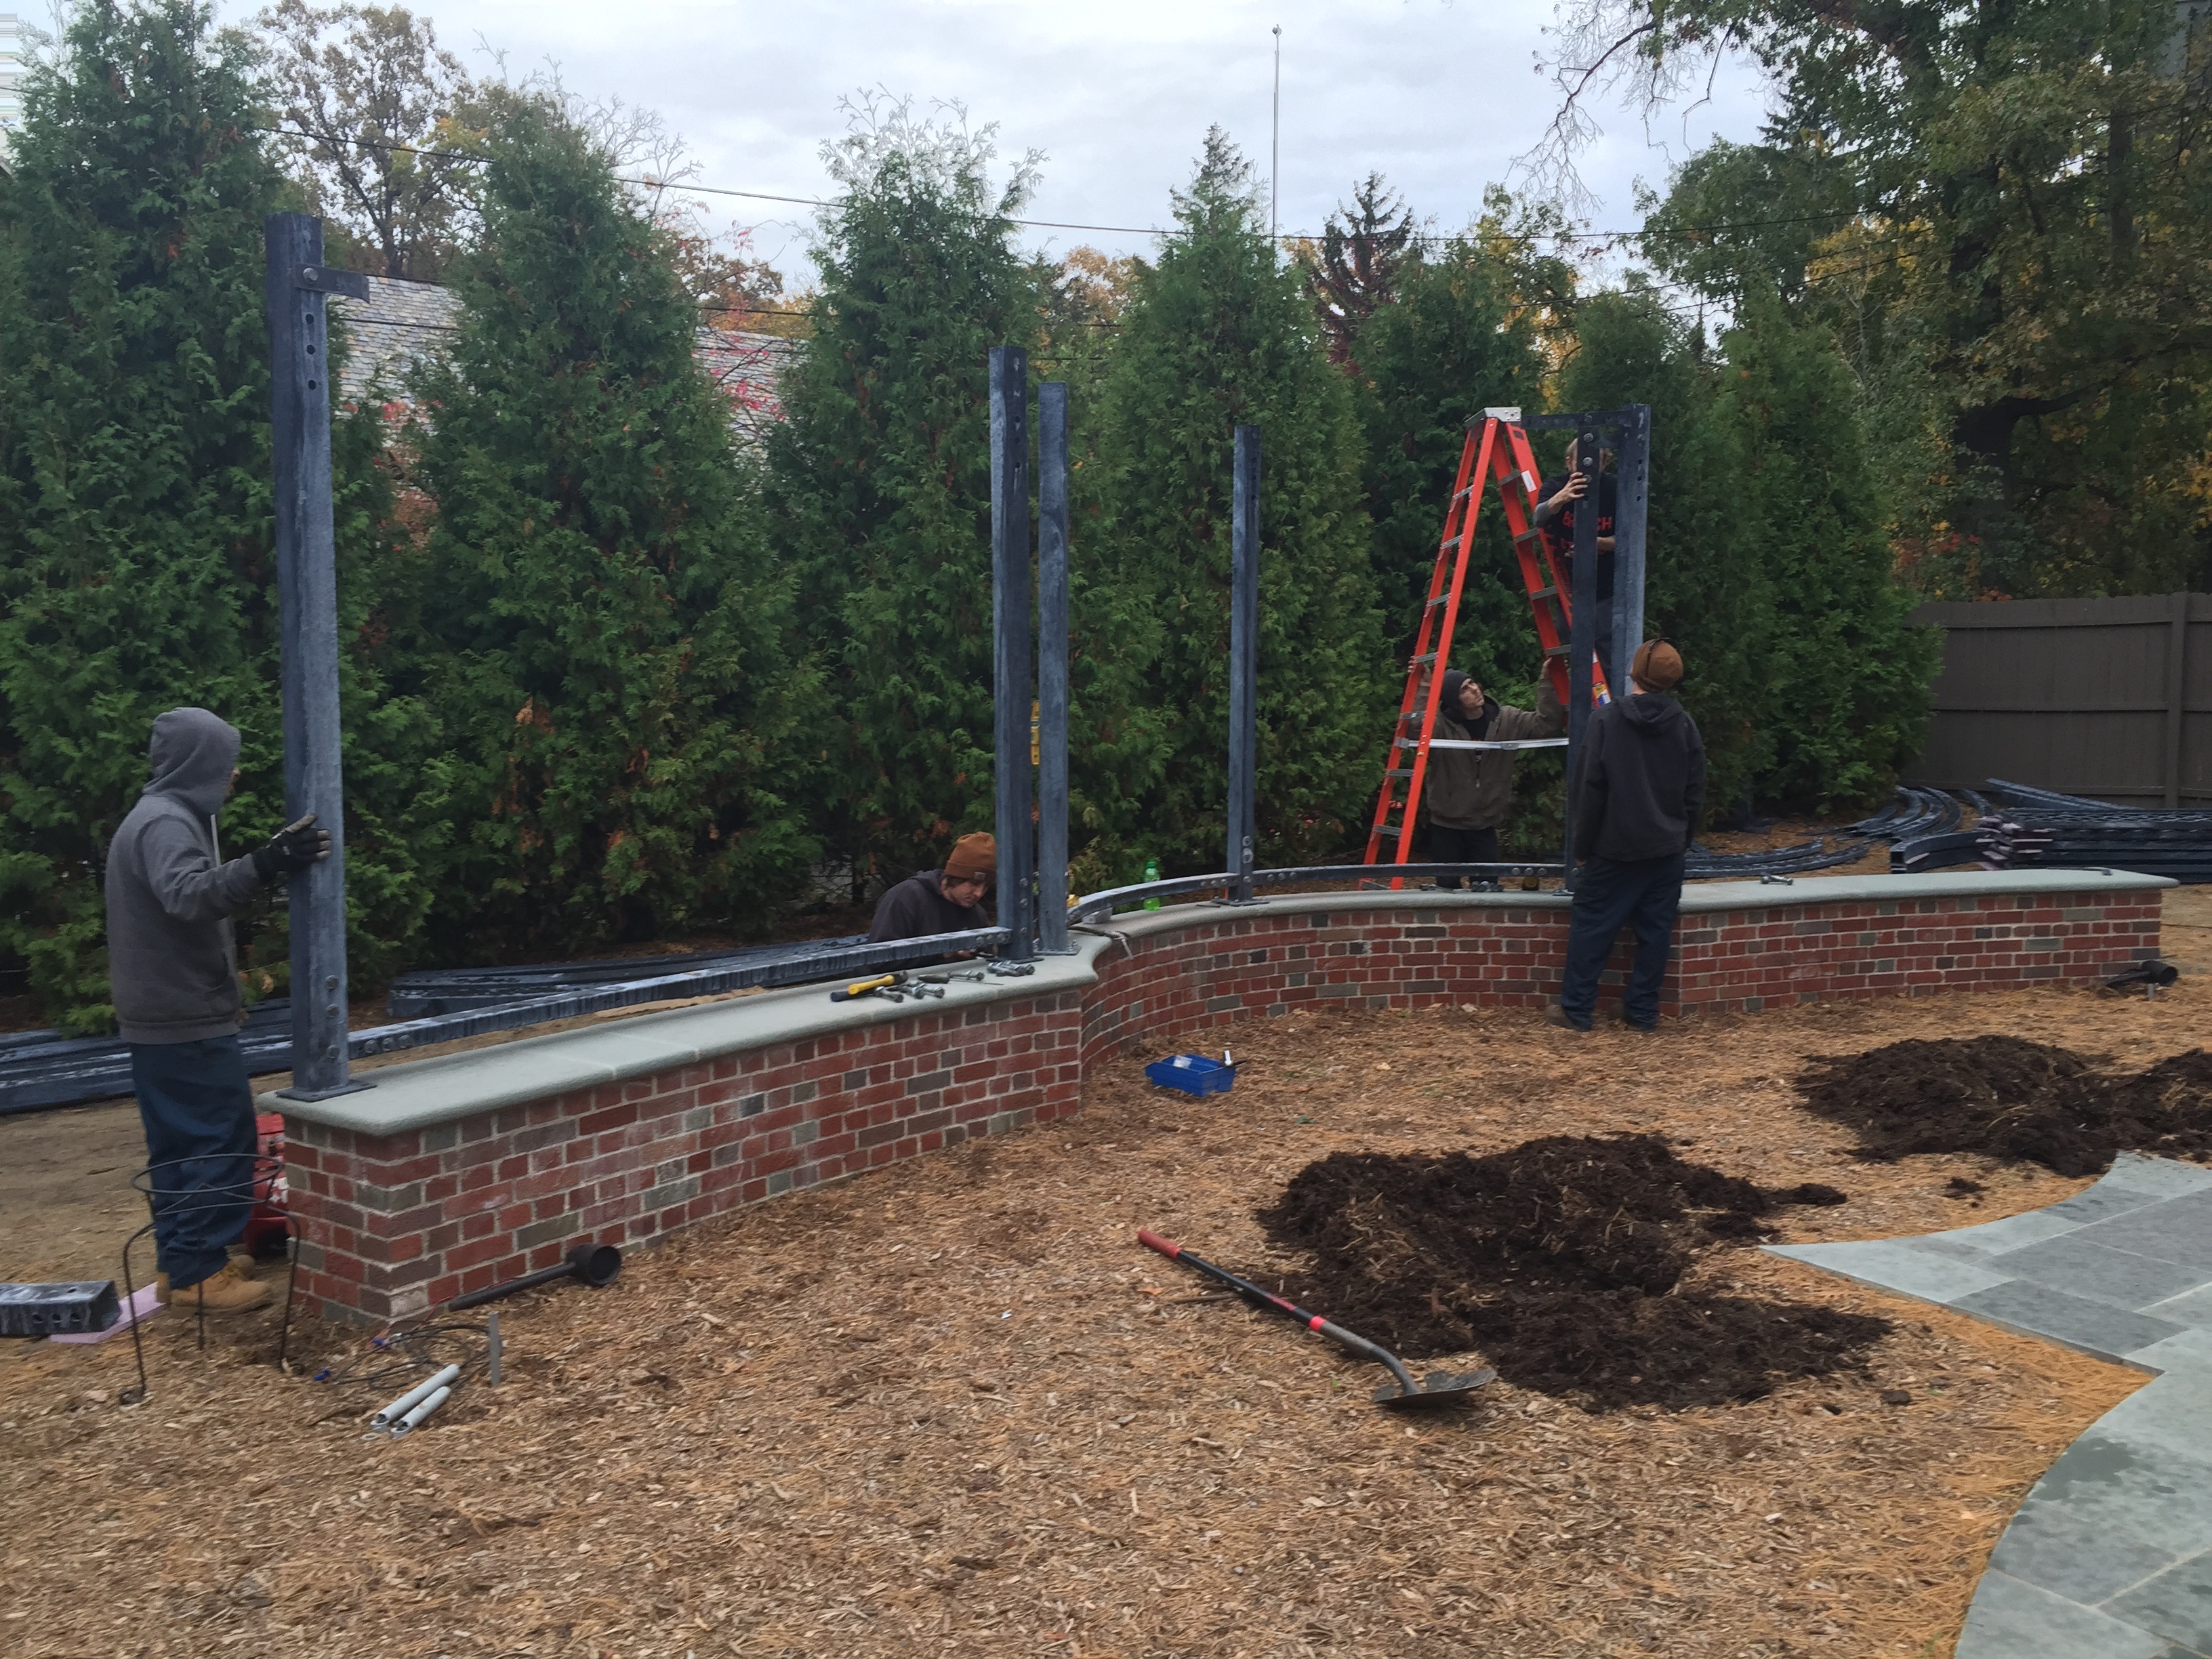
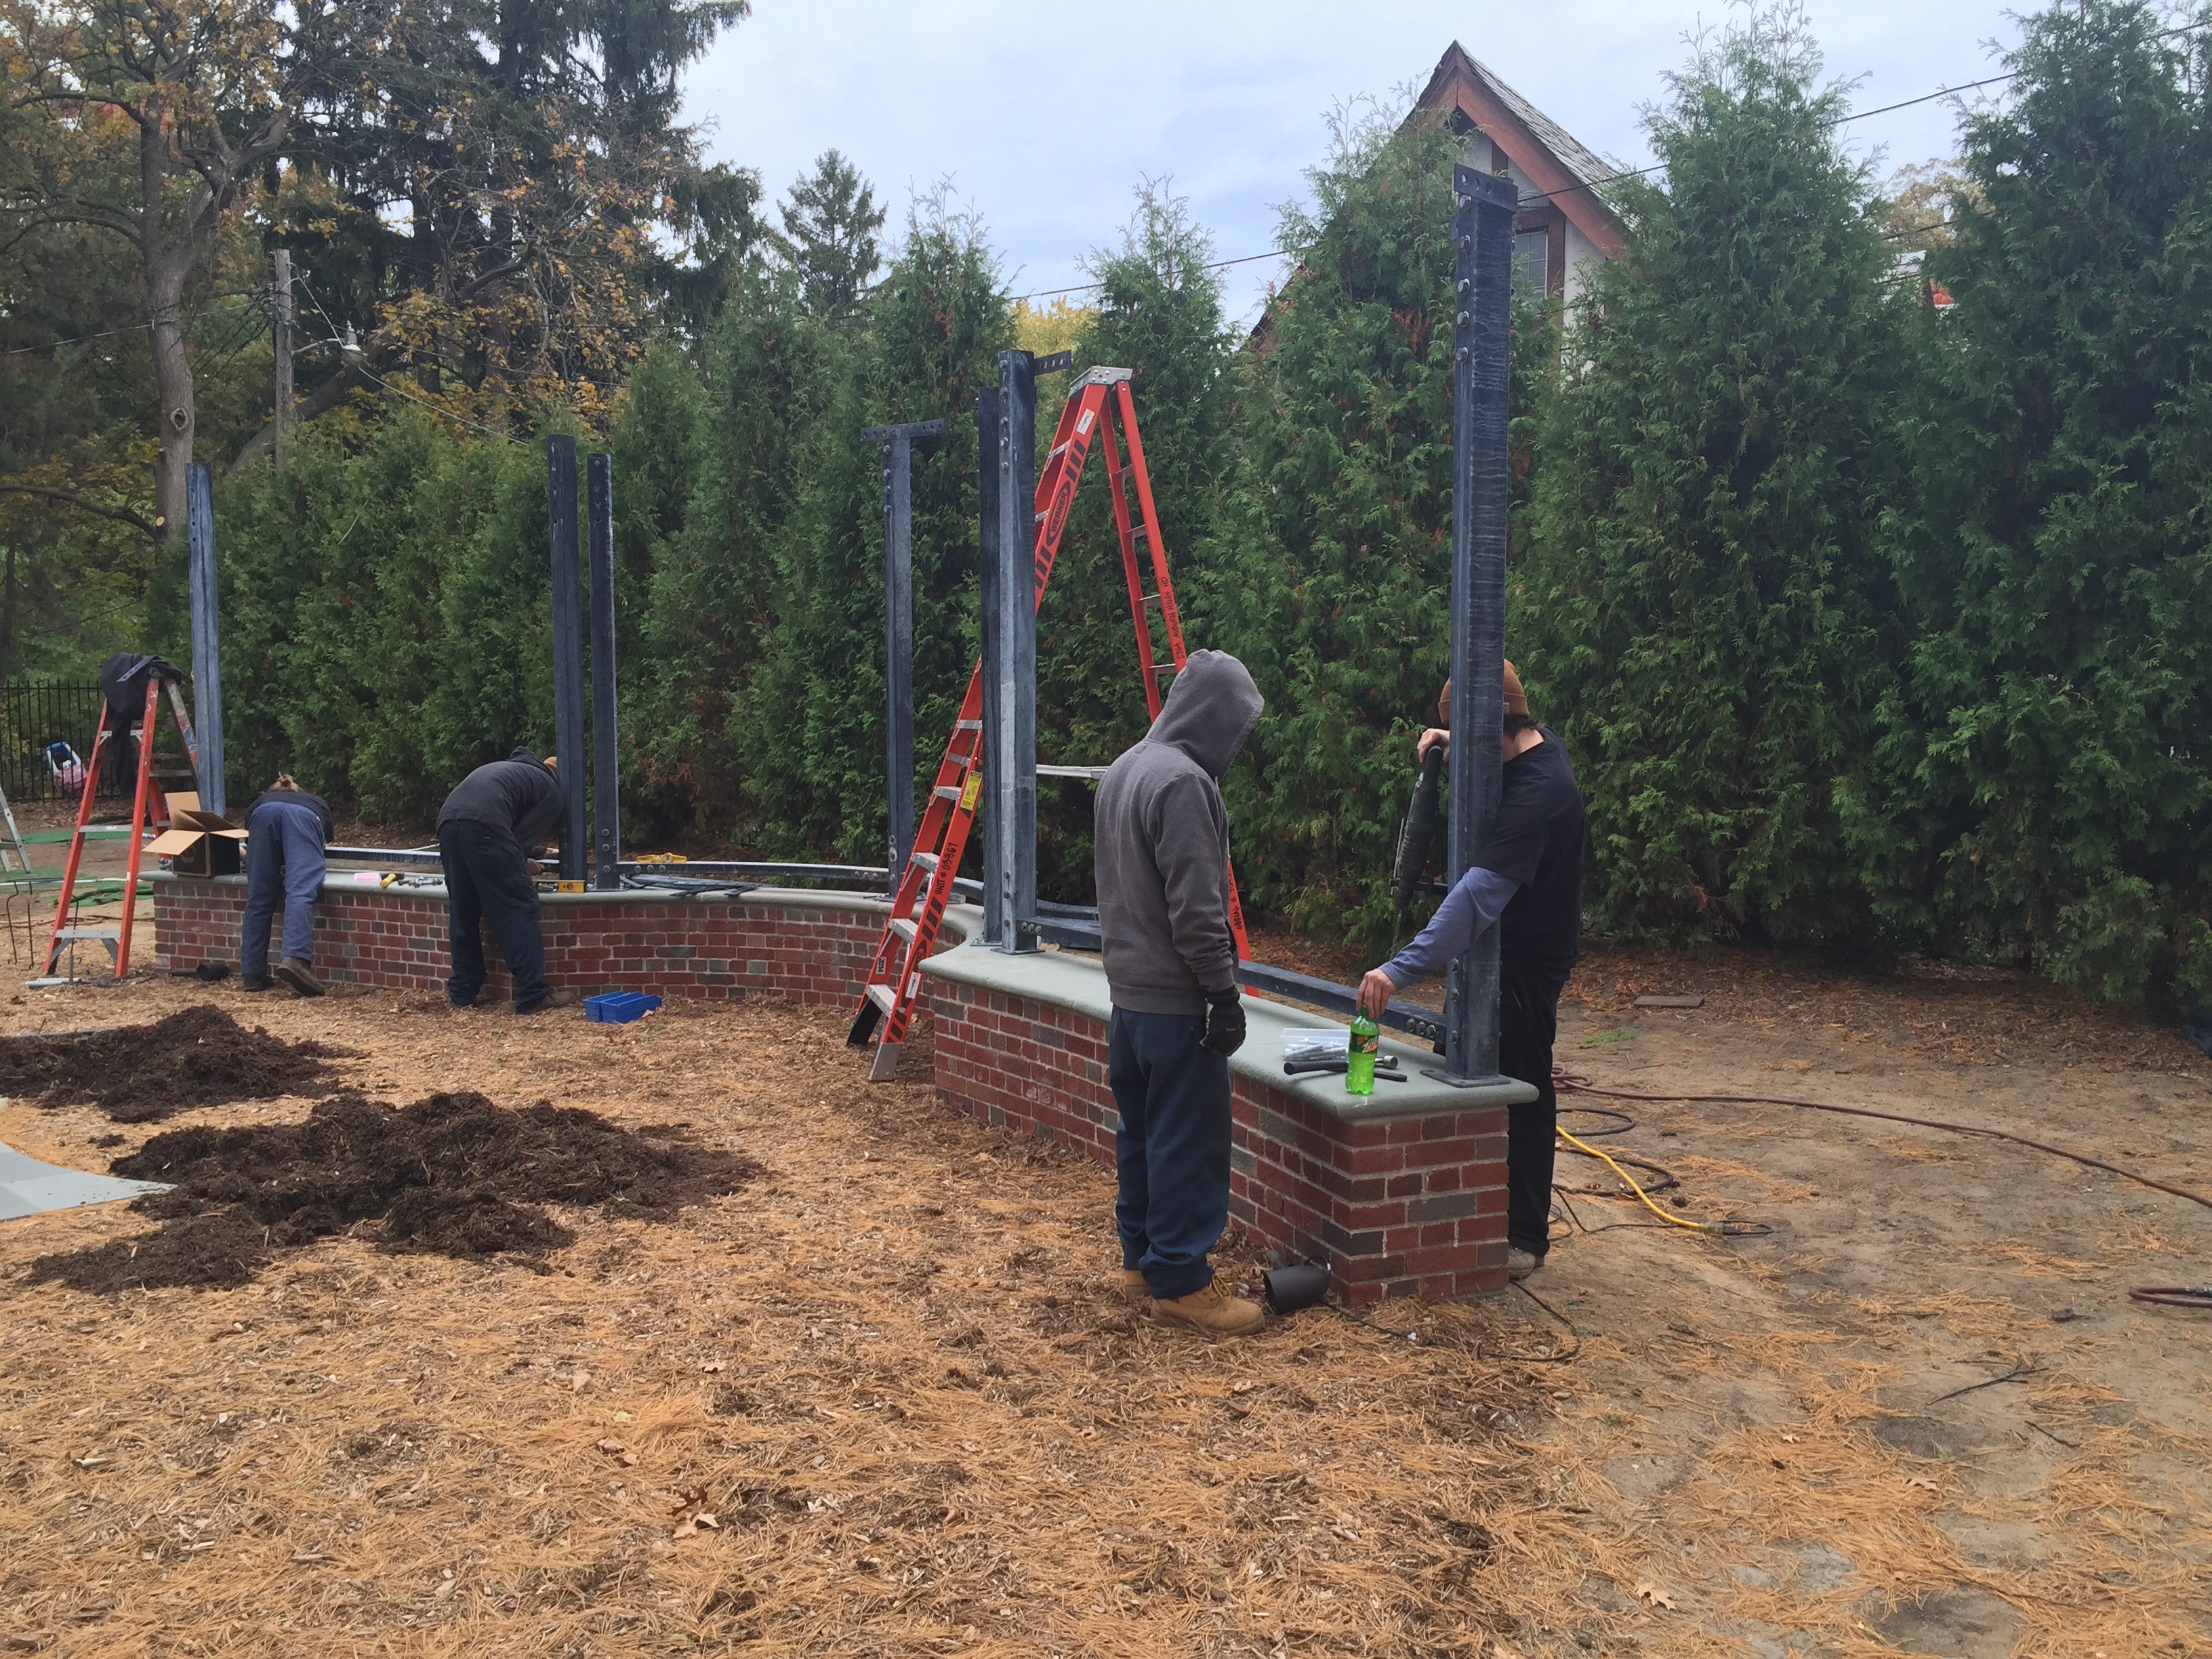 The top of the brick wall is seat height, and width.

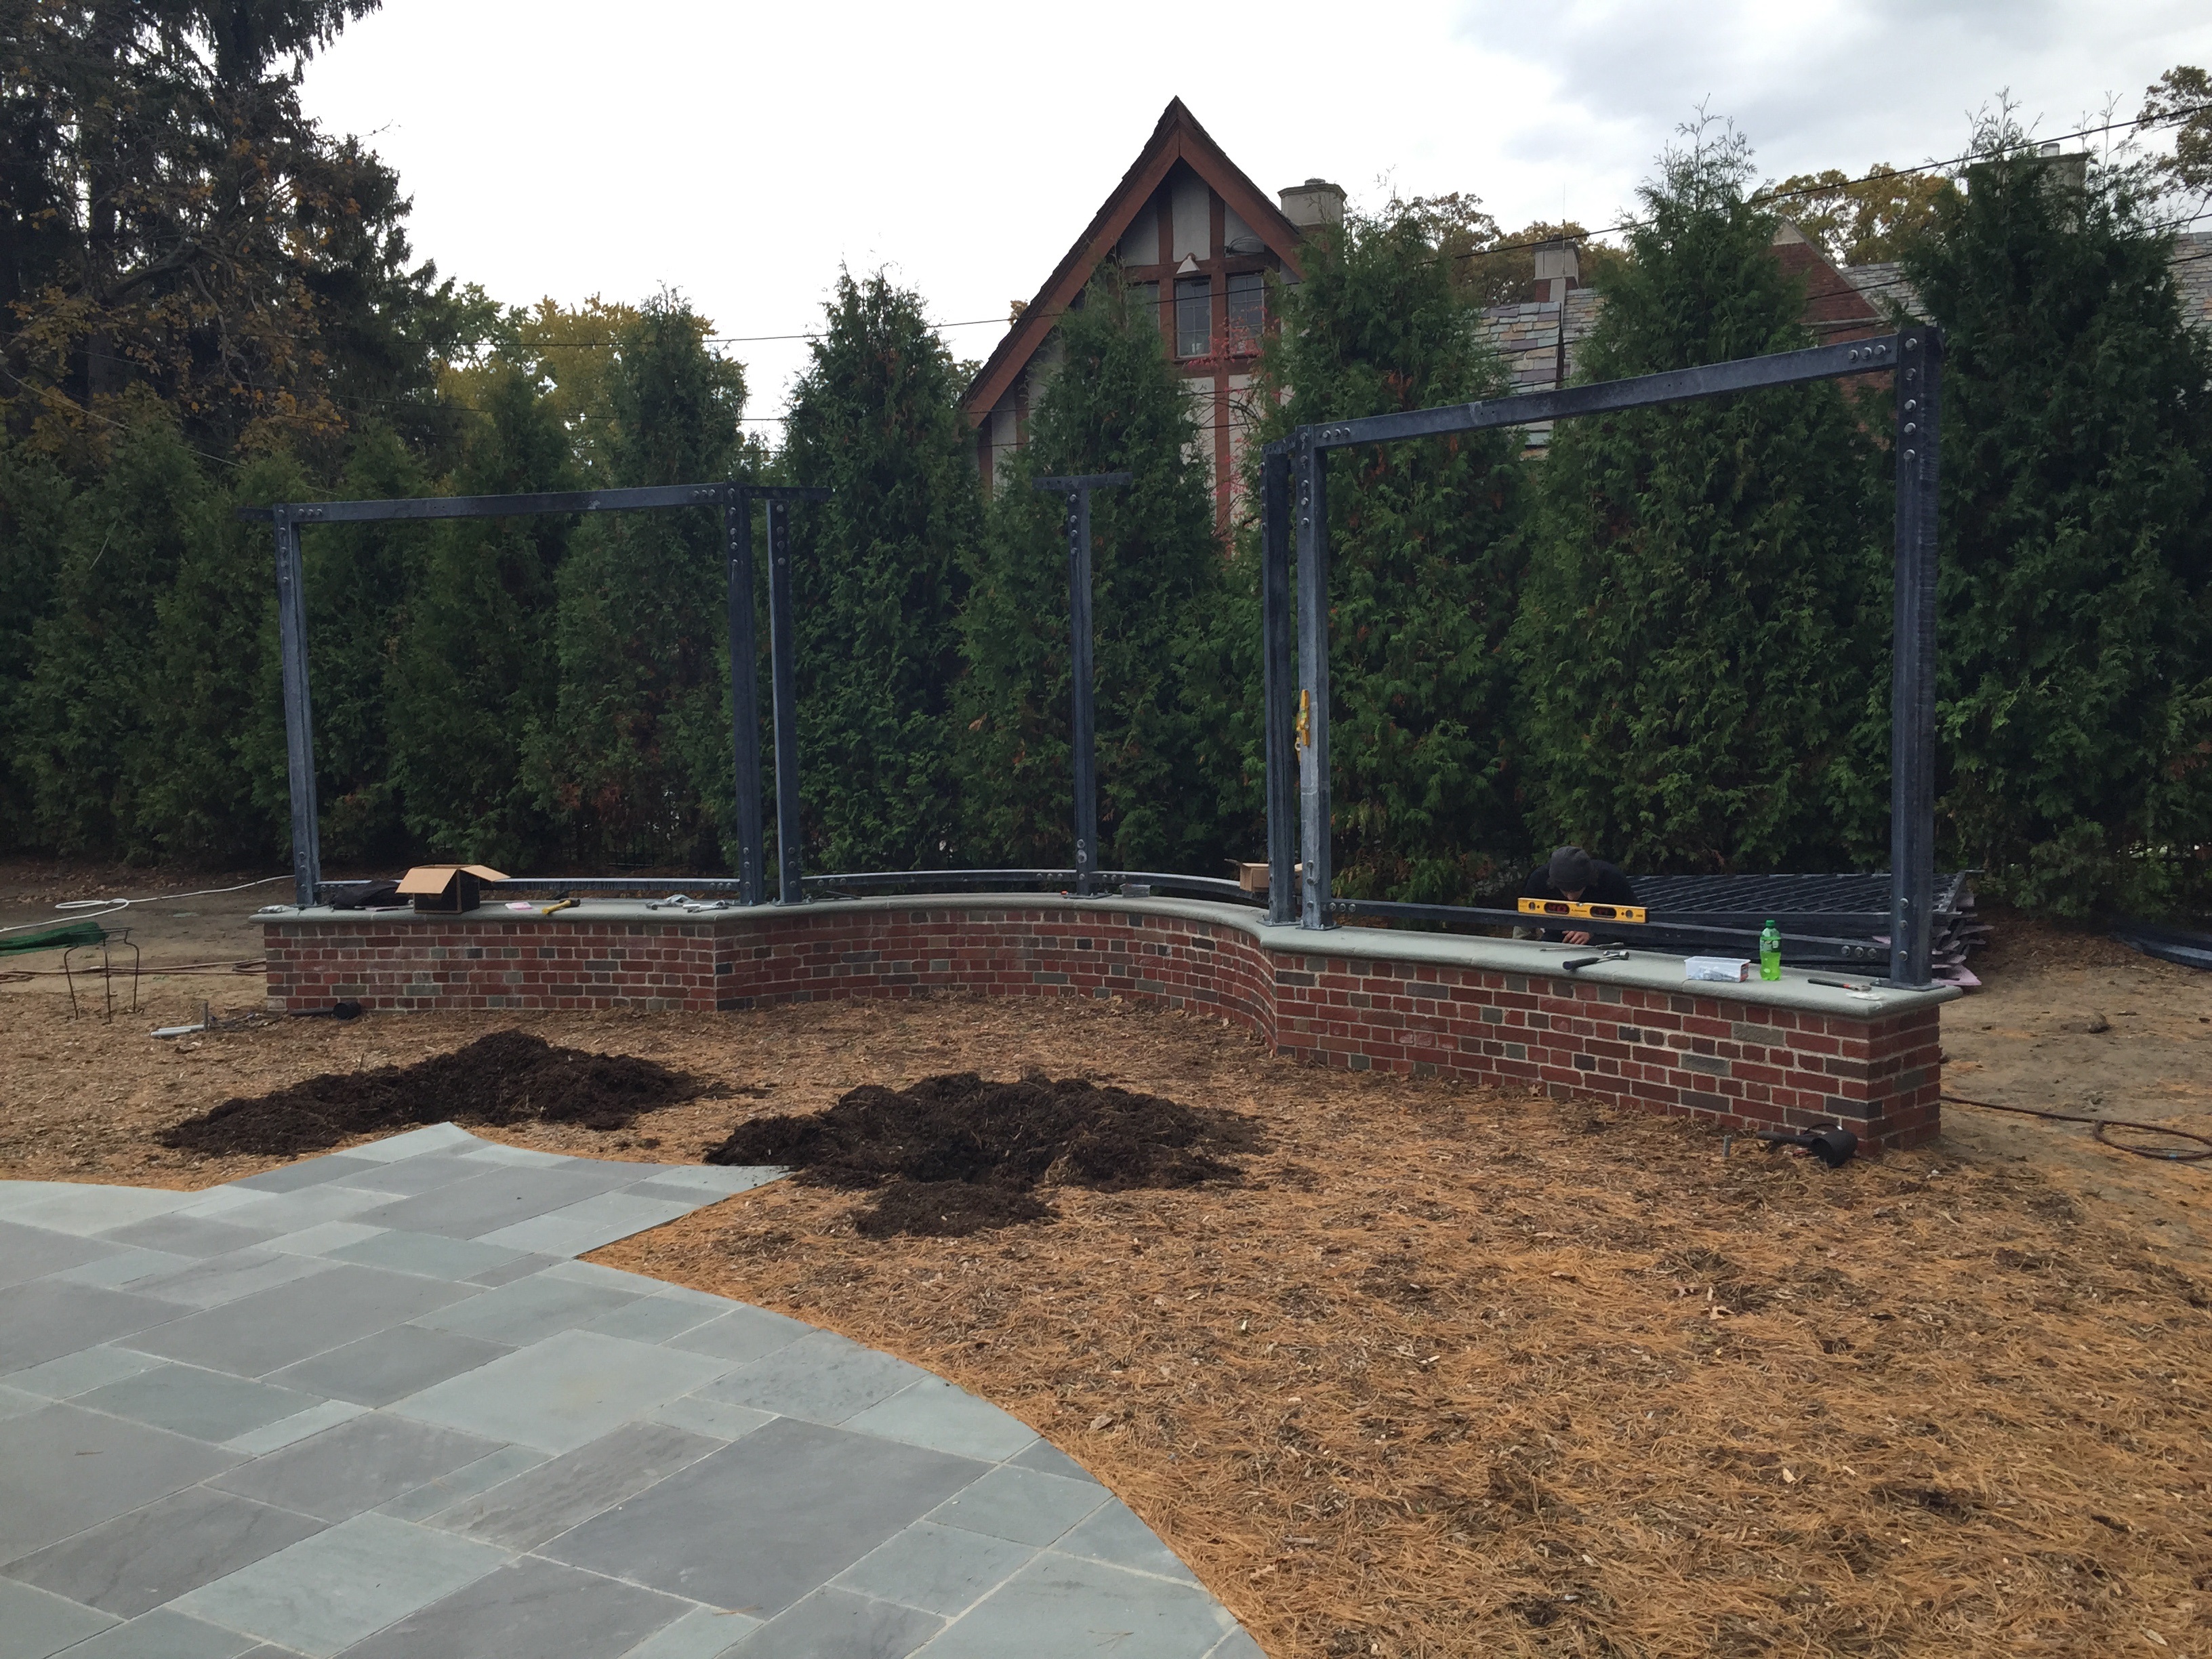
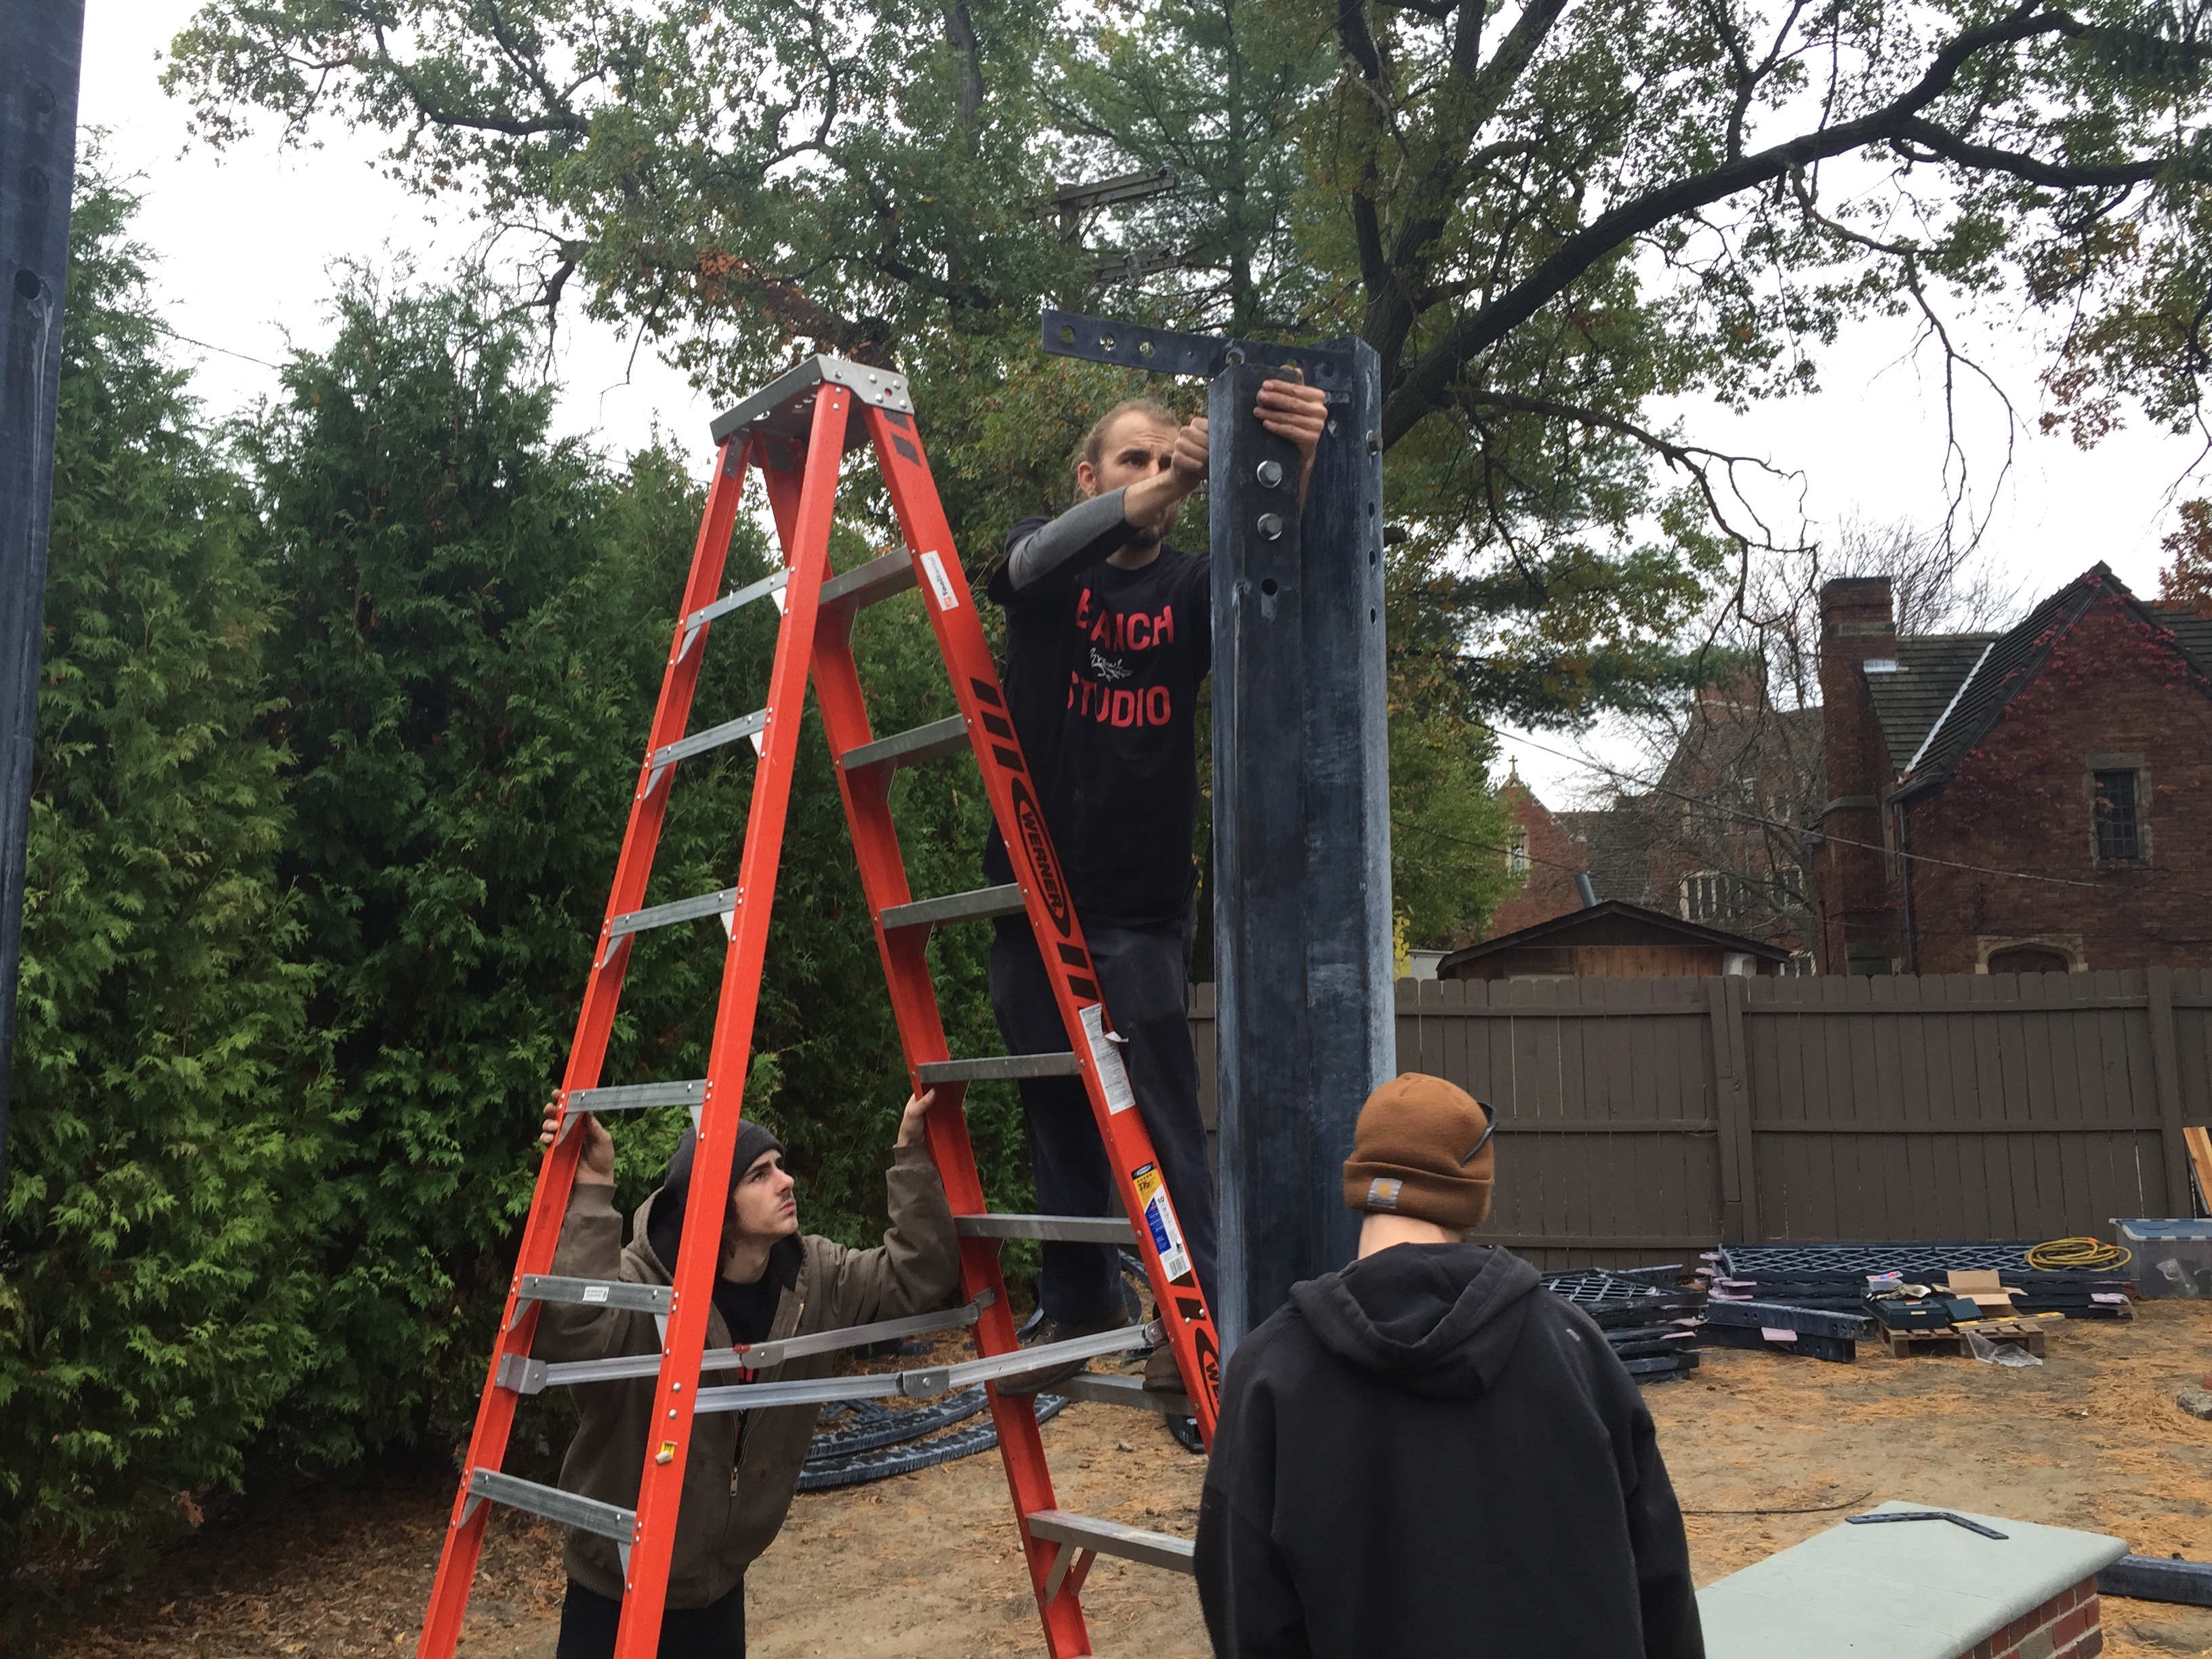
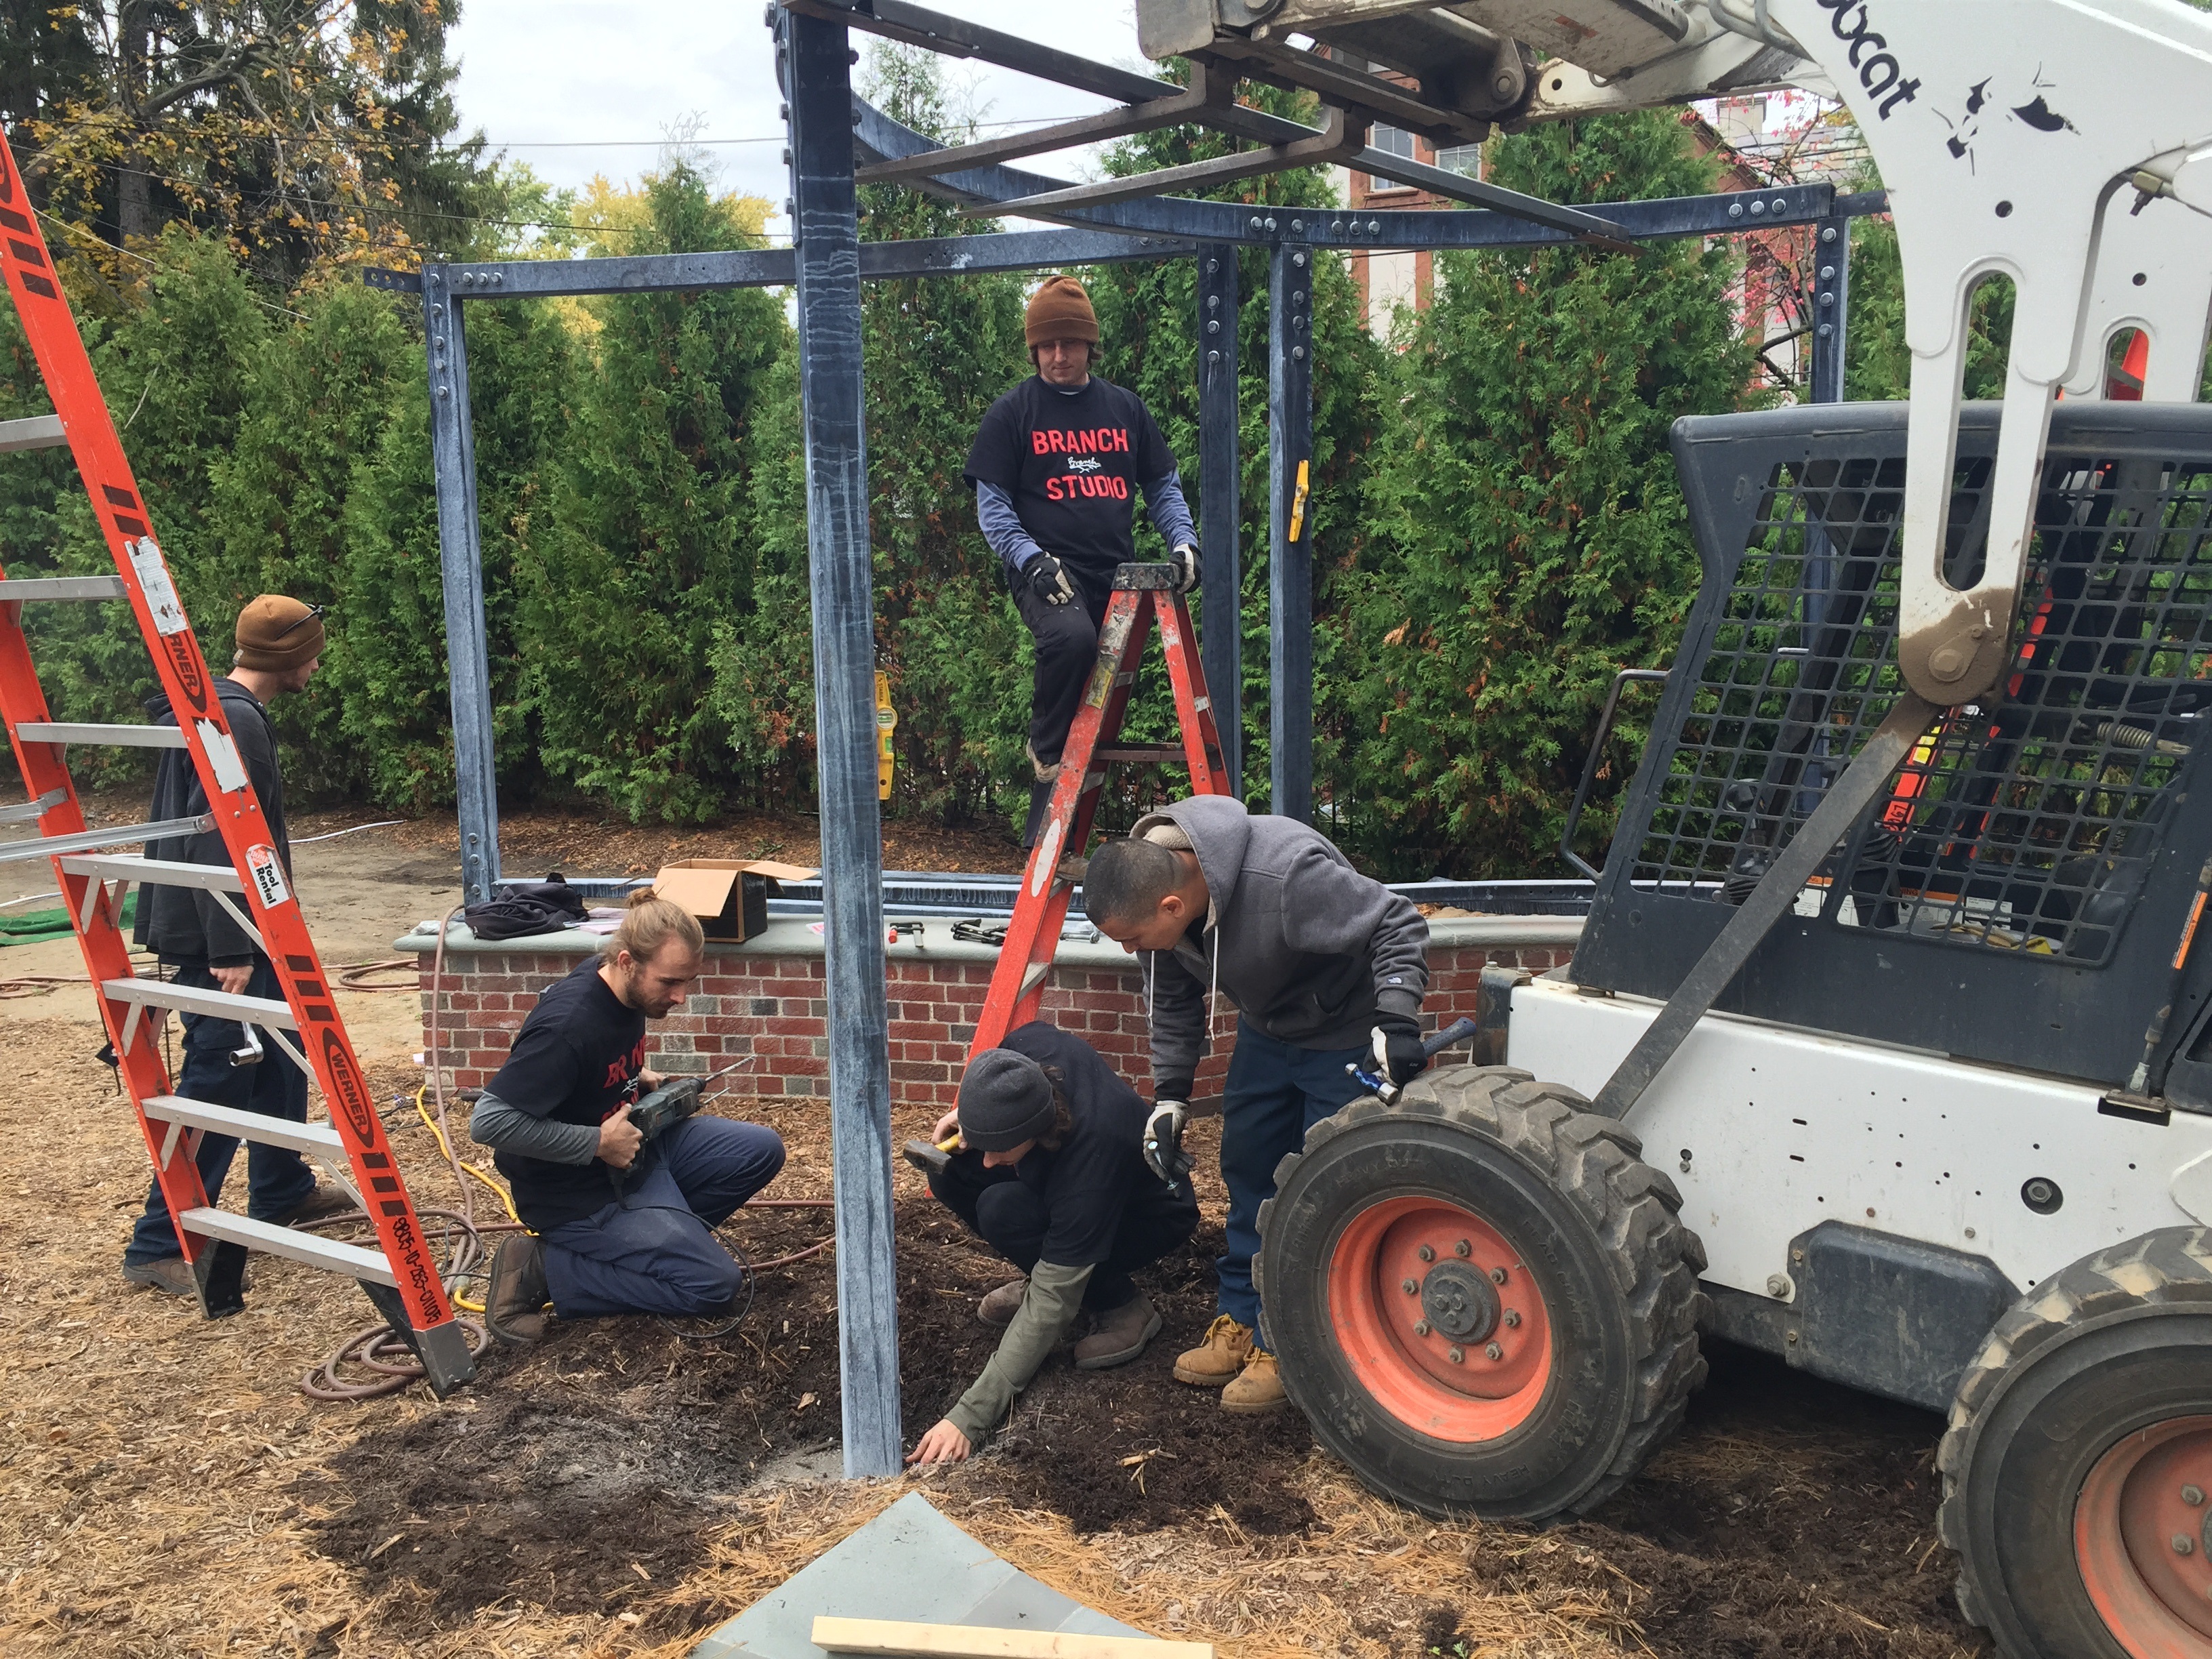
 The front post were anchored to 42″ deep concrete footings.
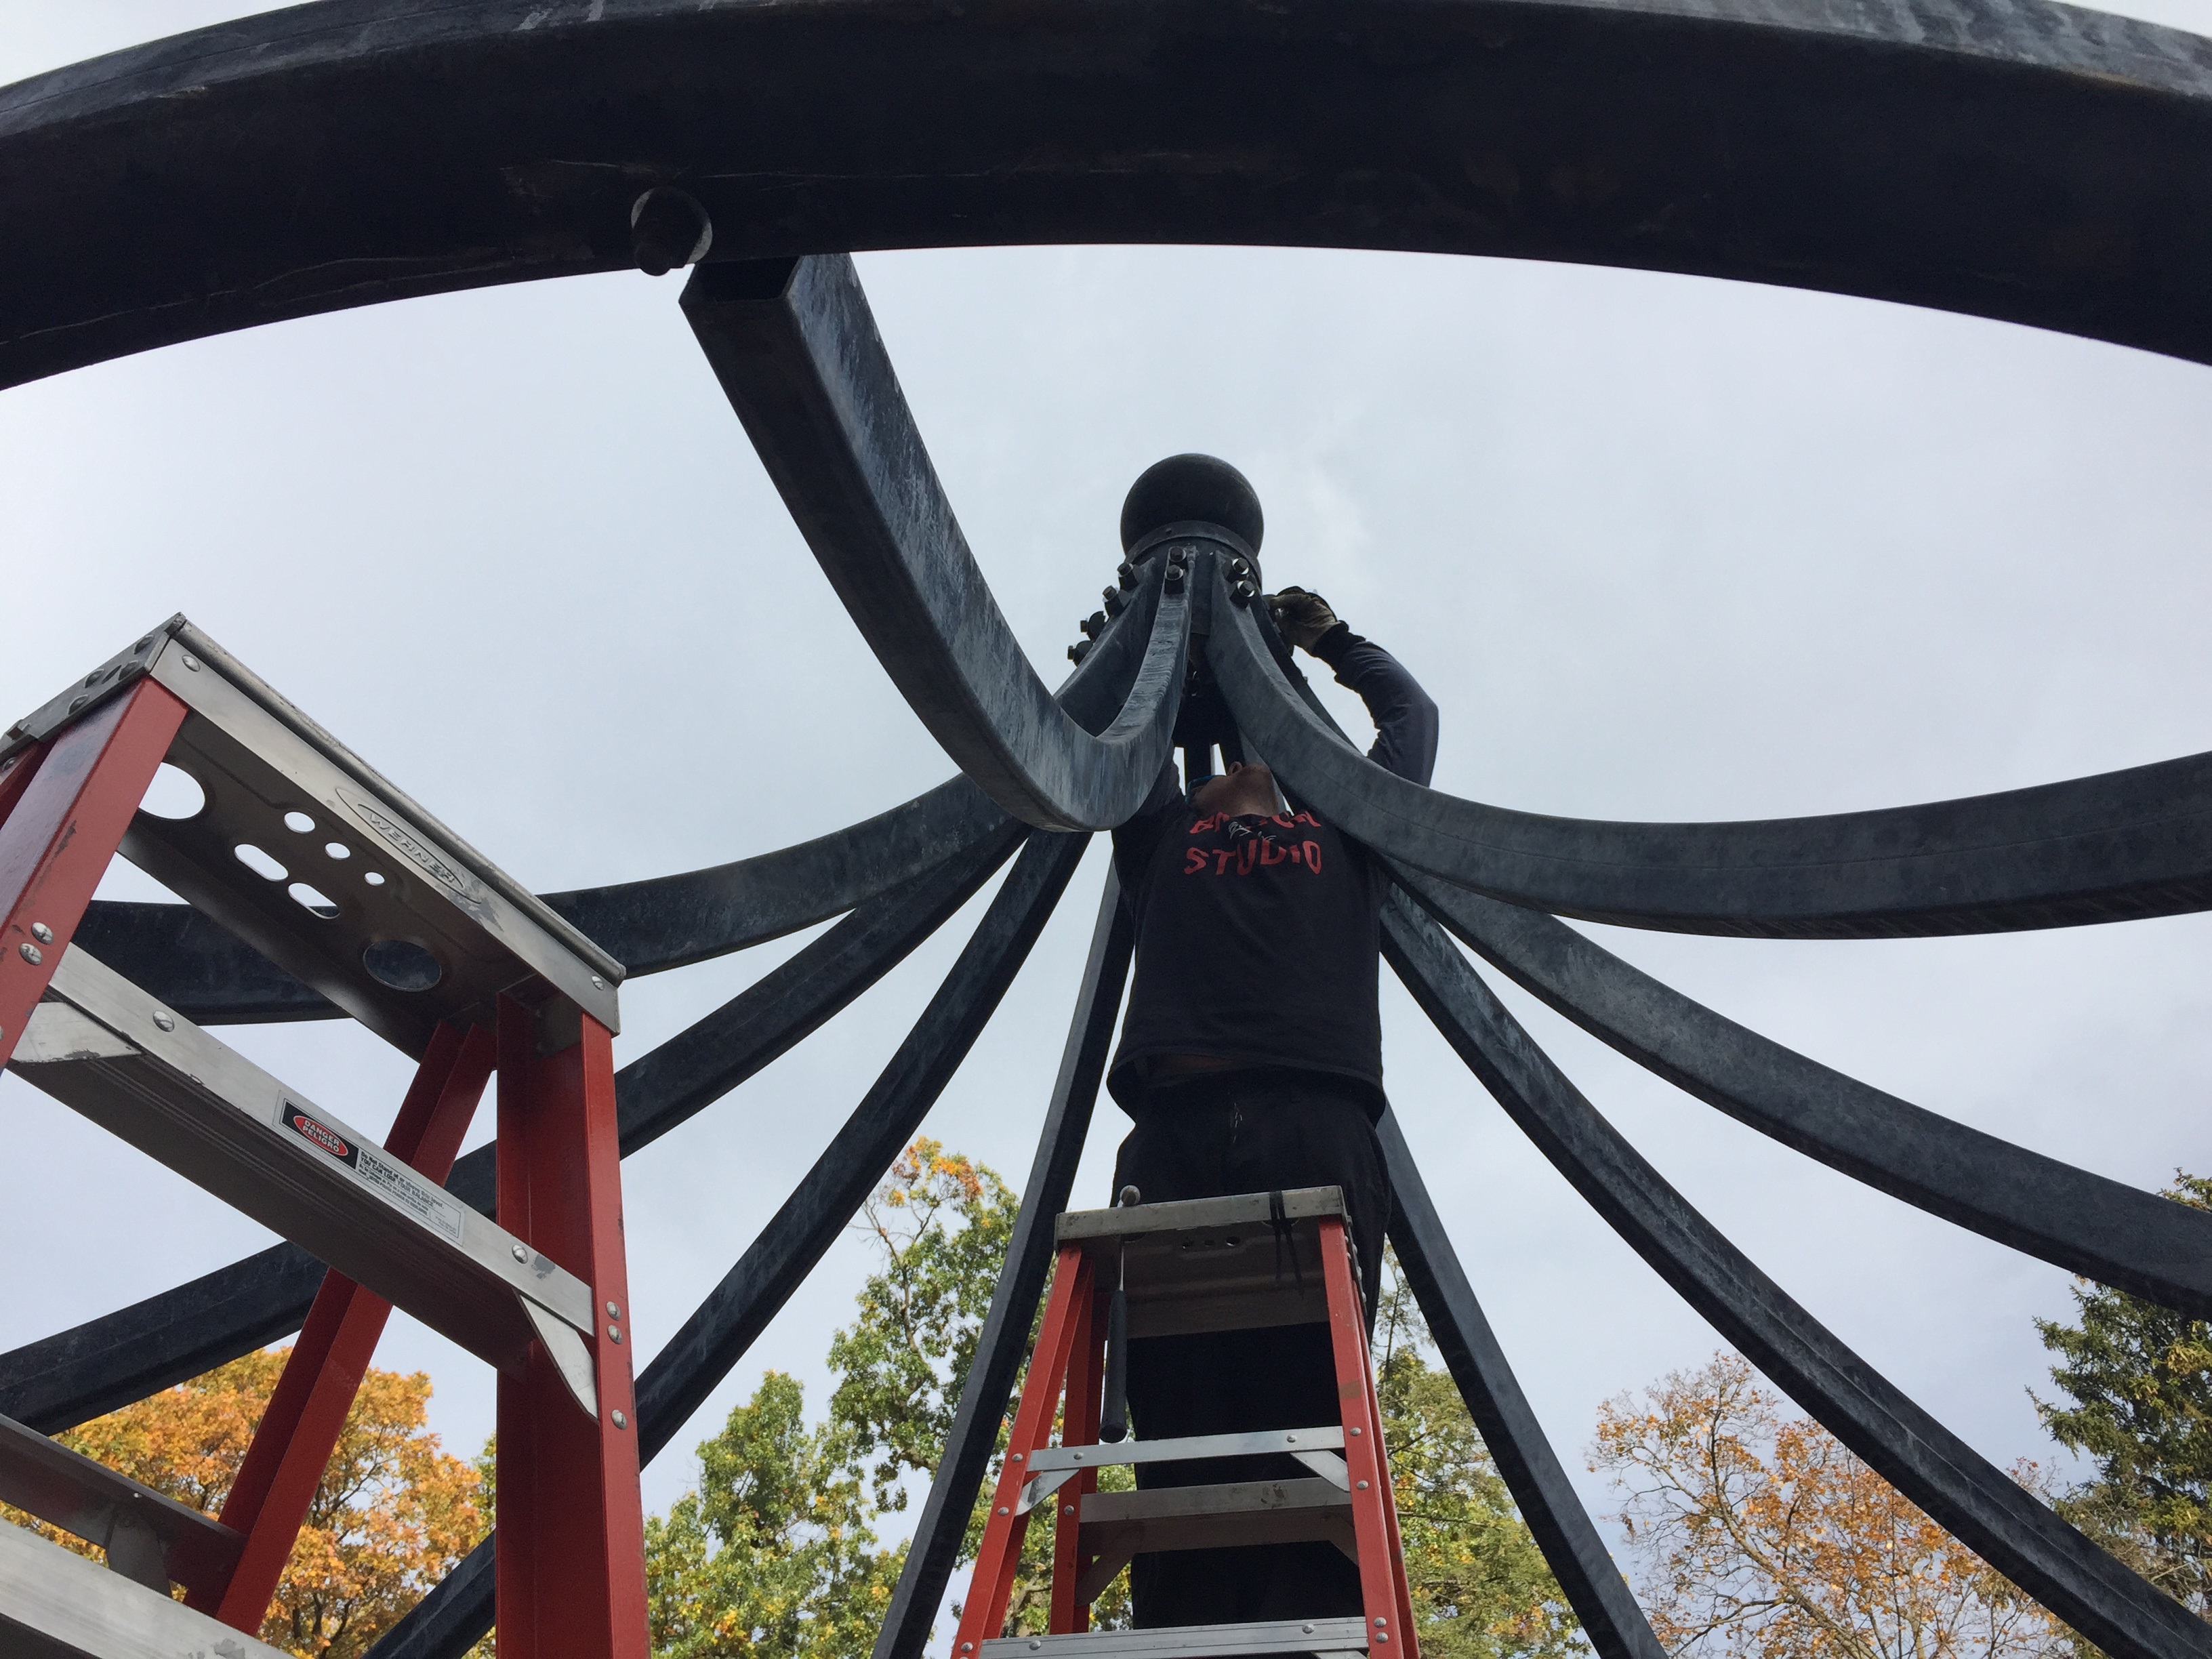
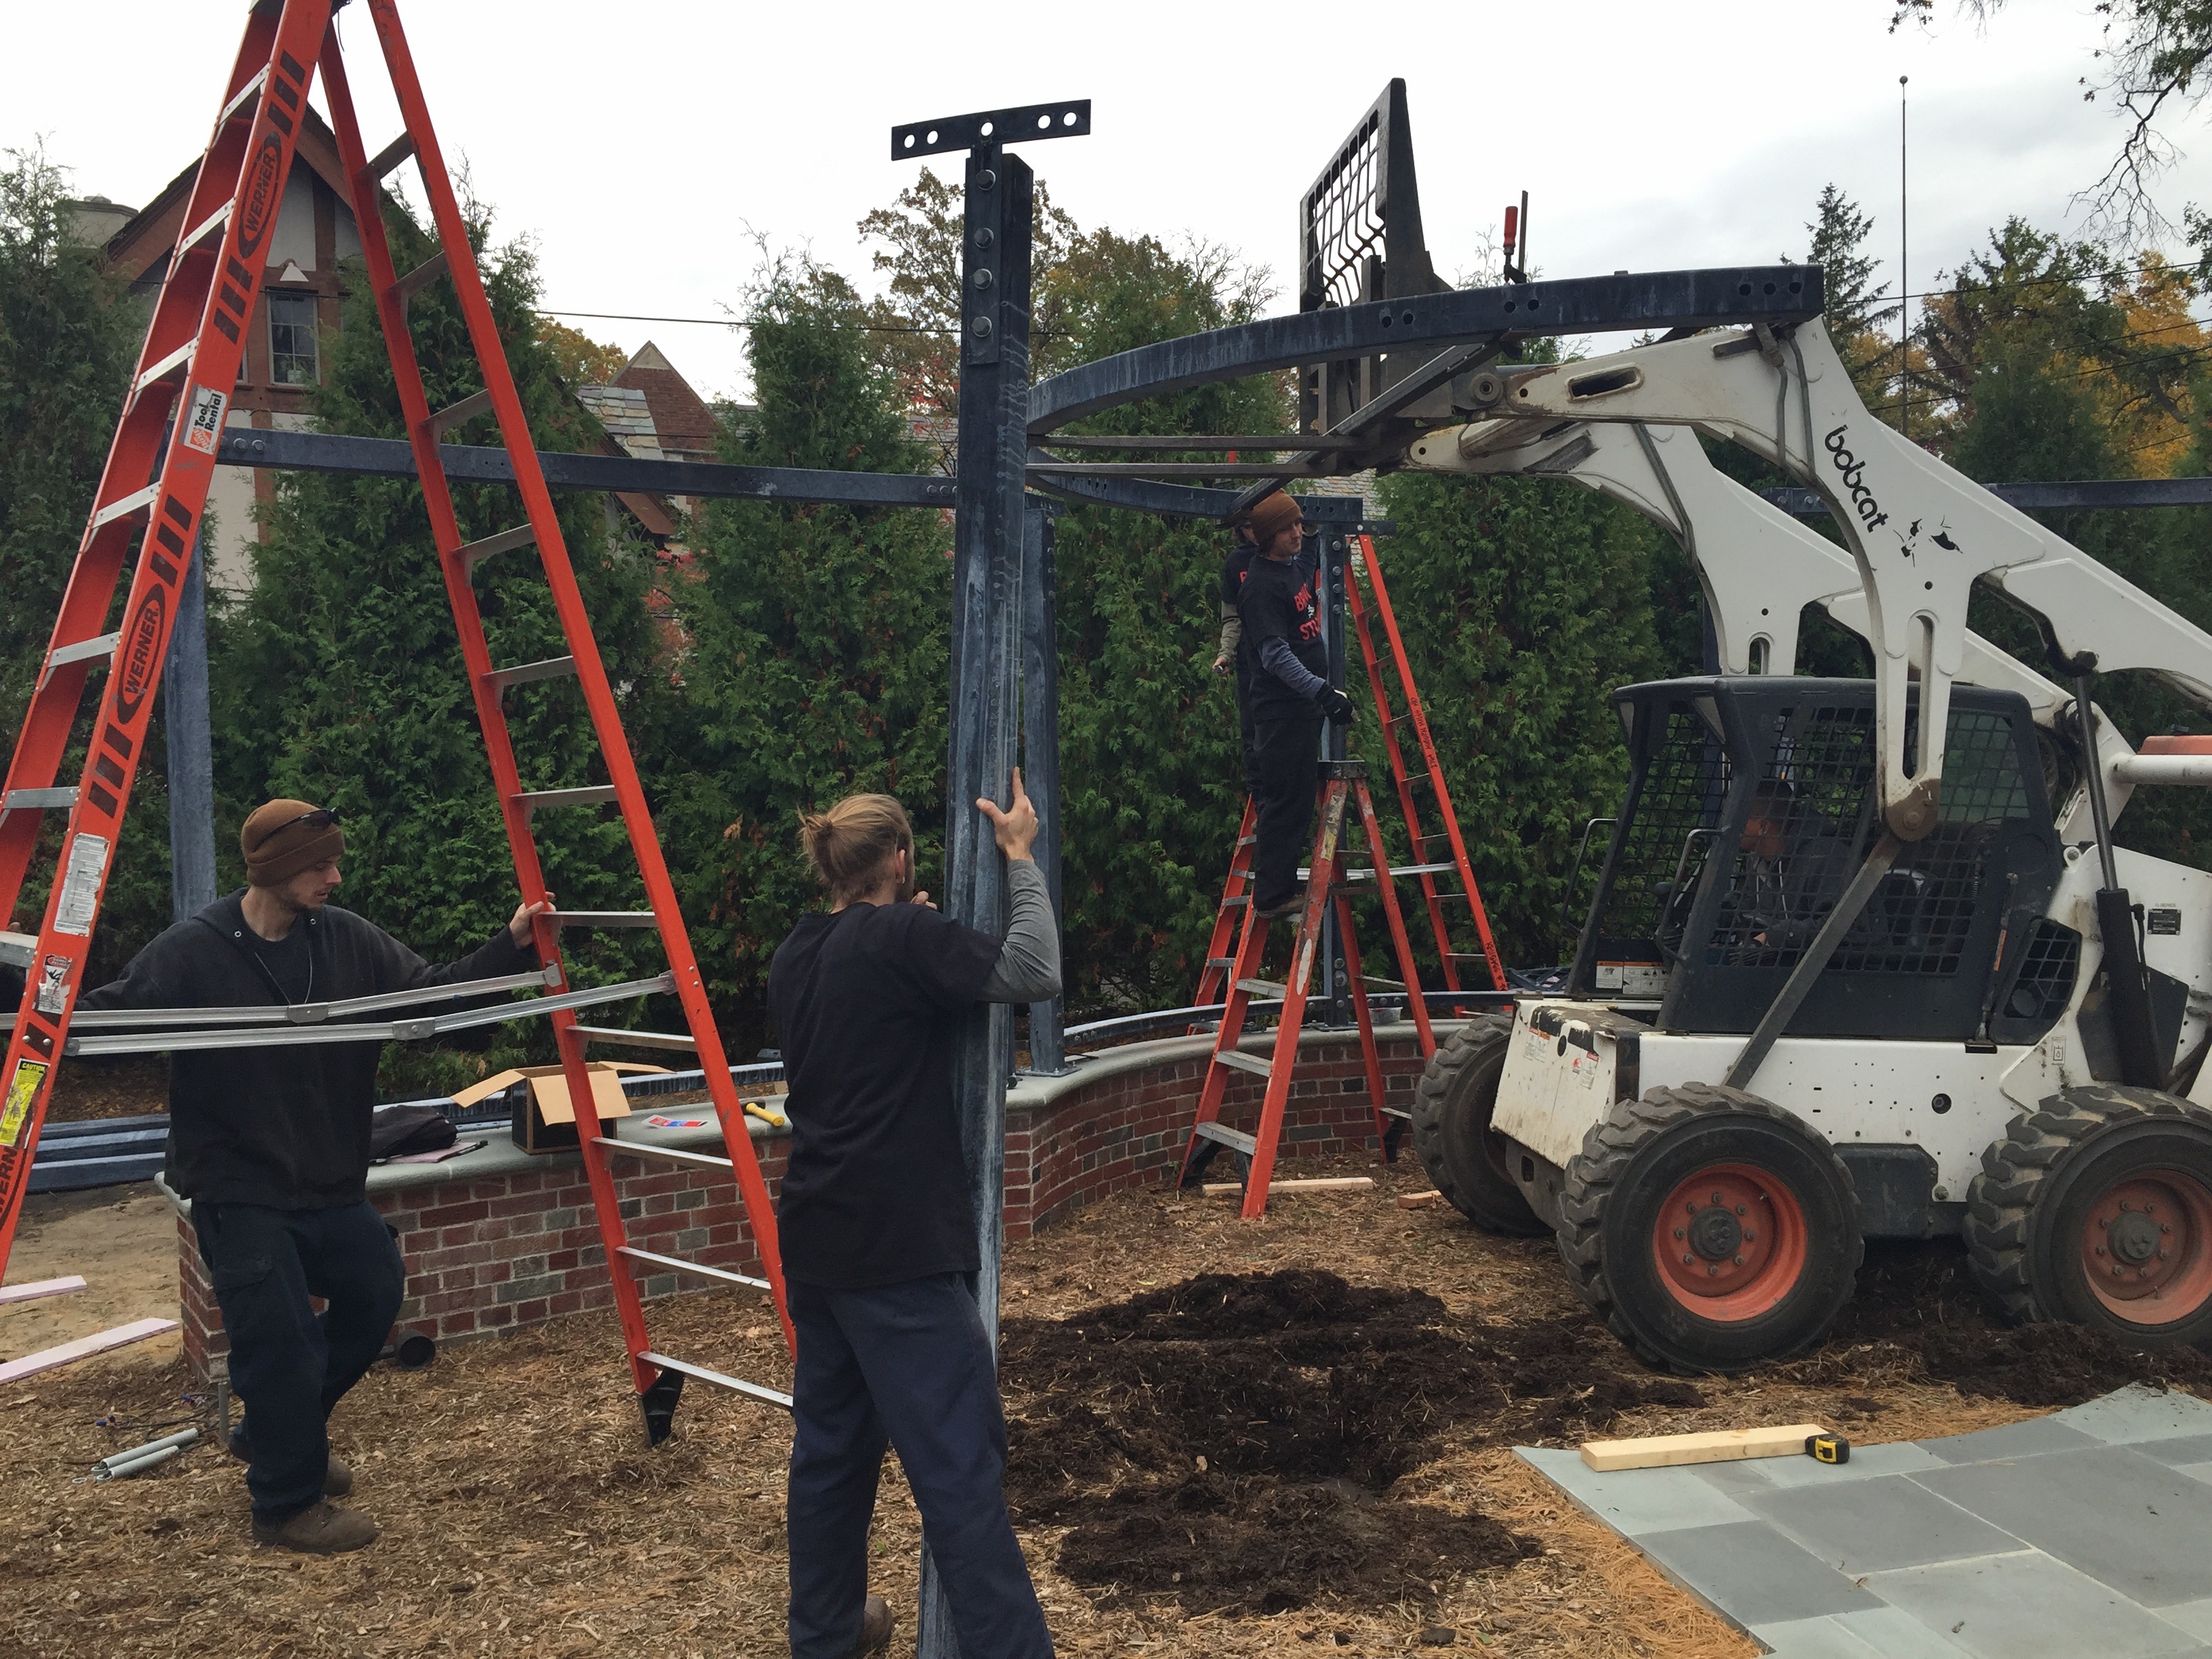 Setting the roof beams was the most difficult part of the job. Each half-beam was 12 feet in diameter, and was incredibly heavy. A support bar made especially to hold these beams, and a loader was necessary to get these pieces to the proper height for bolting on.
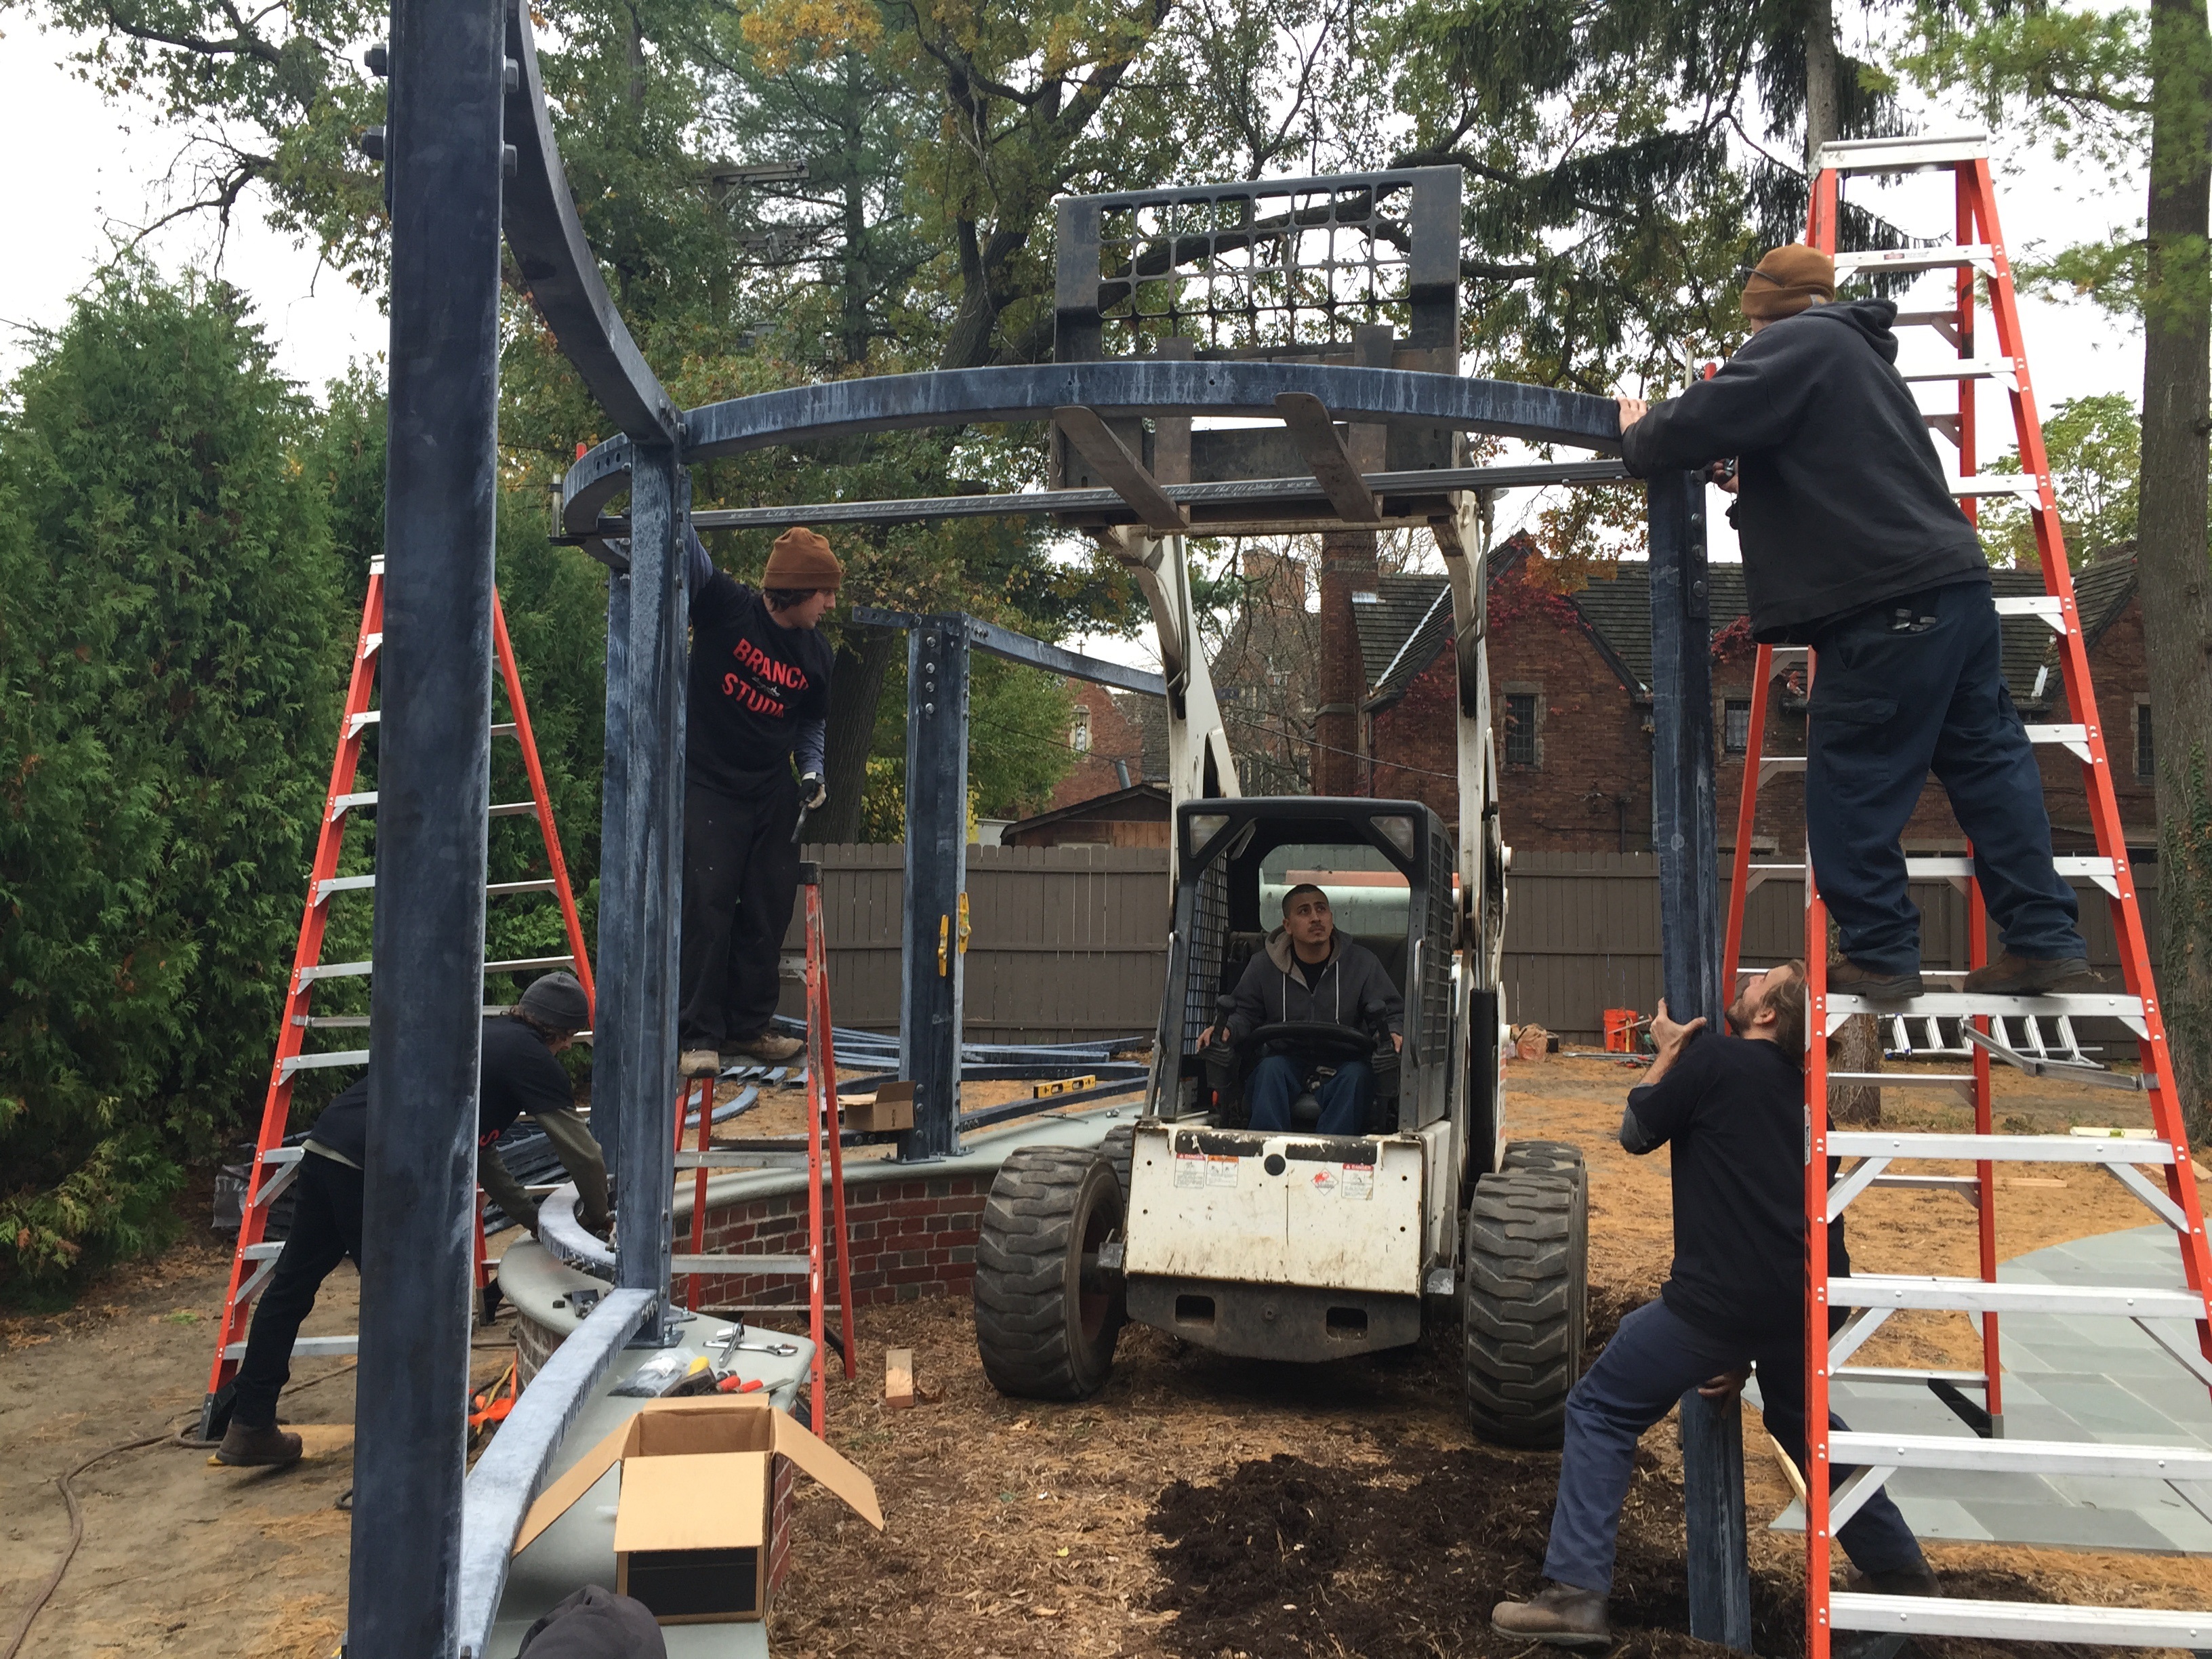
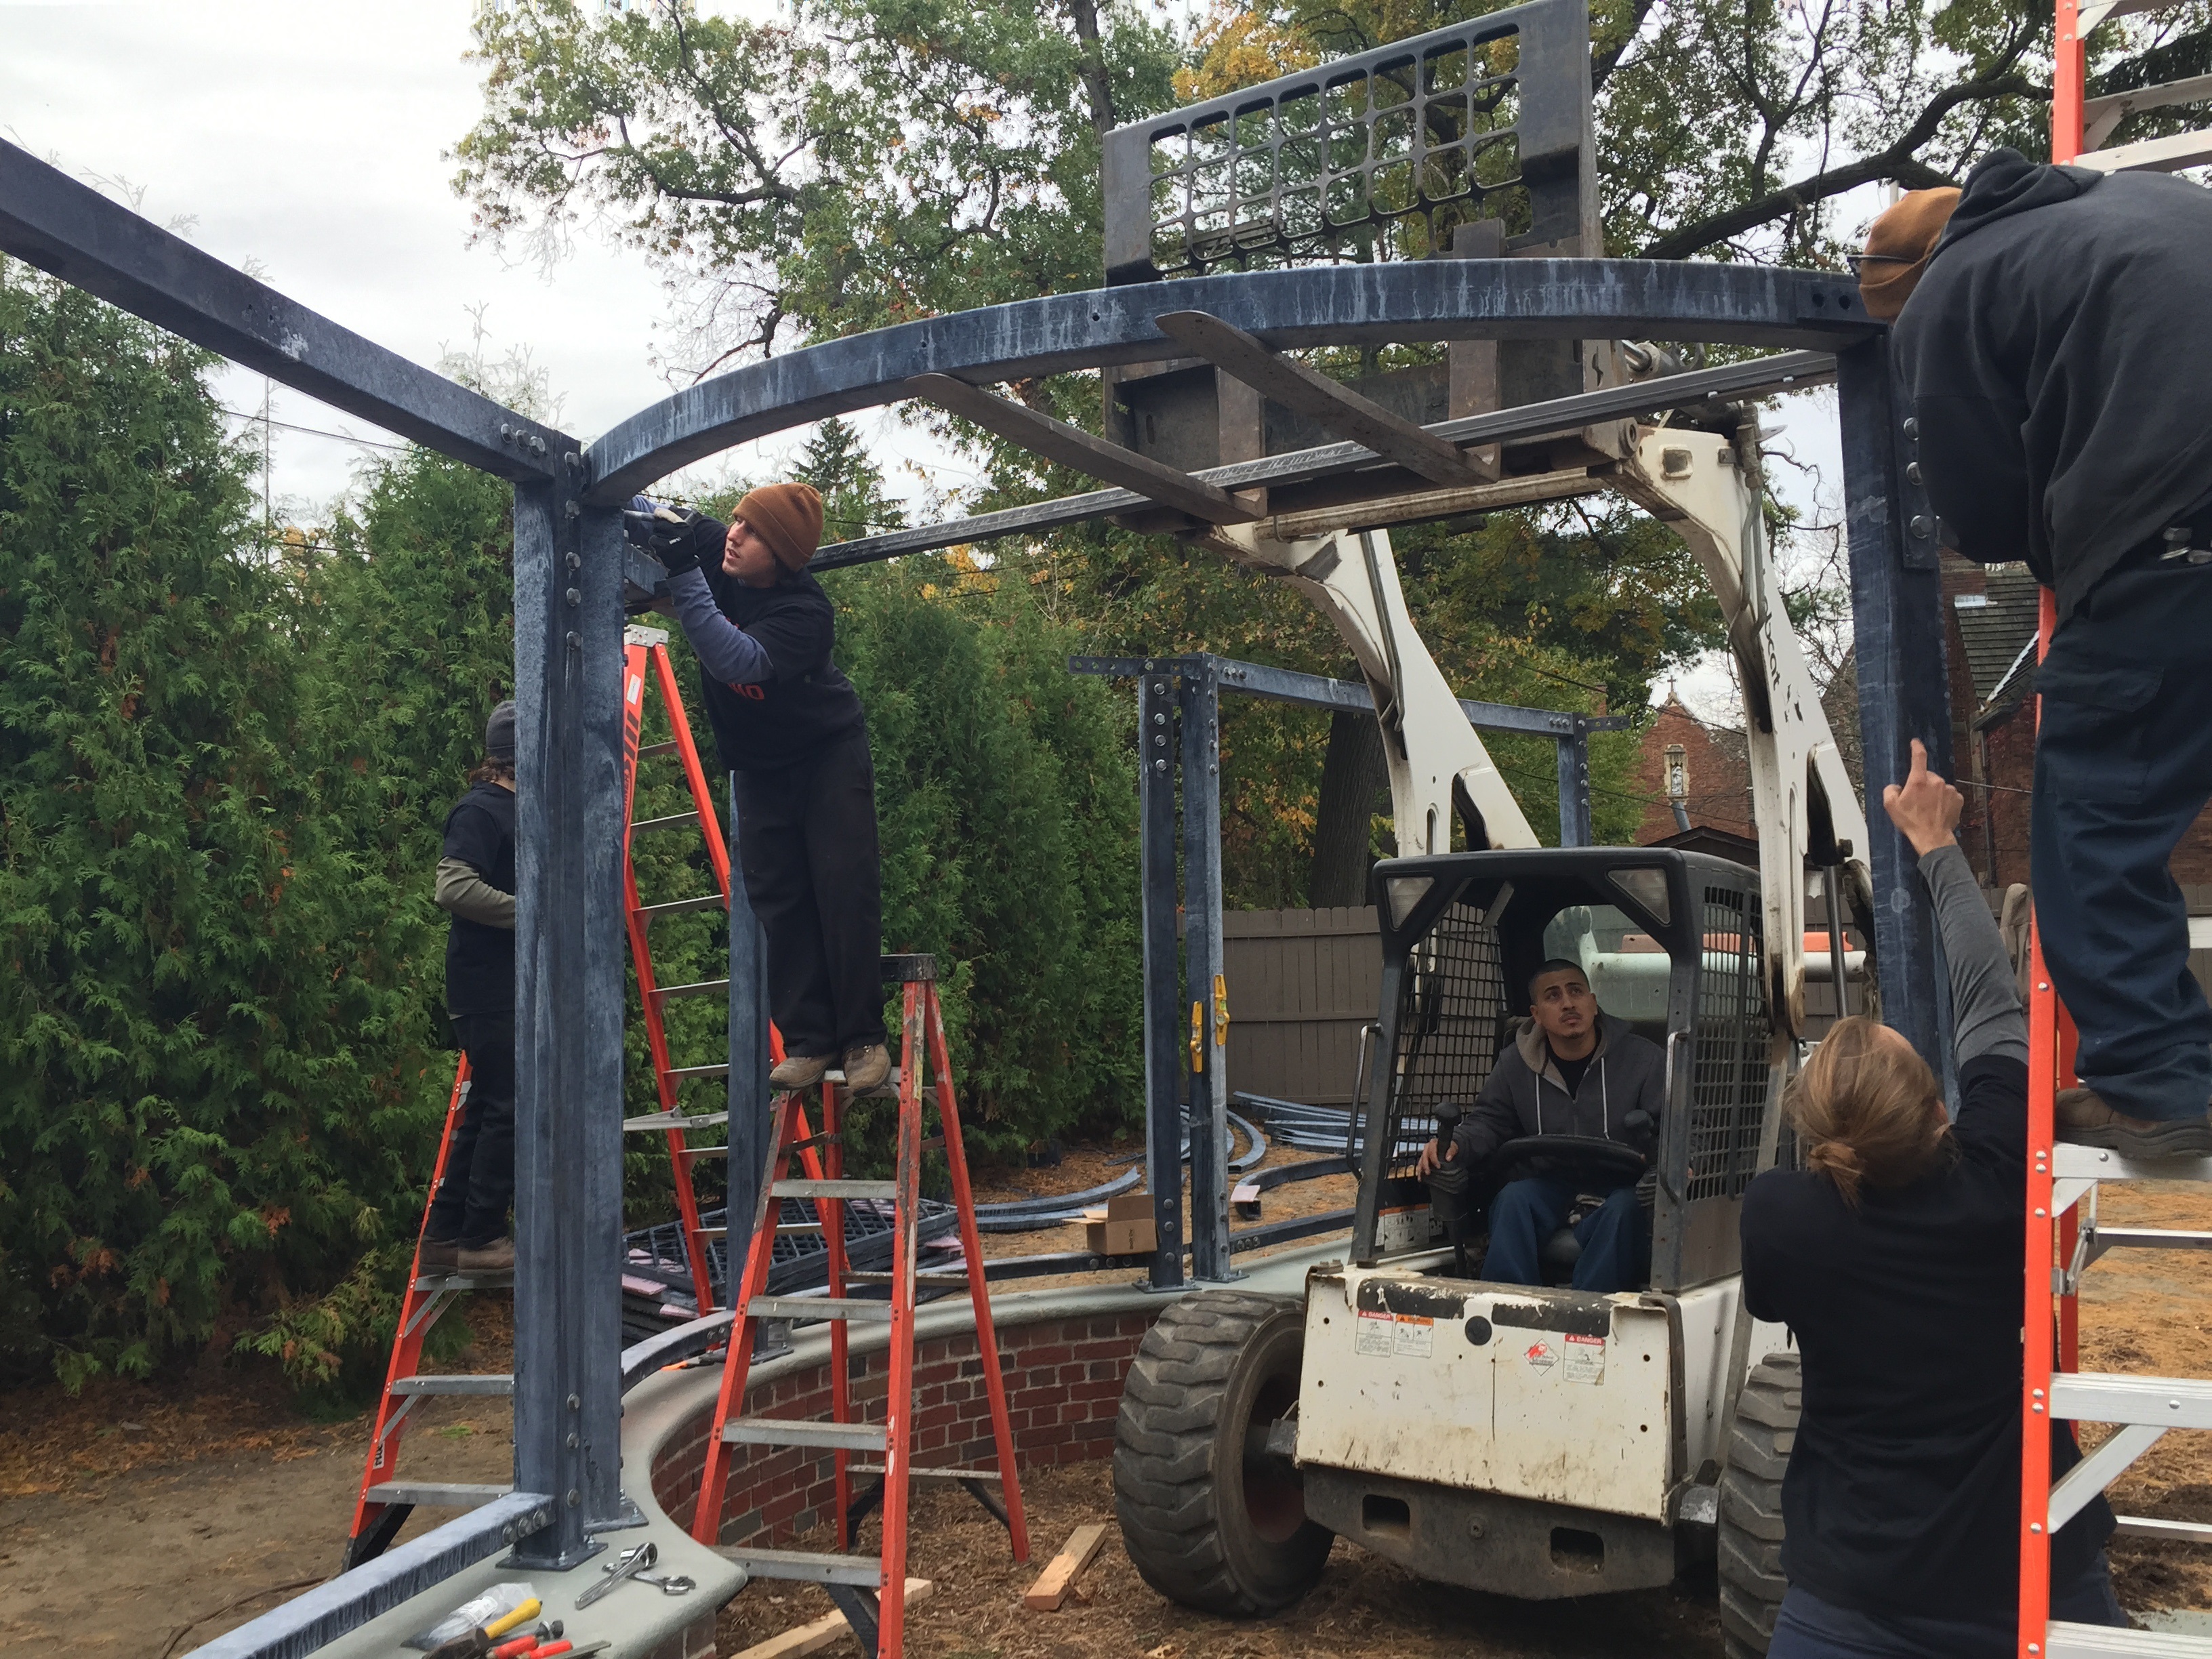


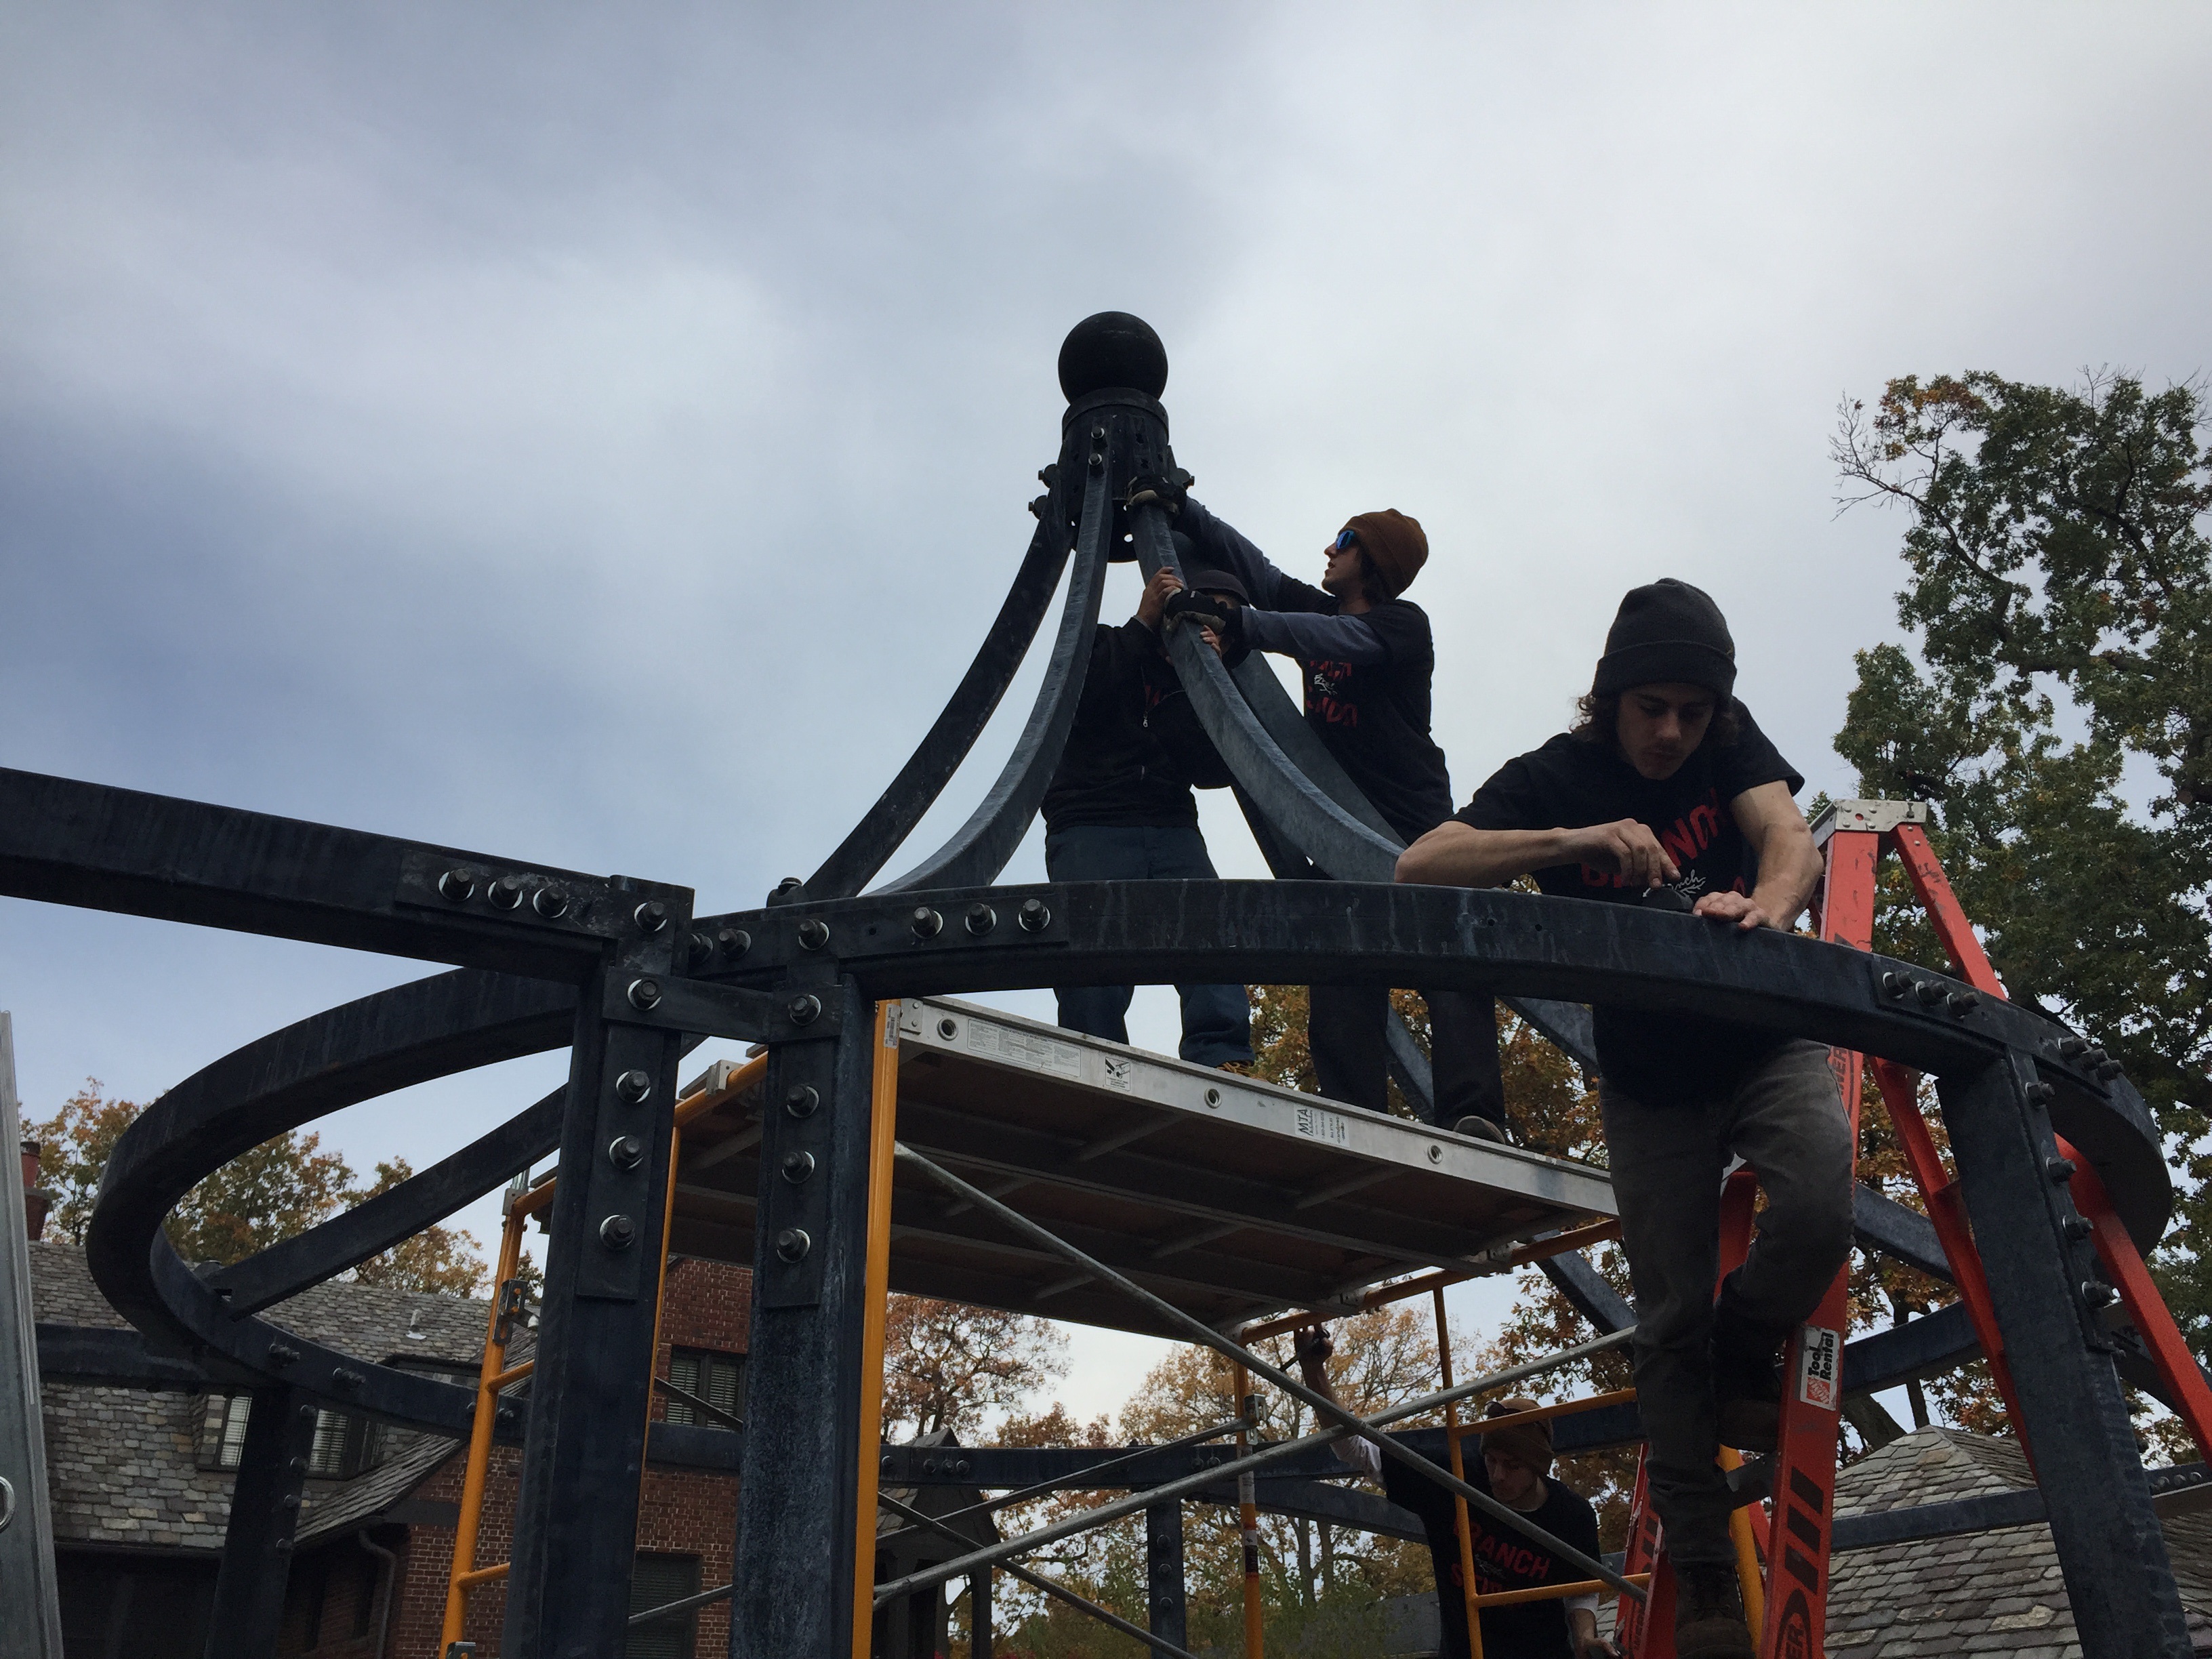
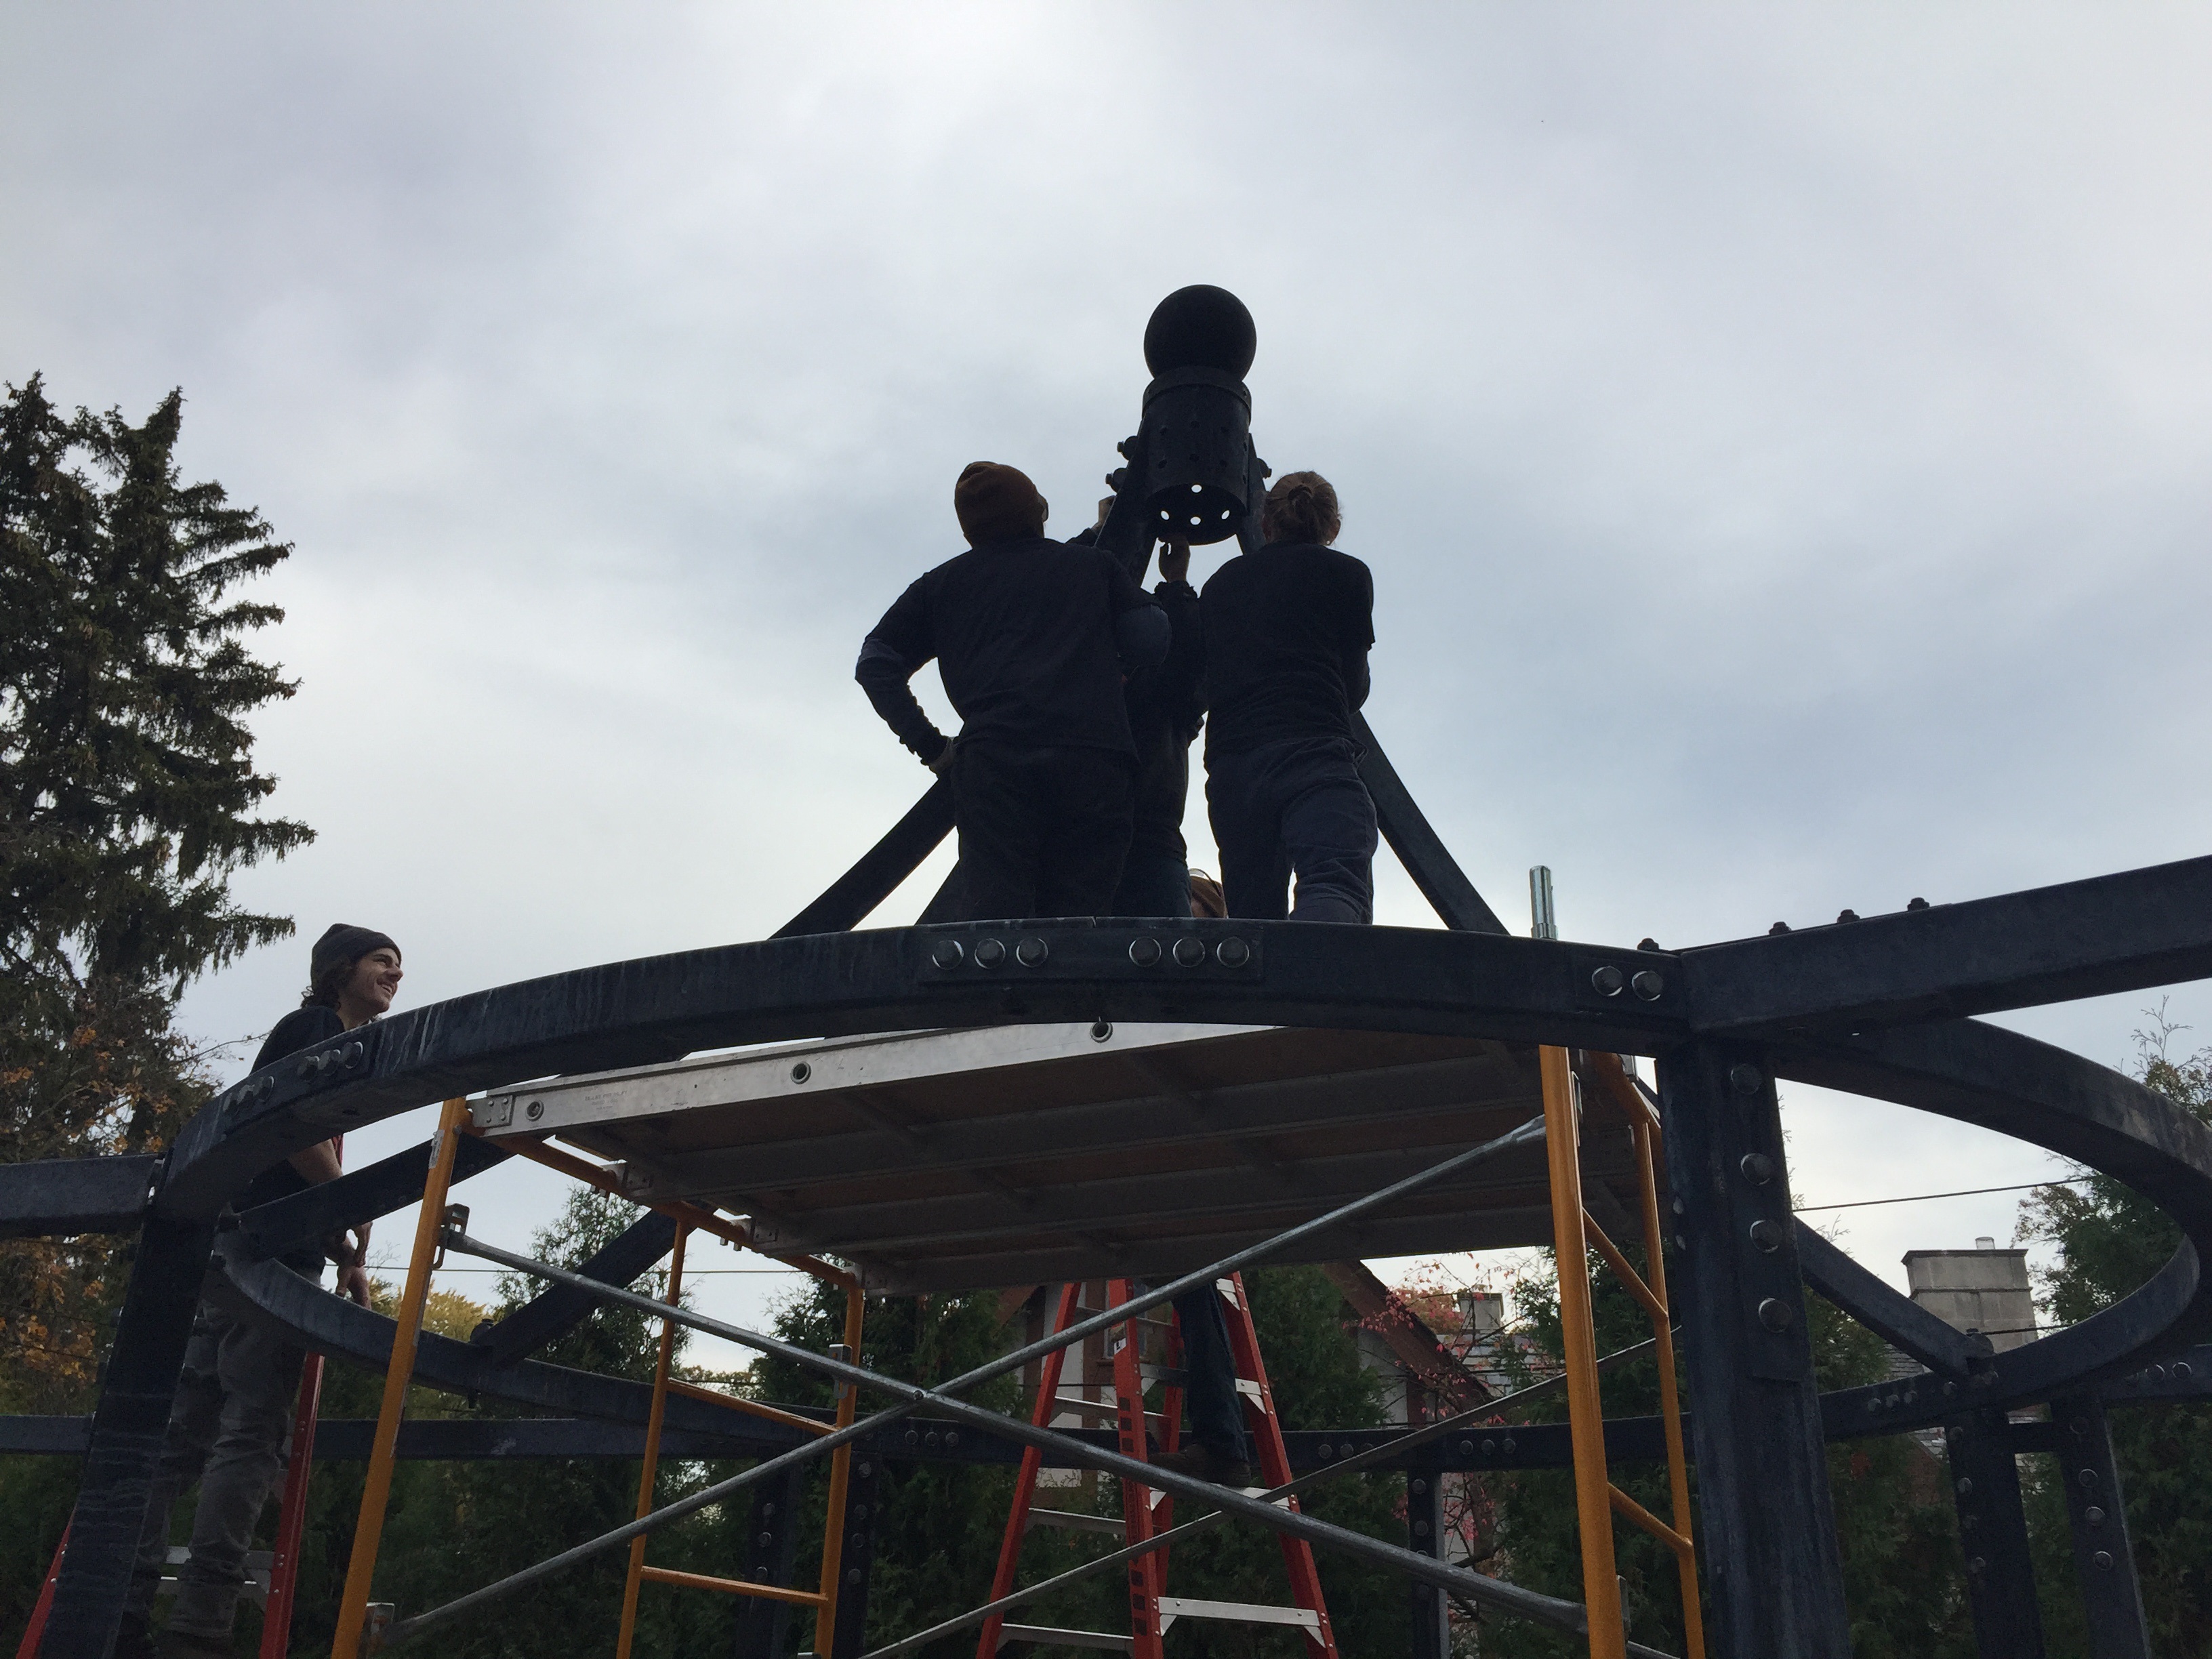 Setting the roof. These pictures are not so swell, with all that sky behind the action. The top of the finial is 17 feet off the ground.
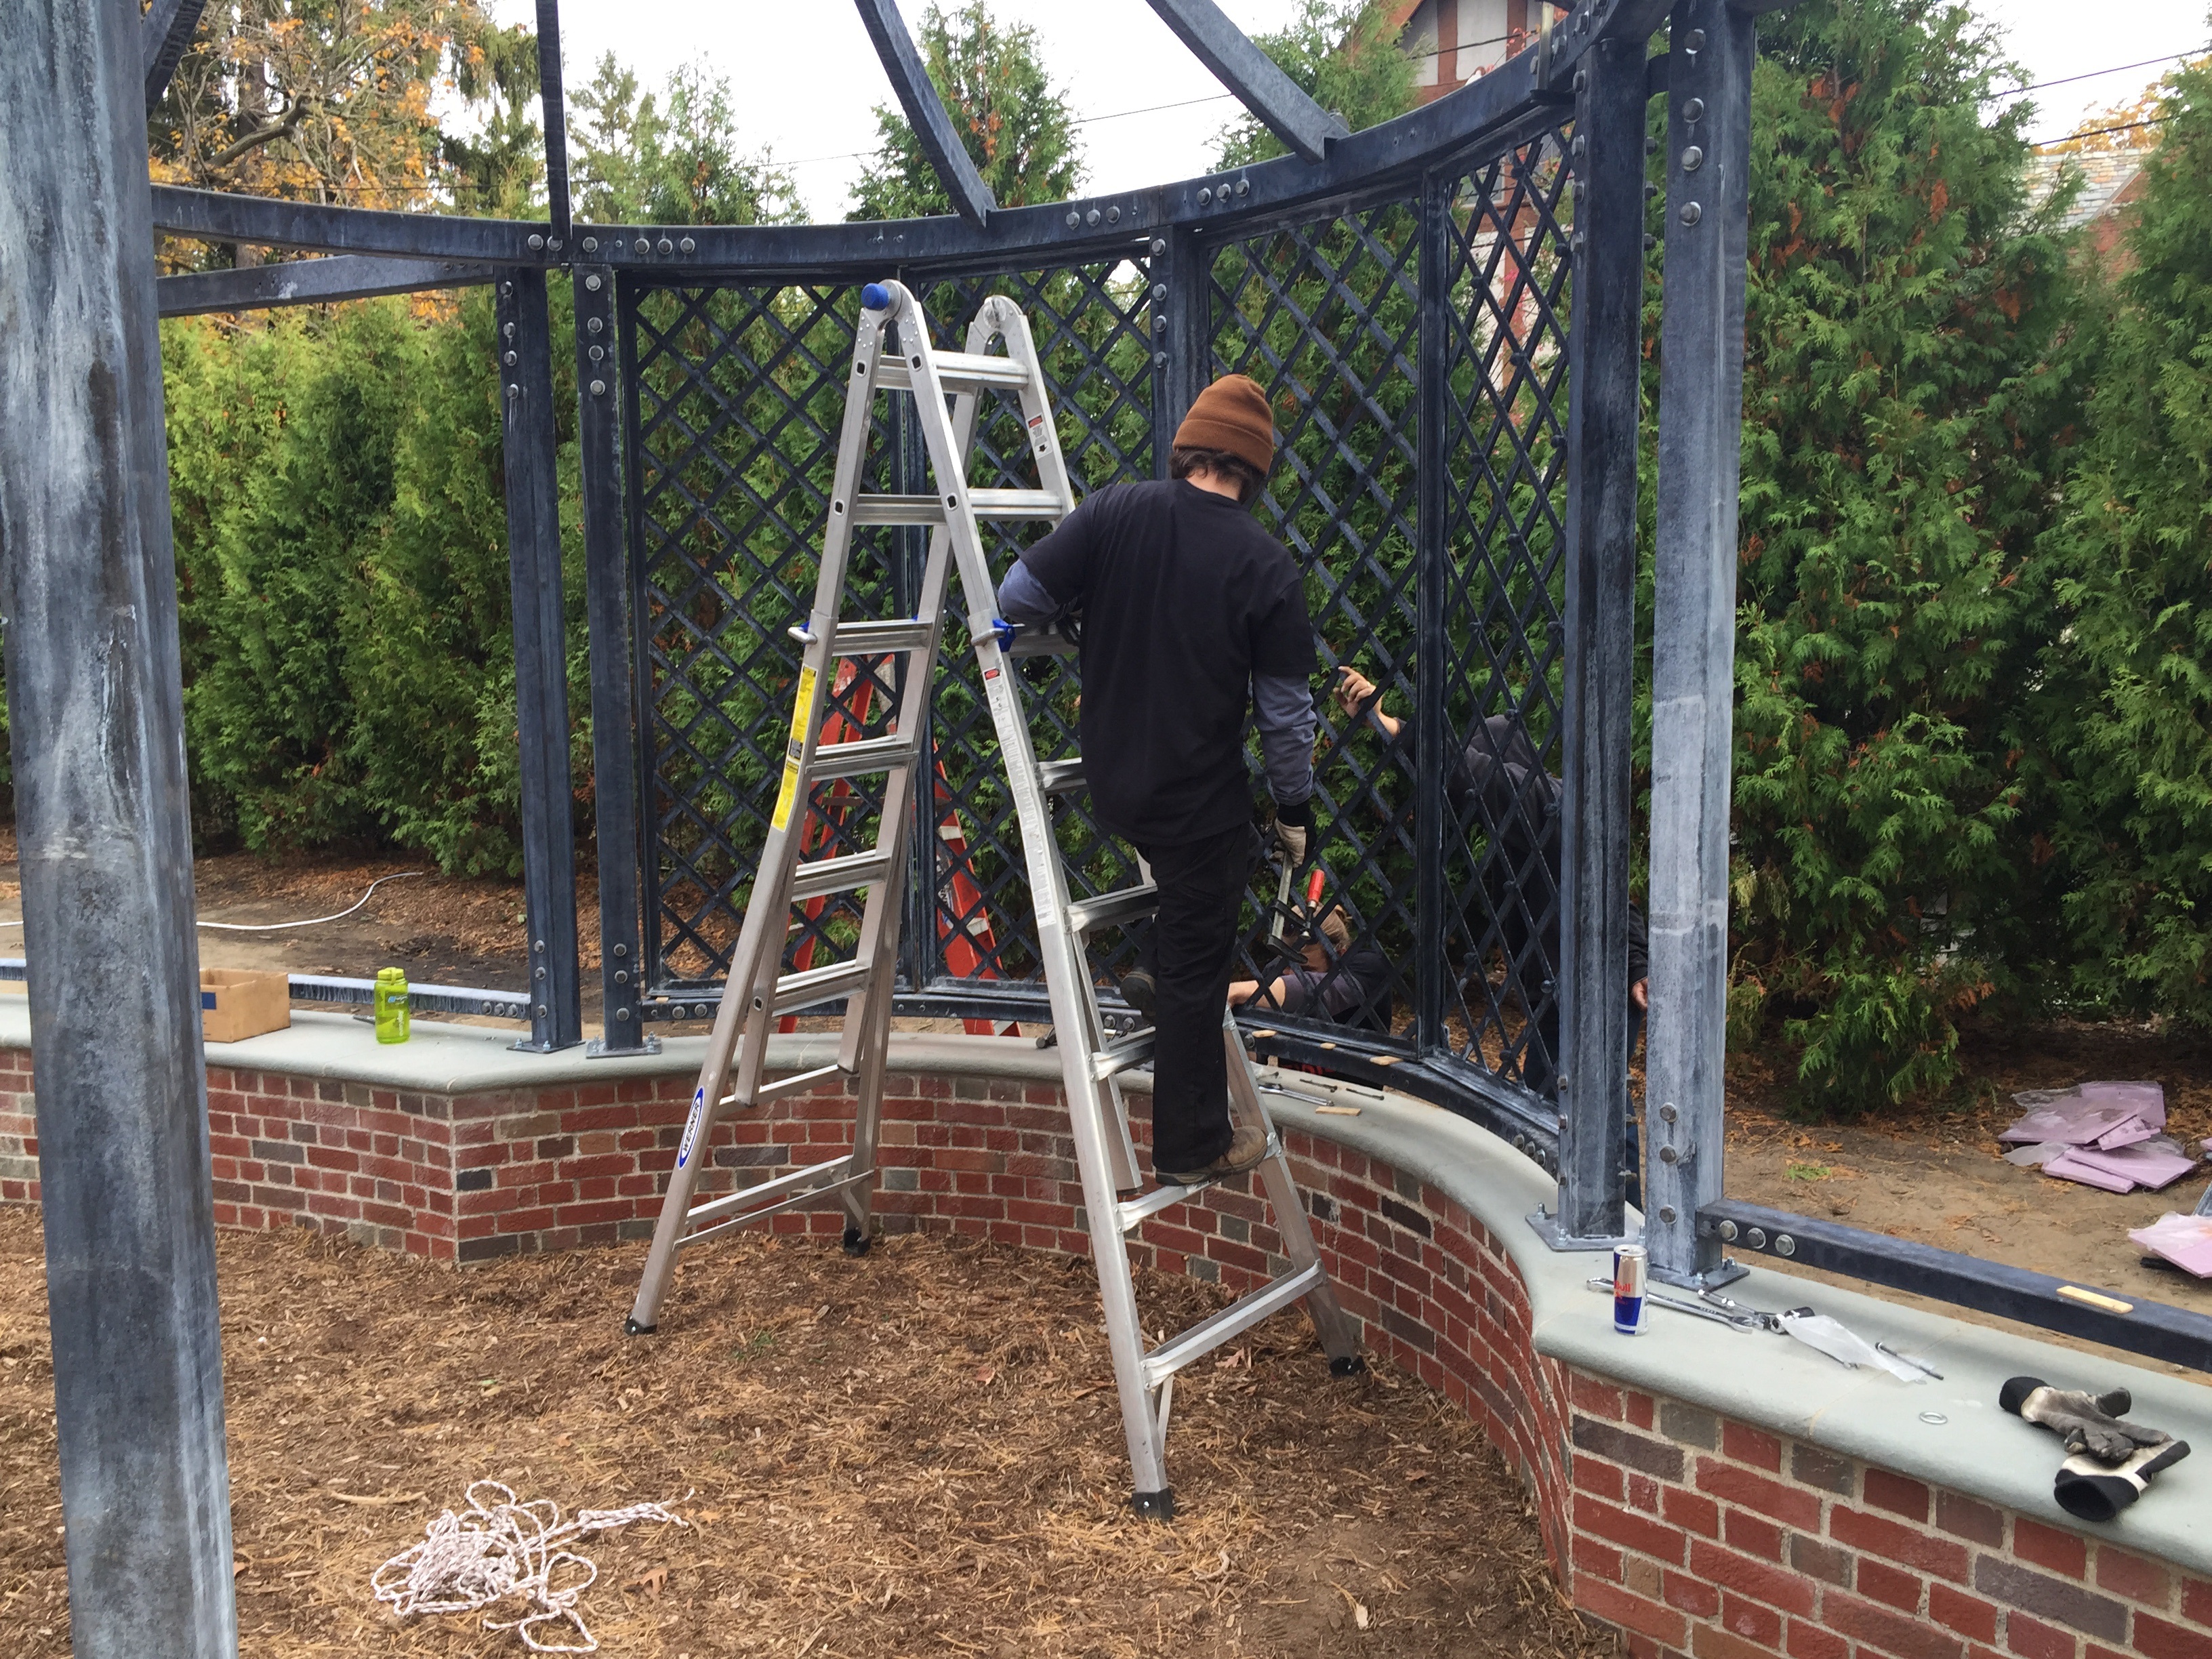
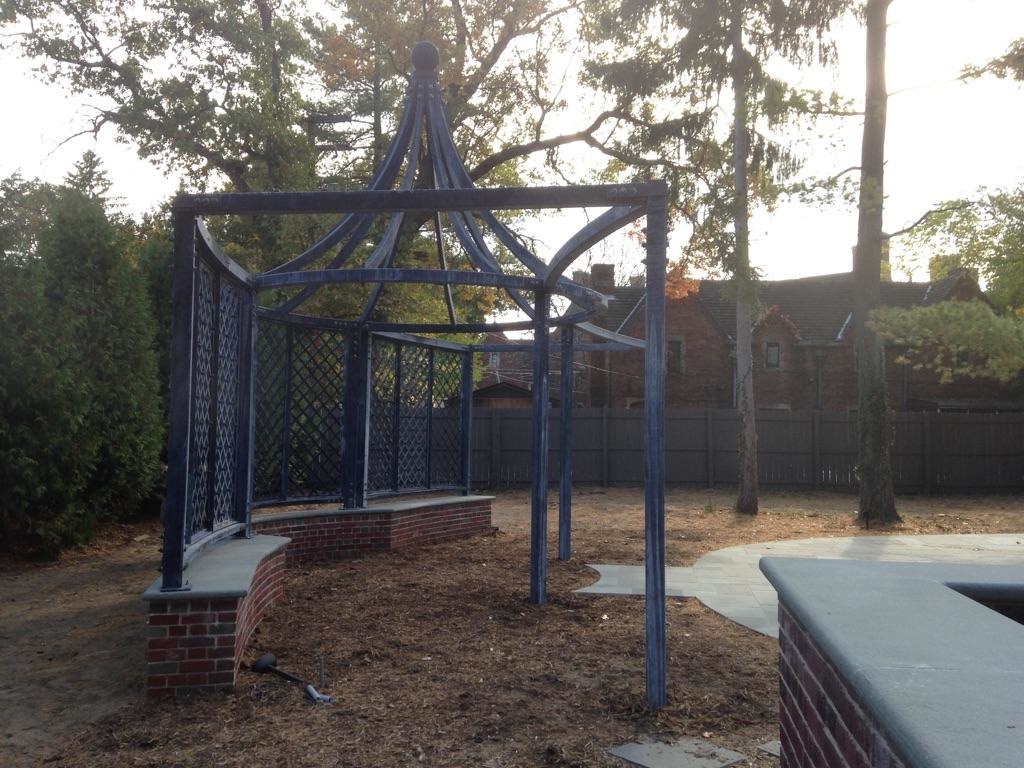
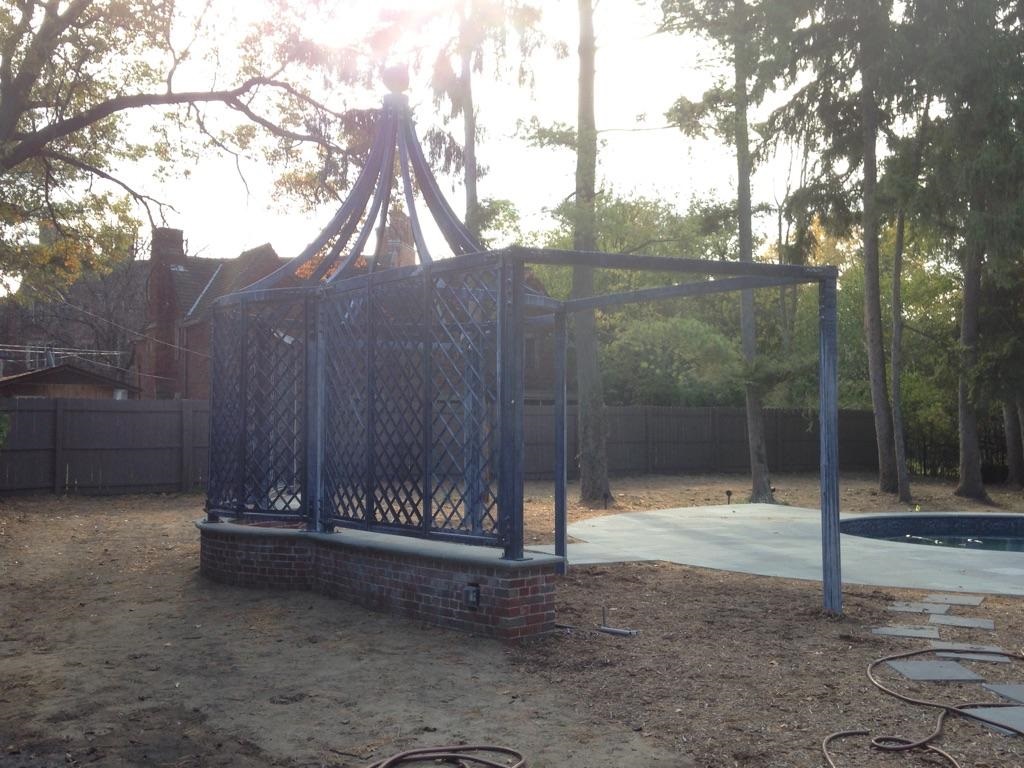
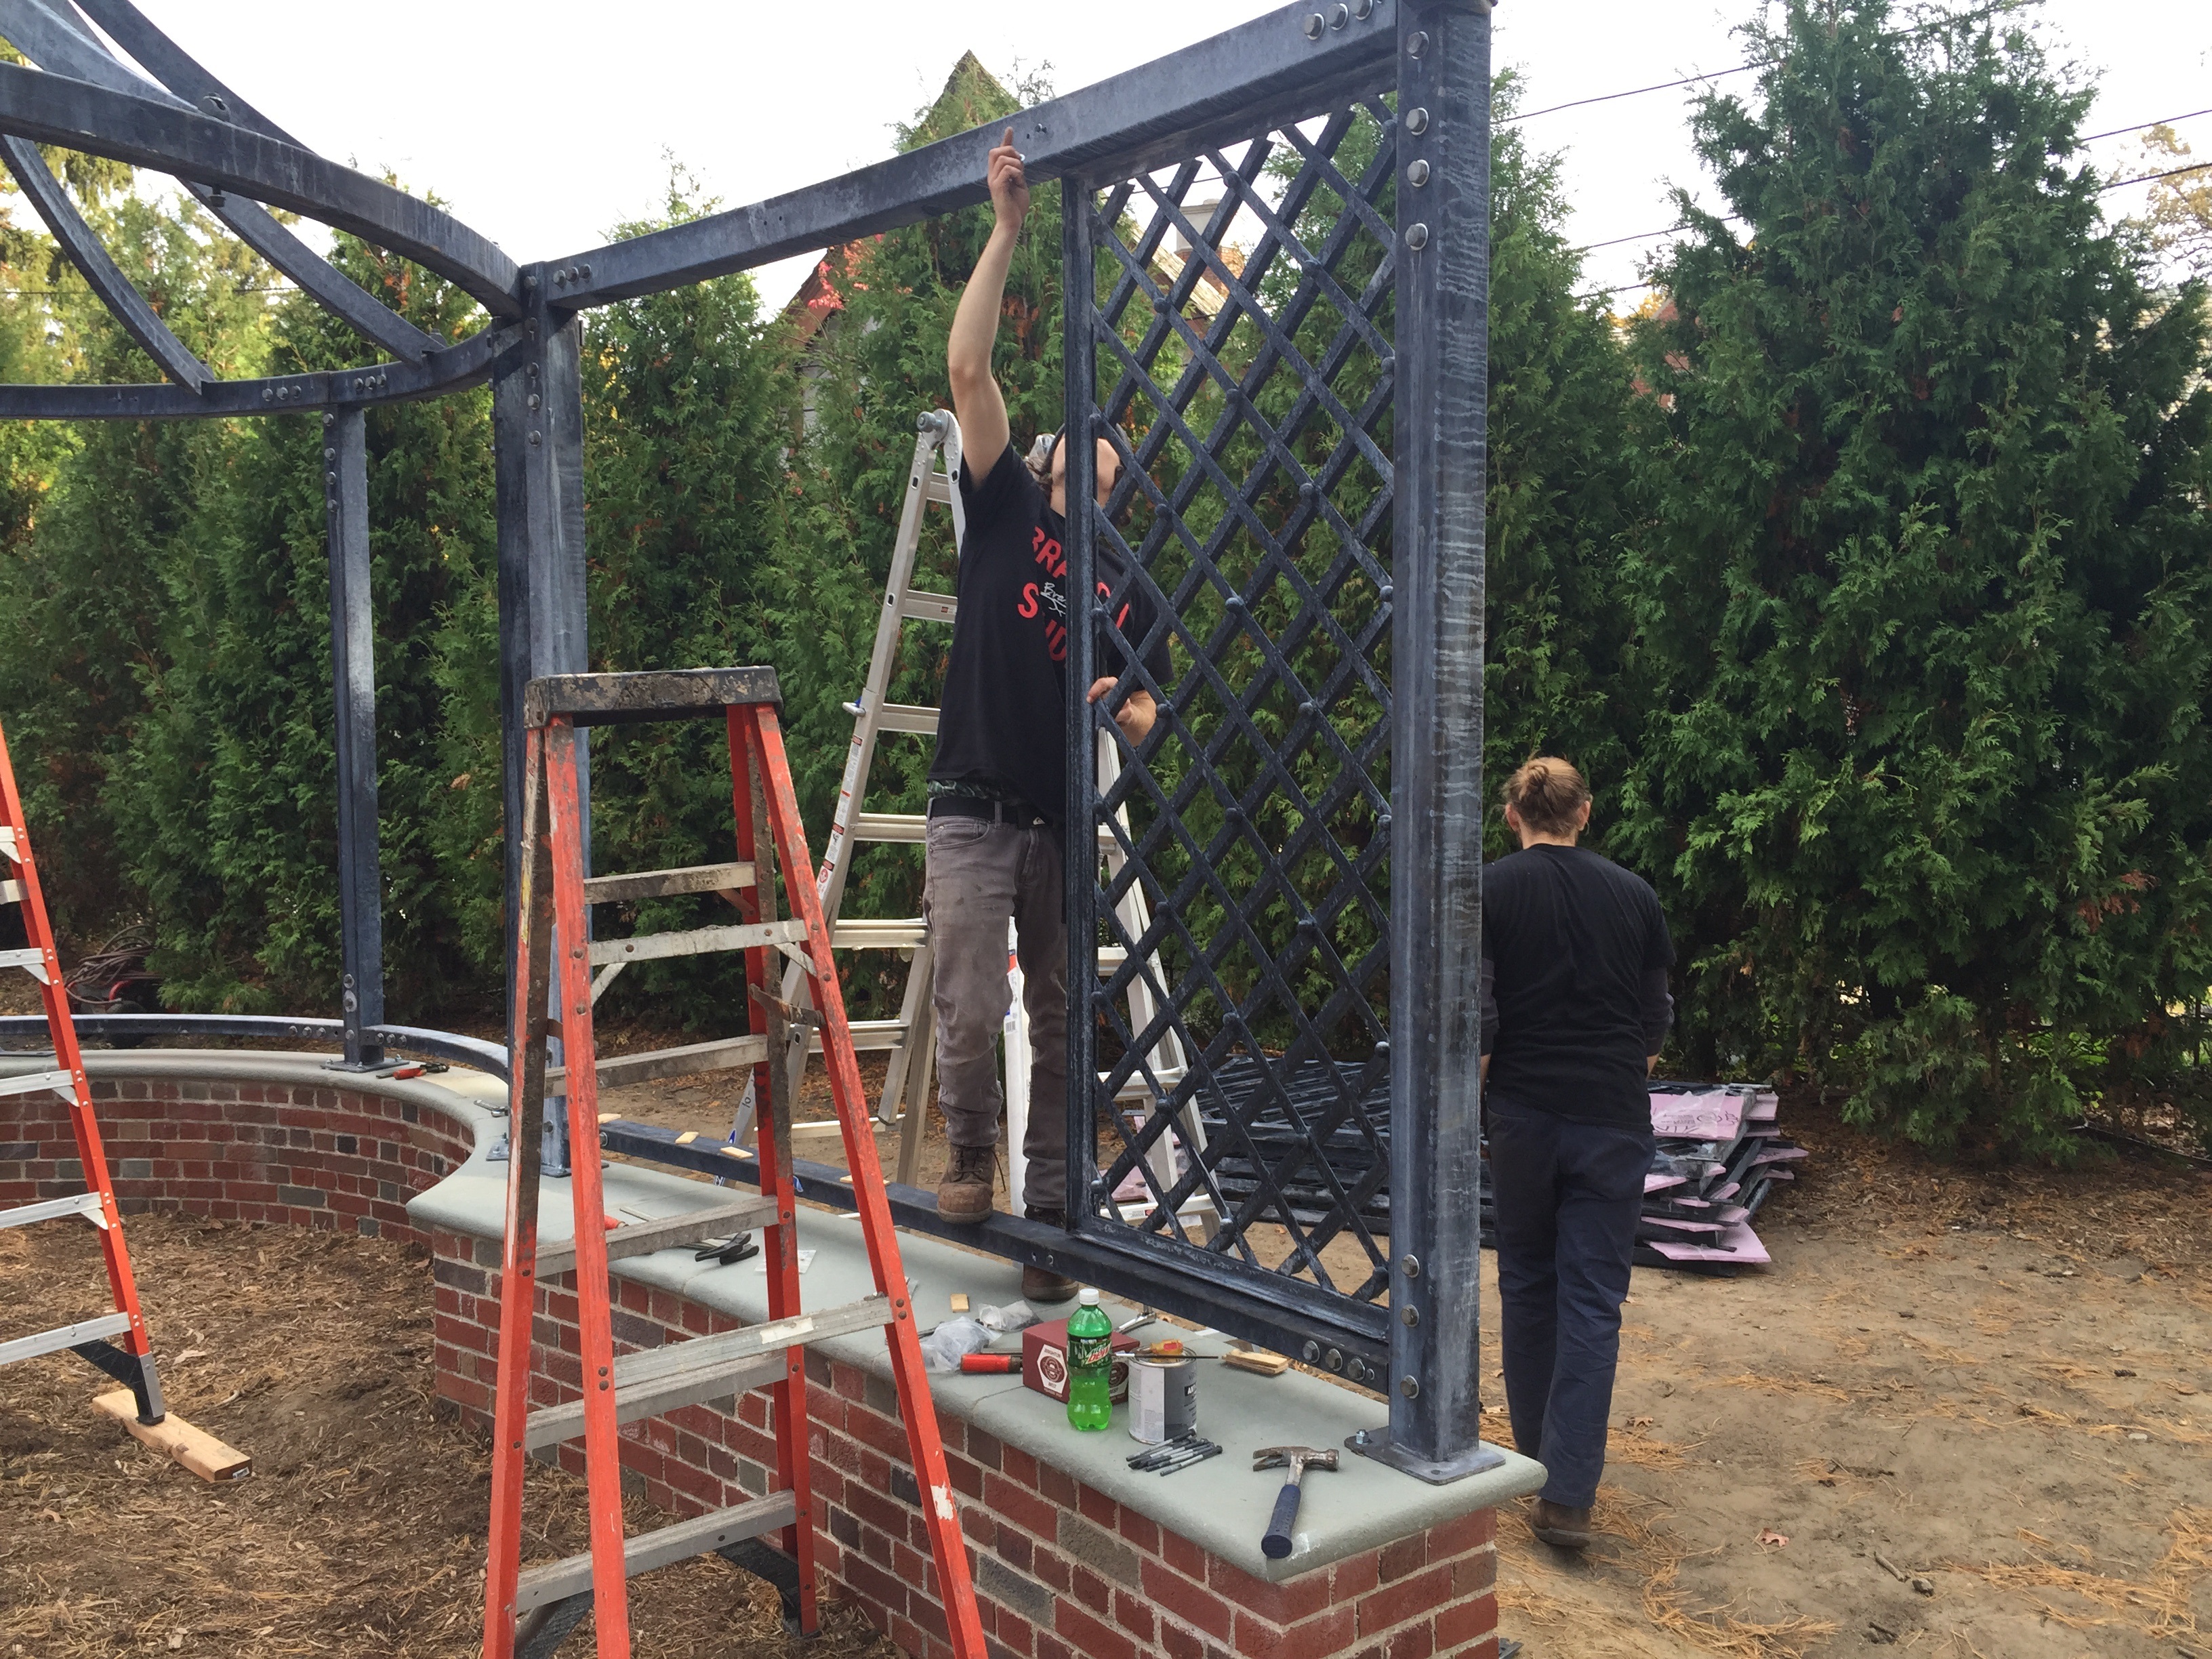 hanging the lattice panels

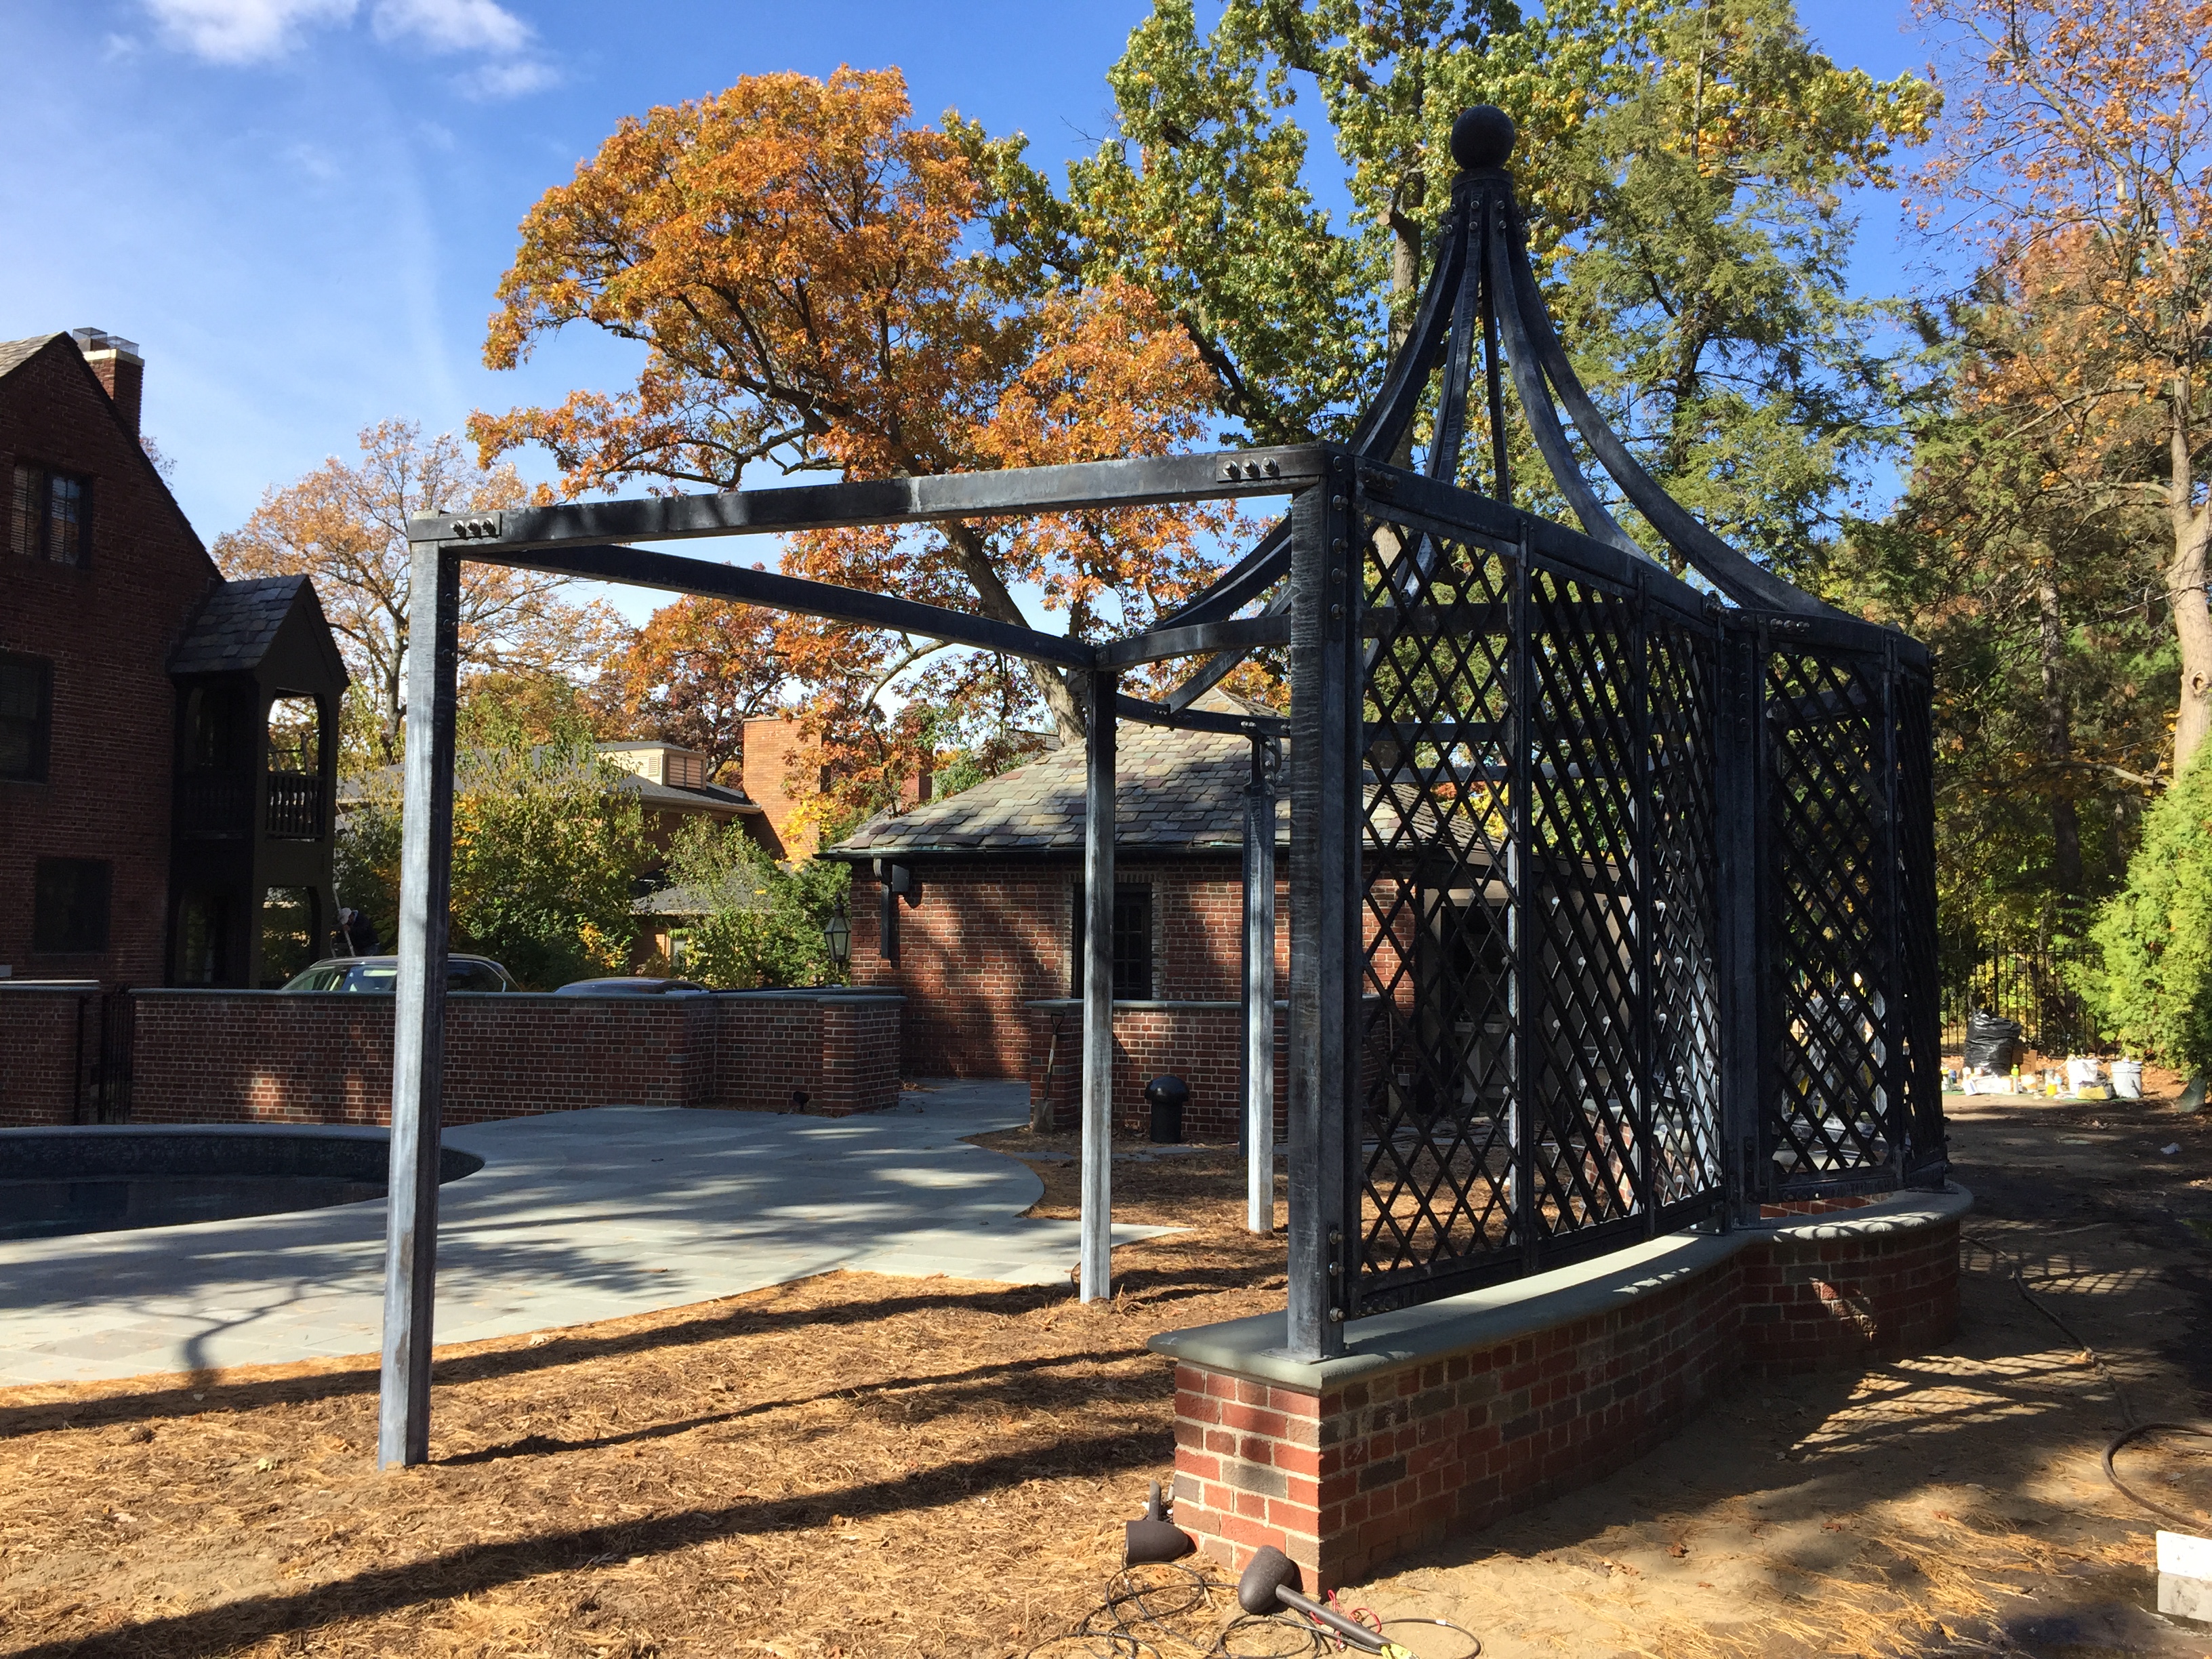
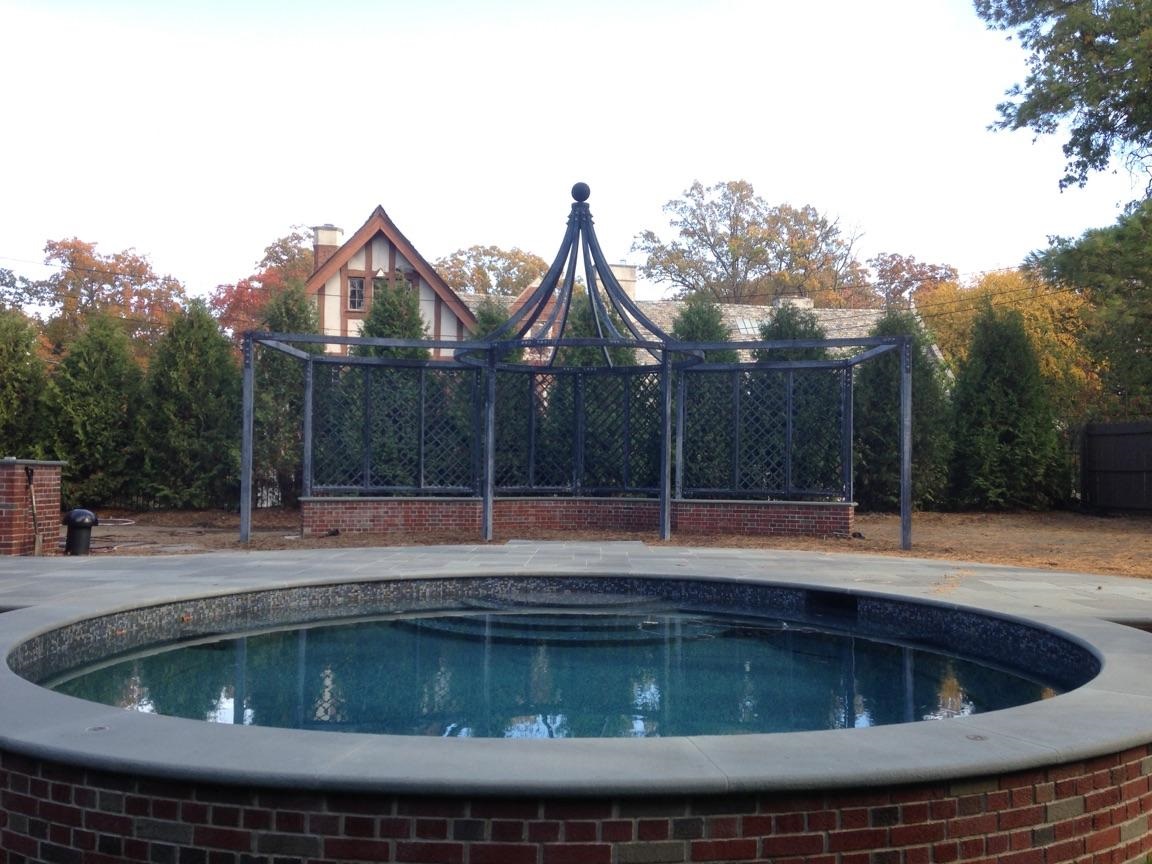
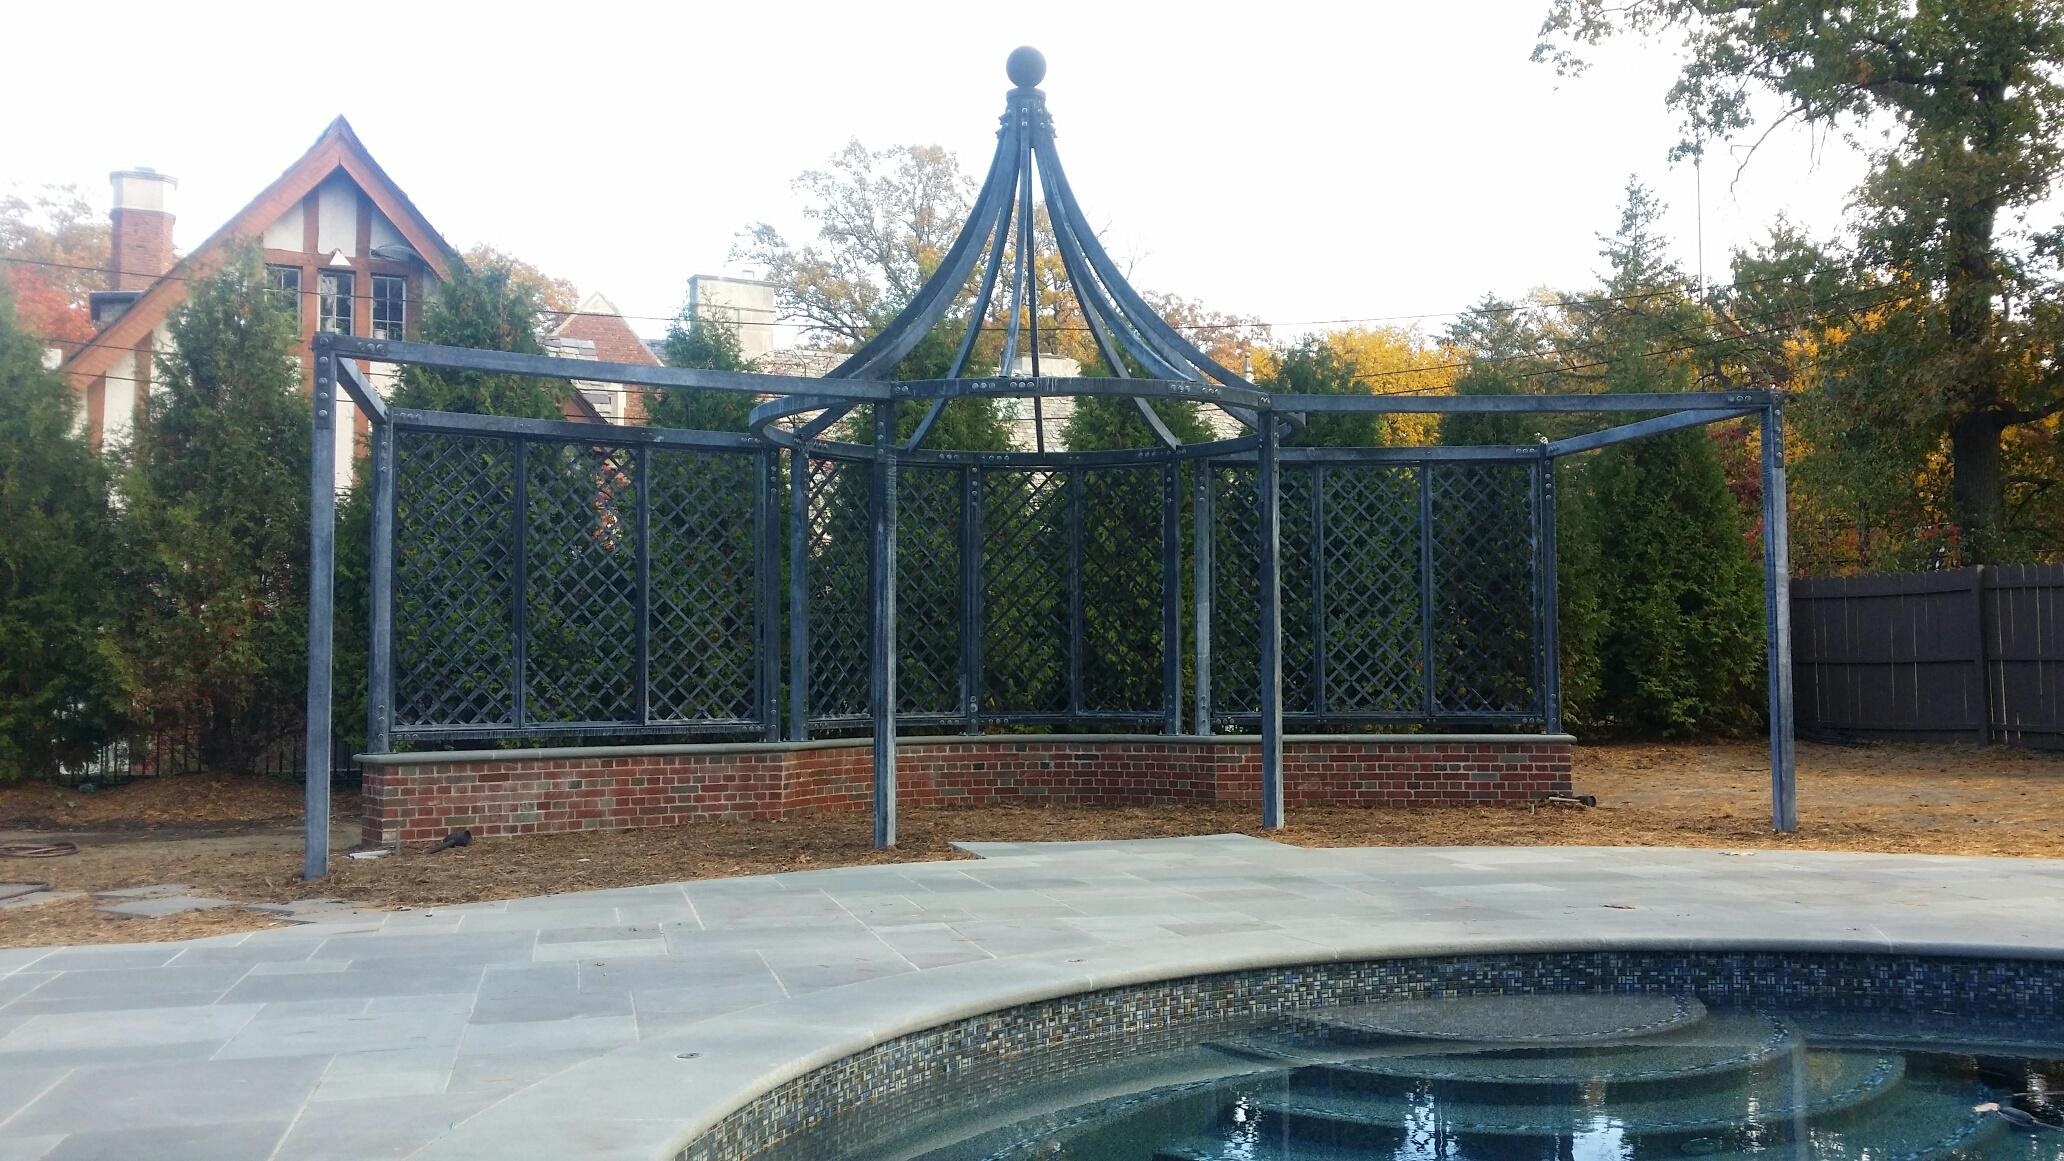 The finish
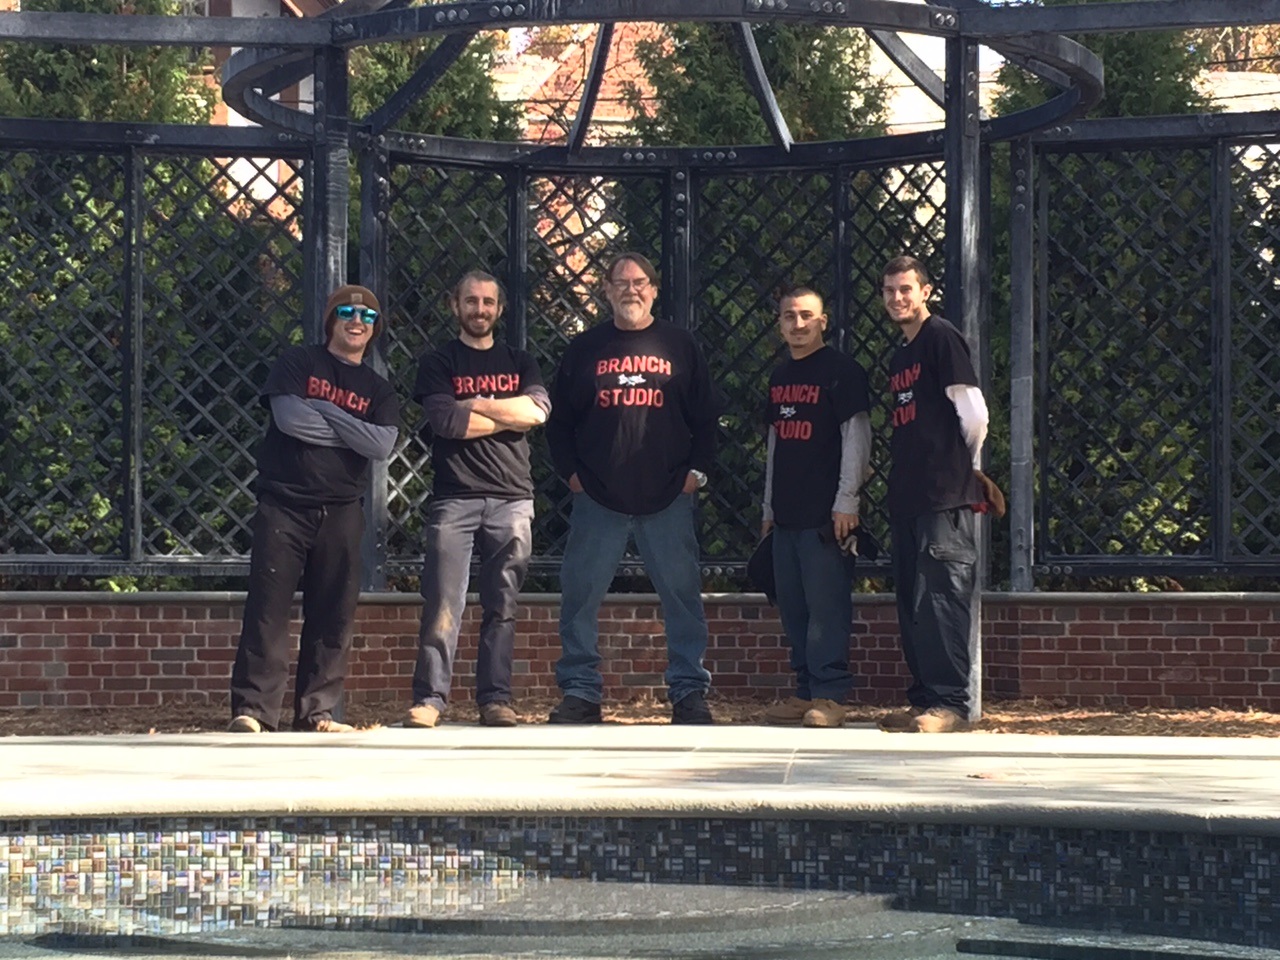 5 of the 6 Branch Studio dudes
 The two day installation consumed 110 hours of work on the part of all 6 members of Branch. My clients had the great idea to do a time lapse video of the installation-what a treat this is to watch! If you are interested in watching, click on the link below.
the Lucerne Pergola installation

 This pavilion is very much about enclosure. It would be fine with vines, and fine without. The client who purchased this steel “building” had us construct cedar and steel benches for the sides; it became a place to meet in her garden.


