The Last On The Limelight Hydrangeas

Given that close to 7000 gardeners have read my last post on hydrangeas in the past few days, I am encouraged to write again.  I went back out last night to rephotograph my hydrangeas with a specific purpose in mind. How do I site them in the landscape, and how do I take care of them? I have a significant disclaimer up front. How I grow hydrangeas is not the be all and end all. How I grow them works for me.  What will work for you involves a lot of independent thought, trial, and error. I would be the first to suggest that you trust your own experience over mine. That said, first up is a discussion about how to grow and manage these big shrubs. No matter where you plant them, hydrangeas reward a gardener who is willing to prune. I only prune in the spring, when the buds are beginning to swell. Limelight hydrangeas that have gotten leggy and ungainly will respond to a pruning to within 18″-24″ above grade. Just be advised that a hard pruning is a restorative pruning that may take 2 years to bring them back up to heavy blooming stage. A yearly pruning down to 18″-24″ results in fewer, and larger flowers.

Want more flowers rather than large flowers? Prune the topmost branches shorter than the bottom branches-so every branch is exposed to the light. Prune several times early in the season to promote branching. Come mid May, I stop pruning.This hydrangea on standard has a beautiful branchy structure as a result of multiple pruning sessions. Notice how the flowers are much smaller than my hydrangeas at home? Post an early spring pruning, a lighter pruning over the course of a few spring weeks results in an embarrassment of riches in smaller flowers.

In love with the giant flowers? Prune vigorously. Pruning deciduous shrubs is not just a matter of style, and it certainly is not a matter of control. Pruning promotes growth that maximizes the opportunity for good blooming. A Limelight left to its own devices will have lots of growth on the top that eventually results in leggy and leafless lower branches.

Big shrubs do and will grow big. Harder pruning may result in a finished size and height at the low end of their growth range. Severe pruning-as in pruning right down to the ground, forces growth from below ground, from what are called basal shoots. I never prune hydrangeas that hard. I like having some old wood to support all those new branches to come. Pruning is all about what the future. The Limelights bloom on new wood – the current year’s growth. If you grow hydrangeas that bloom on the previous year’s growth, prune right after they bloom. This enables them to grow and set flowers for the season to come before winter. Leave them be until after they bloom the following year. But no matter what cultivar you grow, adequate light and water will reward your effort to grow them.

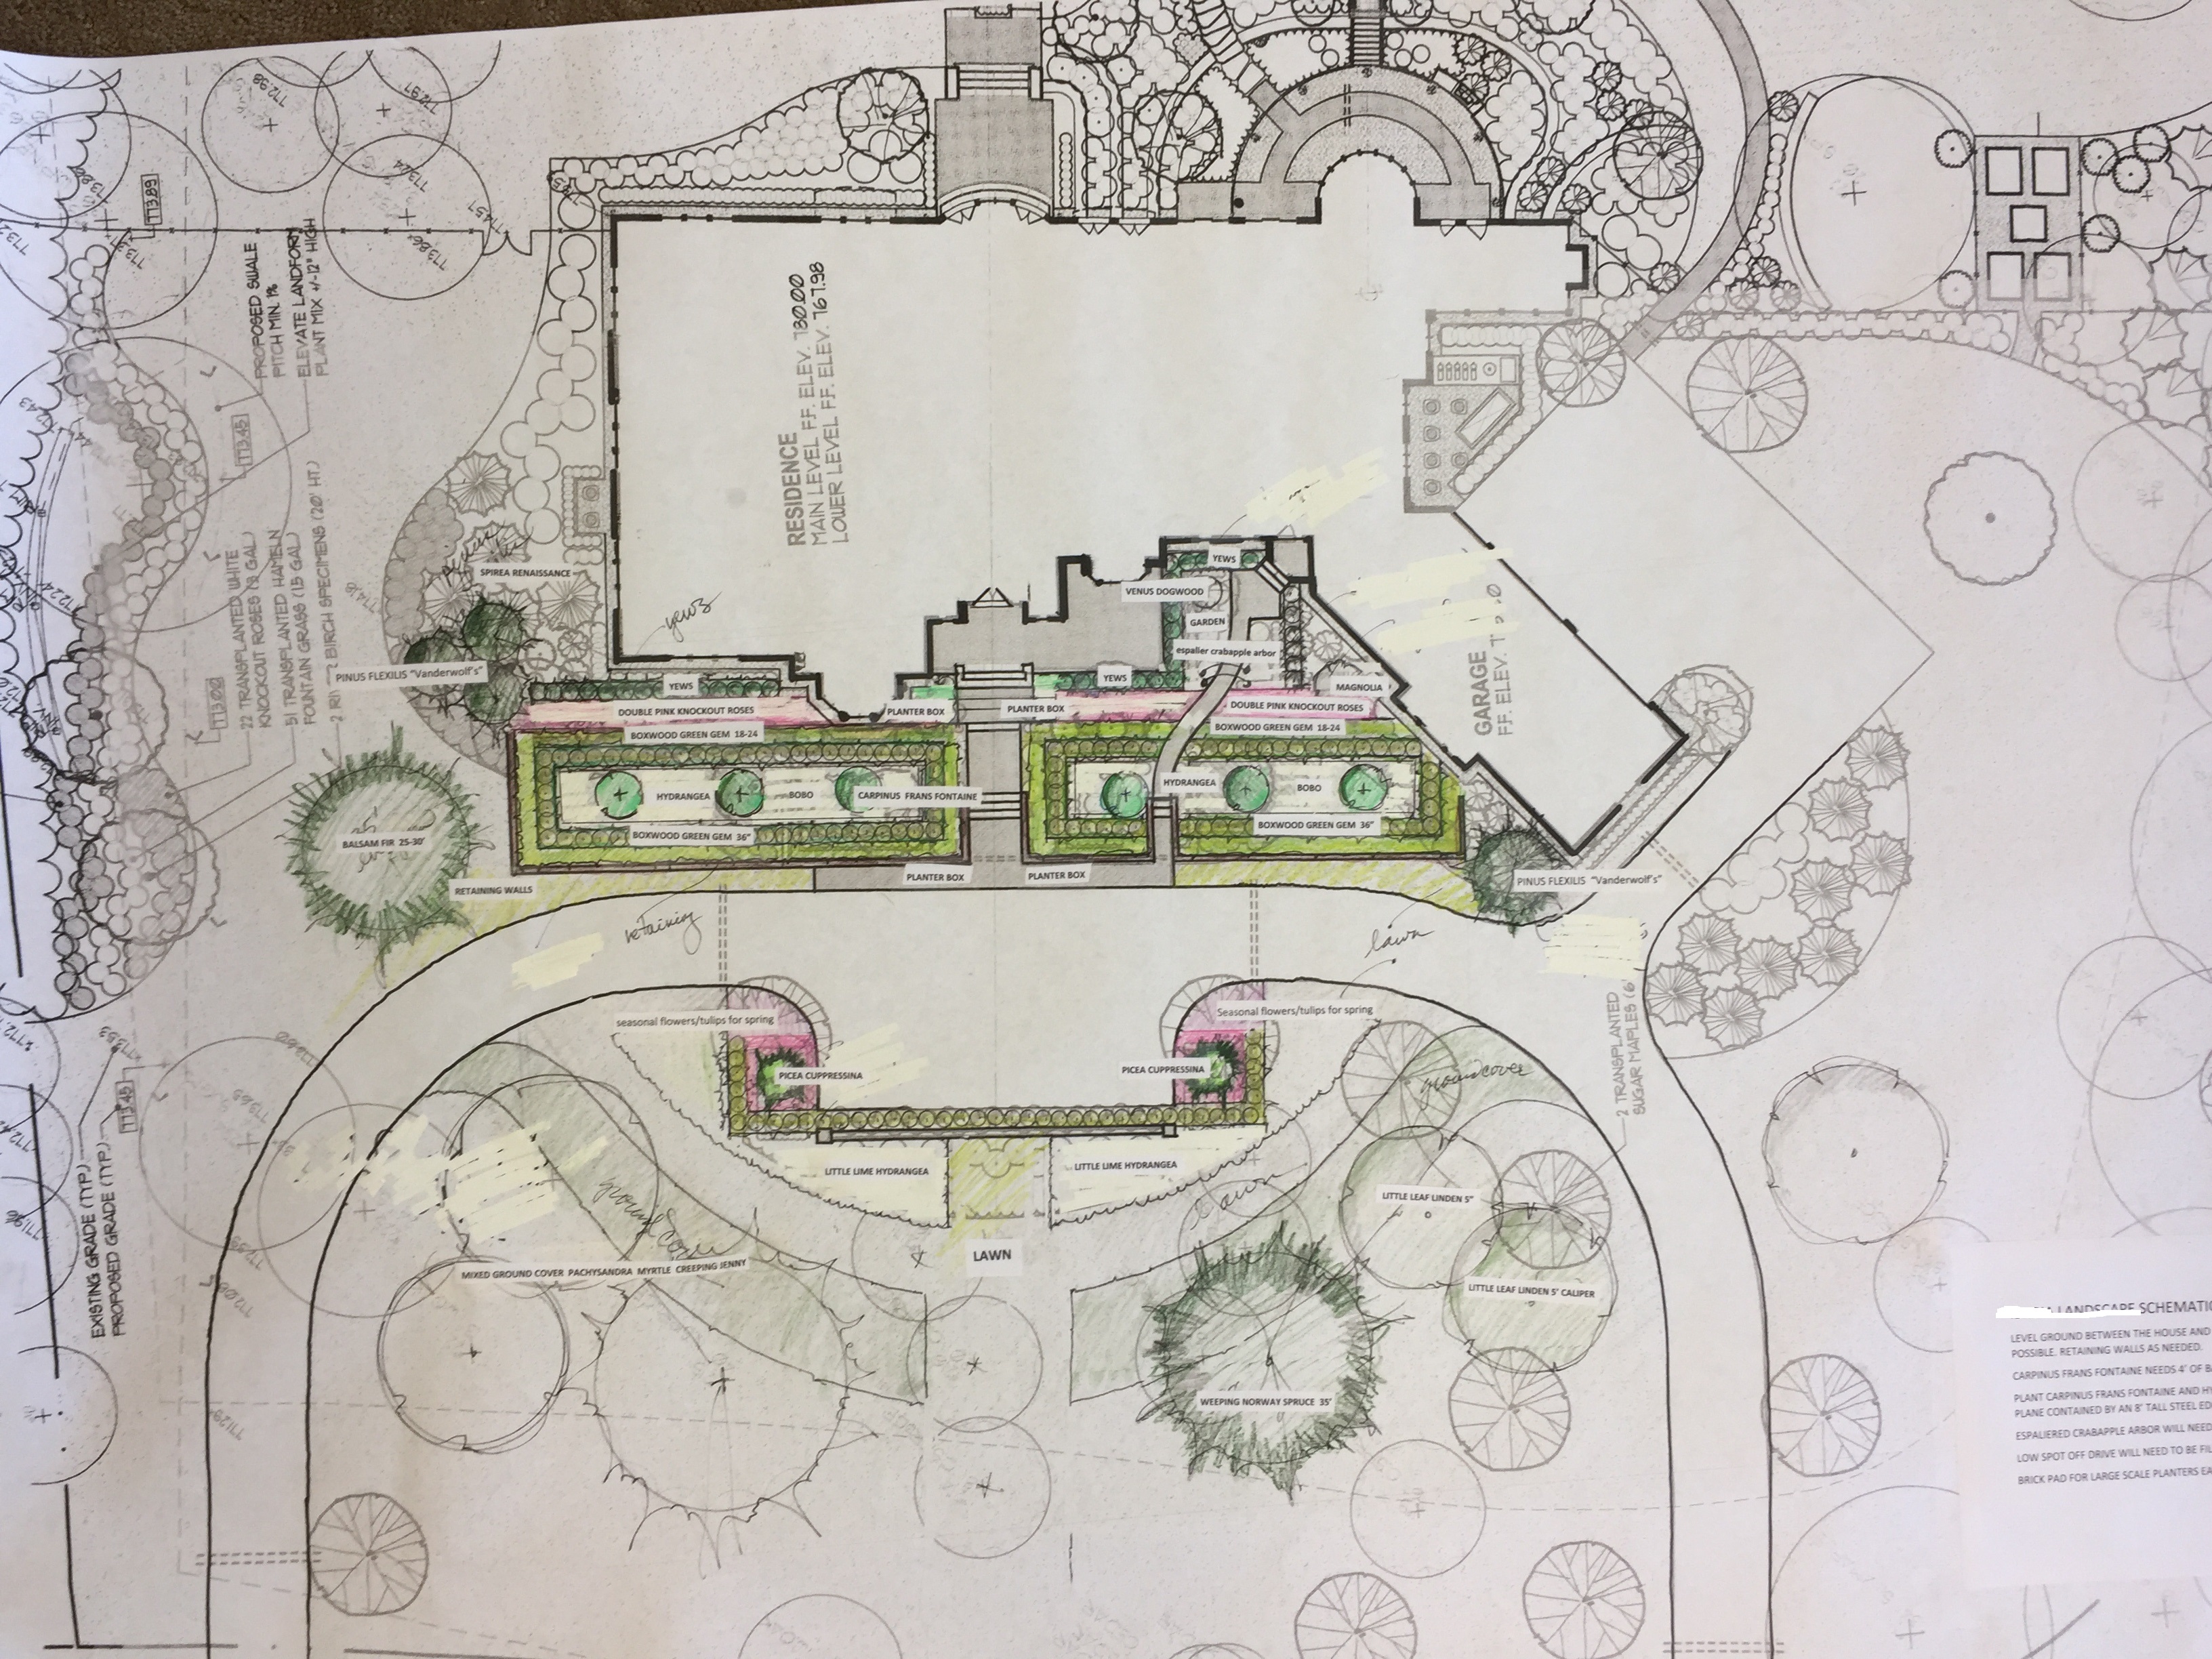
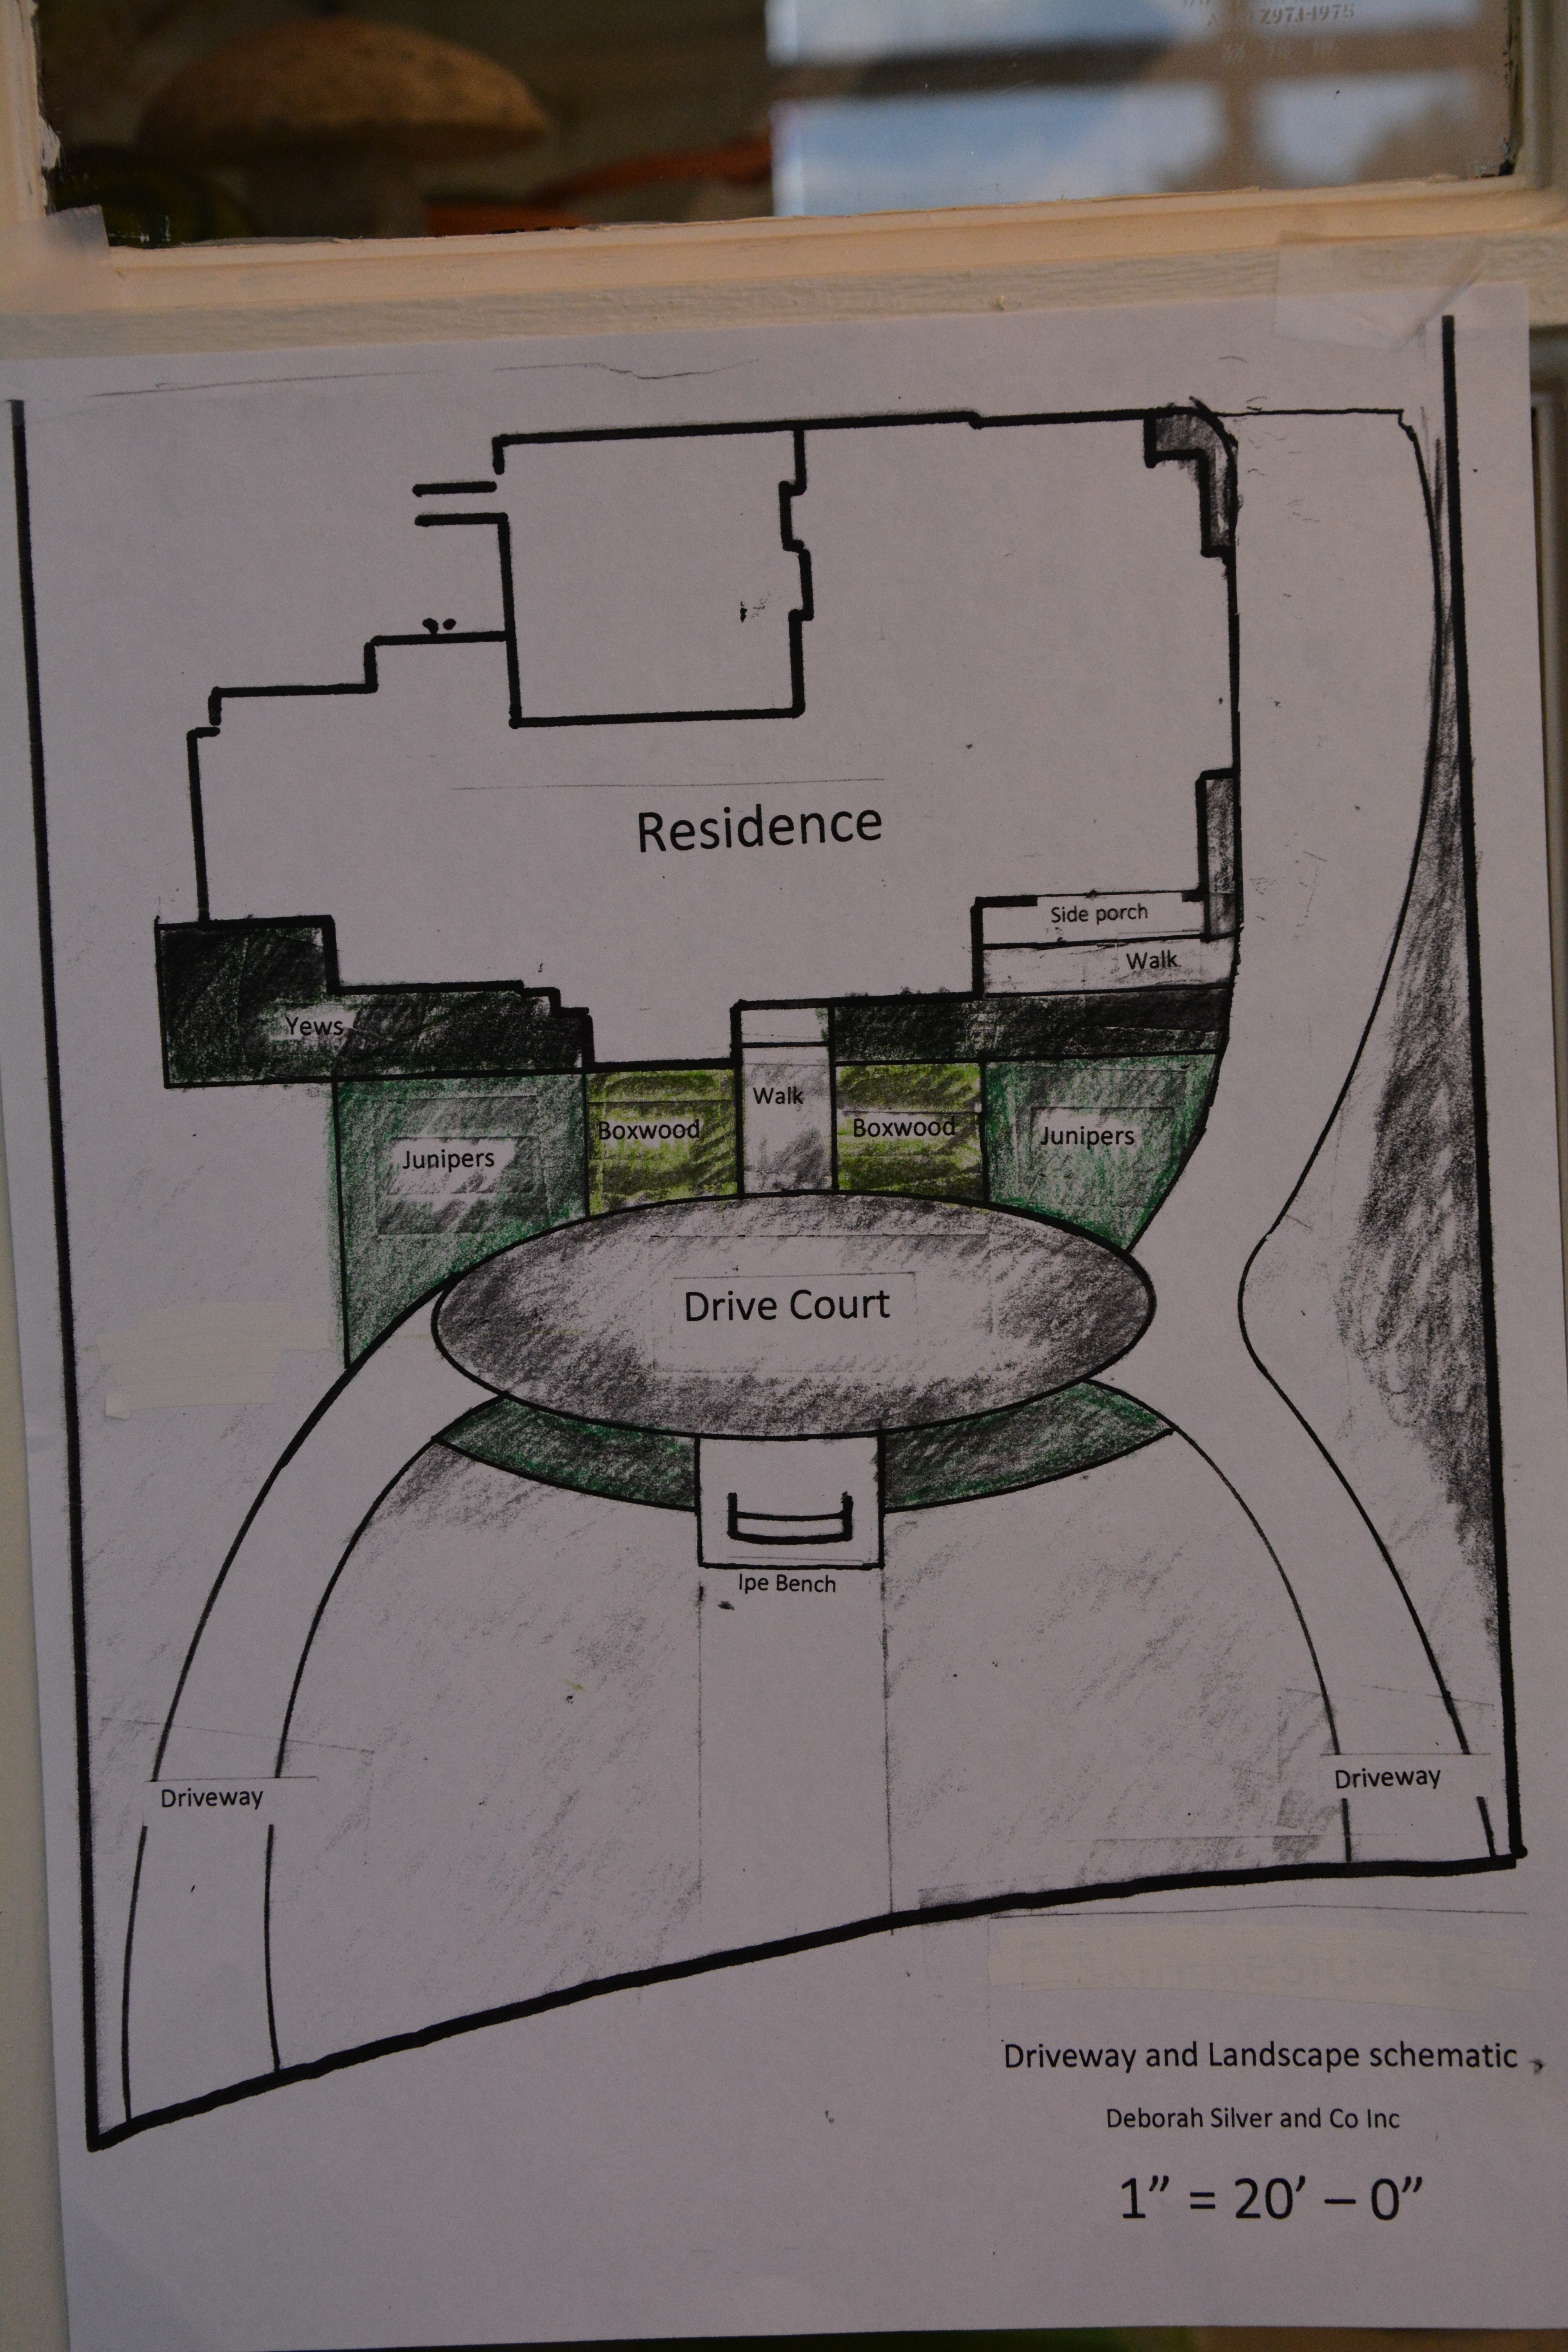
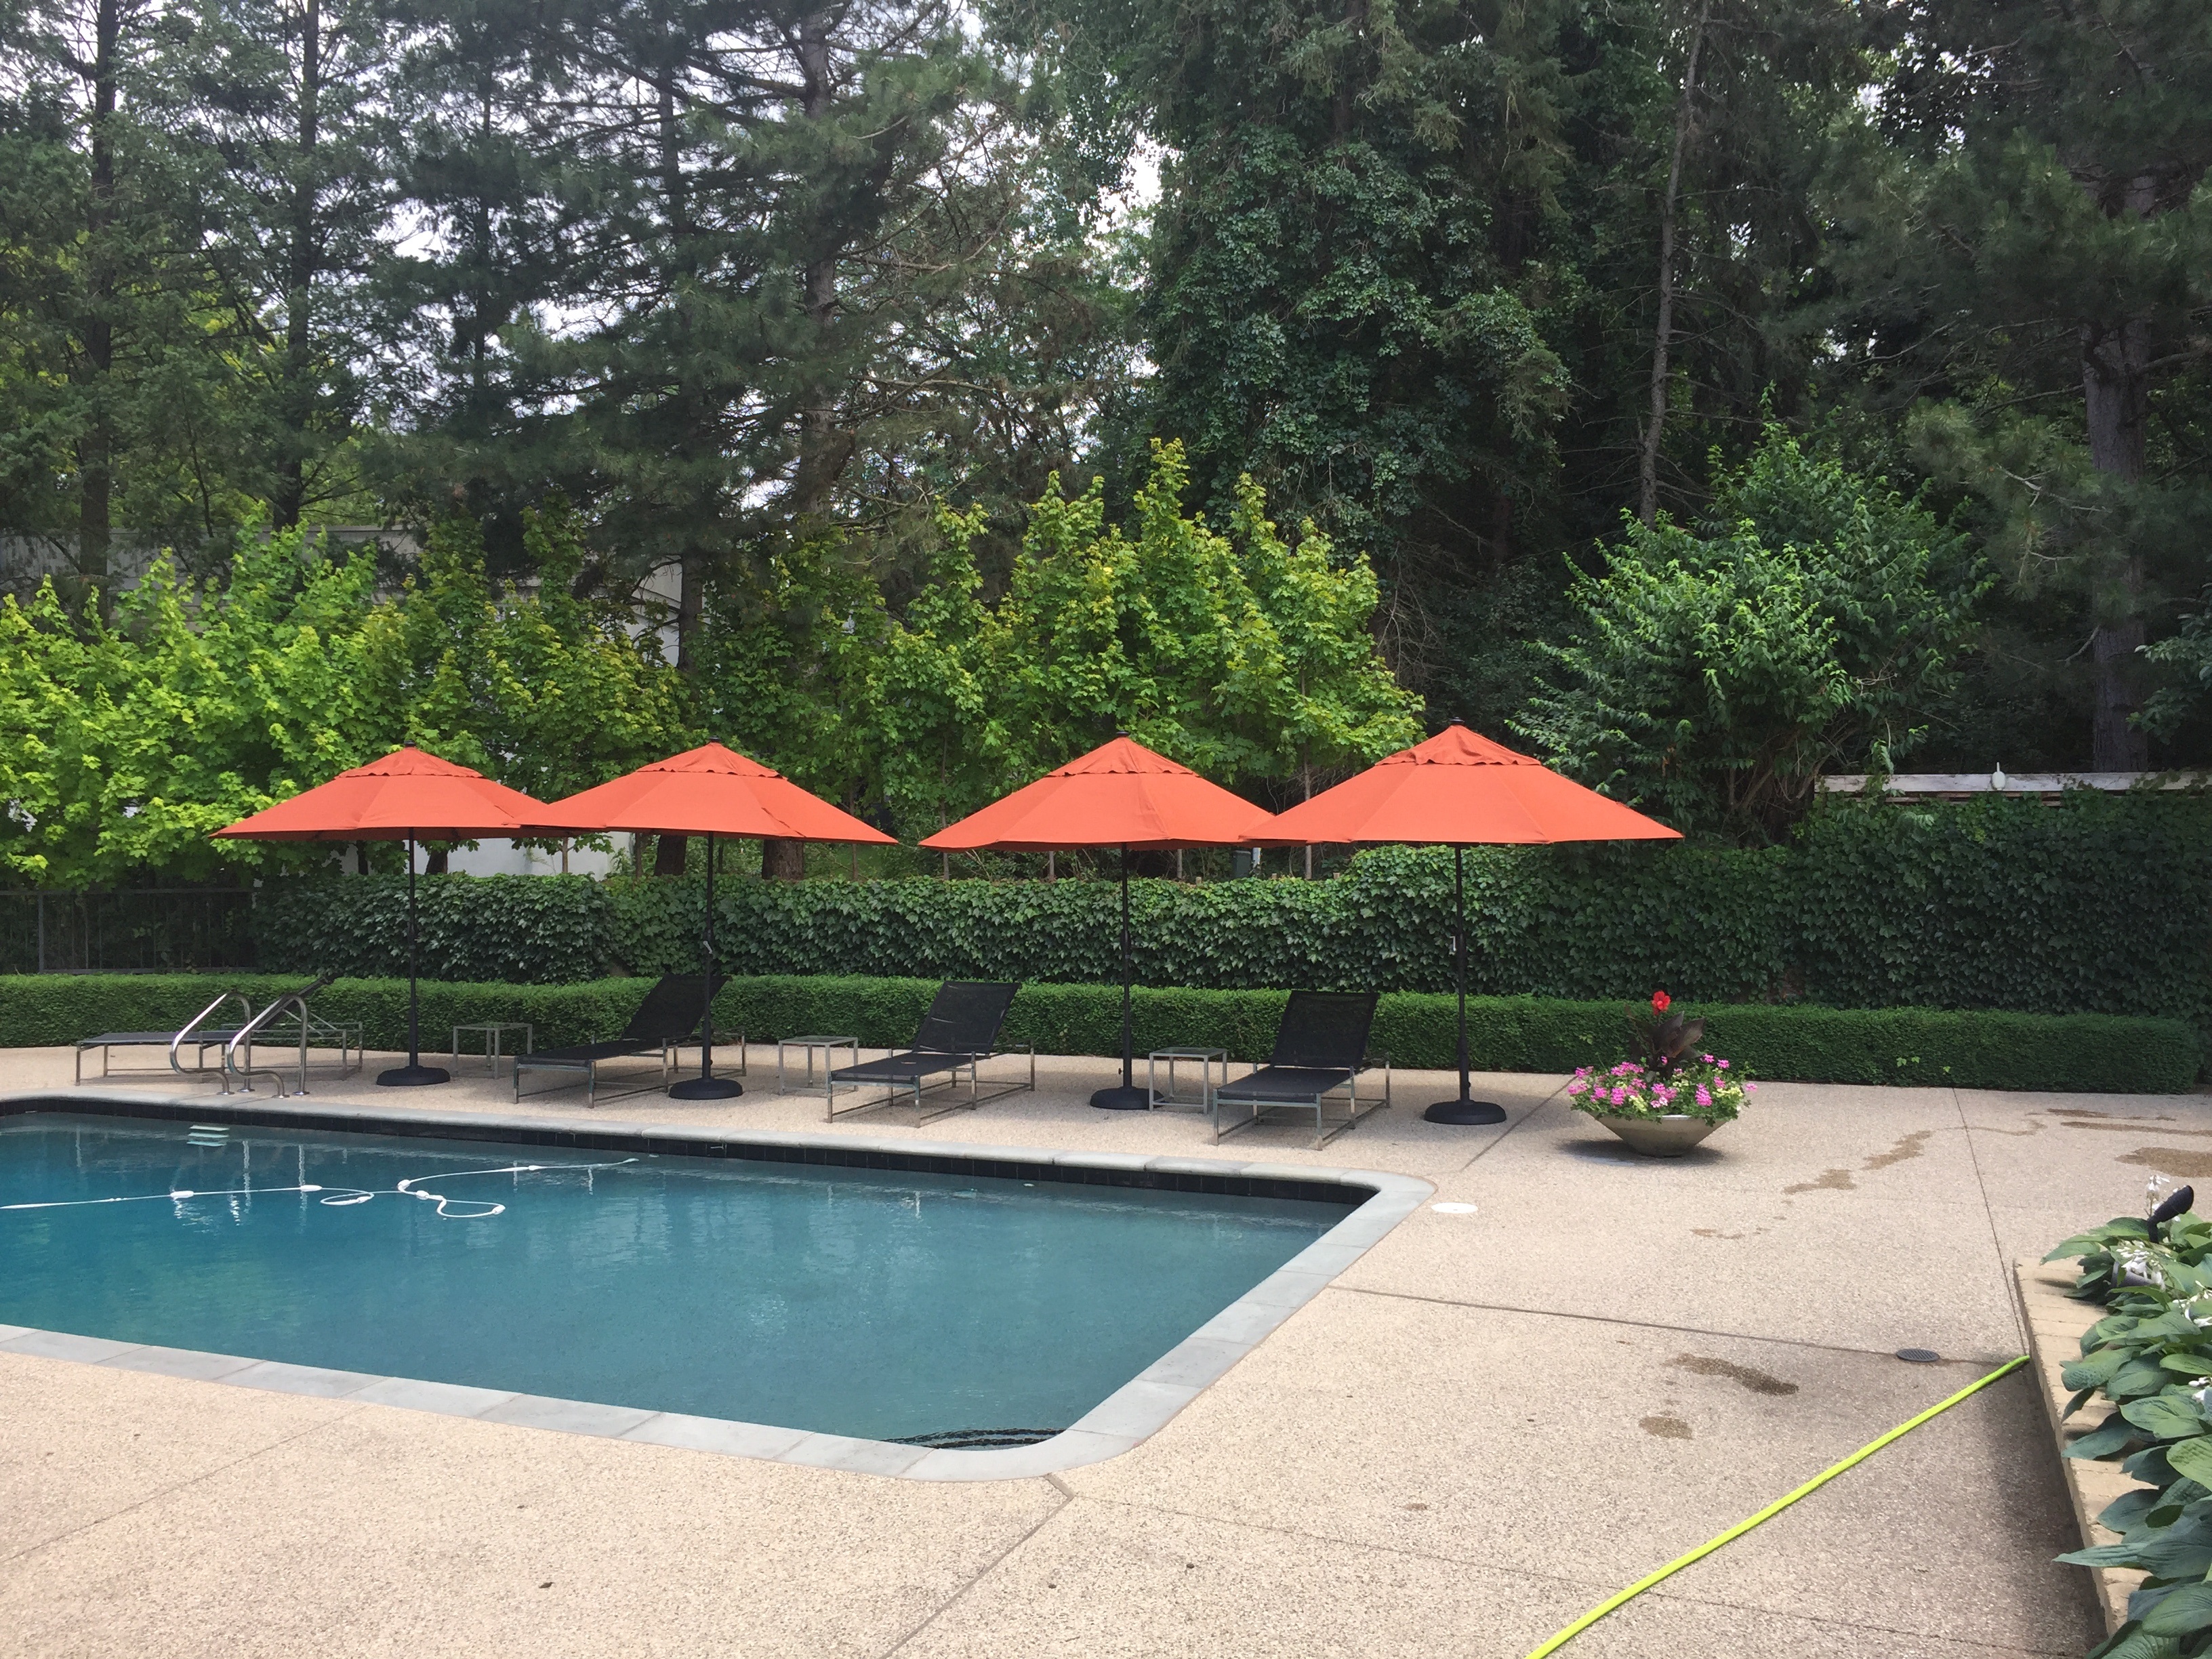
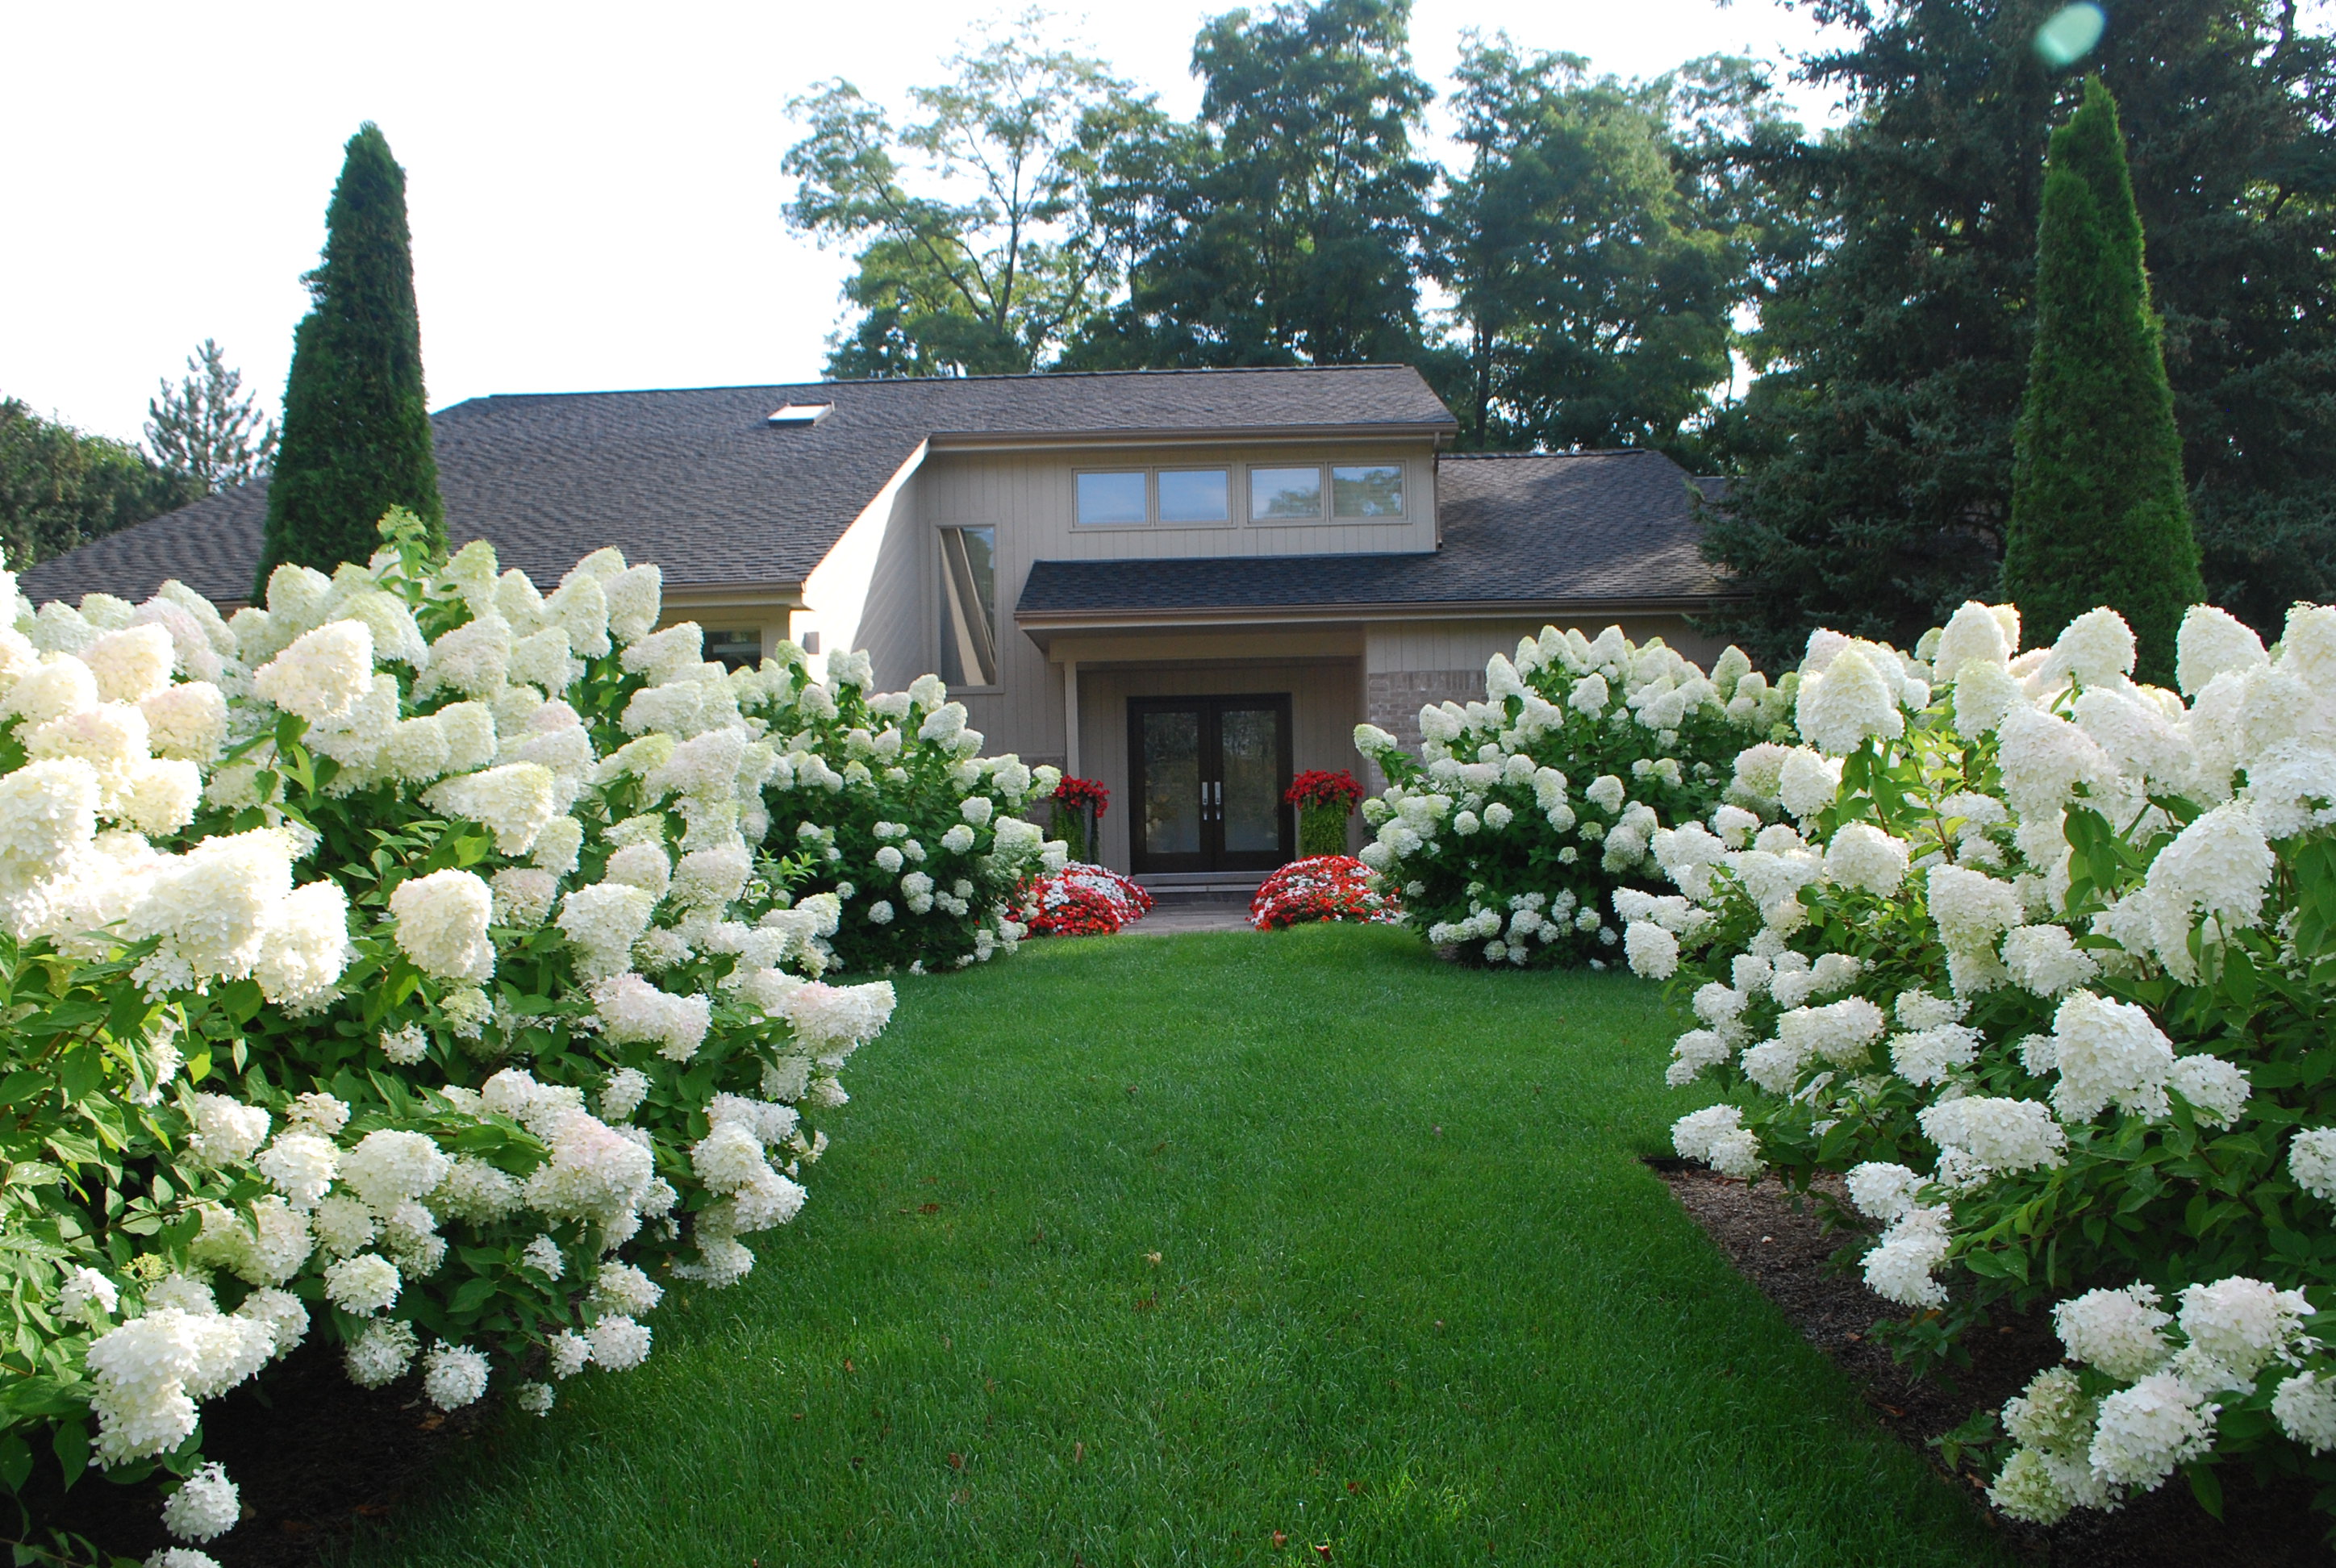
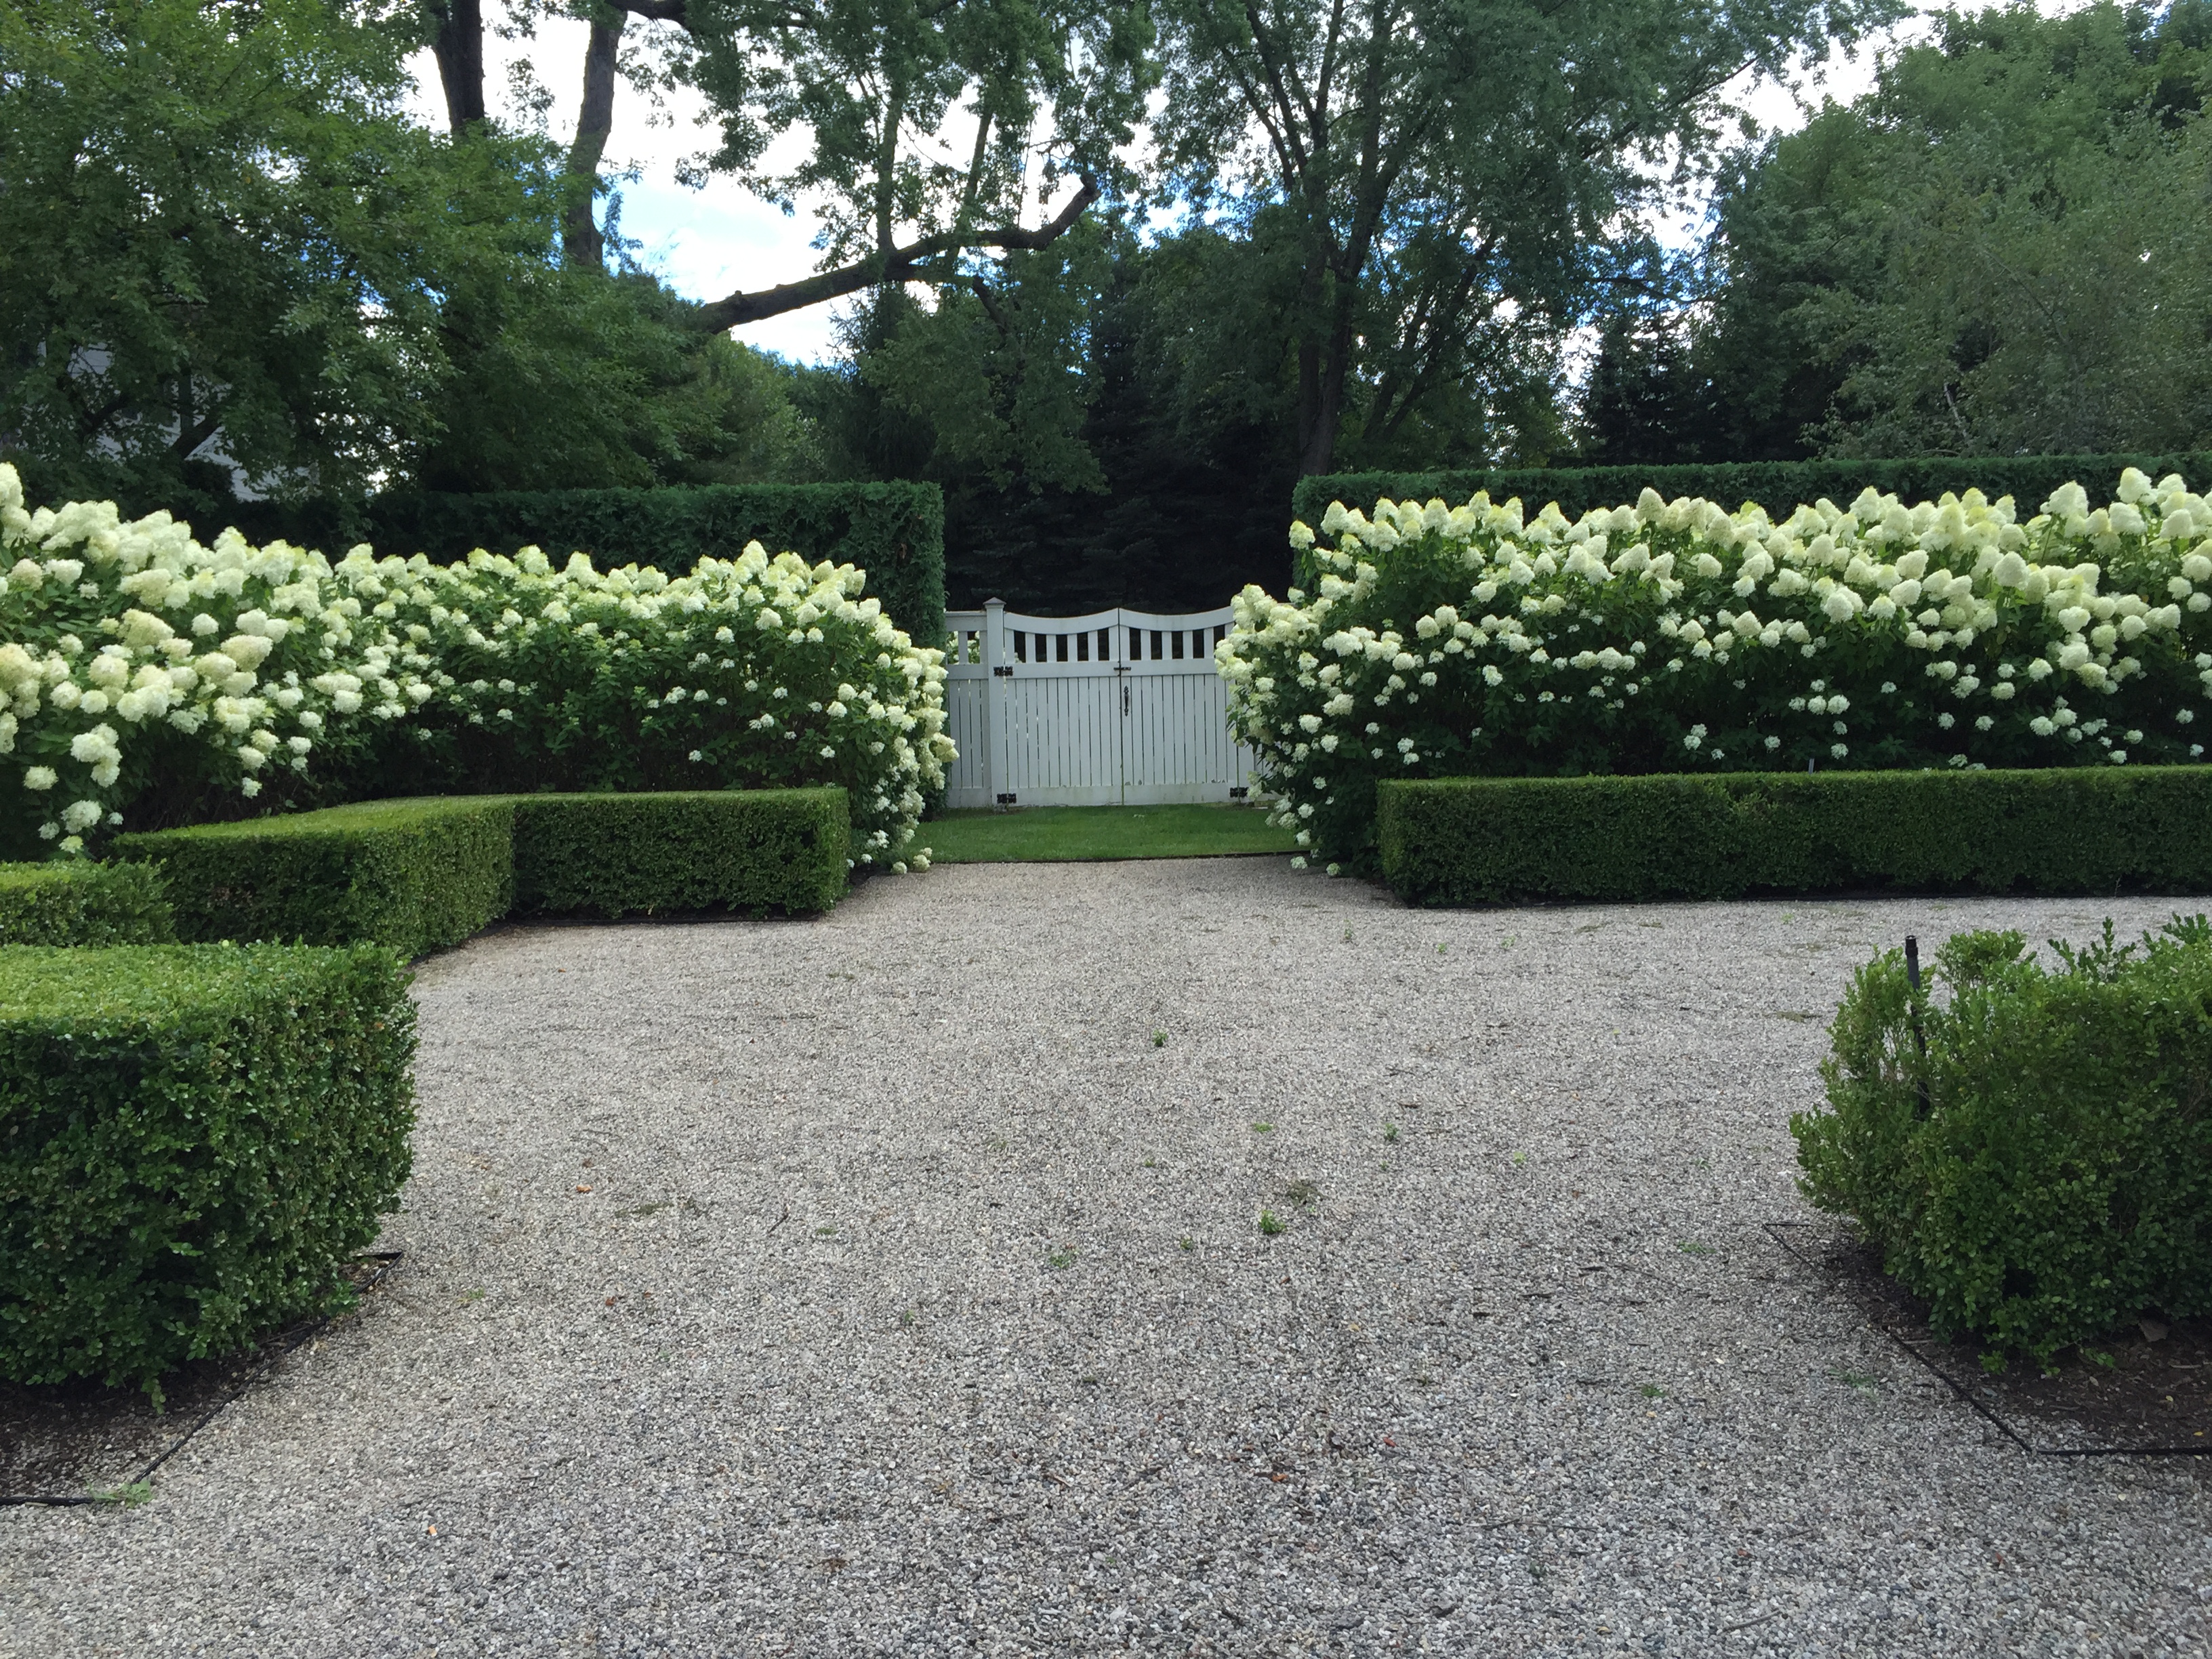
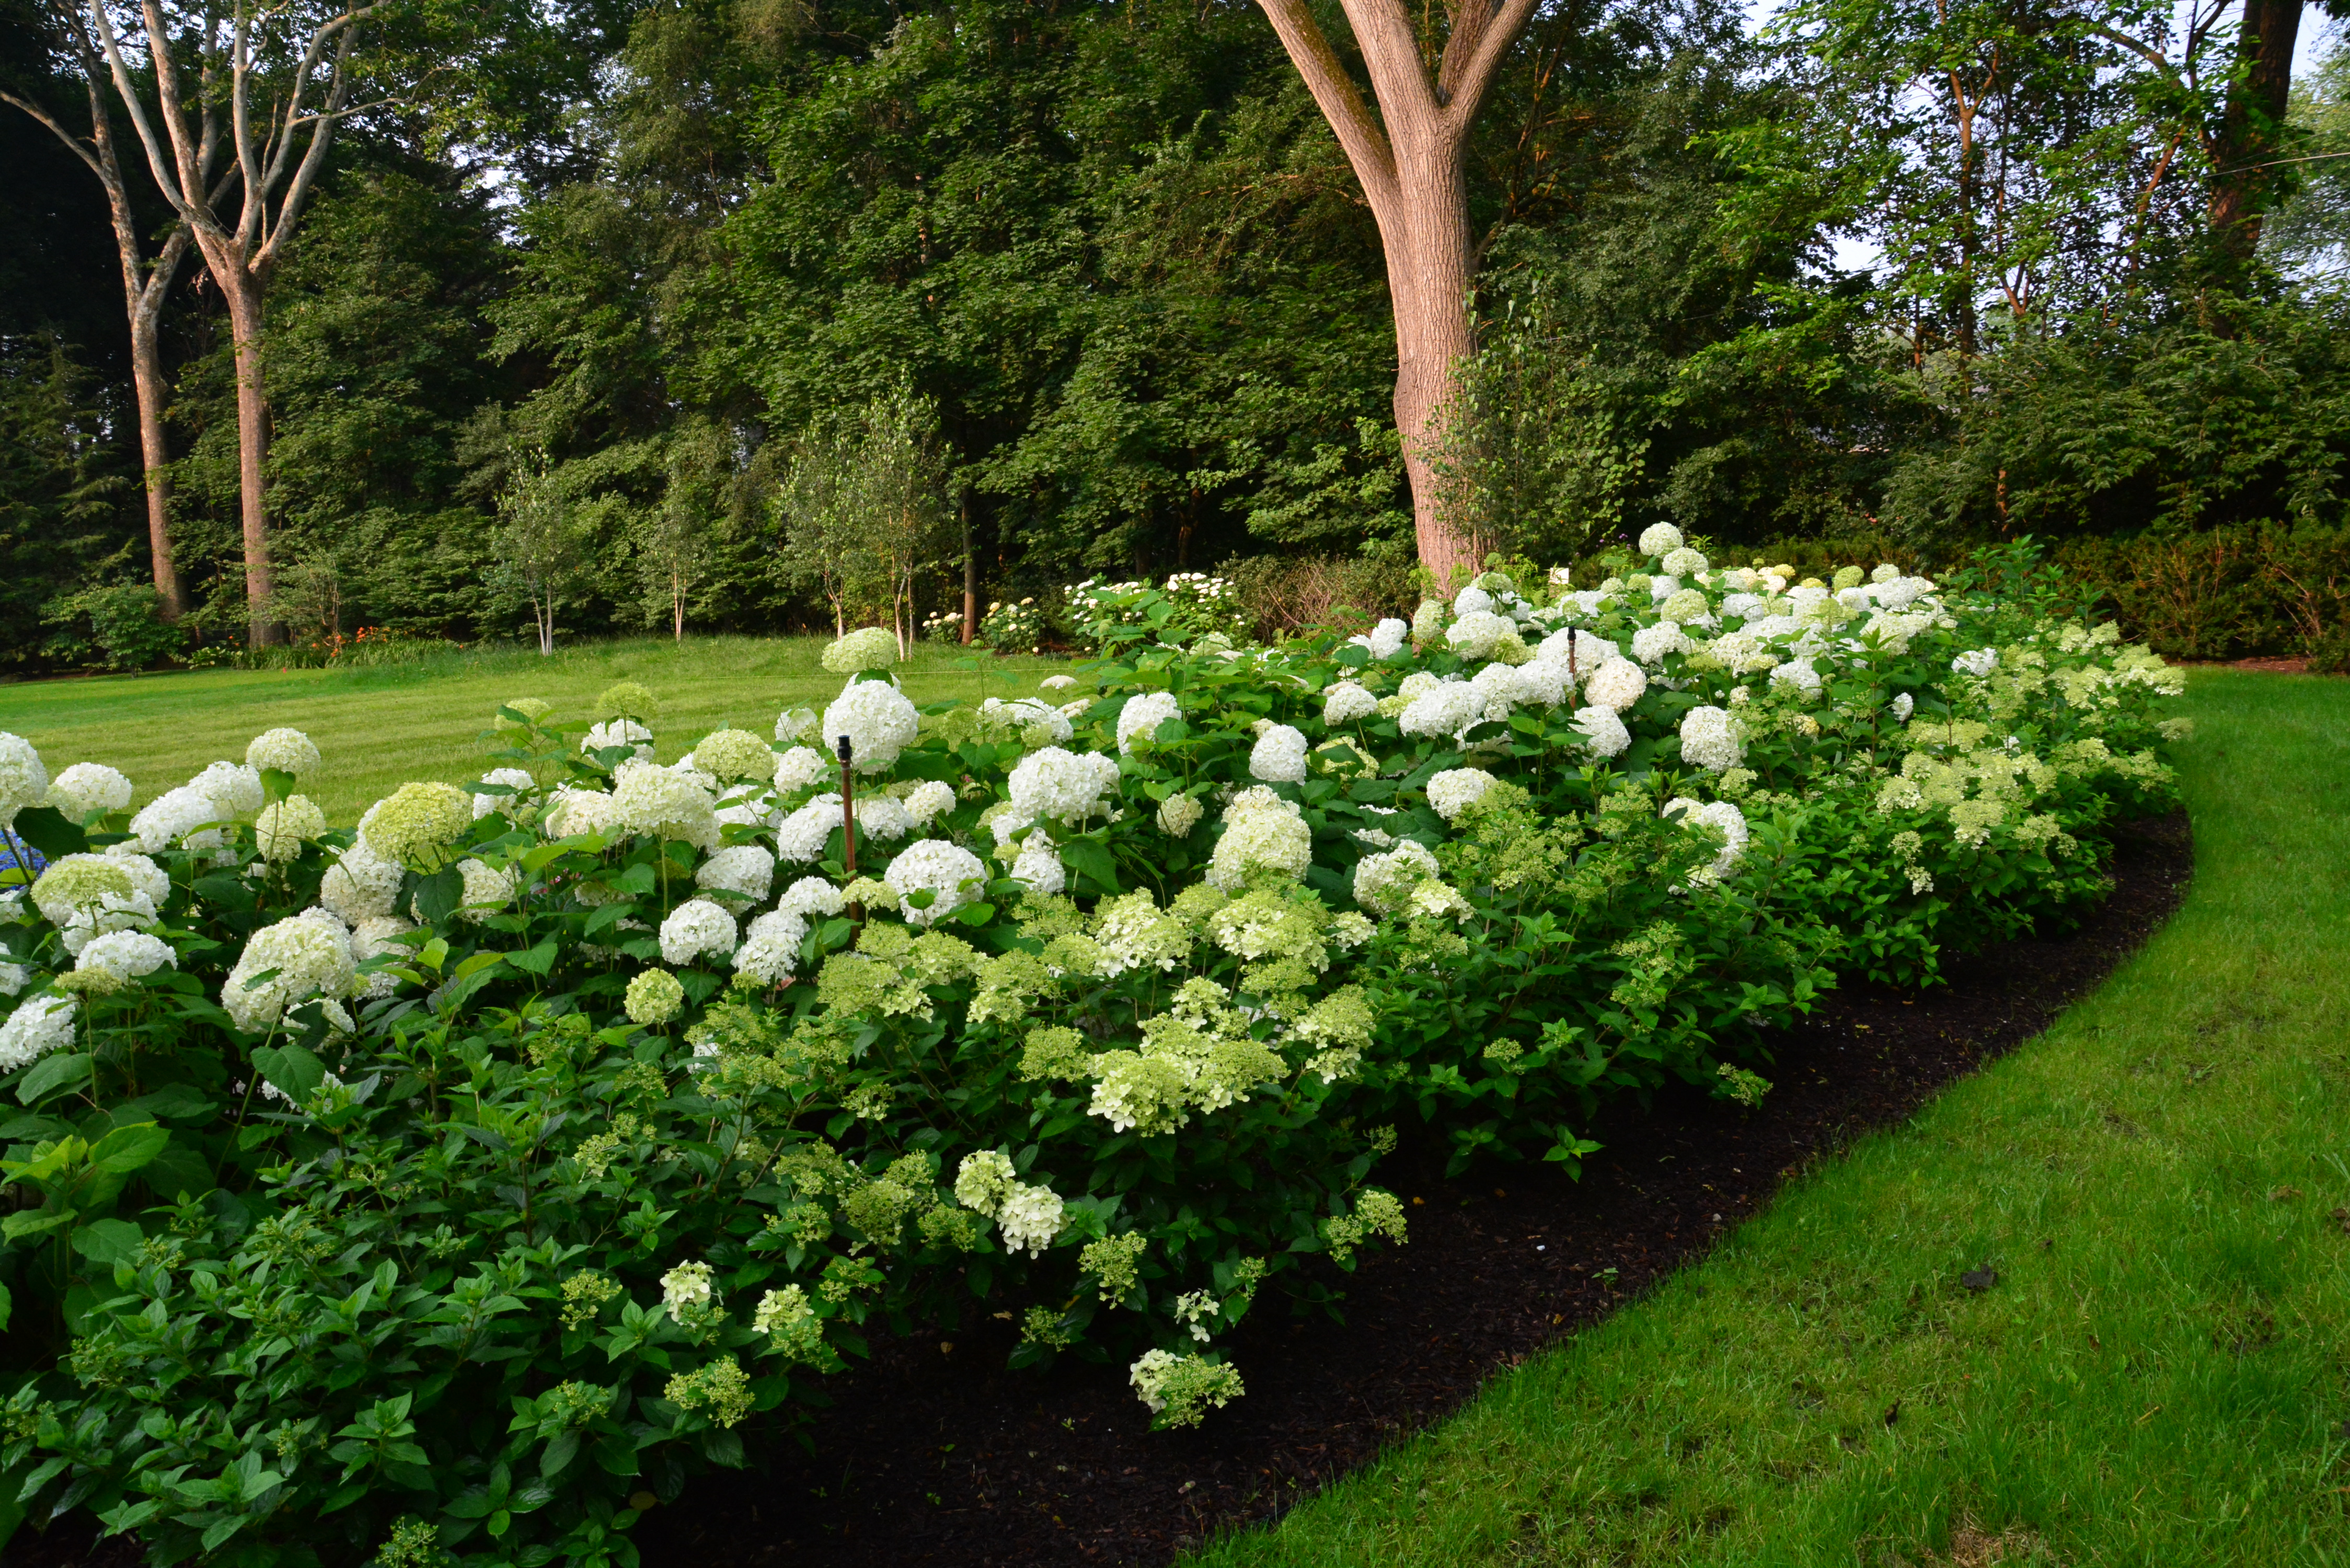
Hydrangeas are big growing shrubs with course leaves and giant flowers. This means they are eminently able to hold down a spot in the garden all on their own. But how does a gardener beautifully integrate them into a garden and landscape?  I make sure they have lots of company-both taller and shorter. My landscape can accommodate them at their full height. I have a much larger and taller hedge of arborvitae planted behind them. That dark green foliage highlights the flowers in a dramatic way.

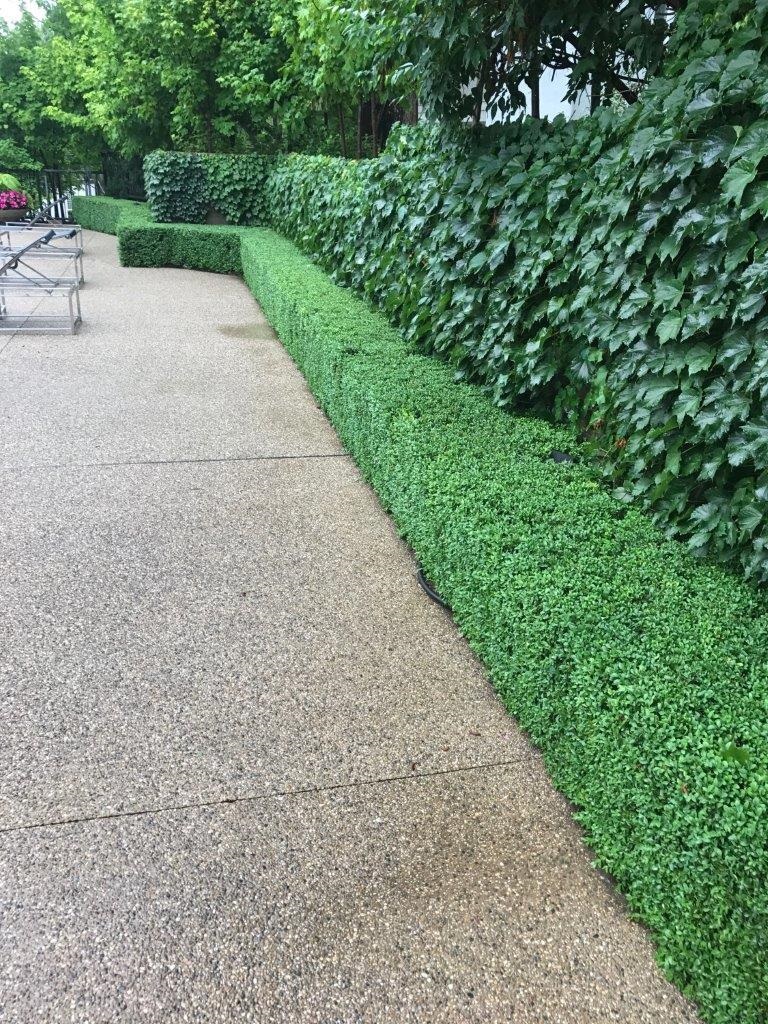
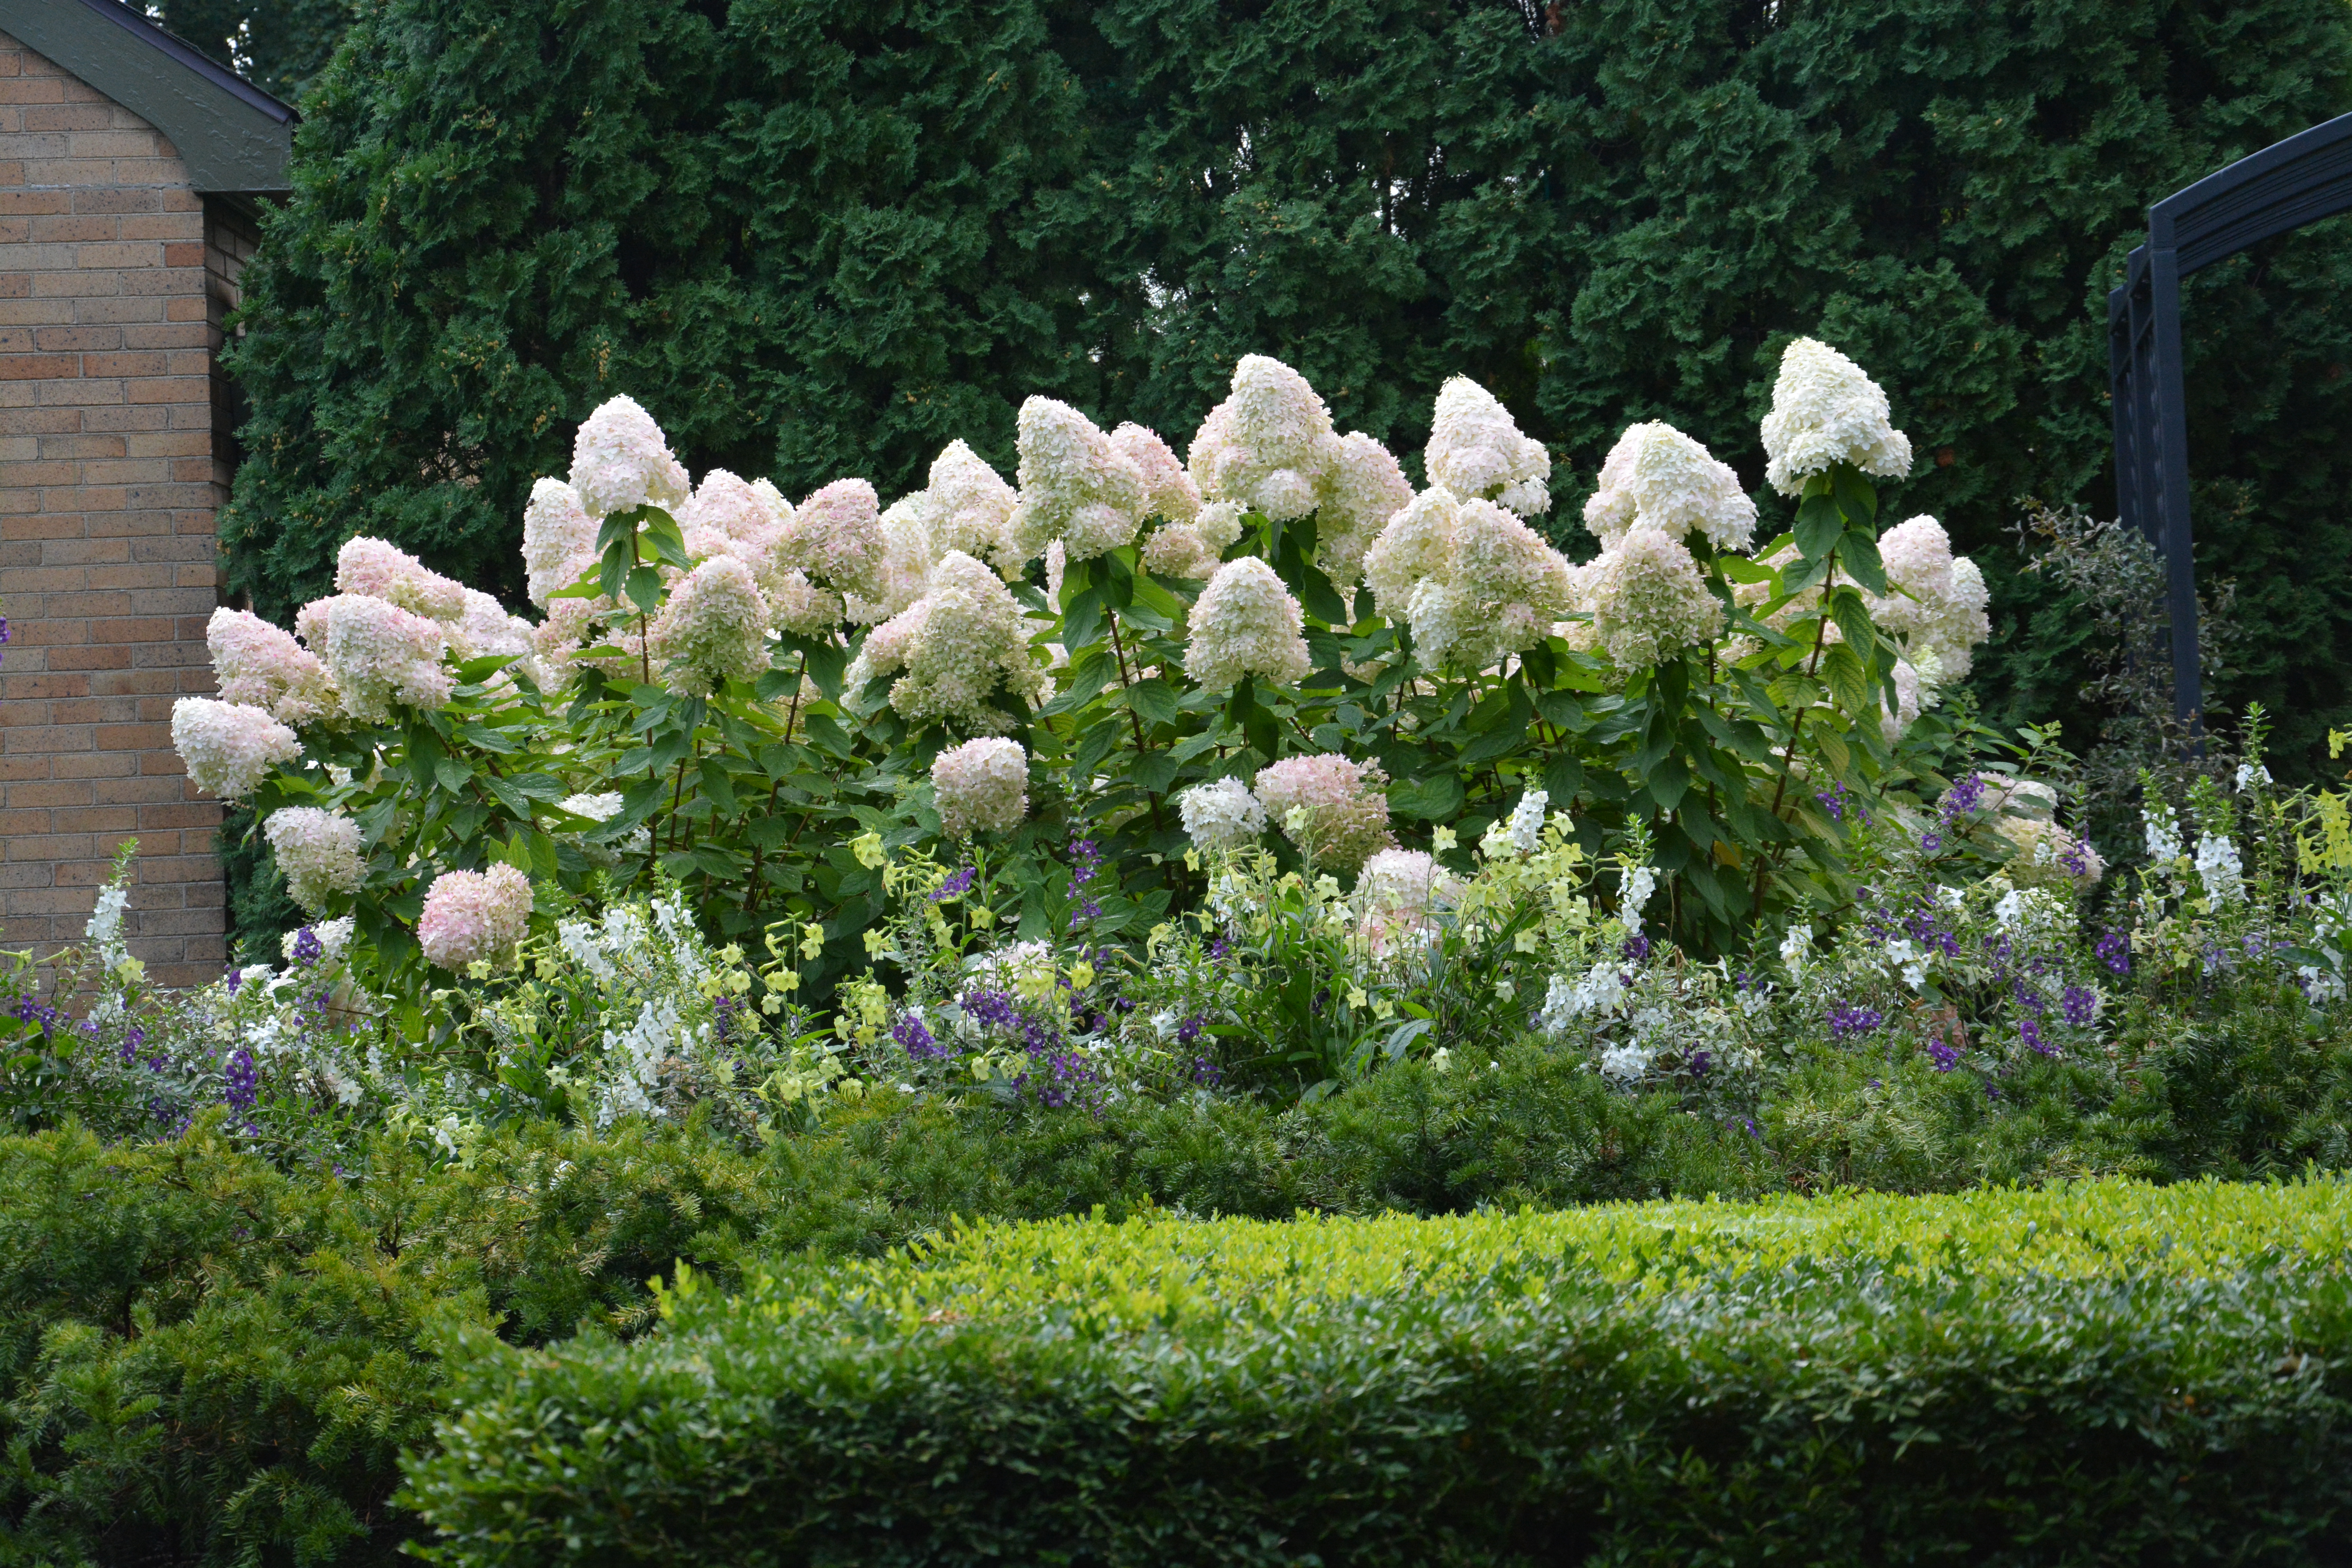
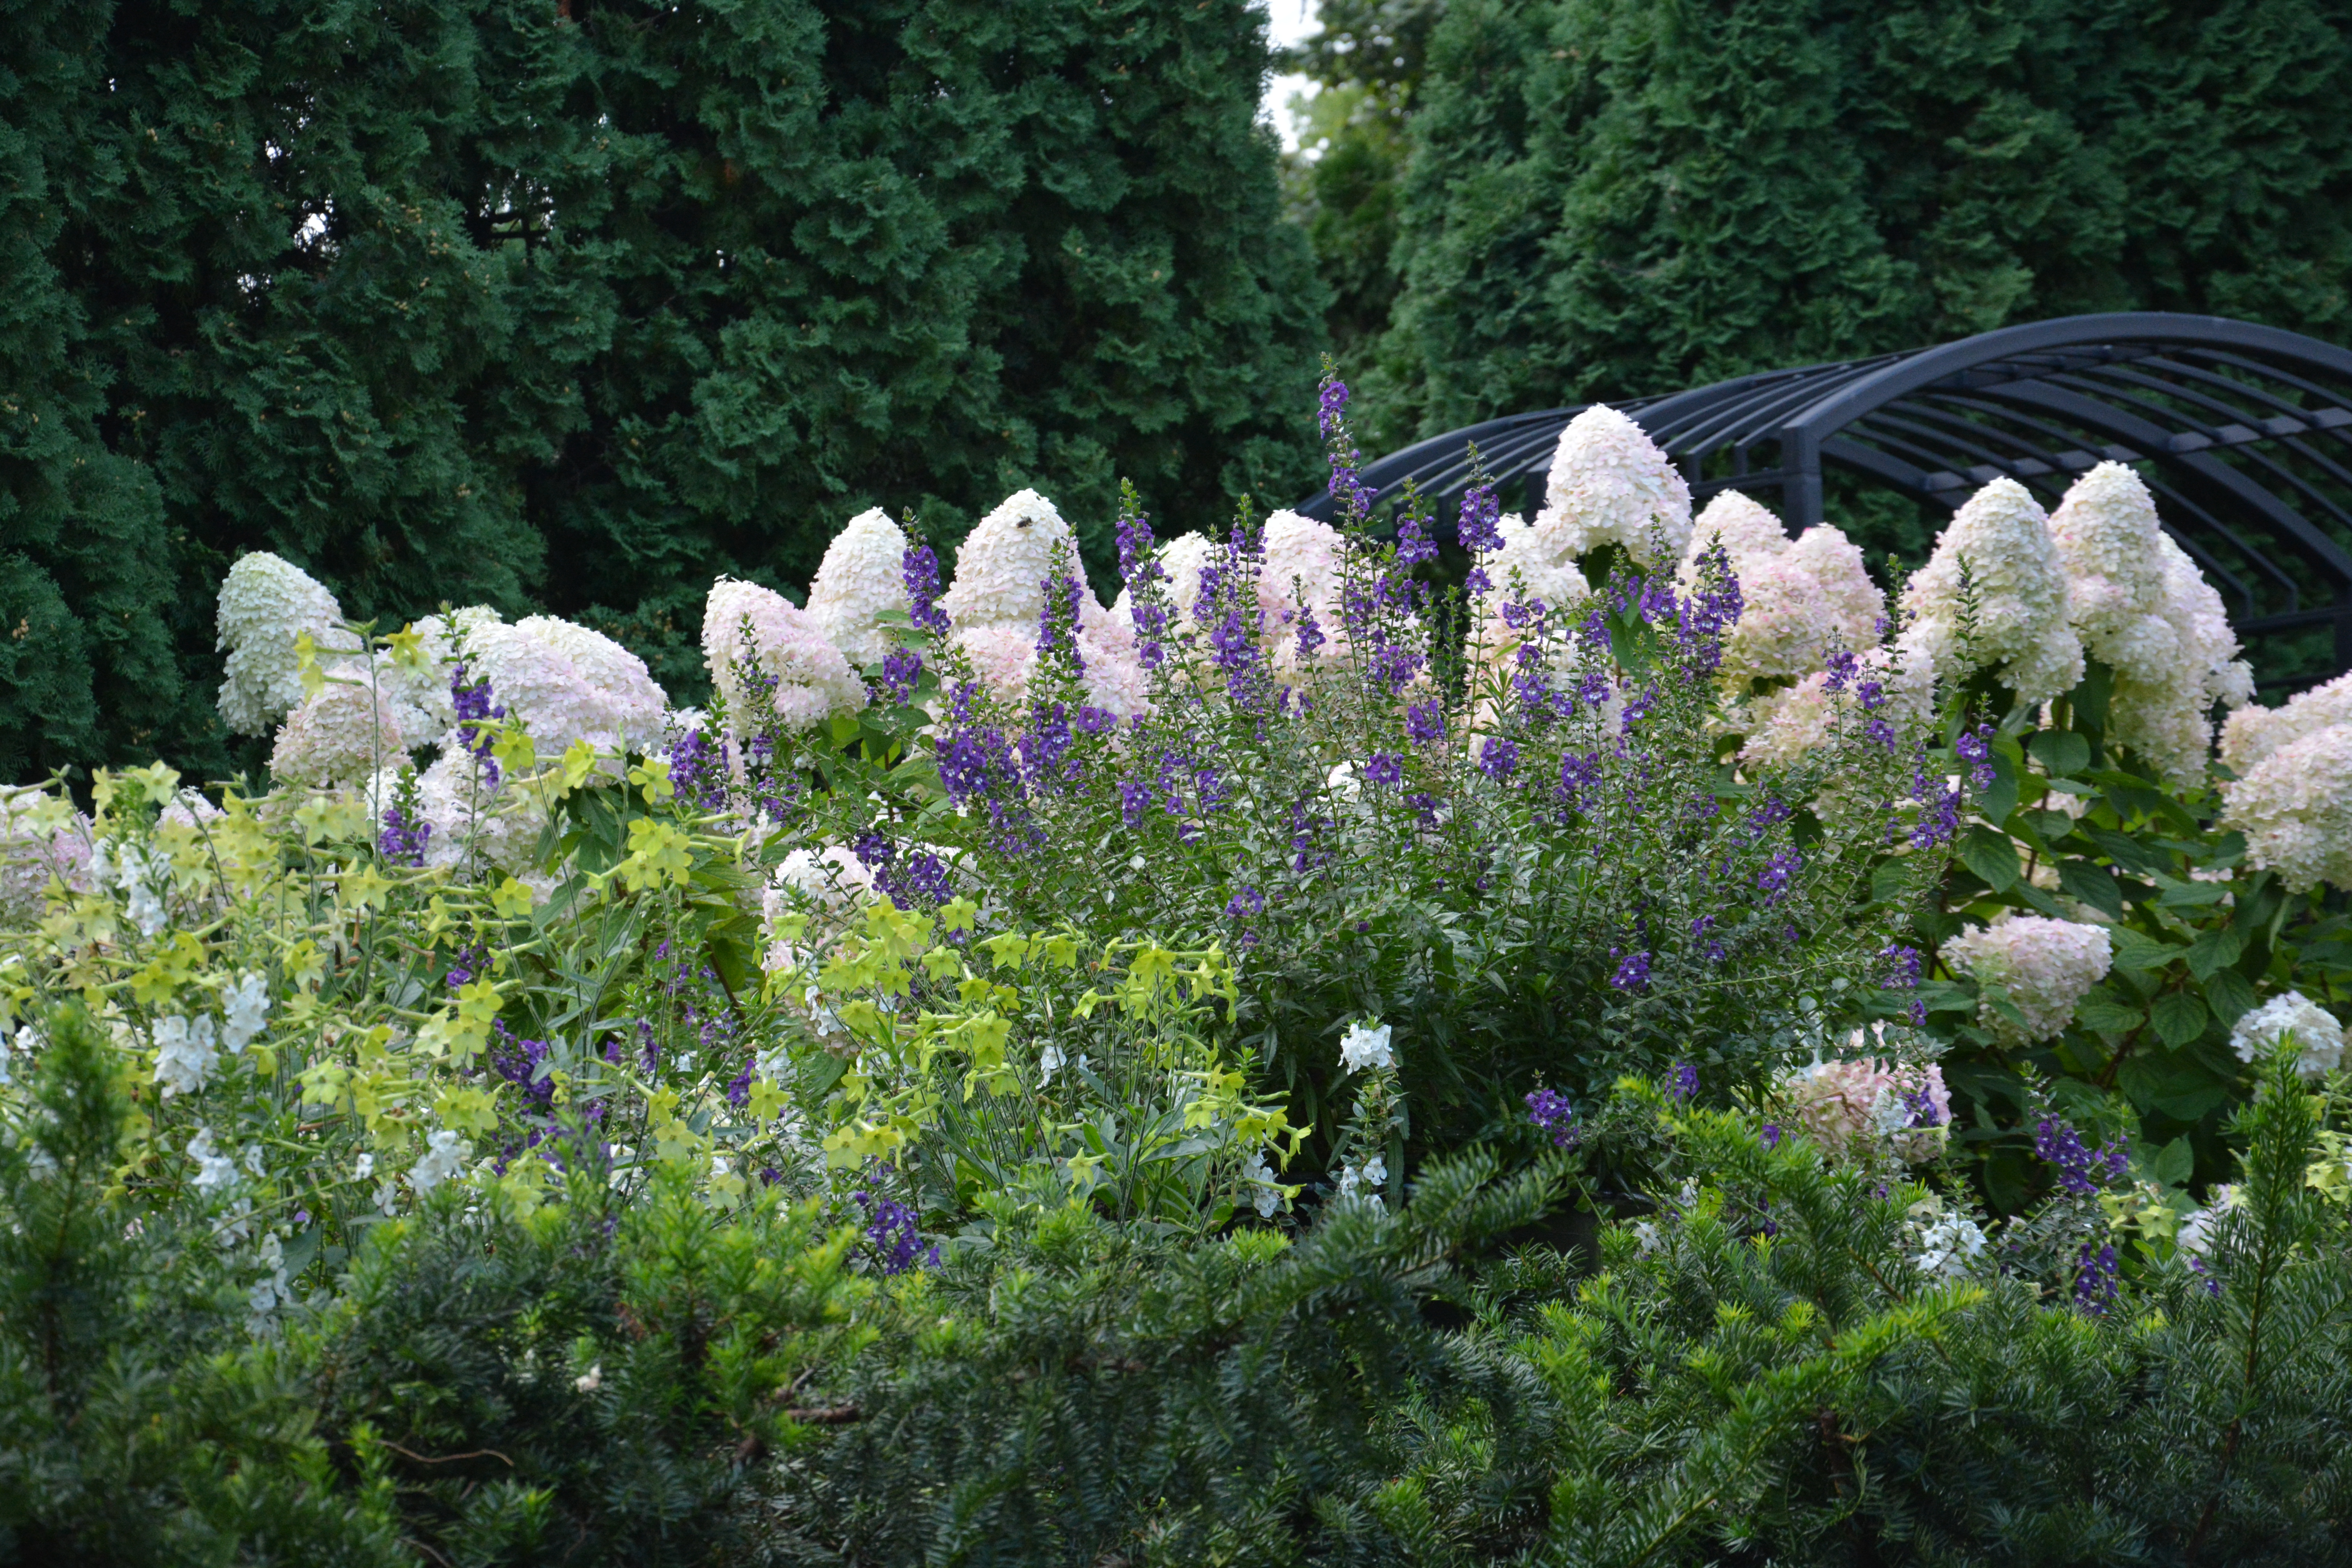
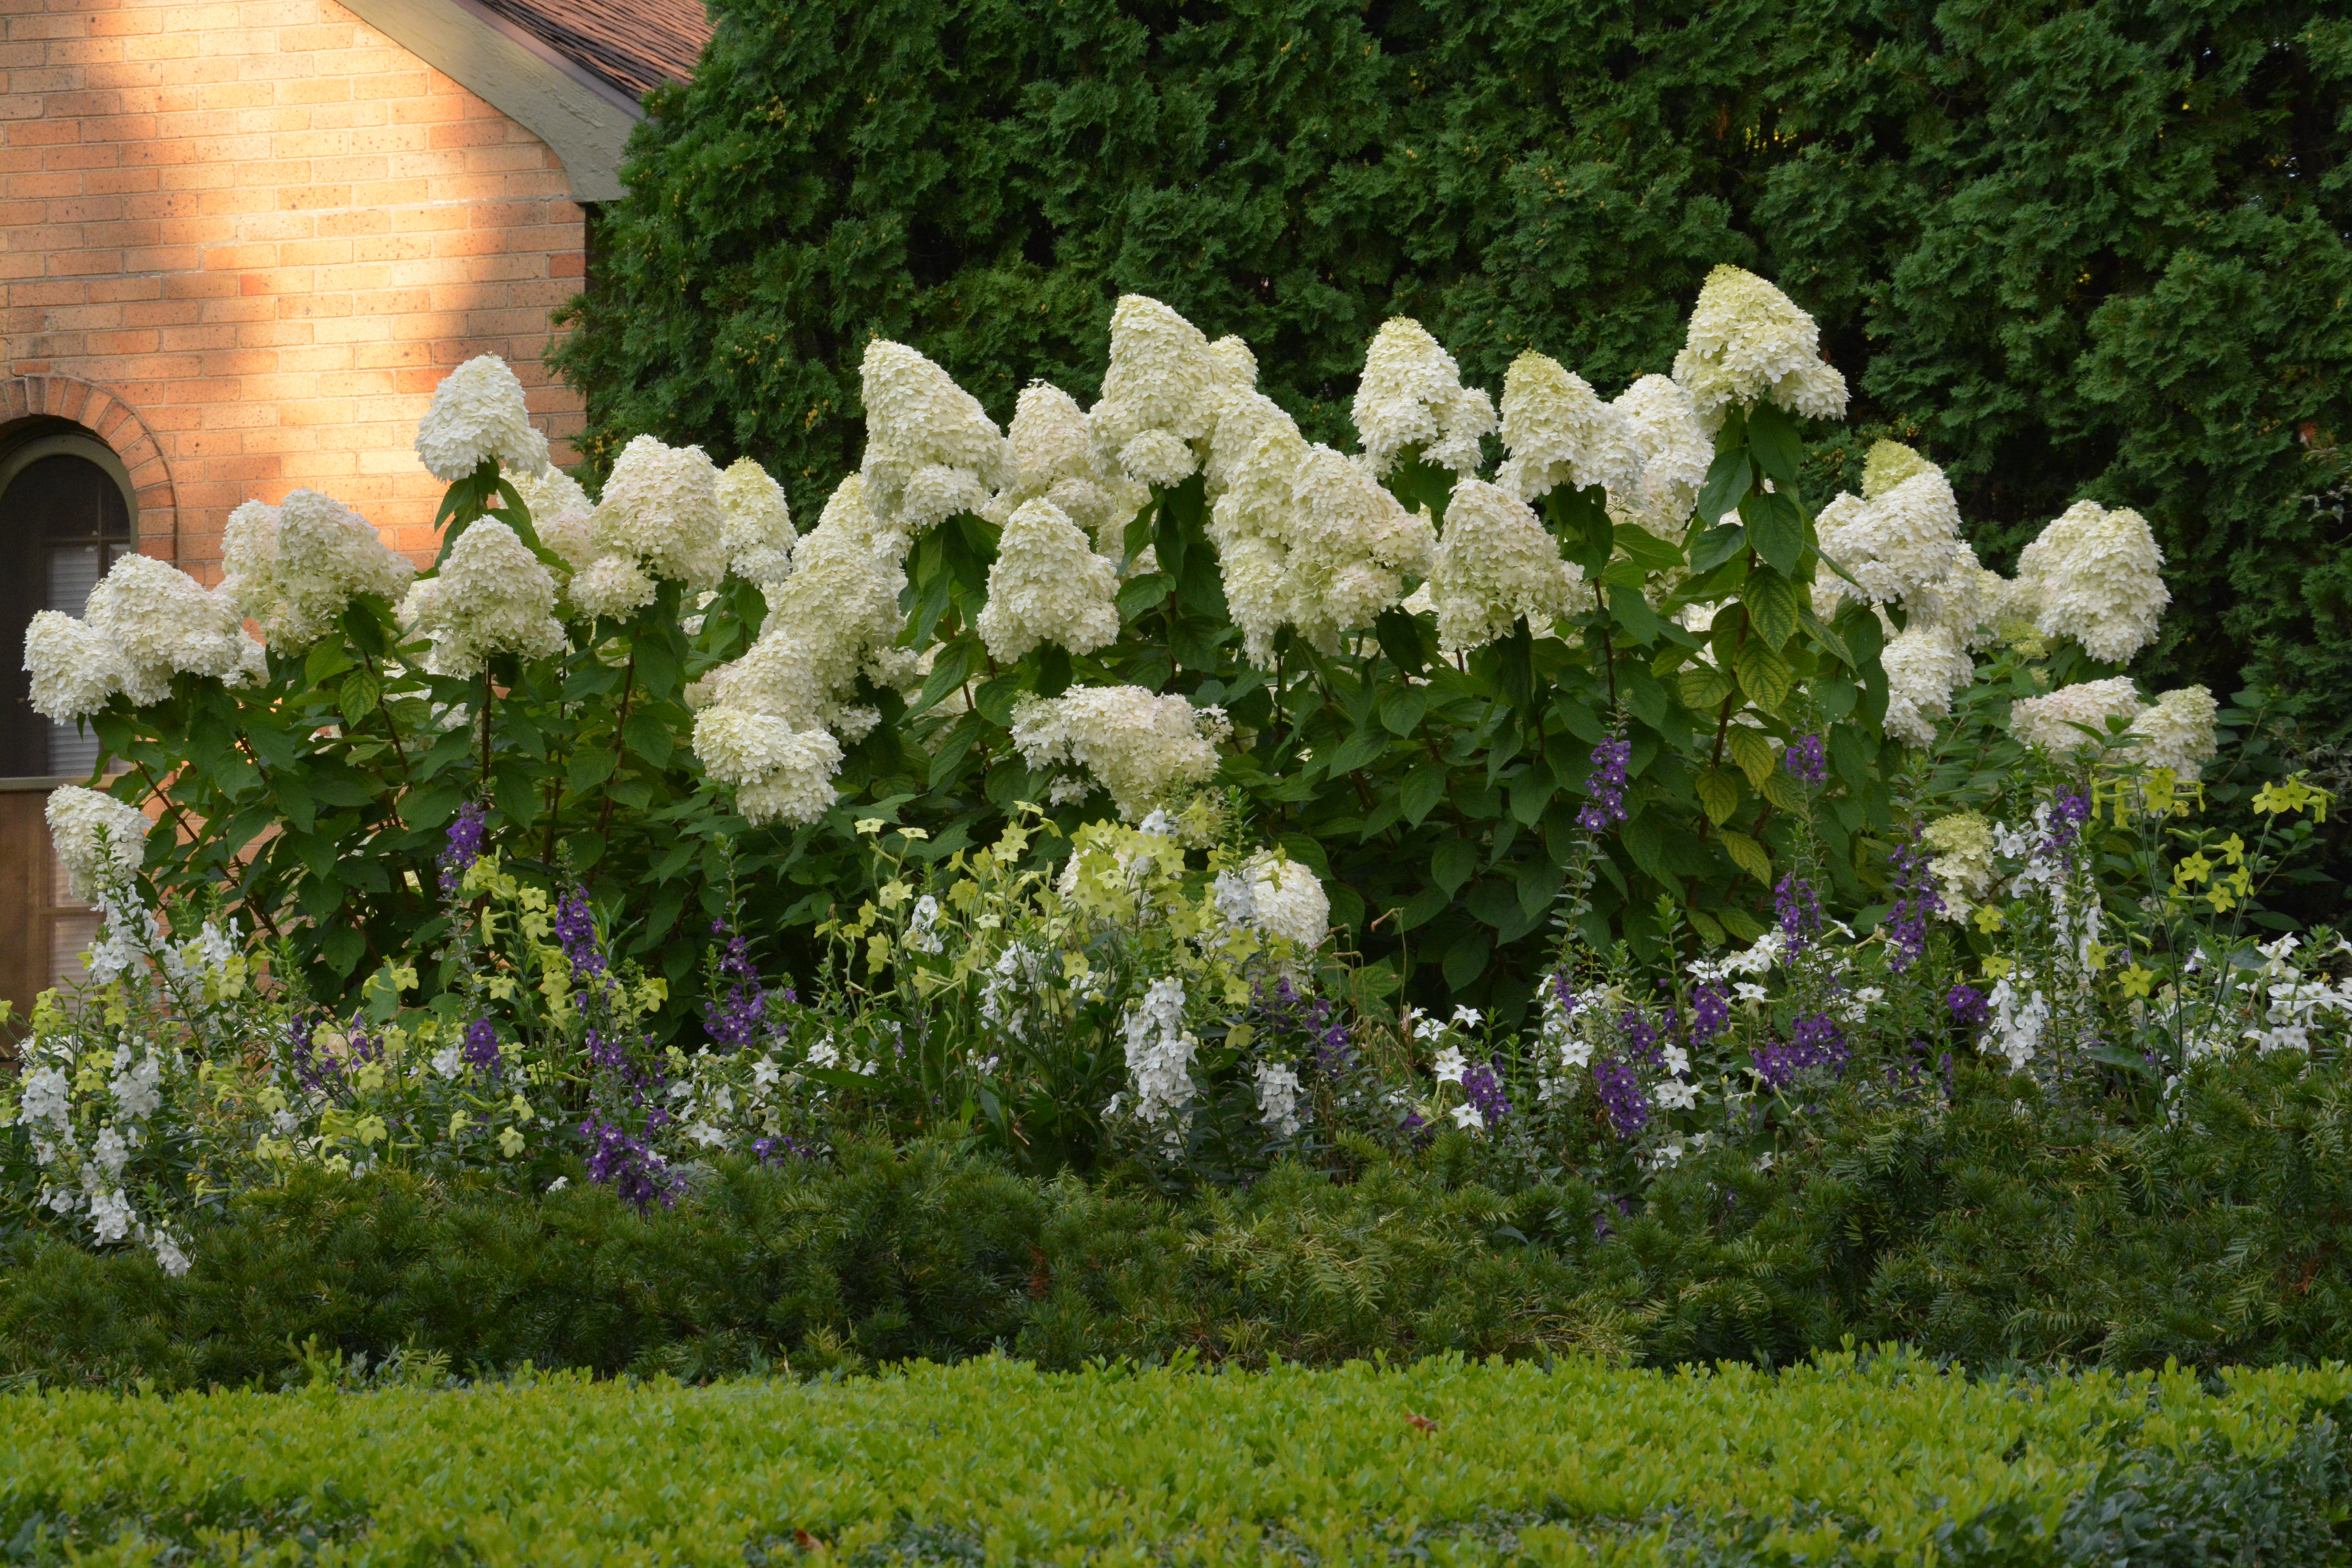
There are several more layers of plantings in front of them. A hedge of Hicks yews whose health had been declining for years was removed. A series of planter boxes were put in their place. This years planting of nicotiana and angelonia is as loose and airy as the hydrangeas are solid and stiff. Companions to hydrangeas that have a looser habit of growth compliment them. A middle layer of loosely pruned taxus densiformis is faced down with clipped boxwood shapes. 4 layers of companionship is none too few for a shrub that grows 6-8 feet tall.

Limelight hydrangeas integrated into a garden

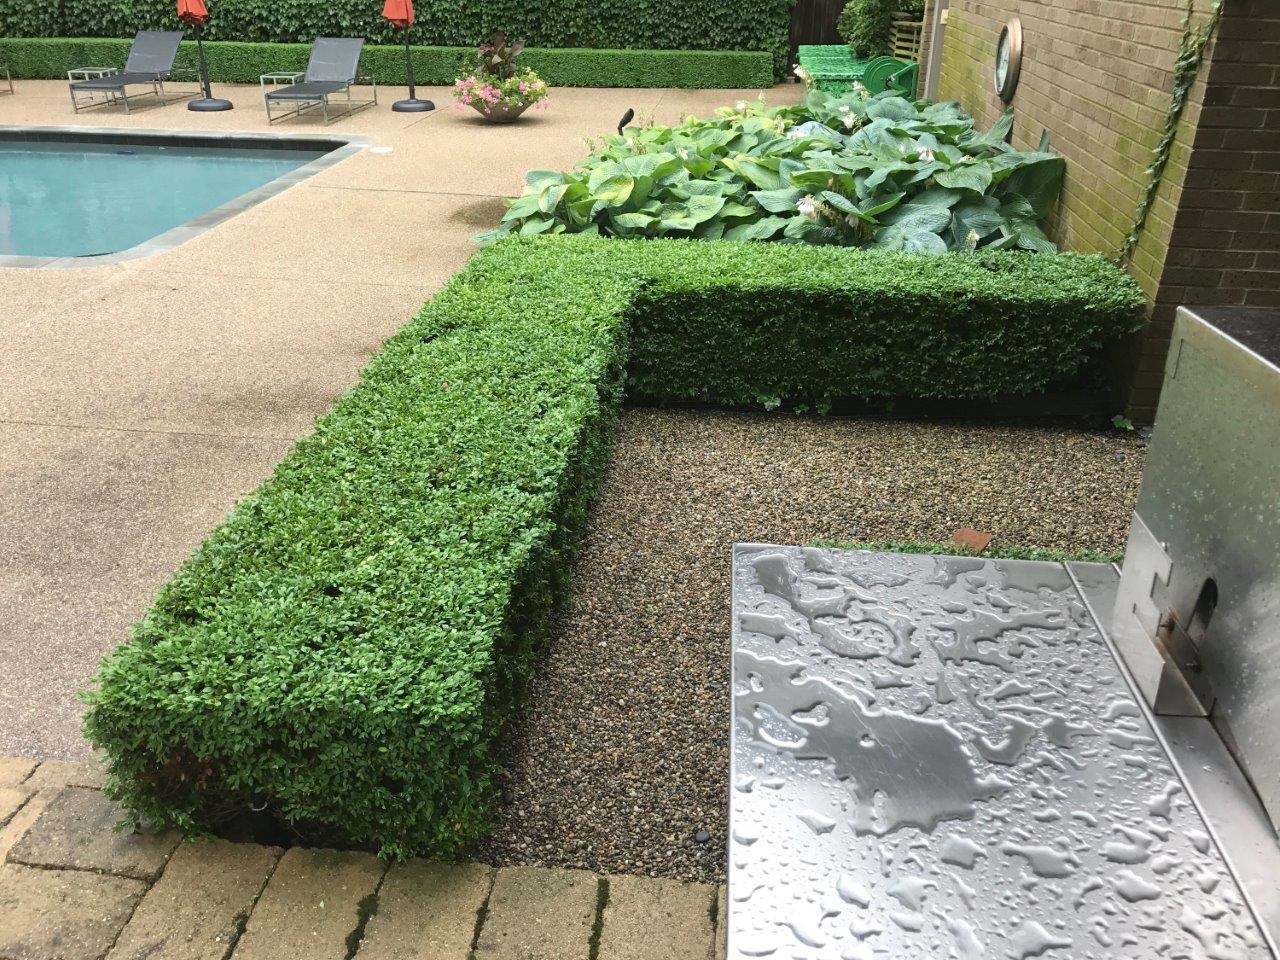
Limelight hydrangea hedge faced down with boxwood

Limelight hydrangeas faced down with anemone “Honorine Jobert”

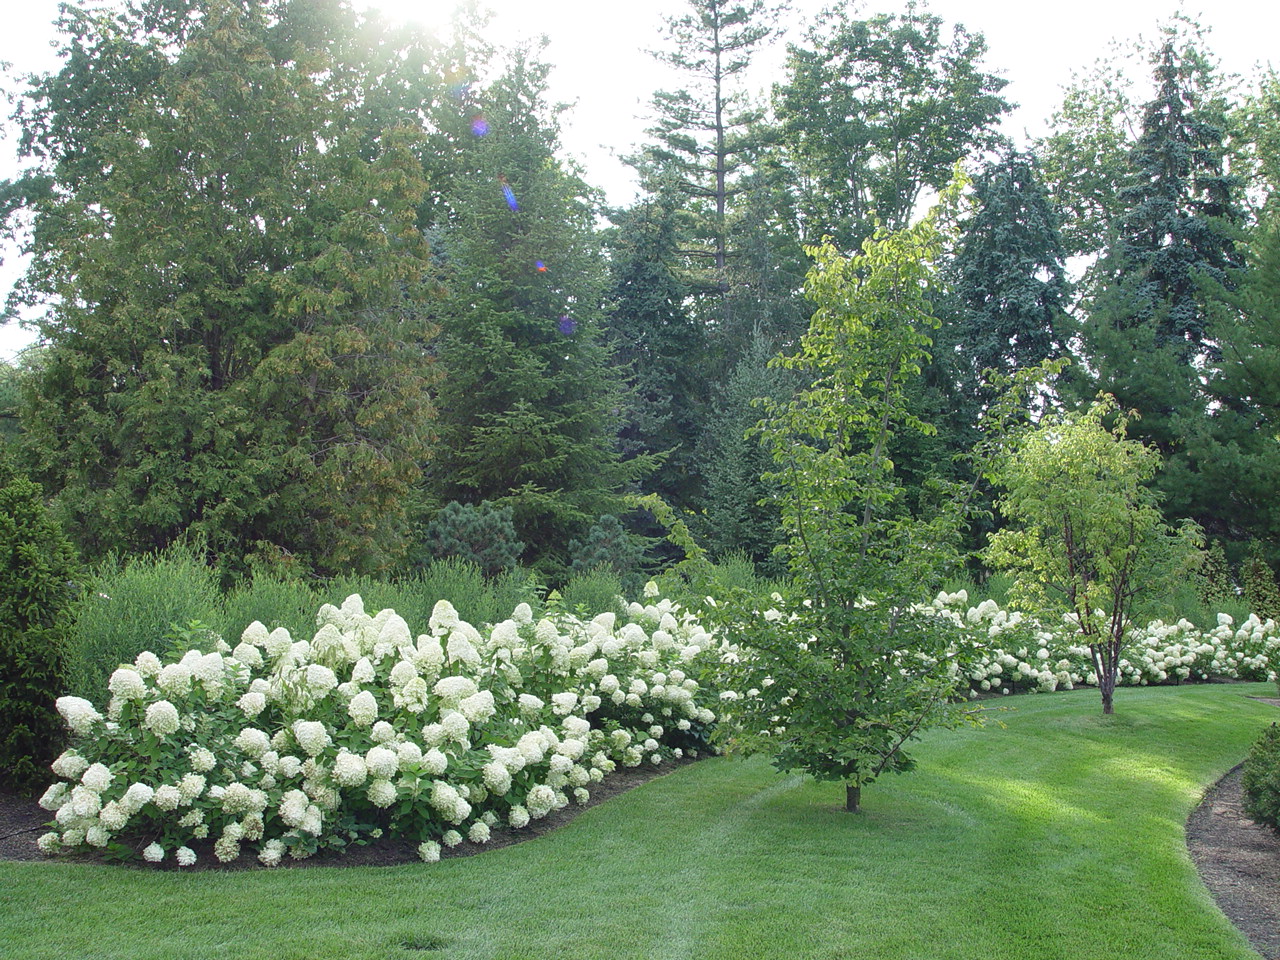
hedge of Limelights as a border to a large group of mixed evergreens

These hydrangeas are pruned to keep them at a 5.5-6 foot height.

Between the large evergreens and the hydrangeas is a mass of boltonia asteroides.

Limelights and boxwood

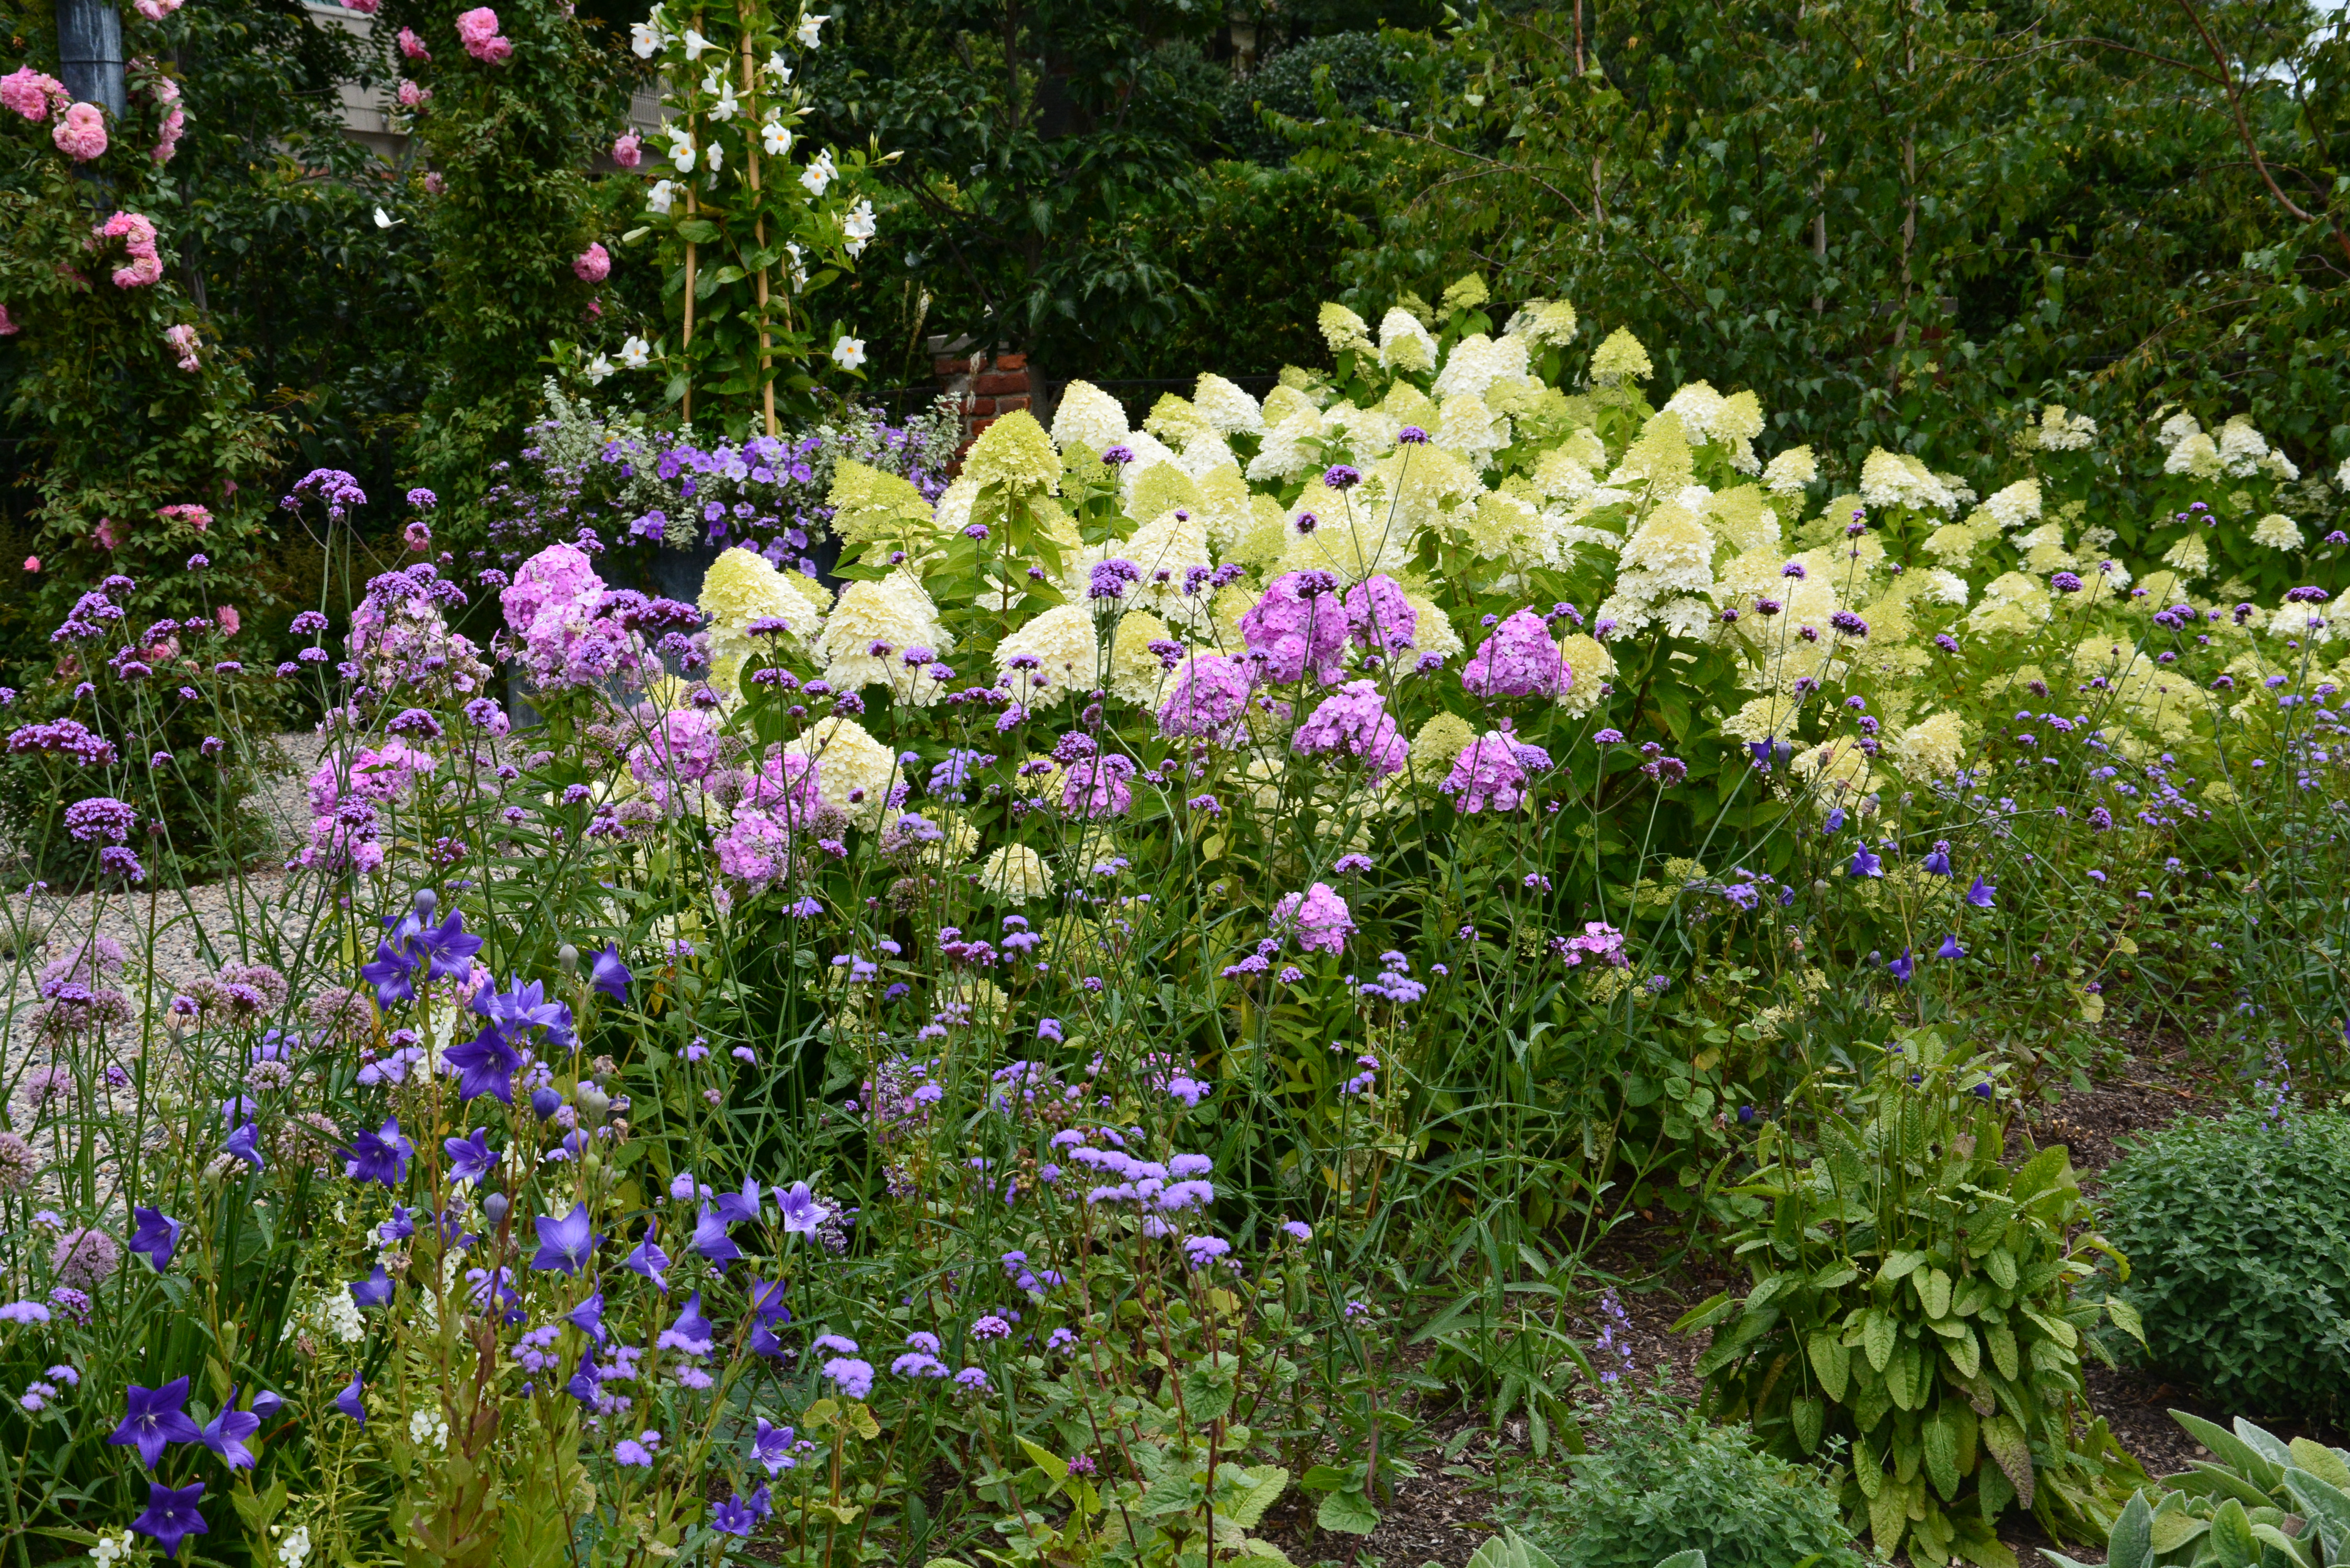
Limelights in a garden

new planting of annabelles and limelights together

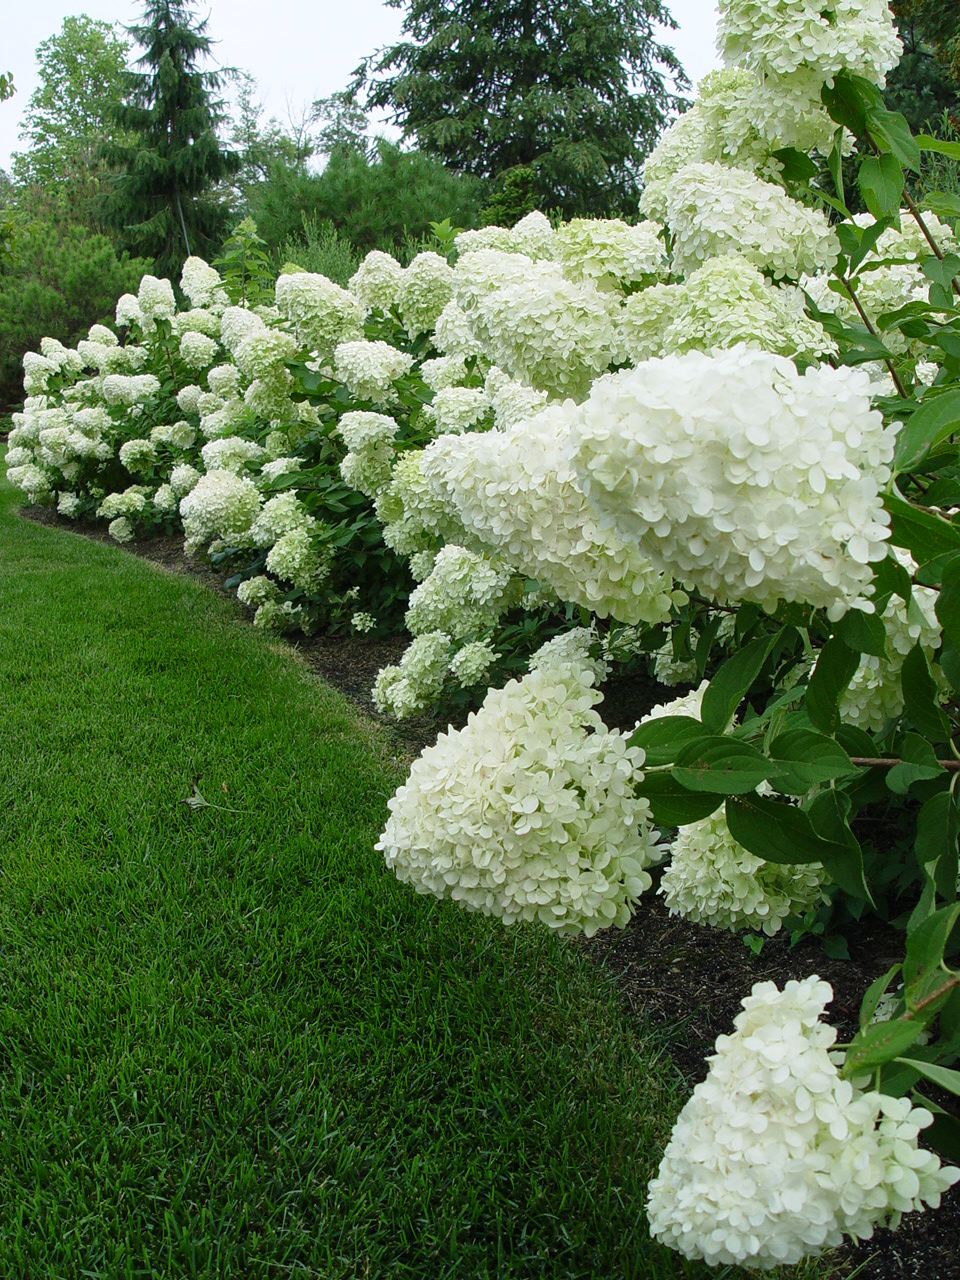
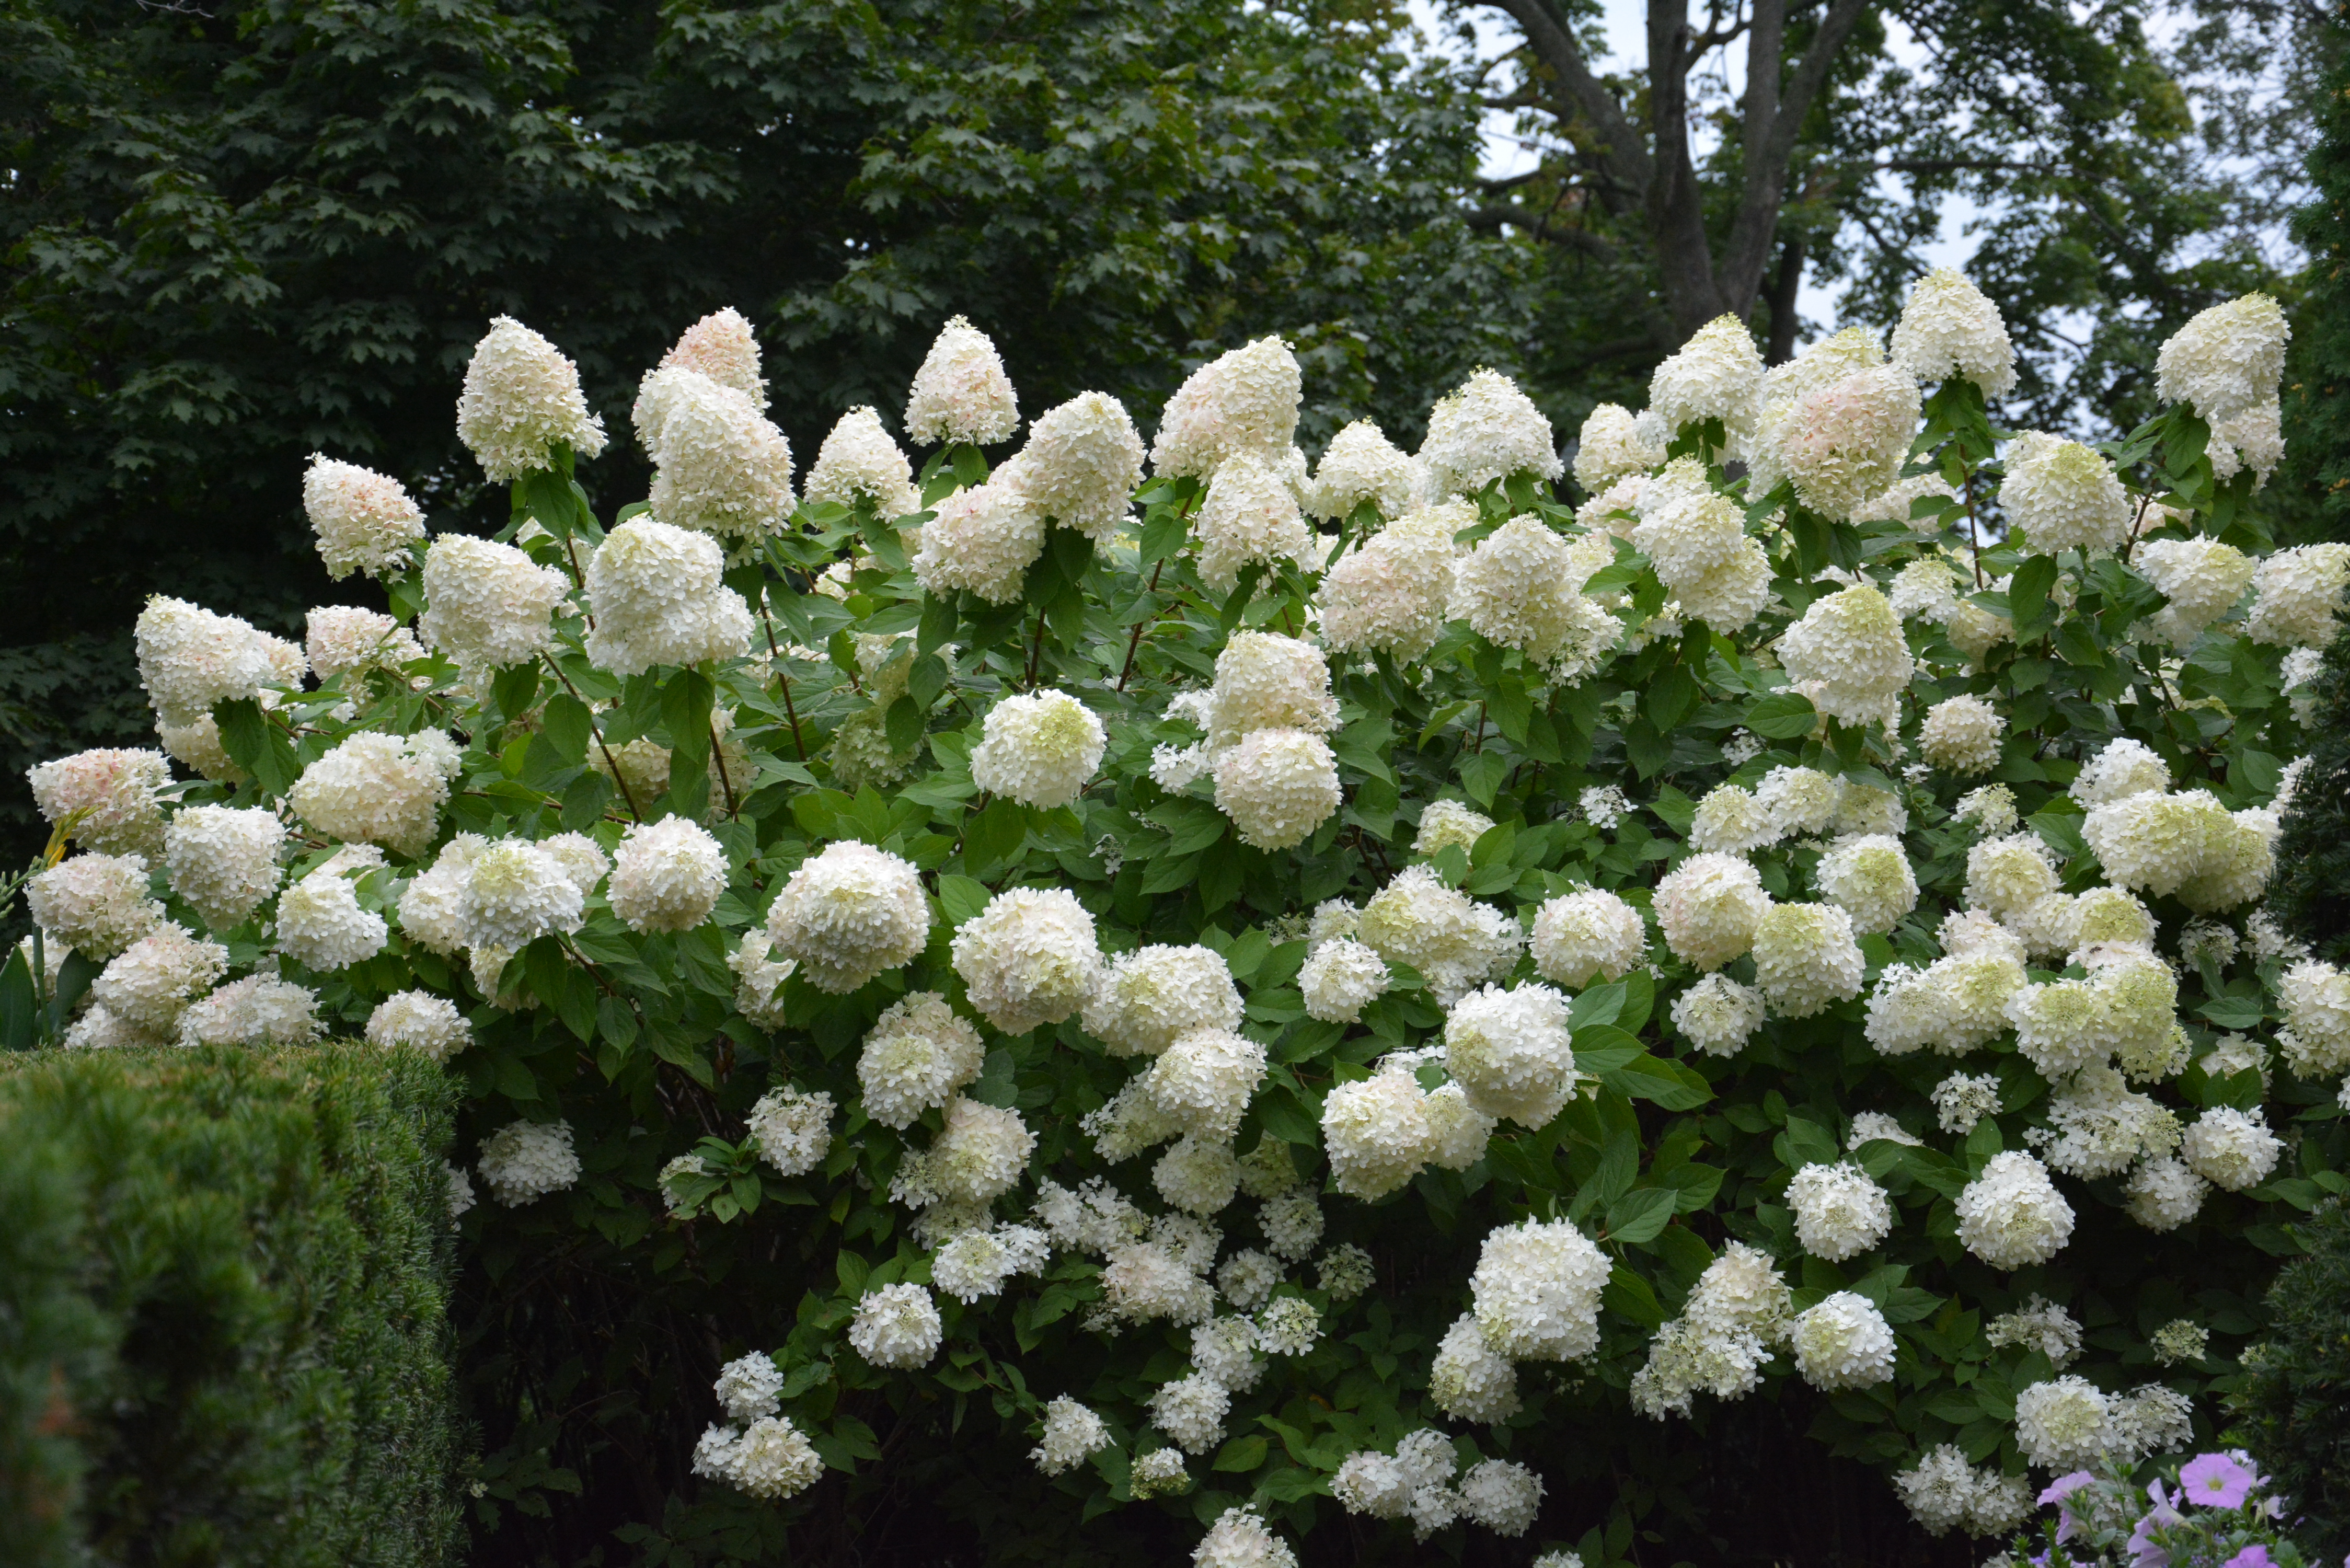
Limelights blooming top to bottom

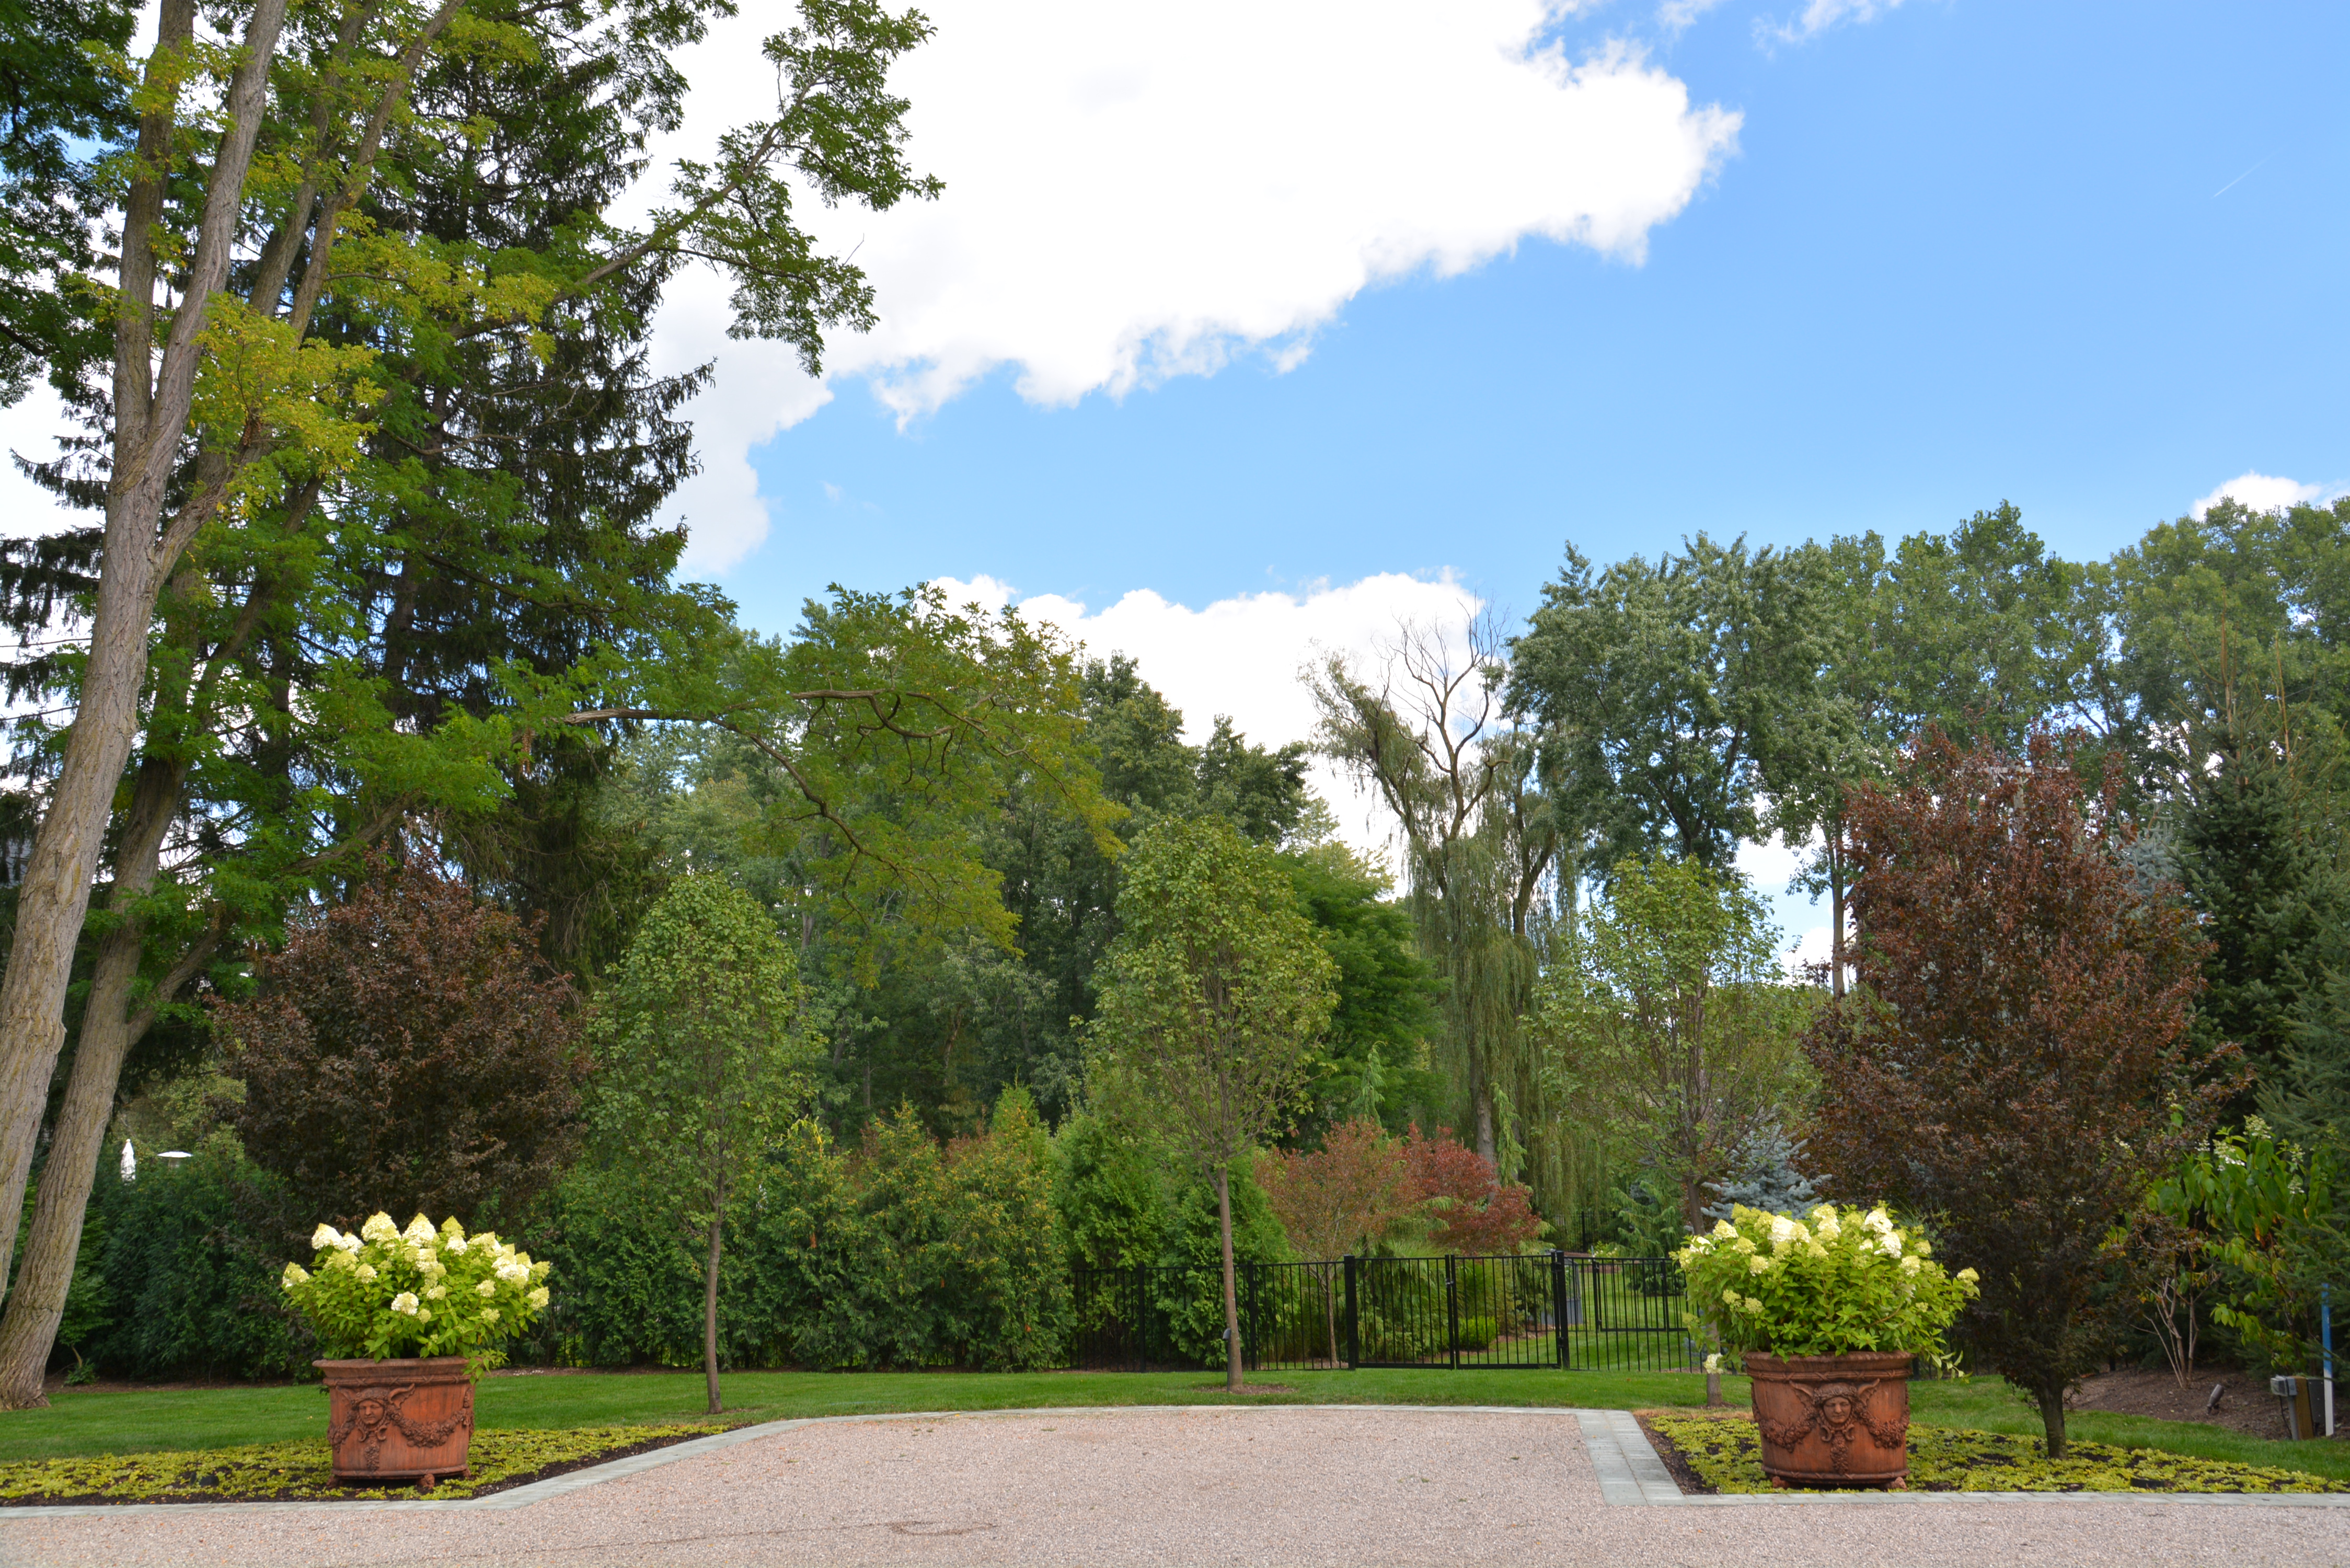
Limelights massed in containers

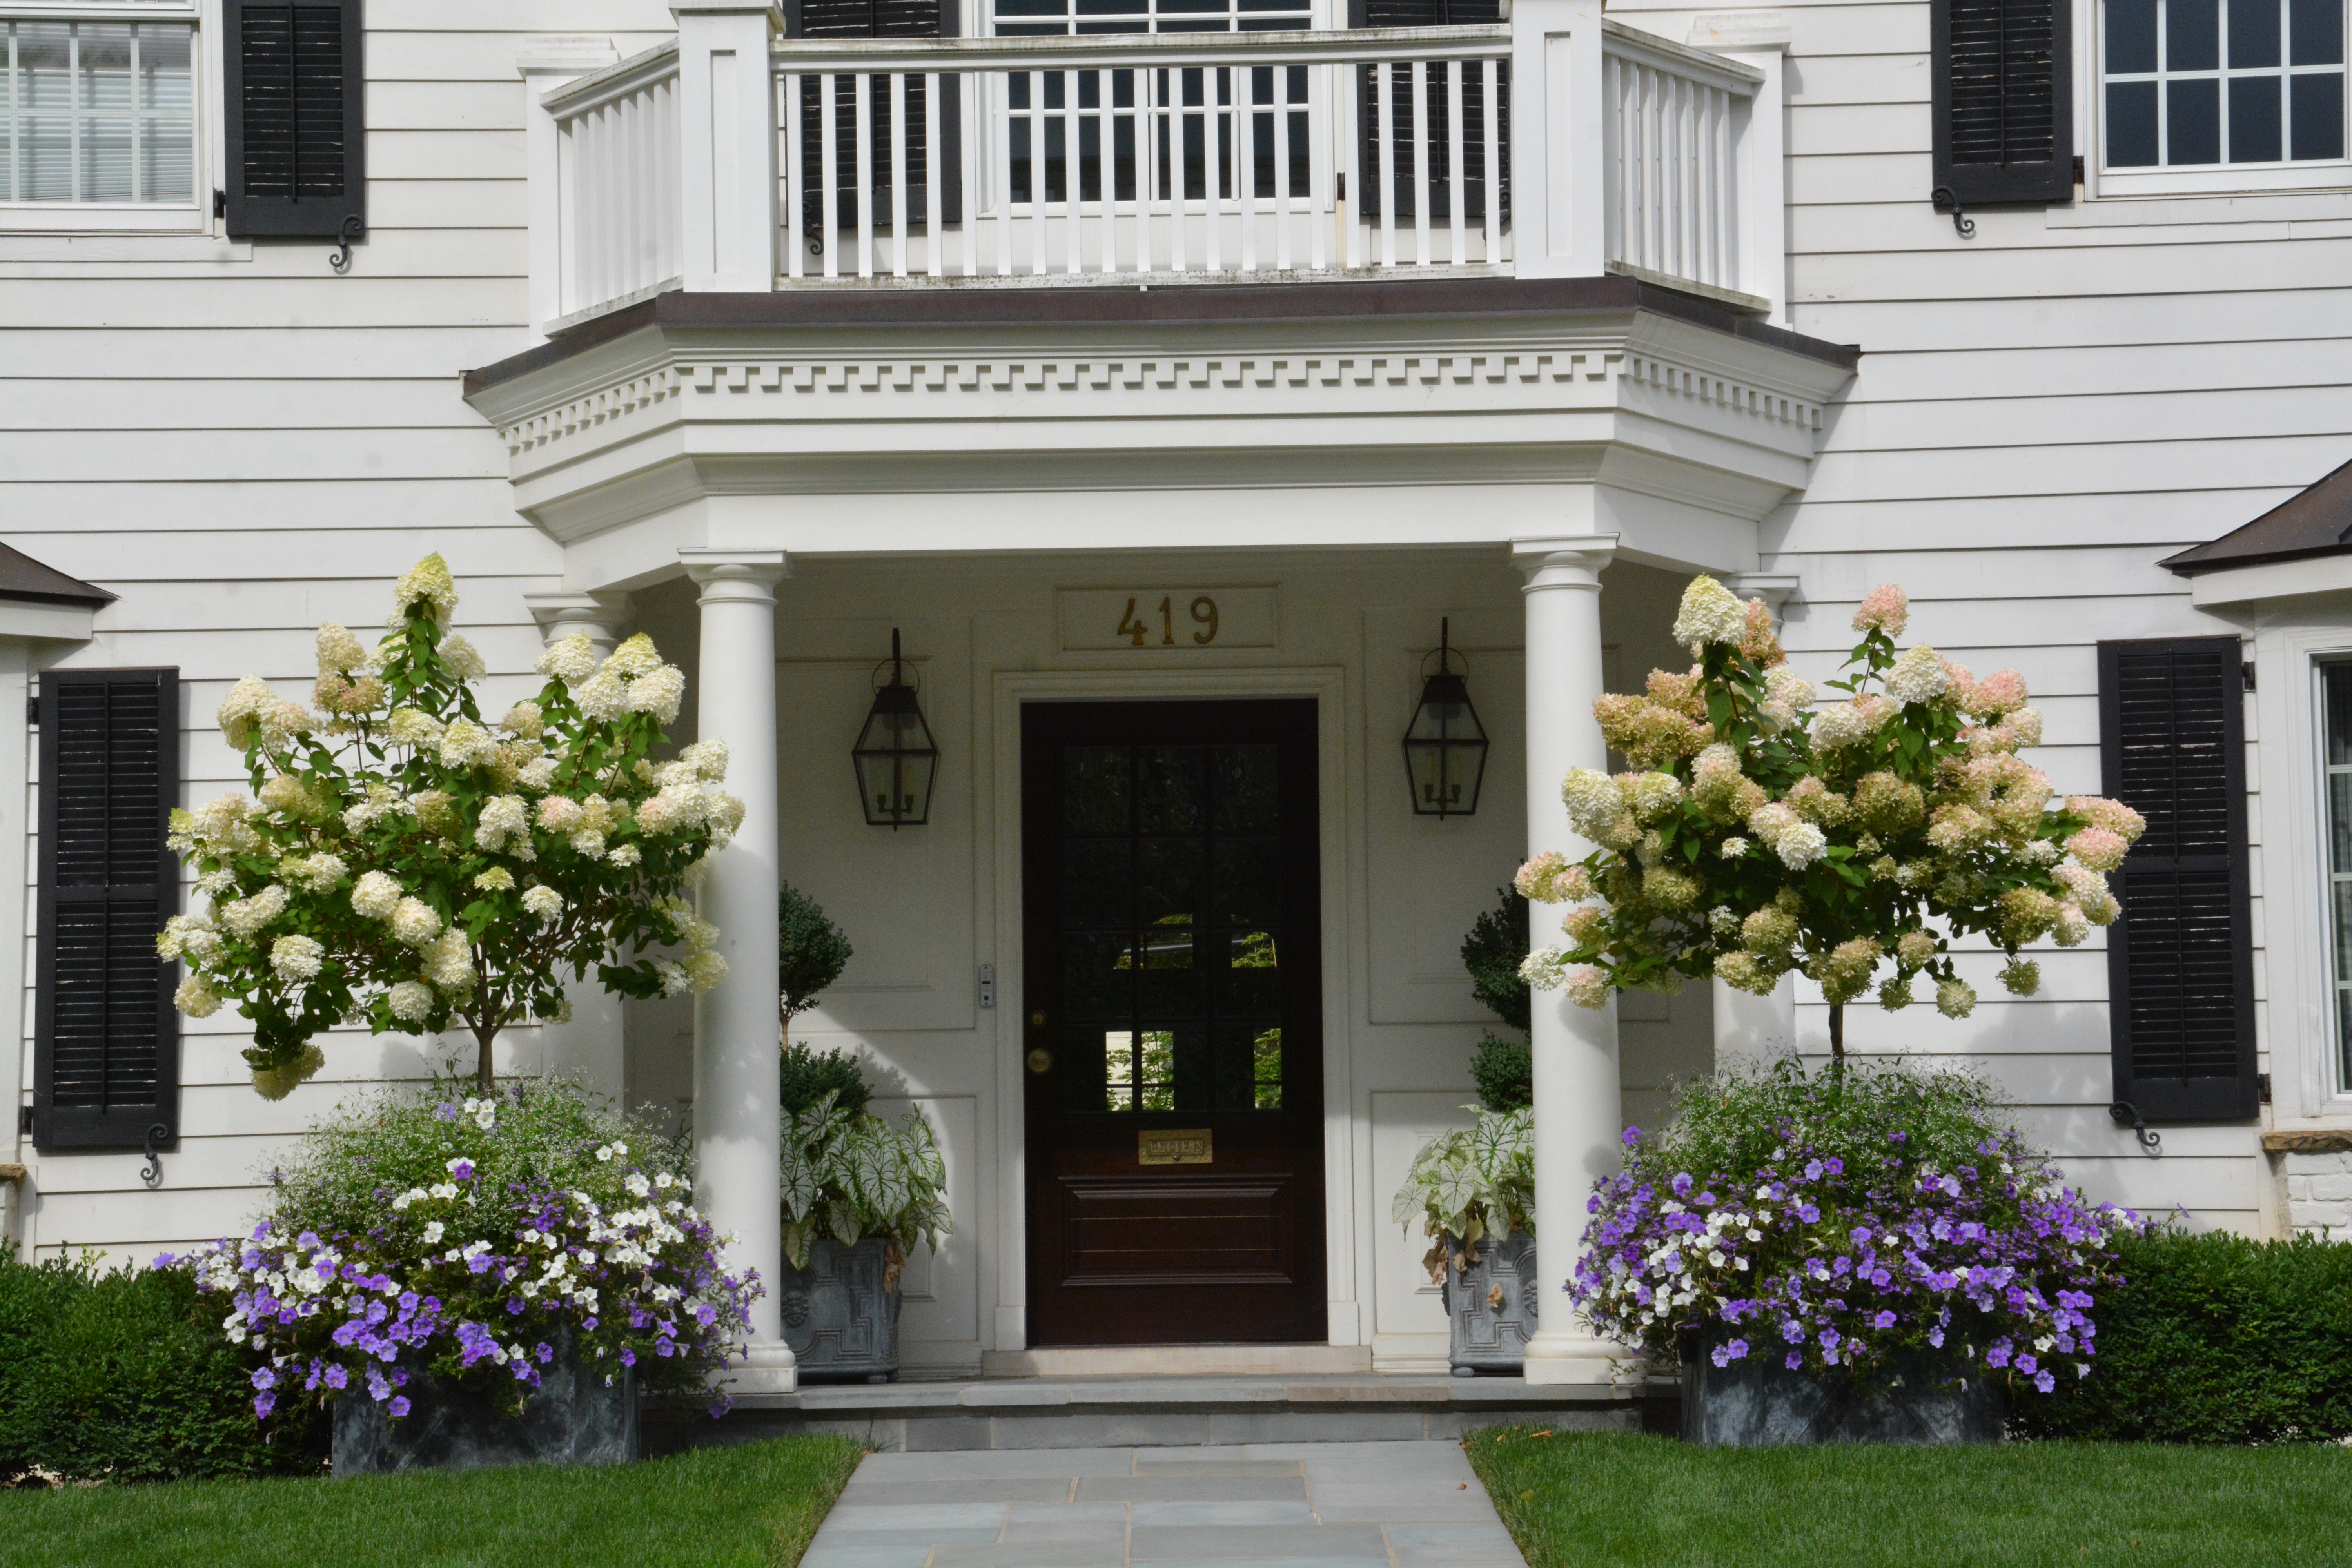
My client’s containers featuring Limelights on standard are robust and showy this early part of September. We will heel them in the ground at our landscape yard late in the fall, and plant them back in these pots come spring. I do have clients who have and do winter them over in their containers.  I am not that nervy with plants that do not belong to me, but I am not surprised to hear this. Hydrangeas ask for little, and are so satisfying to grow.


Save

Save

Save

Save

Save

Save

Save

Save

Save

Save

Save

The Stonework

Once the pool construction detailed in my last post was in a reasonably finished state, a substantial amount of stonework would be required to finish terracing this steeply sloping yard. The drop from the pool terrace to the lower terrace is about 5.5 feet, meaning stairs would be necessary to access the lower level. A pair of 10′ wide stone staircases flanking the pool would permit easy access and flow from the upper to the lower terrace. Mike Newman, stone contractor extraordinnaire, and owner of Mountain Paver Construction Co, sent numerous drawings of these stairs to me over a period of a few weeks, until every detail was worked out.

Though the plan I had drawn was to scale, it was necessary to produce specialized drawings of these stairs. The pool was a given whose dimensions could not be changed. Everything to come would have to be adjusted to meet those “as built” dimensions. Producing a precise drawing can help mitigate problems later. He would have to order stone cut to specific dimensions. Surprises can be great, but not so much for a stone structure that would take months to build. My drawings of the stairs were place holders, and nothing more. The stairs would be built from his drawings.

Mike and I did research and send for a number of stone samples. Pictured above is what was eventually presented to my clients for the wall stone veneer, the pool deck and stairs stone, and the bluestone dots. Veneer stone is available in many different color mixes.  It was eventually decided to use 25% of one mix, and 75% of another. Once stone is chosen, it takes time to get an order processed and shipped.  The stone for the pool deck was special ordered in 2′ square pieces that are 2 1/4″ thick The pool deck stone was mortared to a concrete substrate.  The stone for the stairs was custom cut for this particular project.To follow are pictures that detail the work on the walls and stairs that took the better part of 7 months to complete.  Every piece of stone that went on the wall had to be cut so they would fit together smoothly without any mortar joints. This was an aesthetic decision, not a construction decision. My clients liked the look without.

The concrete for the north and south staircases were poured adjacent to the lower pool. All foundations and stonework that was part of the pool and the lower pool were done by the pool contractor.

I had hopes of beginning the rear yard landscape last fall, but that was not to be. The trucks and equipment necessary to complete the stone work occupied a a lot of the back yard space.  An earth ramp had to be built so equipment and vehicles could be driven to the rear yard.  Building anything is a big messy business. All of those vehicles and pallets of stone made me wince-the compaction of the soil would be an issue we would have to deal with later.

The dark stones you see in the wall above are from the second mix. That darker color would add some interest to these big walls. A table full of stone enabled Mike to pick and choose the shapes and colors as he saw fit.

fall 2016

late November, 2016

Eventually it became necessary to tent and heat the area around the construction of the final staircase and retaining wall, so the work could continue. Continue it did, all winter long.


veneer stone being applied to wall

valders stone treads and risers in place

The return on the final and bottom step of the staircase was a complex shape, so Mike built a template so I could see what it would look like. Sometimes a drawing is not enough information. That piece of stone would be radiused and bull nosed at the stone yard.

By spring, the south retaining wall was done.

staircase done but for the curved lower step returns

finished staircase

Just a few weeks ago, we were finally able to begin laying out the landscape for the lower level. The concrete block structure in the middle foreground is a firepit under construction. Once that foundation and block work was done, it was time for some green. My superintendent Dan thinks a good bit of this lower level landscape will be finished in a few days. Needless to say, I have pictures.

Save

Save

Save

Save

Save

Save

Save

Save

A Schematic Plan

Some landscapes not only require drawings, they require multiple drawings. My initial meeting with these clients was in March of this past year. They had had a mind to renovate or remake every inch of their home and landscape. My initial visit revealed little in the way of landscape, beyond a random collection of neglected and weedy looking trees, and an equally patchy lawn. They assured me that the landscape portion of the project would be their favorite. There are those clients for whom the first choice of a place to be is a place outdoors. This is a very large property. The distance from the river to the road is 680 feet; the footage on the river is 150 feet –  2 and 1/3 acres in all. Based on our discussions, I would draw what I call a schematic plan.

A schematic plan details and addresses the location and shapes of  various spaces and places with a fair minimum of detail. It does address specific needs. In this section of the plan which includes the the road, a request for privacy at the road is addressed with a gate and gate piers, inset 40 feet from the road to meet local code. A hedge of double wide arborvitae stands in lieu of a fence. Groupings of large evergreens finish and cap the ends of the arborvitae fence. Low but broad plantings will soften the arborvitae wall. Just inside the gate are graveled areas for parking both to the north and south to accommodate guest parking. A picture of a mariner’s compass is a placeholder for a medallion to be determined in the drive.These parking areas will be screened with parallel hedges of limelight hydrangeas. Due east of the parking areas is a landscape feature which is bisected by the driveway. Successively smaller radiused beds will be planted with columnar Norway spruce to the outside, flowering trees or Himalayan white barked birch to the inside, and a pair of curving pergolas planted with roses and vines. As the plan does not call for any gardens in the front yard, large pots are planned in regular intervals along side the drive. What these pots will look like, and what will be planted in them is a decision to come.

My clients have added a second garage with apartments upstairs for their extended families and guests. A large drive court will permit parking and a space for events. The center fountain was a specific request. grass areas bordering the west side of the drive court will provide a place to put snow. To the north, that lawn area will permit the passage of a golf cart from the garage to the dock.

The rear yard drops sharply from the grade of the house to the river. The upper level landscape was designed with an infinity edge swimming pool on 3 sides.  Water would drop over a 5.5′ tall stone retaining wall to a lower pool. The pool landscape would be built on flat ground, courtesy of several adjacent stone walls.  Dual stone staircases would provide access to the rear yard. A formal landscape of boxes planted in geometric shapes would be punctuated with 3 garden areas, and low shrub beds along the stone wall.

This drawing is a schematic plan for the pool. The pool is on axis with the rear porch, and features a spa facing the river, and an in pool seating ledge at the infinity edge. The pool fence would be screened on the north and south side with landscape. Subsequent to this drawing, it was decided that the fence between the pool deck and river will be glass, with a mechanically operated sliding glass gate which will cover both the staircases to the lower level. Once the client had approved this scheme, it would be the job of the pool and stone contractor to produce more detailed drawings in order to actually fabricate what this schematic plan suggests. It would be my job to present options for materials for the walls and pool deck. A drawing is a series of lines and shapes on a piece of paper.  Dealing with the reality of the land would be another issue altogether. I favor initial schematic master plans.  It gives the client the opportunity to commit to or change the big picture first, without being visually burdened by countless details. I have seen landscape plans that are so detailed in the initial phase that it is impossible for a client to see the underlying structure upon which all the details will be built.

To follow are a series of photographs detailing the first phase of the landscape installation –  the construction and installation of the pool, retaining walls and stairs. This picture, taken last March, makes clear how little flat ground existed near the house, and the steepness of the drop to the river.

the original swimming pool under demolition.

forms being built for the new pool

pool construction

pool and spa walls poured

spa insulation layer

the shell of the pool and lower pool

working with the general contractor on the step location, based on the pool, as built.

stone for the spa exterior

The construction of a negative edge such as this is very complex, and requires an expert installation. The pool coping is constructed in 2 parallel rows. The row adjacent to the interior pool set at a slight downward angle, and will always have a slight amount of water over it.  When the pool is full, a series of pumps pushes the water over the slot between the 2 rows of coping.That water is then recirculated back into the pool. This keeps the top layer of water at the same grade as the outer, dry pool coping. This fine detail came after the determination of the size and location of the pool.

Adding the finish stone to the water wall. Gillette Brothers Pool and Spa fabricated and installed the swimming pool, water wall, and lower pool.

the water wall

pouring the concrete base for the pool deck

spa stone and coping

Valders stone pool deck

3″ blue stone dots were installed in the inside corners of every other group of four tiles. Each square tile had to have a corner cut off to accommodate the blue stone dot. This pool deck, as well as the retaining walls and stone staircases were installed by Mike Newman, who owns Mountain Paver Construction. The installation is incredibly beautiful and precise. What you see in the above picture are the finished cut outs, prior to installing the dots.

Once the blue stone squares were installed, the entire stone surface was sanded and sandblasted to insure that water would drain away from the pool.

finished pool and pool deck

rainy day

Next up in my discussion of plans, the retaining walls and staircases to the lower yard.

This aerial photograph was taken by my client, after the basic installation of the pool, and during the construction of the stone retaining walls last winter. The retaining wall to the north you see in the top left of this picture was tented, and heated so the stone work could progress over the winter. I am so very pleased to be a part of this project.

Save

Save

Save

Save

Save

Save

Save

Save

Save

Save

Save

Save

Save

Save

Drawing Landscape Plans

You may surmise from my last month’s worth of posts that all I do is plant containers. Ha! Nothing could be further from the truth. I do make a specialty of container plantings in late May, June and early July, but first and foremost I am a landscape and garden designer. That work occupies the majority of my time, effort and interest. Landscape design work involves making drawings, all of which I do by hand. I have never had much interest in learning how to do computer assisted design. I cannot really explain this, but the hand drawing process is crucial to my design process. I design as I draw. Or doodle. Of course, an eraser is as essential to my process as my pencil. I do not often take on a design client who has an installation company of long standing in the wings. I usually give design precedence to clients who have the idea that I will design, and install. But this client interested me. Her front yard landscape was not to her liking. She was incredibly articulate about what she did not like, and equally as articulate about what she did like. She made the process interesting. I did the design and drawing for her, over the top of a previous and existing landscape plan. The drawing is not particularly detailed, but it is enough for she and her contractor to work with.              This client has a complicated agenda.  He bought a very traditional house in a school district that he chose specifically for his children. However, he has a a great love of contemporary design. This was not a home he would have chosen for himself. A great neighborhood and great schools for his kids came first. Our design relationship came second. The both of us have forged a relationship over those secondary issues.  We have had a good many meetings about how to transform the exterior of the house and the landscape in a more contemporary direction. The driveway needed replacing. This was an obvious place to start. The design of his new driveway did involve a schematic plan for a new landscape. I did explain to him that the landscape design that was drawn to accompany a new driveway was conceptual, and subject to revision once the driveway was complete. There would be time to address the landscape in more detail, later.

The elliptical drive court and walkway to the front door in concrete aggregate is done now. The driveway approaches were finished just a few days ago. Next up is the regrading of all areas adjacent to the new drive, an irrigation update, and a new lawn. This drive court sets the stage for what is to come. It is functional, in that it provides much needed guest parking. The house is a considerable distance from the road. It also serves as an organizing metaphor for the tone and tenor of the exterior renovations and landscape to come. A more contemporary take is a direction sought by my client. I am happy to oblige.

A good client built a new house on lake property they have owned for some time in Charlevoix this past year. The original house was kept, and re – purposed as a guest house. I tried my best to get them to seek design advise from a local firm, as I would not be able to install a landscape this far from home. Drost Landscape does terrific work in that area. Nevertheless, they wanted my take. So I did make revisions to the drawings done by Drost. I was interested that the concrete walkways be very sculptural and contemporary in shape, and that they would appear to float above the surrounding landscape. And that the planting needed to be done in blocks and  geometric shapes, rather than in more traditional rows and layers. There would be a restricted palette of plants.  The outer perimeter landscape would be natural and casual, and blend in with the existing natural landscape.  The landscape needed to address the architecture of the new house, and gracefully tie in with the old. The landscape also needed to be very low maintenance, as it is not a primary or year round residence.

The original lake house

the new and the old

the new house

Brushed concrete walkways will be friendly to bare feet.

A simple terrace outside the original house/new guest house affords some visual weight to that structure. In the foreground is a newly planted columnar gingko. The landscape installation comes next. The drawings back and forth enabled a discussion between the three of us to what I think will be a good result.

Then there are those projects that proceed without any drawings.  I have been doing landscape work for this client for better than 10 years.  An initial project involved planting boxwood as an intermediary between the pool deck and a wall. That space had previously been occupied by a collection of perennials. The bloom time was short, and and the off season look was bleak. As my clients were not particularly enamored of the wall, we planted Boston ivy behind the boxwood.

A few years later, we planted a loose hedge of Princeton Gold maples on the lot line. The hedge would come up the hill, and terminate just inside the level plane presented by the pool. The last of the trees would replace a few scraggly forsythia that were languishing in the shade.A few years later, the boxwood and ivy had filled in, and provided an attractive green backdrop to the pool.  The Princeton gold maples were thriving. But a close look at the top of this picture reveals that trouble was dead ahead.  A mature stand of Austrian pines were beginning to fail. It would take another 4 years, but this year, it became apparent that those trees had to be removed. The sight of those all but dead trees made it easy for my clients to take them down.

The exposure of a view to the house next door was the unfortunate result of the loss of those old evergreens.  It did not take a drawing to see that the continuation of the Princeton Gold maple trees would be a logical and simple solution to their loss of privacy.

Though their landscape is quite contemporary, another layer of planting would restore their privacy. Fortunately, their property extends quite a ways beyond the pool wall.

These maples are not large. They were grown in 25 gallon pots, but had fairly substantial canopies. We staked each tree, and installed a soaker hose that winds around the root ball of each tree. Once these trees are established, they will not require much additional water than what comes from the sky. We are set to install a hedge of viburnum behind the trees –  to fill in the area above the wall, and below the canopy of the trees. A planting of deciduous trees with a shrub layer in between is an effective way to screen an untoward view that is large or tall.

The boxwood has been in long enough to warrant a good pruning. My clients were kind enough to agree to put their landscape on our tour for the Greening of Detroit a second time, as the changes in the landscape since 2009 are significant.

A landscape design drawing is one thing. It can be a very useful document. There are times that ask for one. The evolution of a landscape is another. The benefit of an evolving landscape is that there is time to reflect upon what is, and respond. I think this landscape is looking and doing well, despite the lack of a drawing. A lack of a drawing in no way implies the lack of a design.


Save

Save

Save

Save

Save

Save

Save

Save

Save

Save

Save

Save

Save