Flip The Switch

Our winter/holiday installations take place during the day. During regular business hours. But we do endow most every project with some night light. As much as we dare provide for. We guess as best we can about the placement and intensity of light in the winter containers. They provide both container and landscape lighting. Our zone has as much darkness as light over the course of the winter. This means the night view is equally as important as the day view.

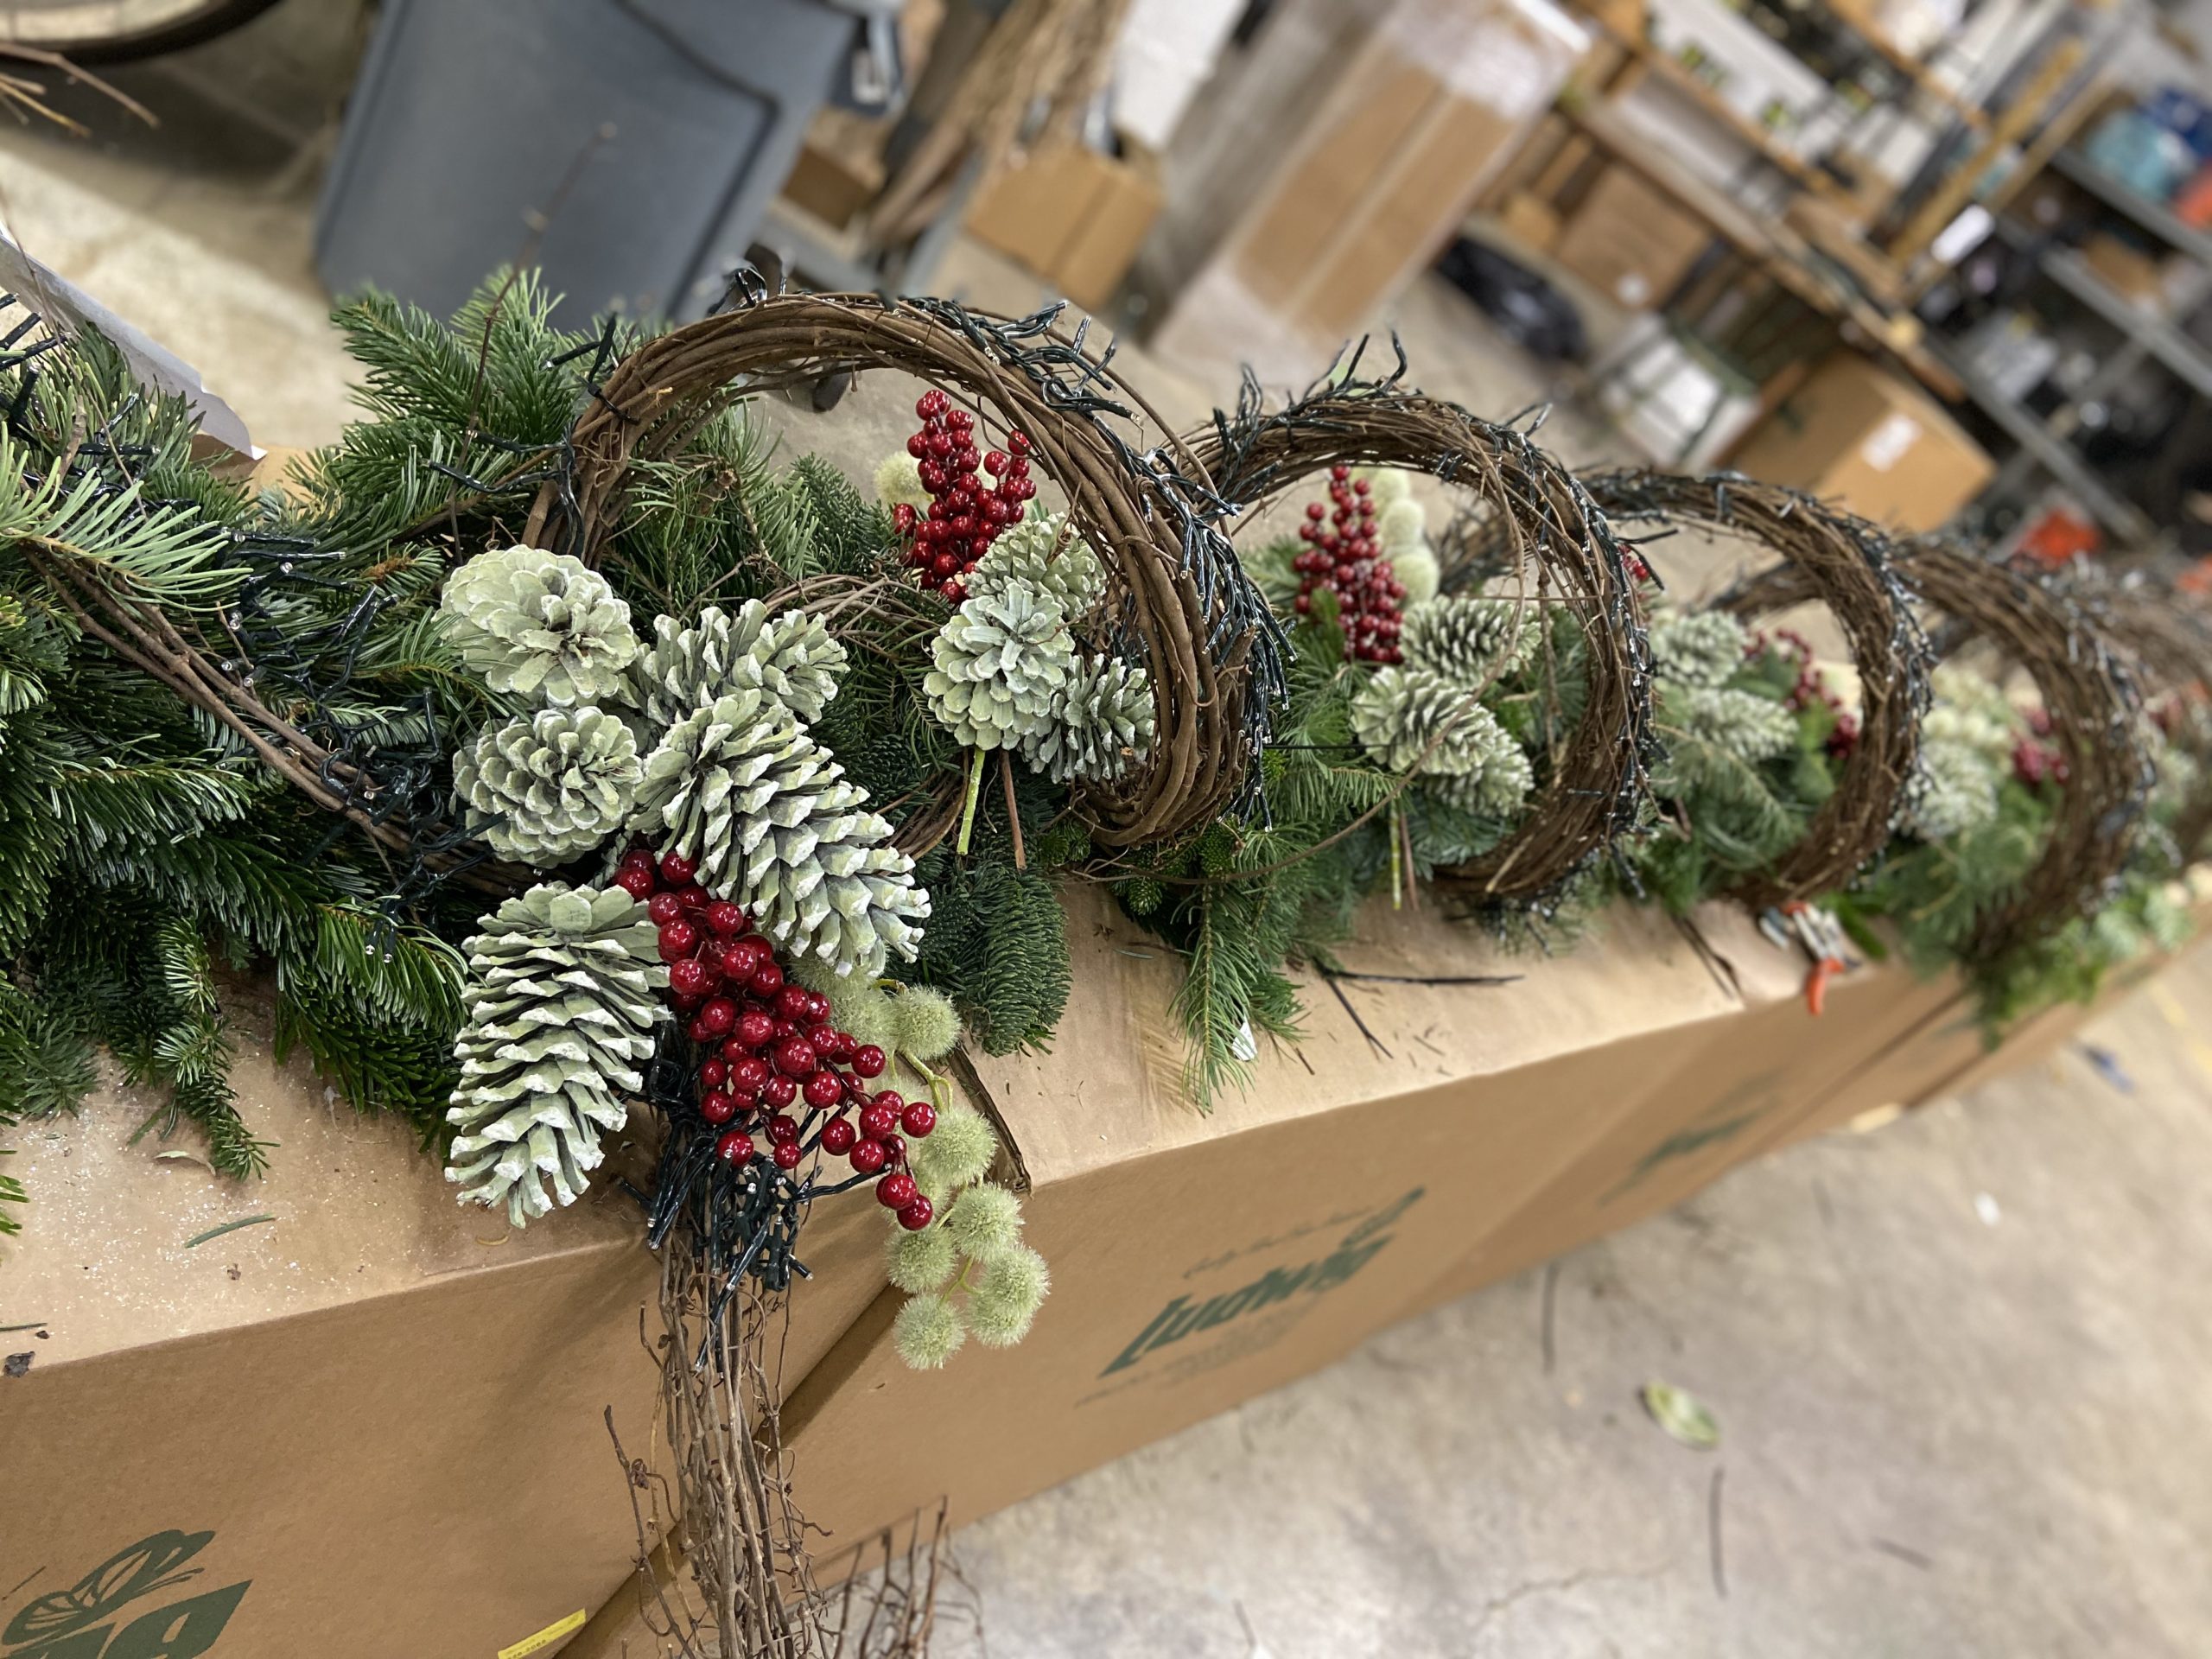
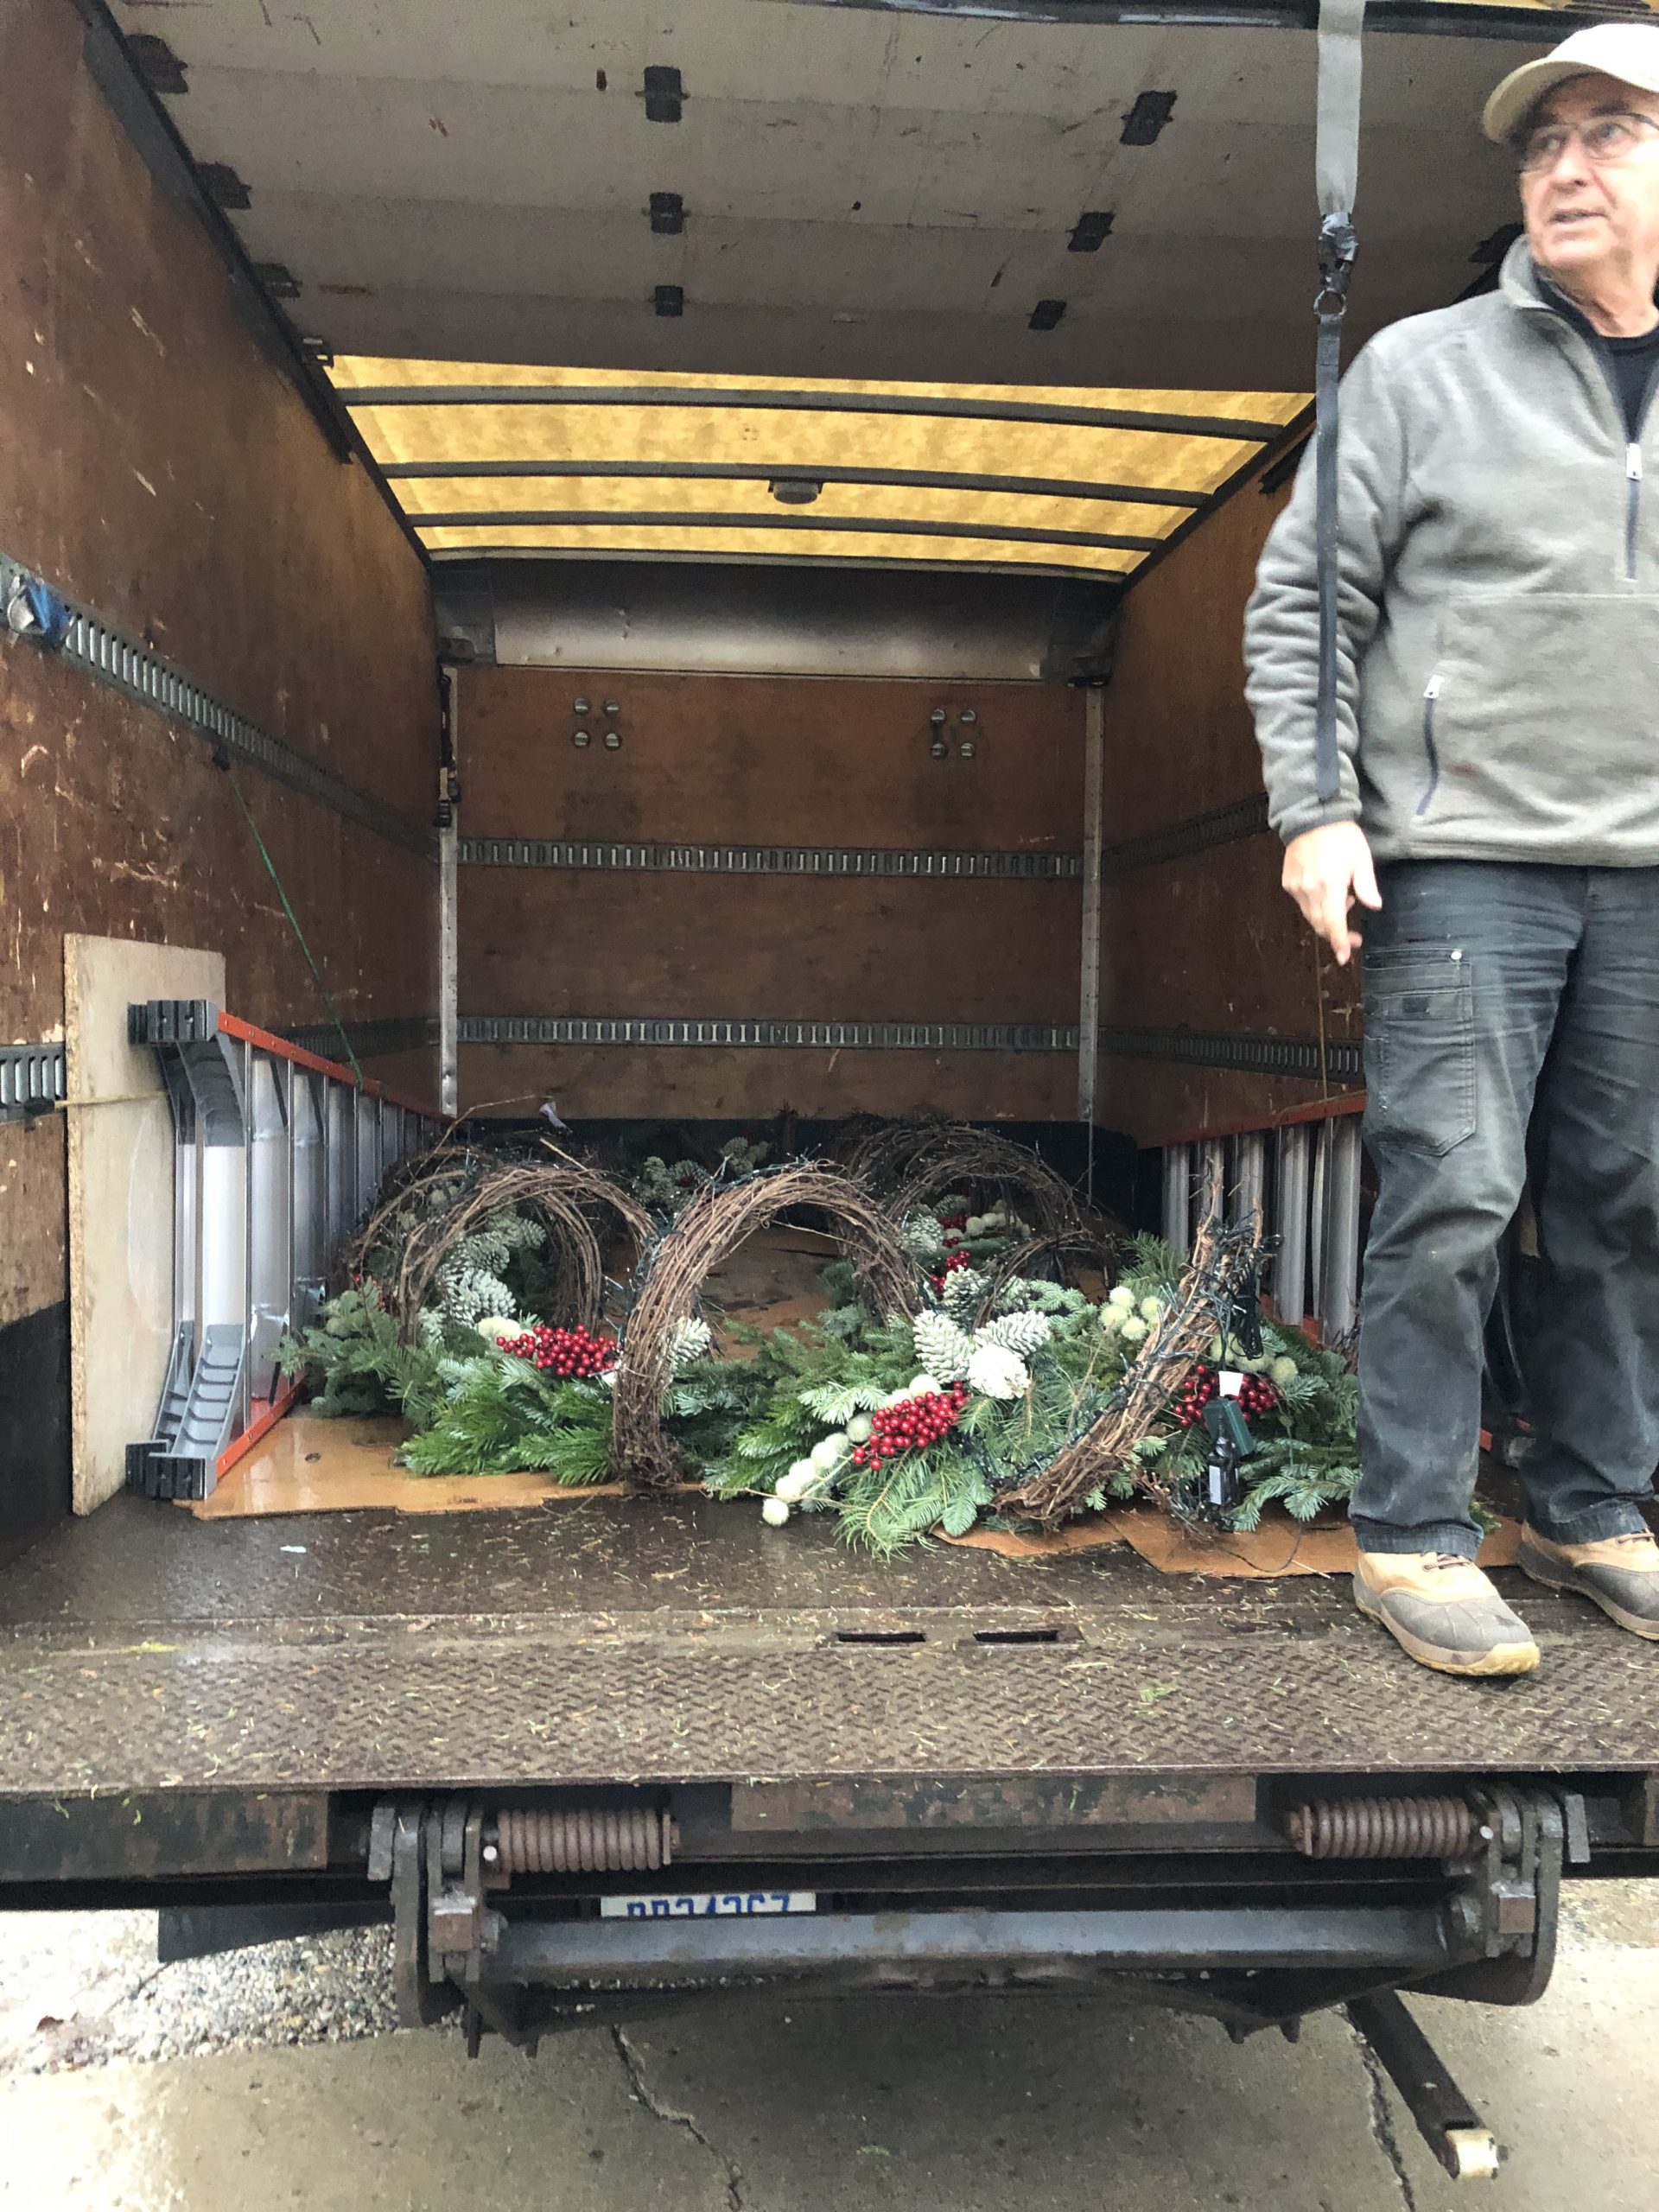
The Lumineo LED string lights are an innovation that has made for just about worry free temporary lighting outdoors. They draw about 1/10th of  the electricity needed by incandescent light strings, But even though you can walk on the bulbs without breaking them, they do need careful handling. Each strand has a function box. Push the button, and a pattern of flashing or blinking lights can be all yours. Ha! Each strand also has a transformer, that dials down the voltage at the outlet. The wire going in and out of the function box, and the wire going in to the transformer can come loose, if it is stretched too far. We usually reinforce that connection with electrical tape. Early winter rain is the bane of winter lighting, as water and electricity do not mix.  Water that seeps into a function box and corrodes the wire inside can cause flickering, or an irreparable short.

Our electrician advised that we leave all plugs and connected open to the air, as encapsulating them in a zip lock bag means that any water that gets inside is trapped, and will not evaporate. Water gaining access to the connection between a plug and extension cord bodes ill. The fit of one to the other is not always a tight fit.  We generously wrap those connections with electrical tape. The best quality and stickiest tape we can find. We also prop up the connections so nothing rests on wet soil. We leave the tags on the lights.  They list how many lights are in a given strand, in case we do need to make a replacement.

A careful job handling the wiring means you can enjoy those lights all season long. We do run the lights around the clock. Timers can produce a surge of power when the lights go back on that can damage the string. The manufacturer recommends that given how inexpensive they are to run, dispense with a timer.

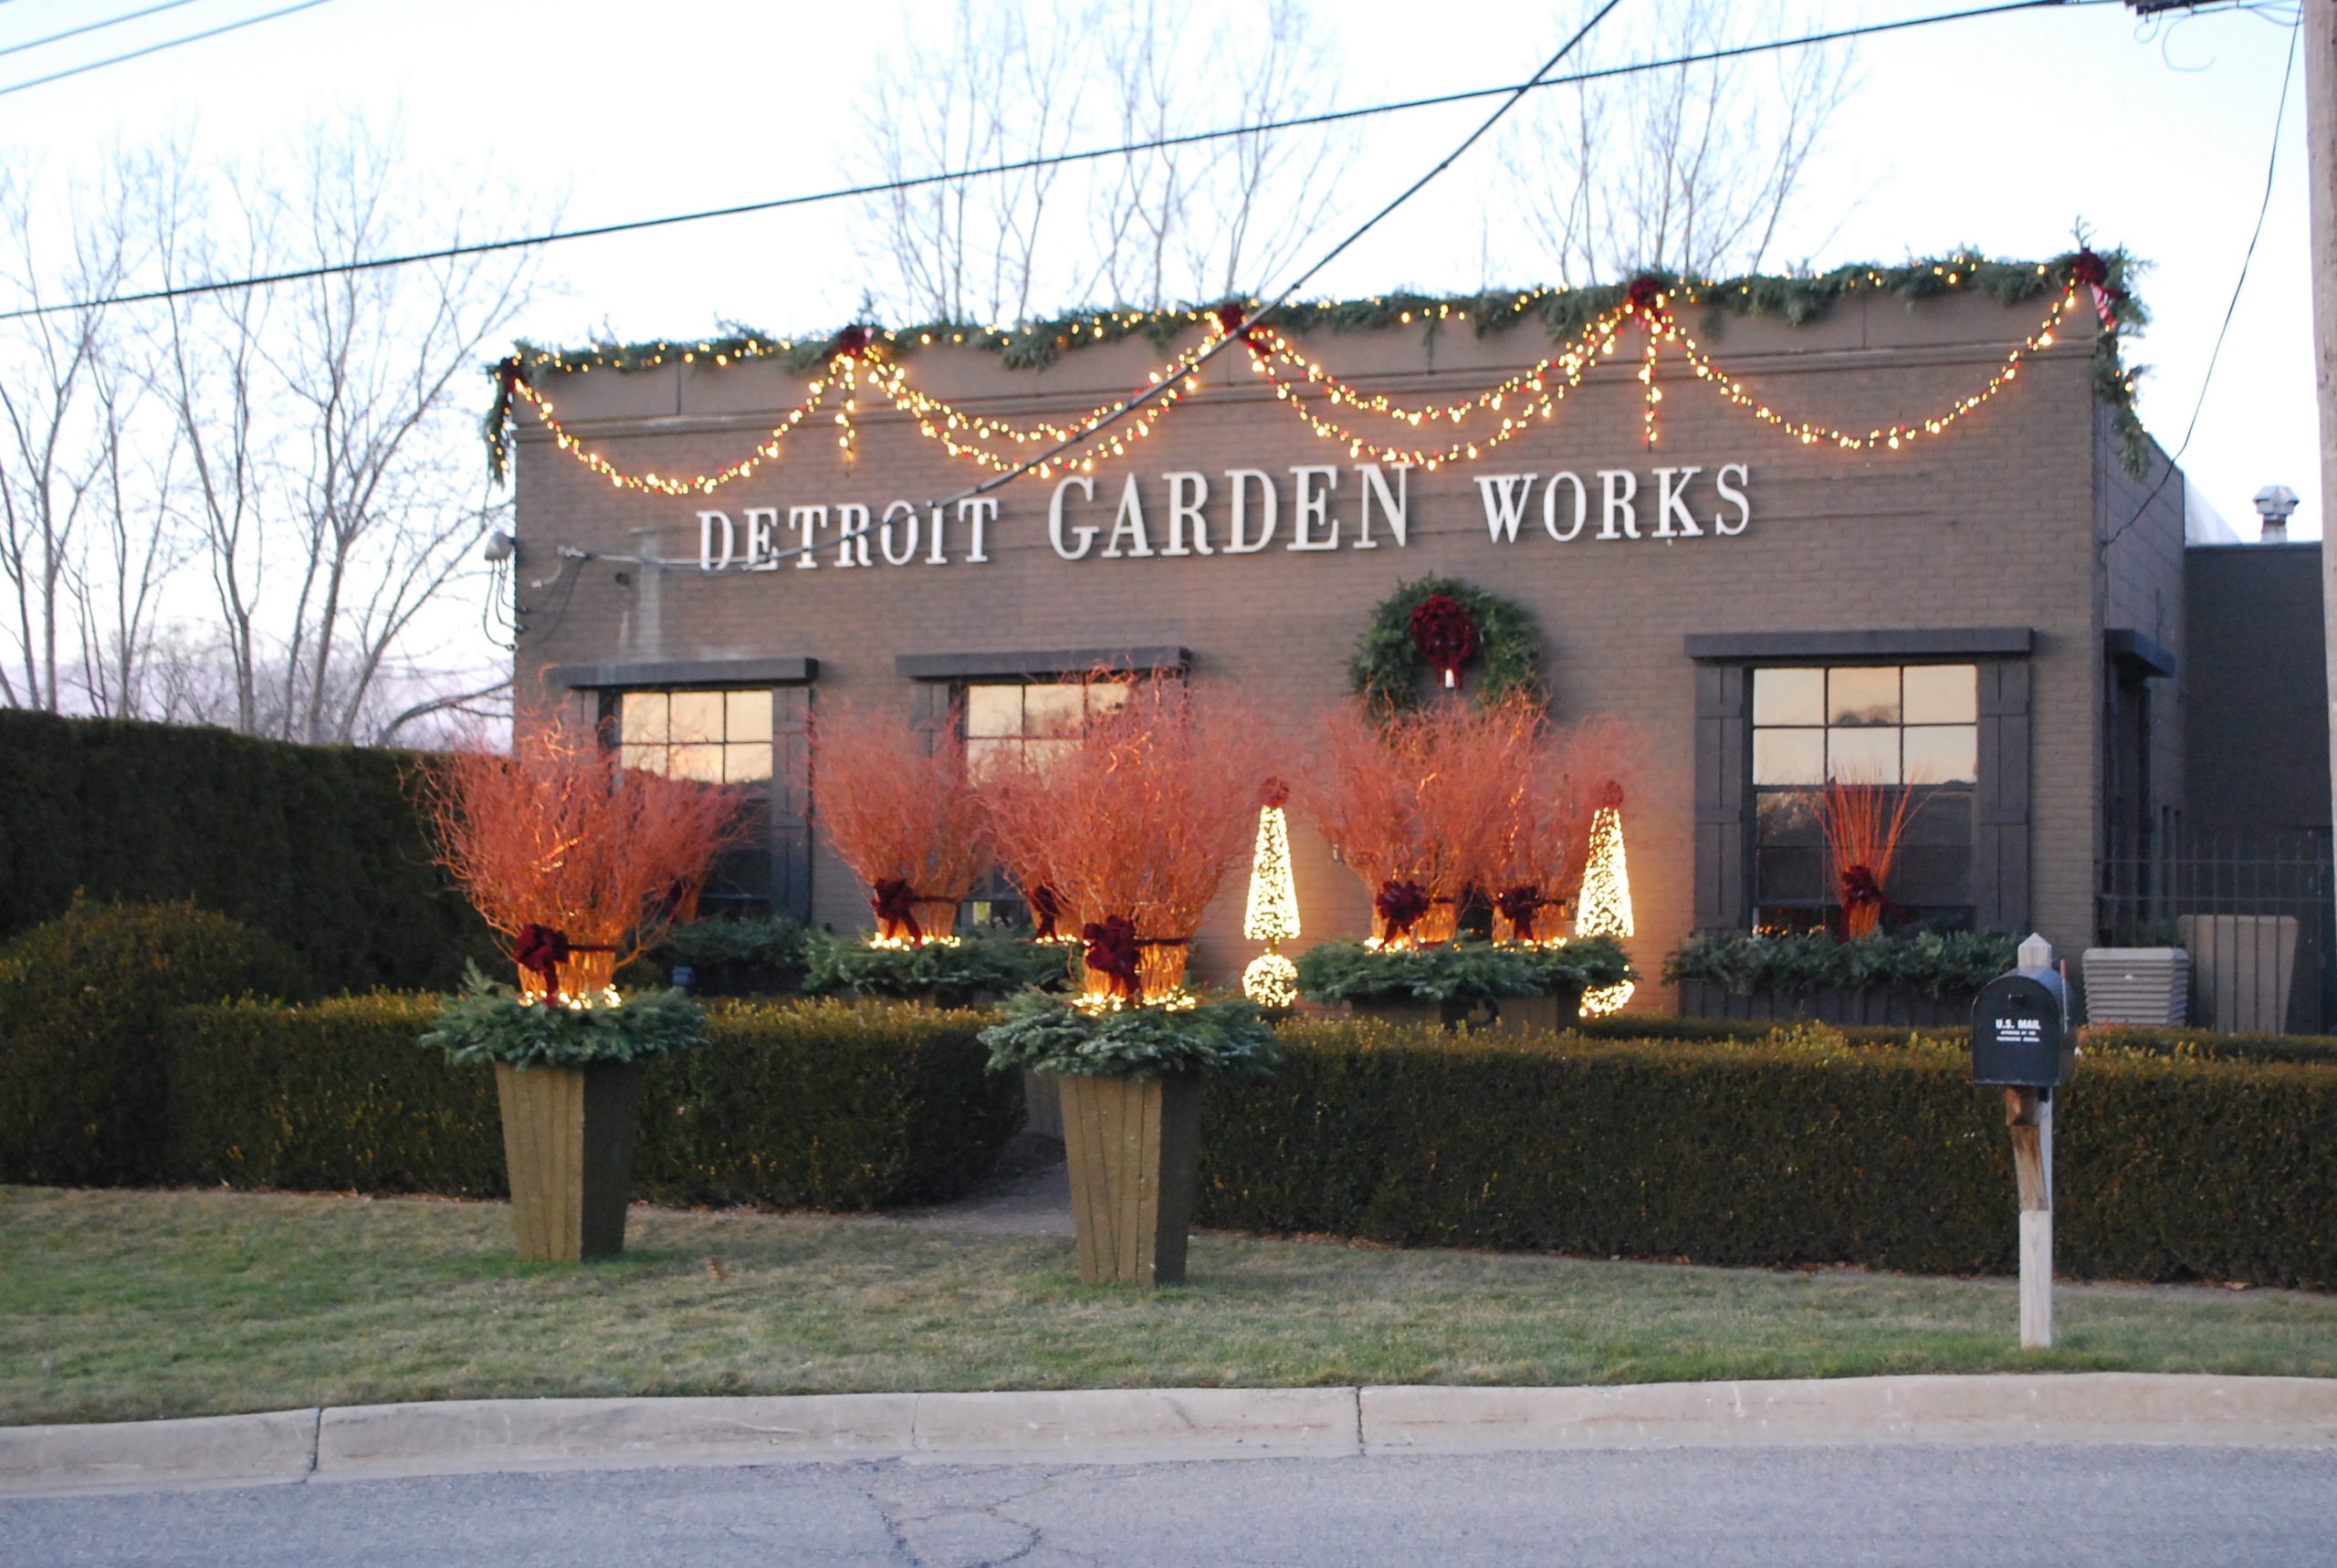
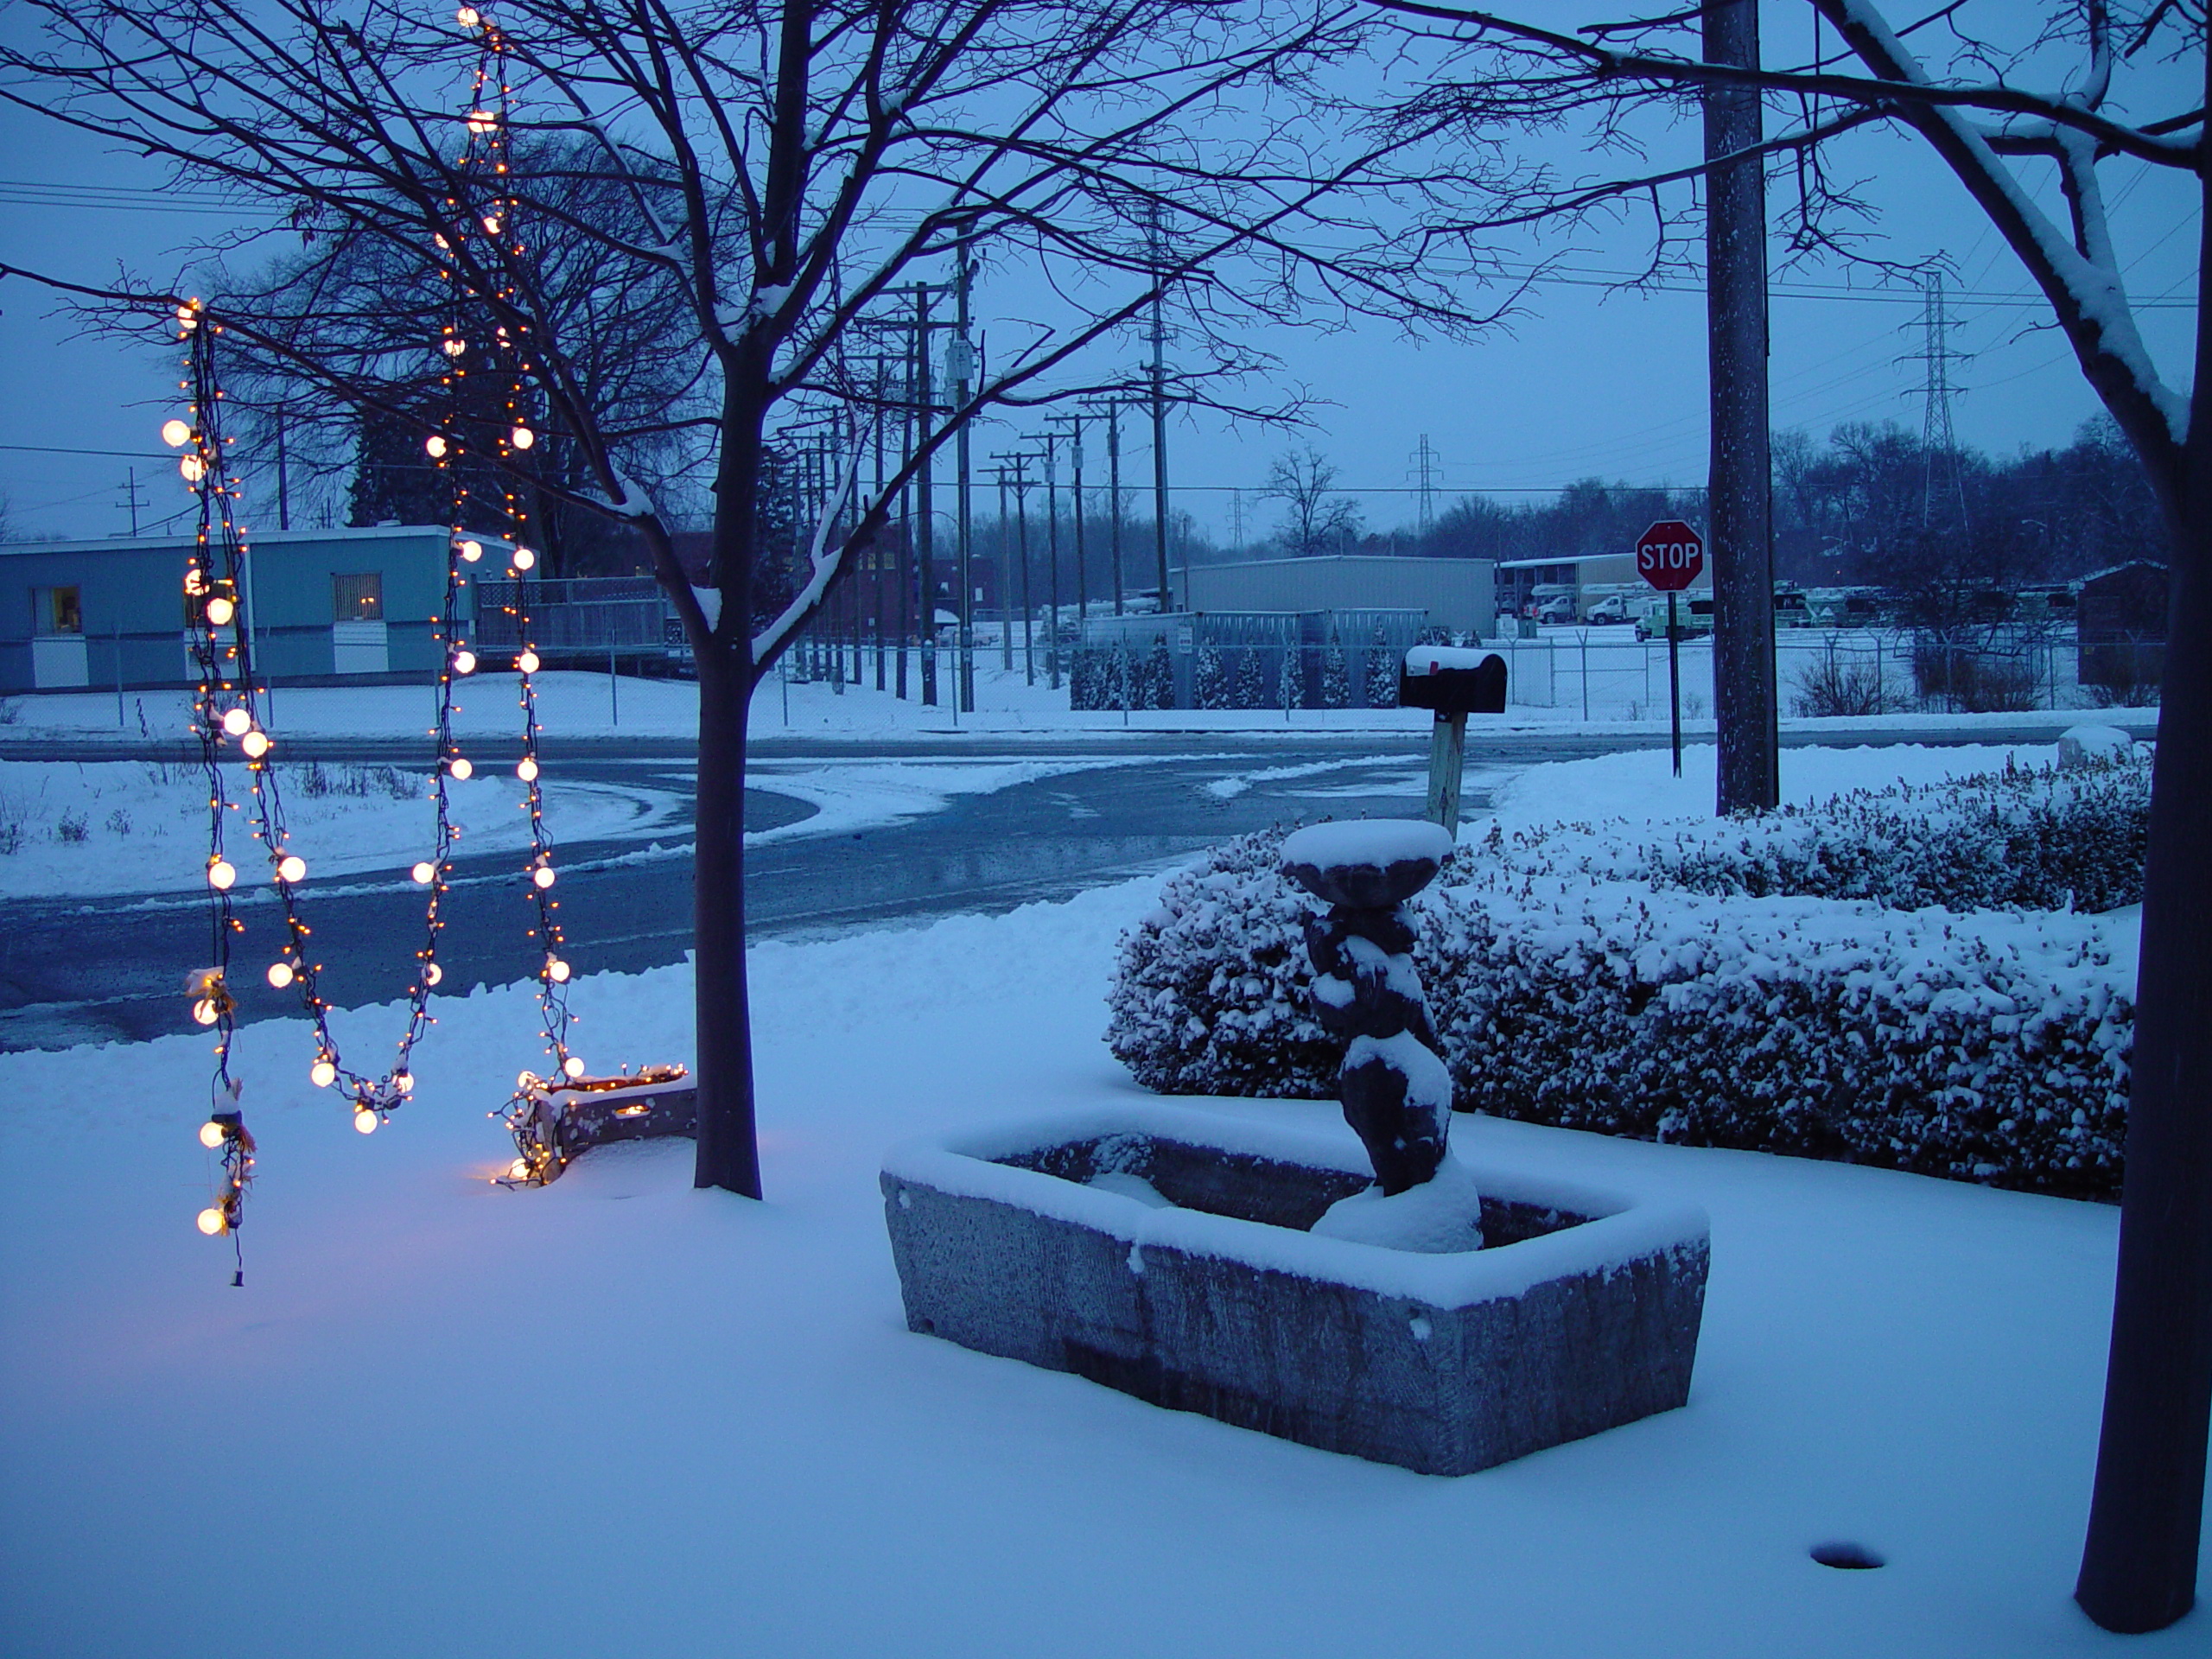
At 4pm, we have dusk, and by 6pm it is dark. As in black dark. Winter lighting can punctuate, highlight, and mitigate that dark.

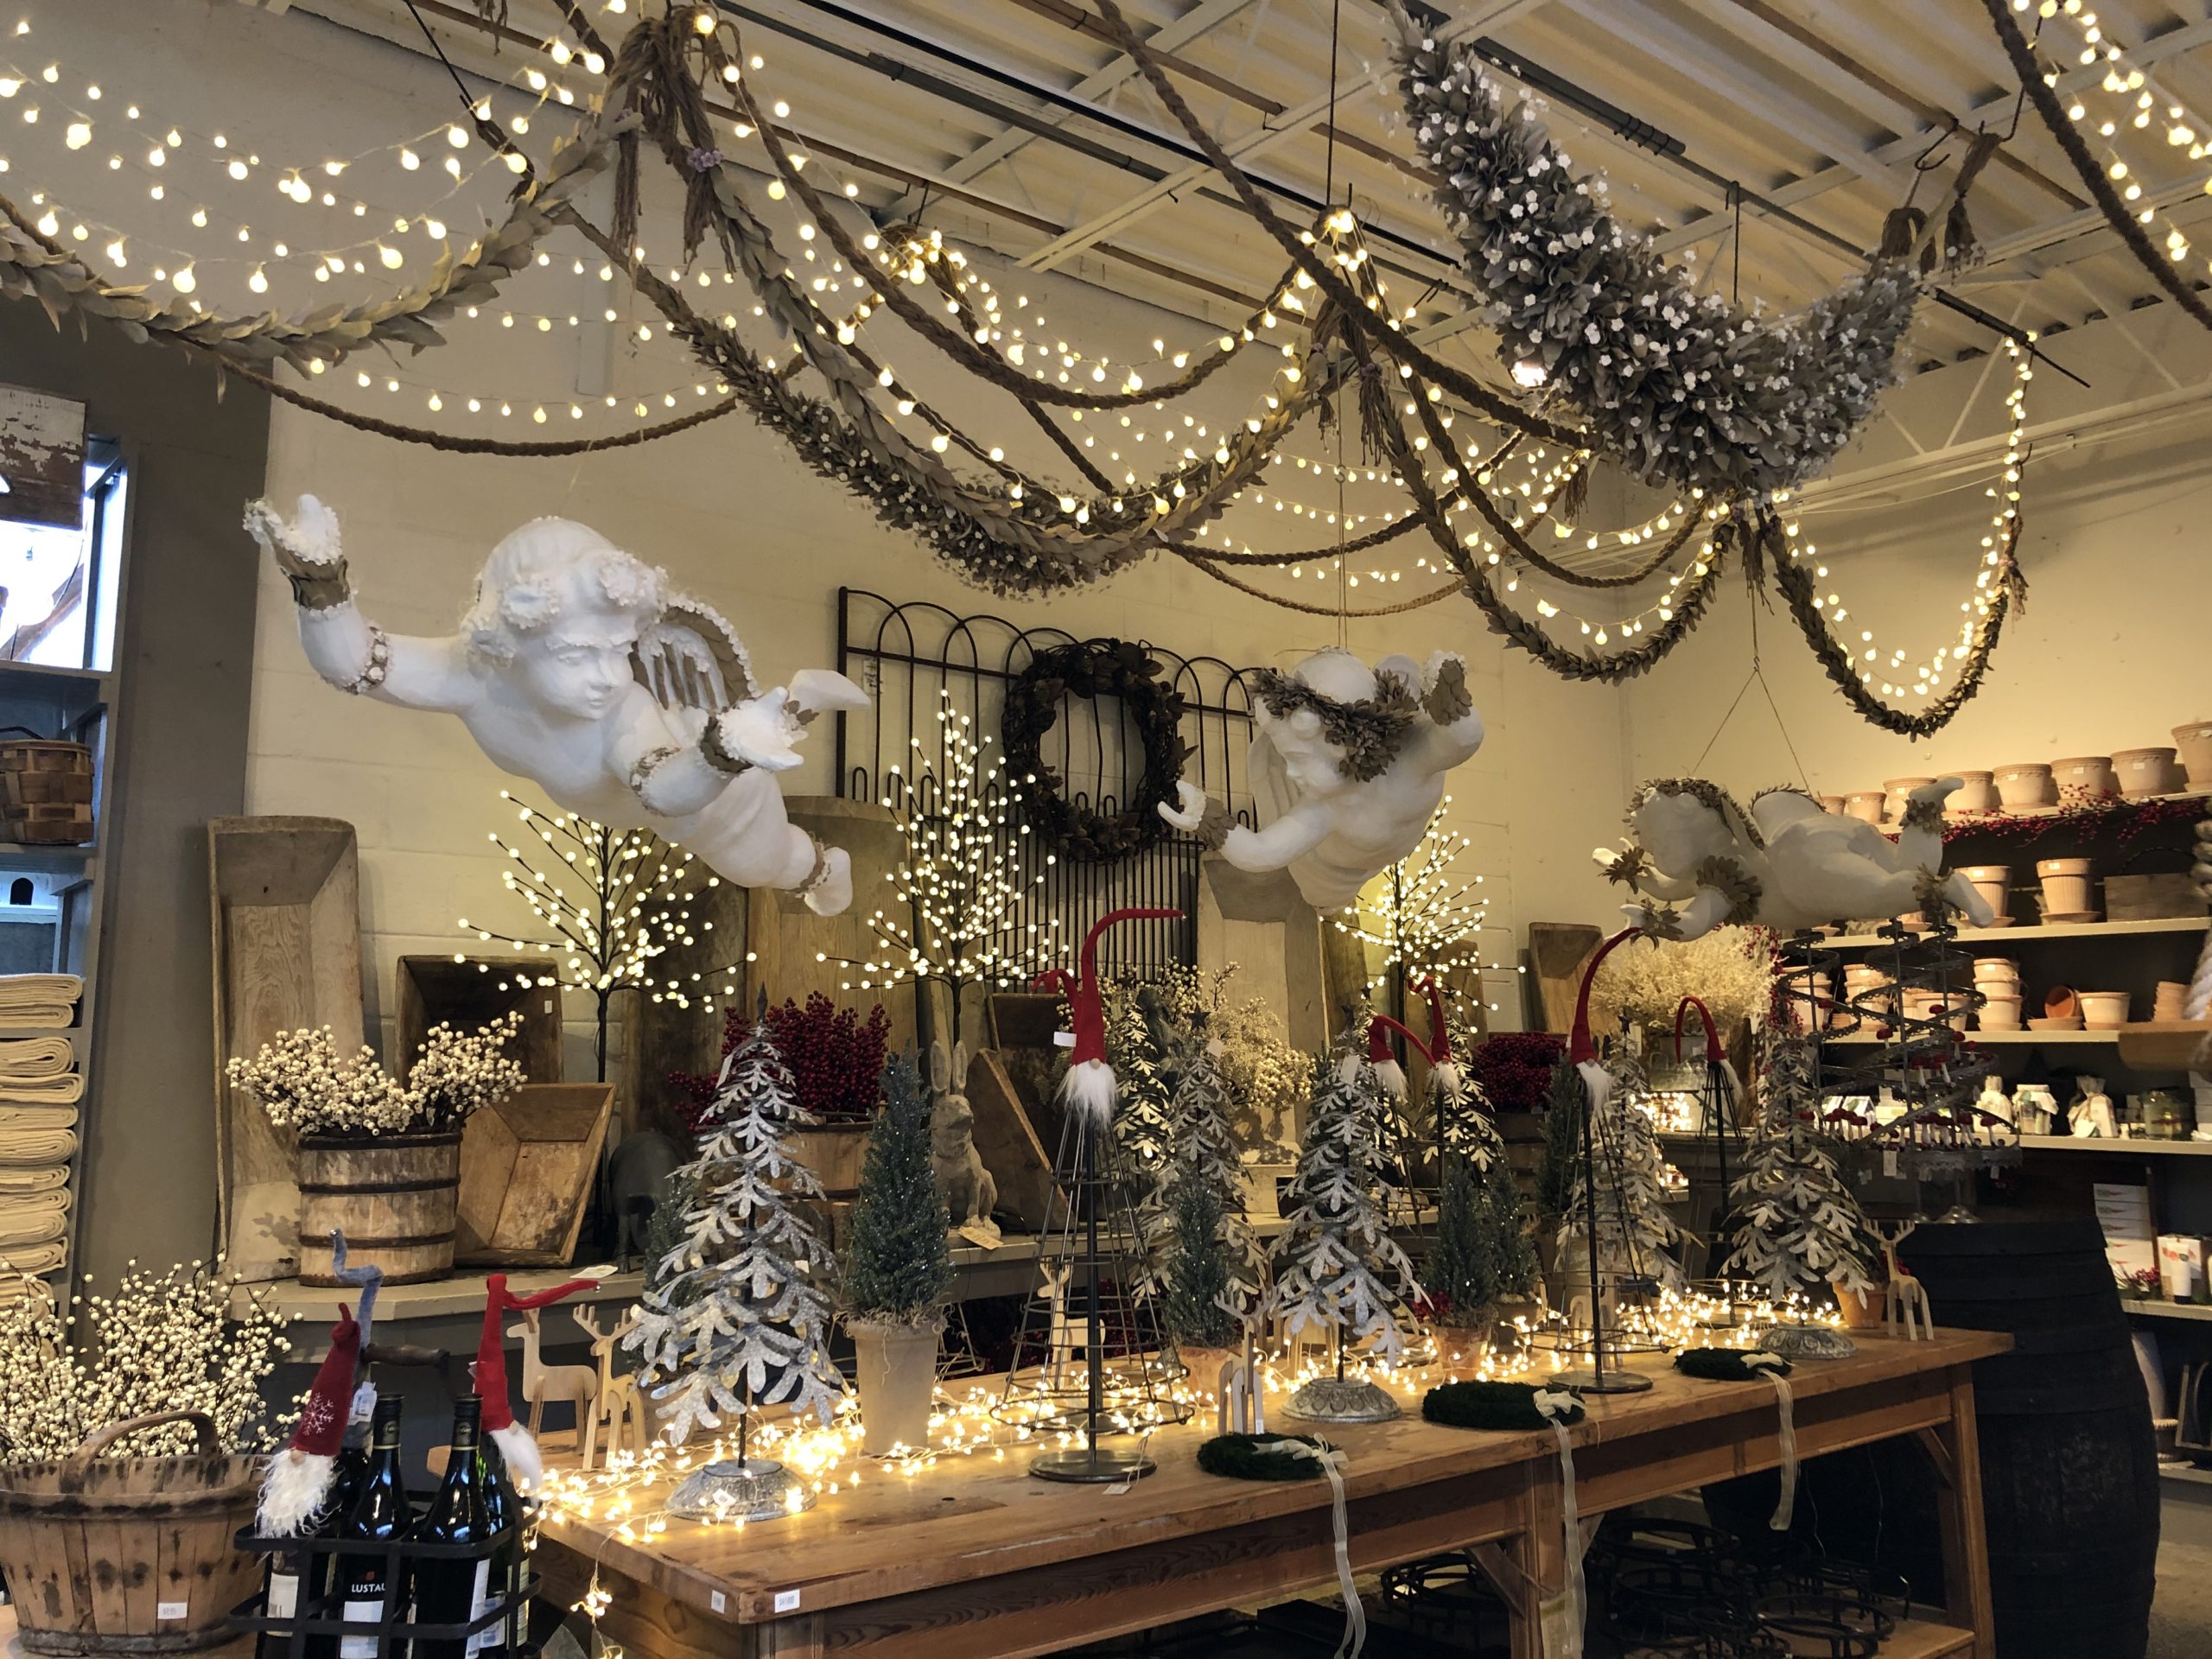
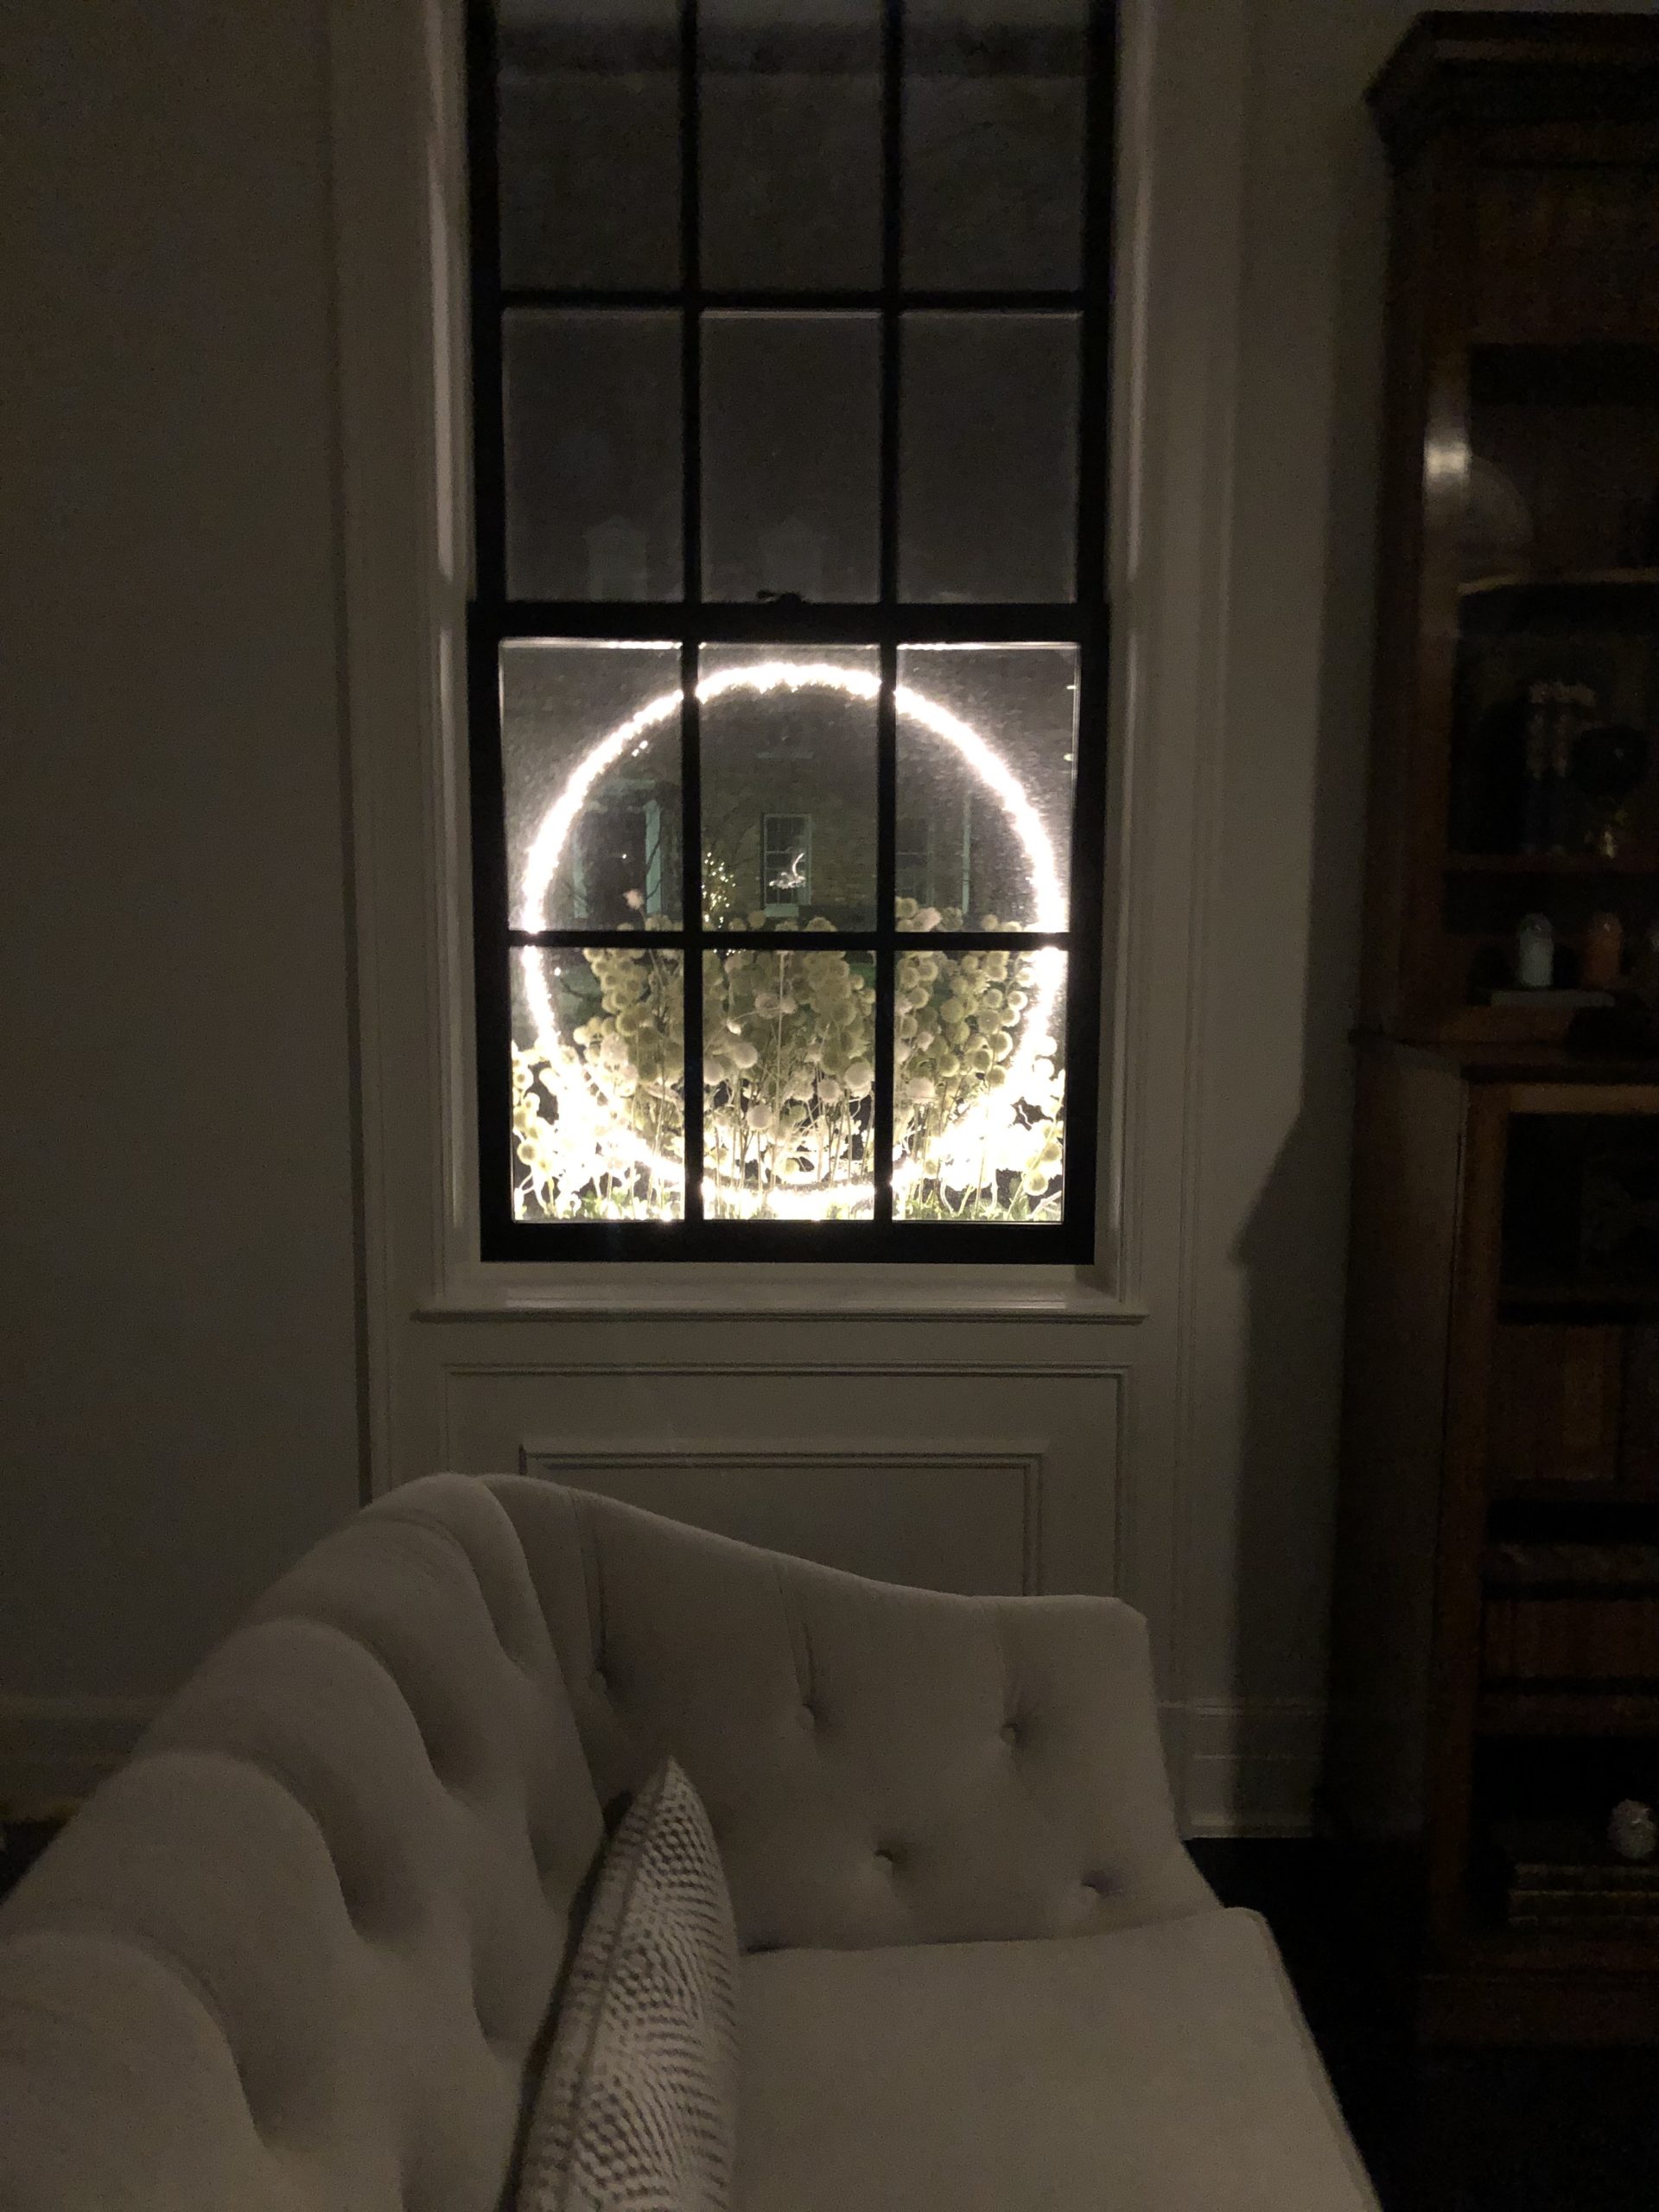
the view from inside out

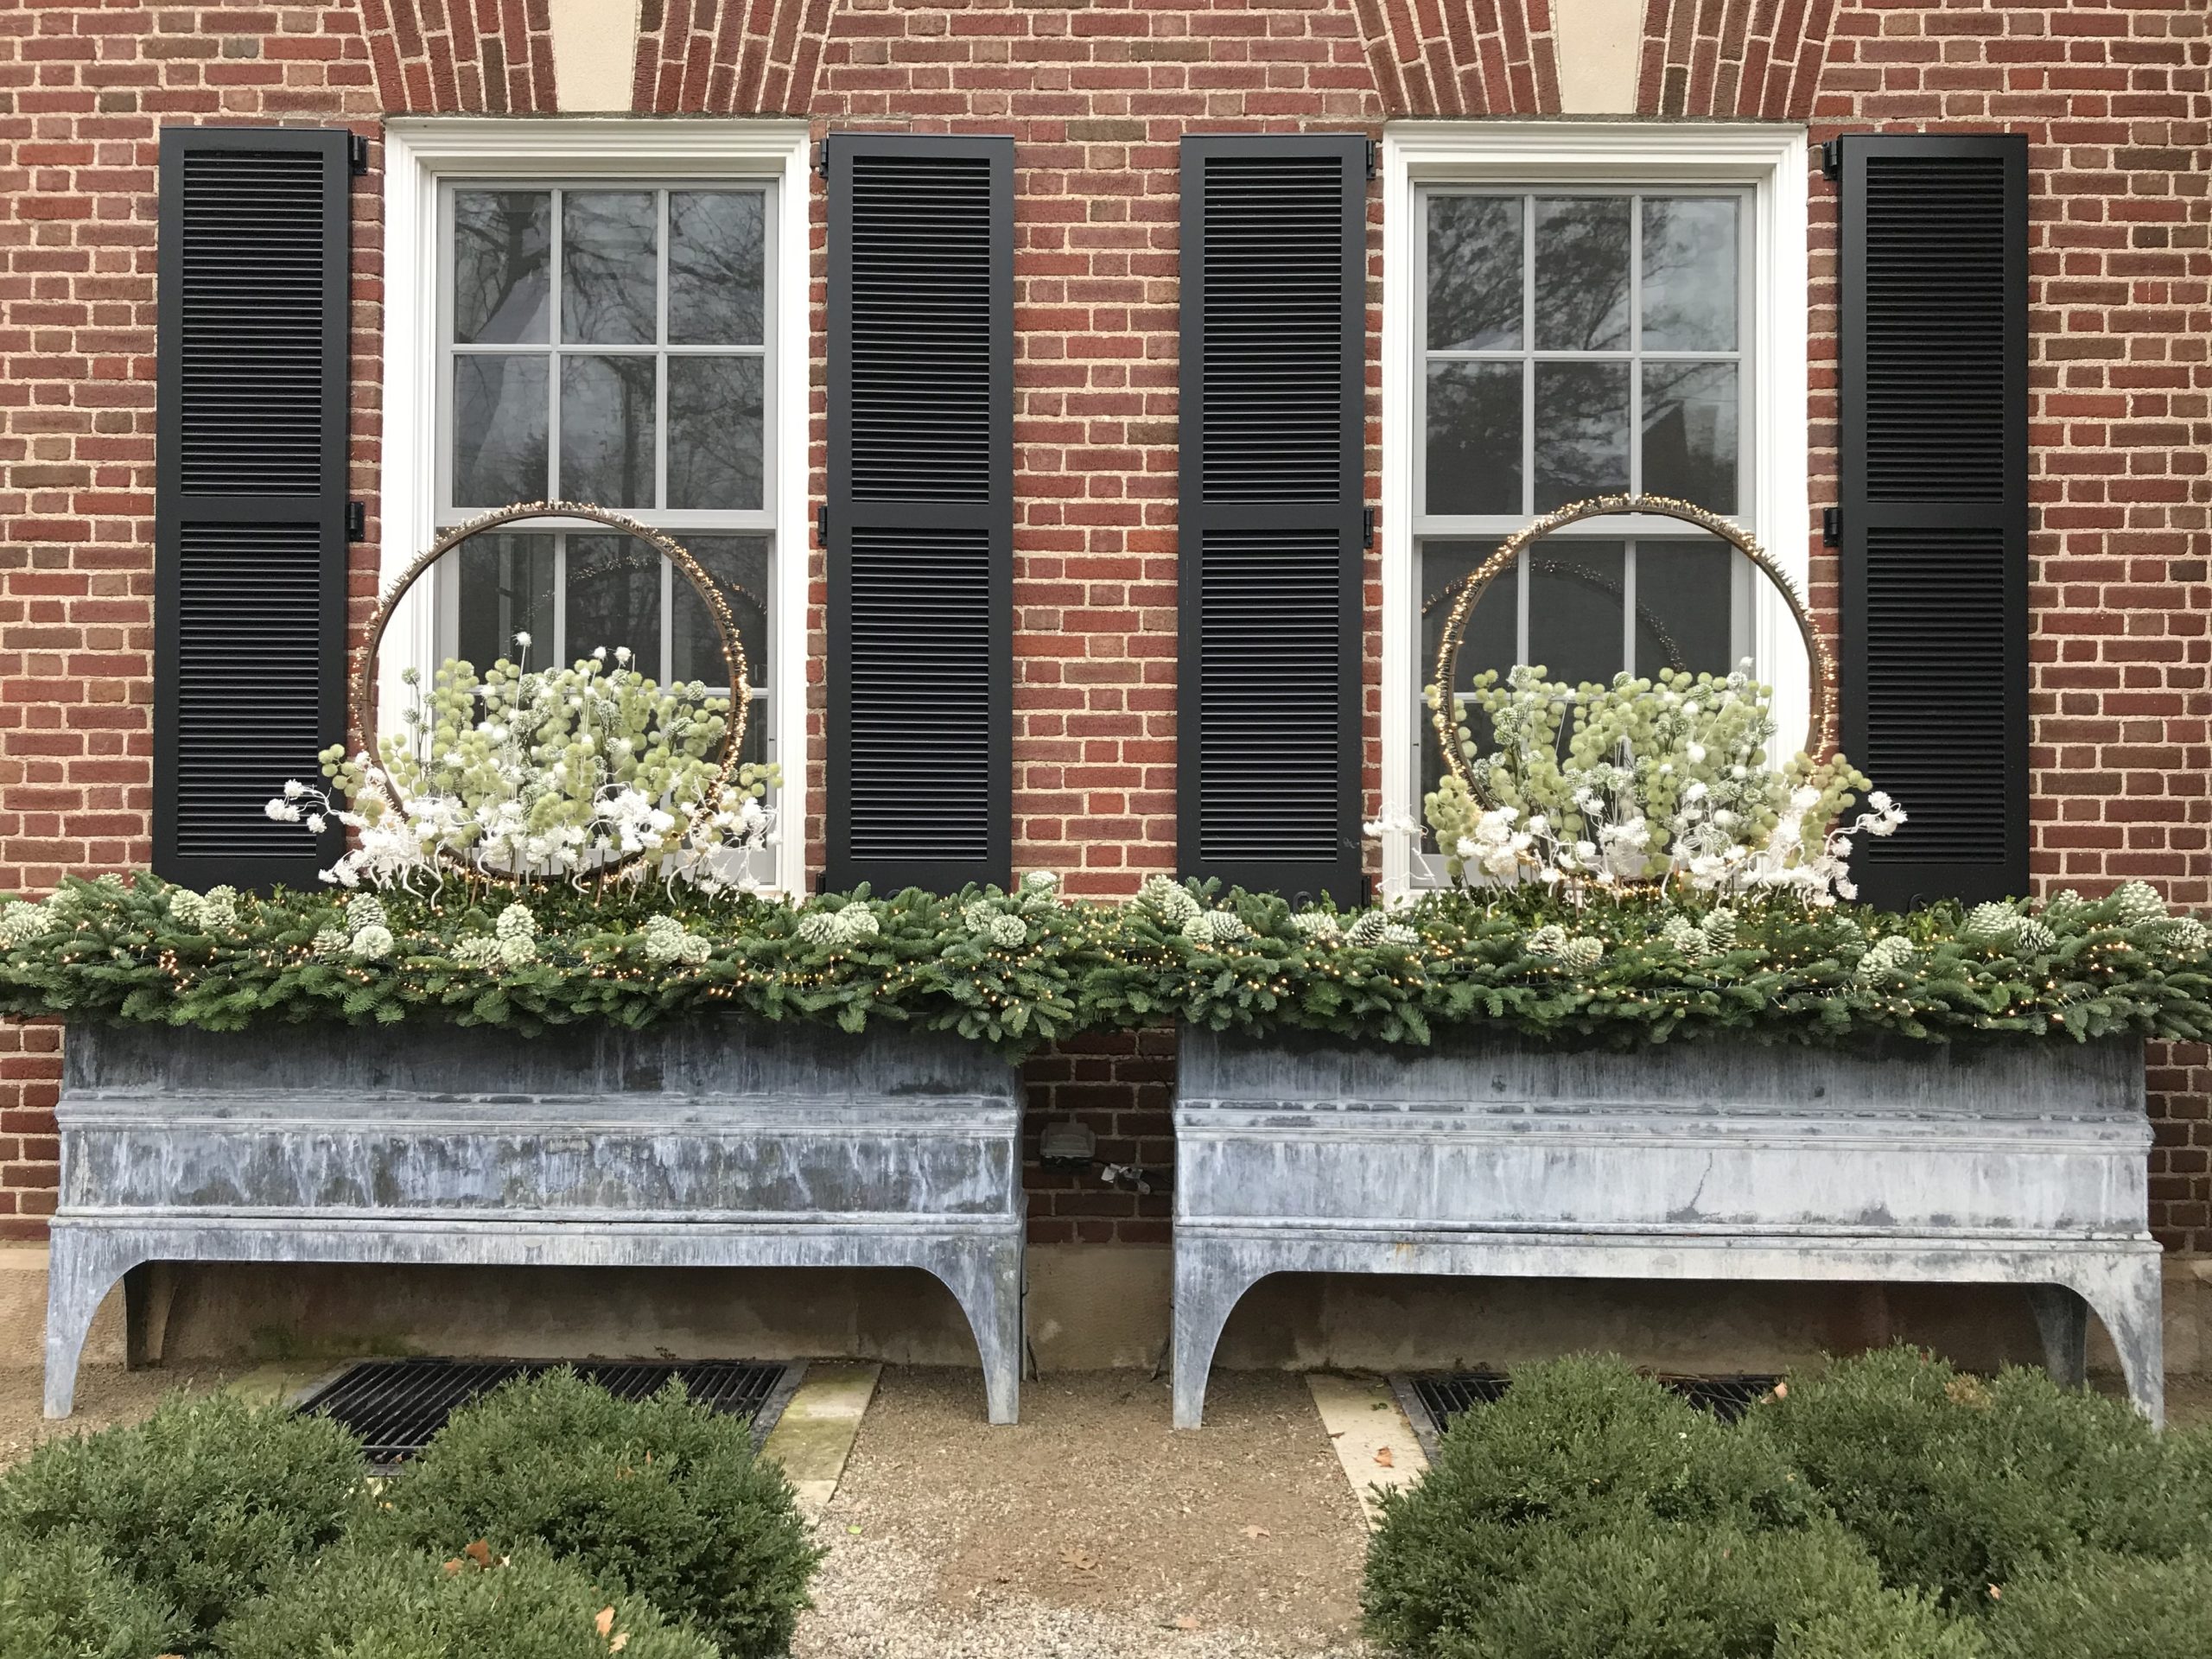
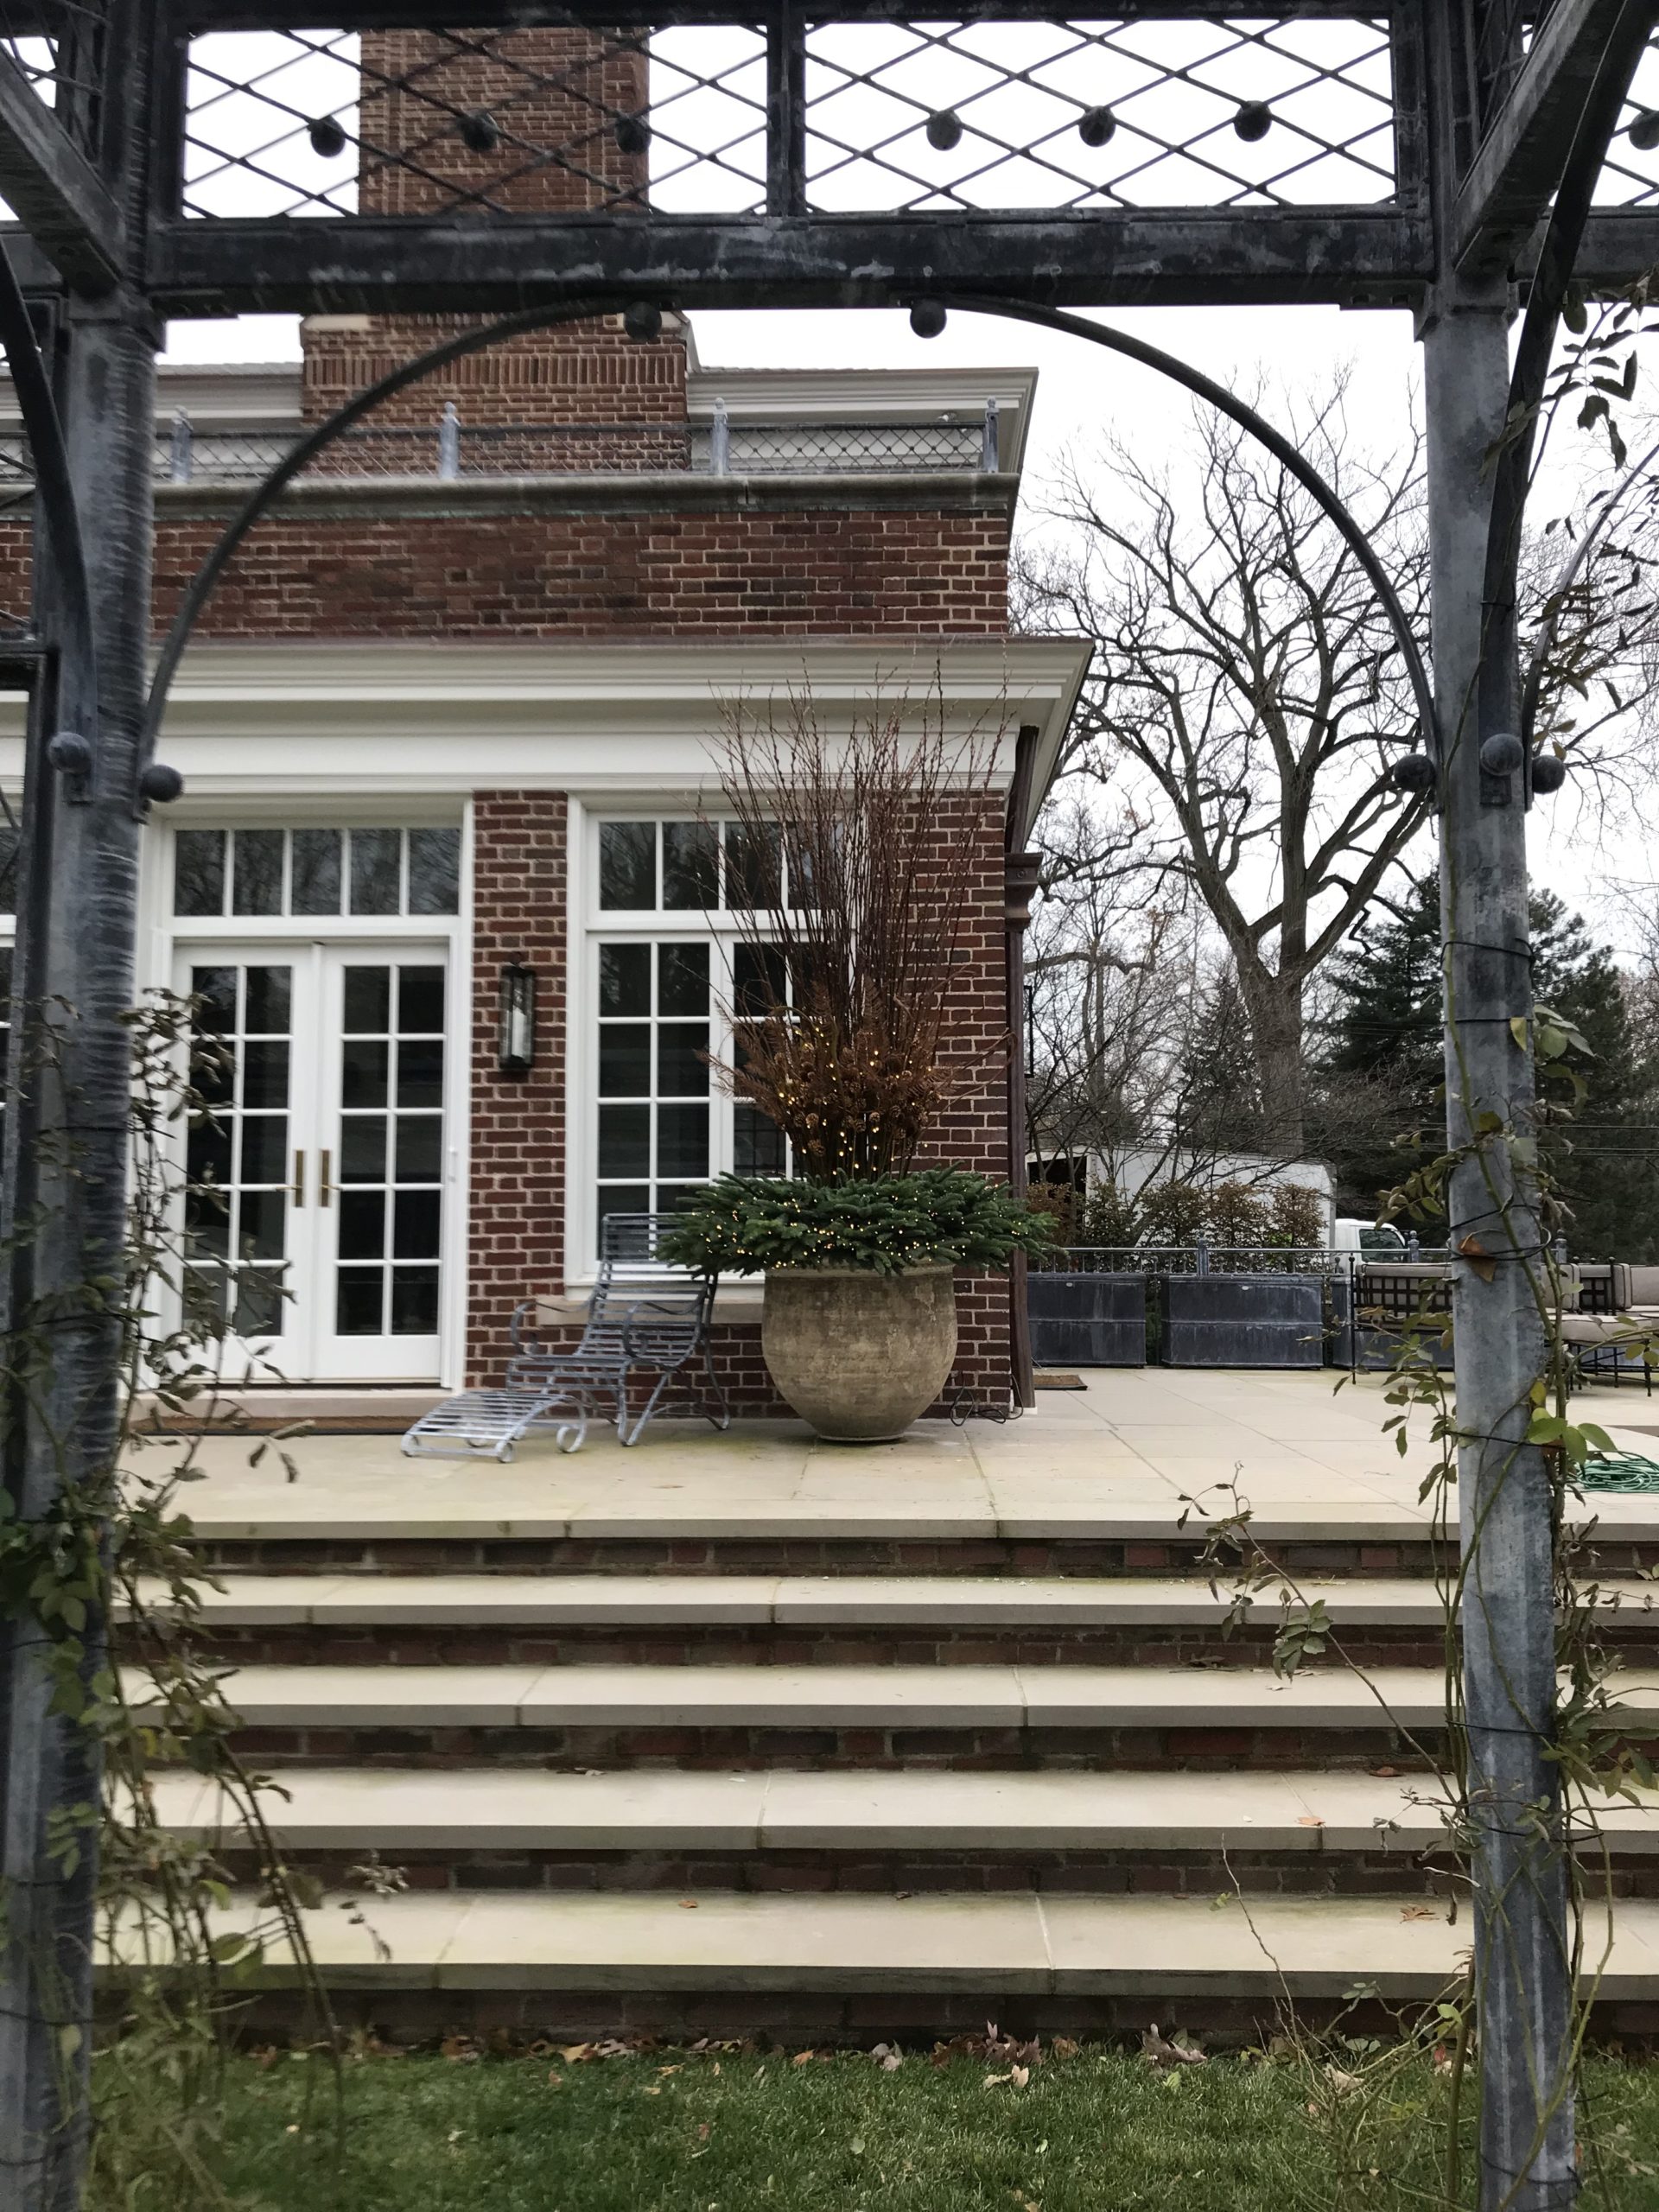
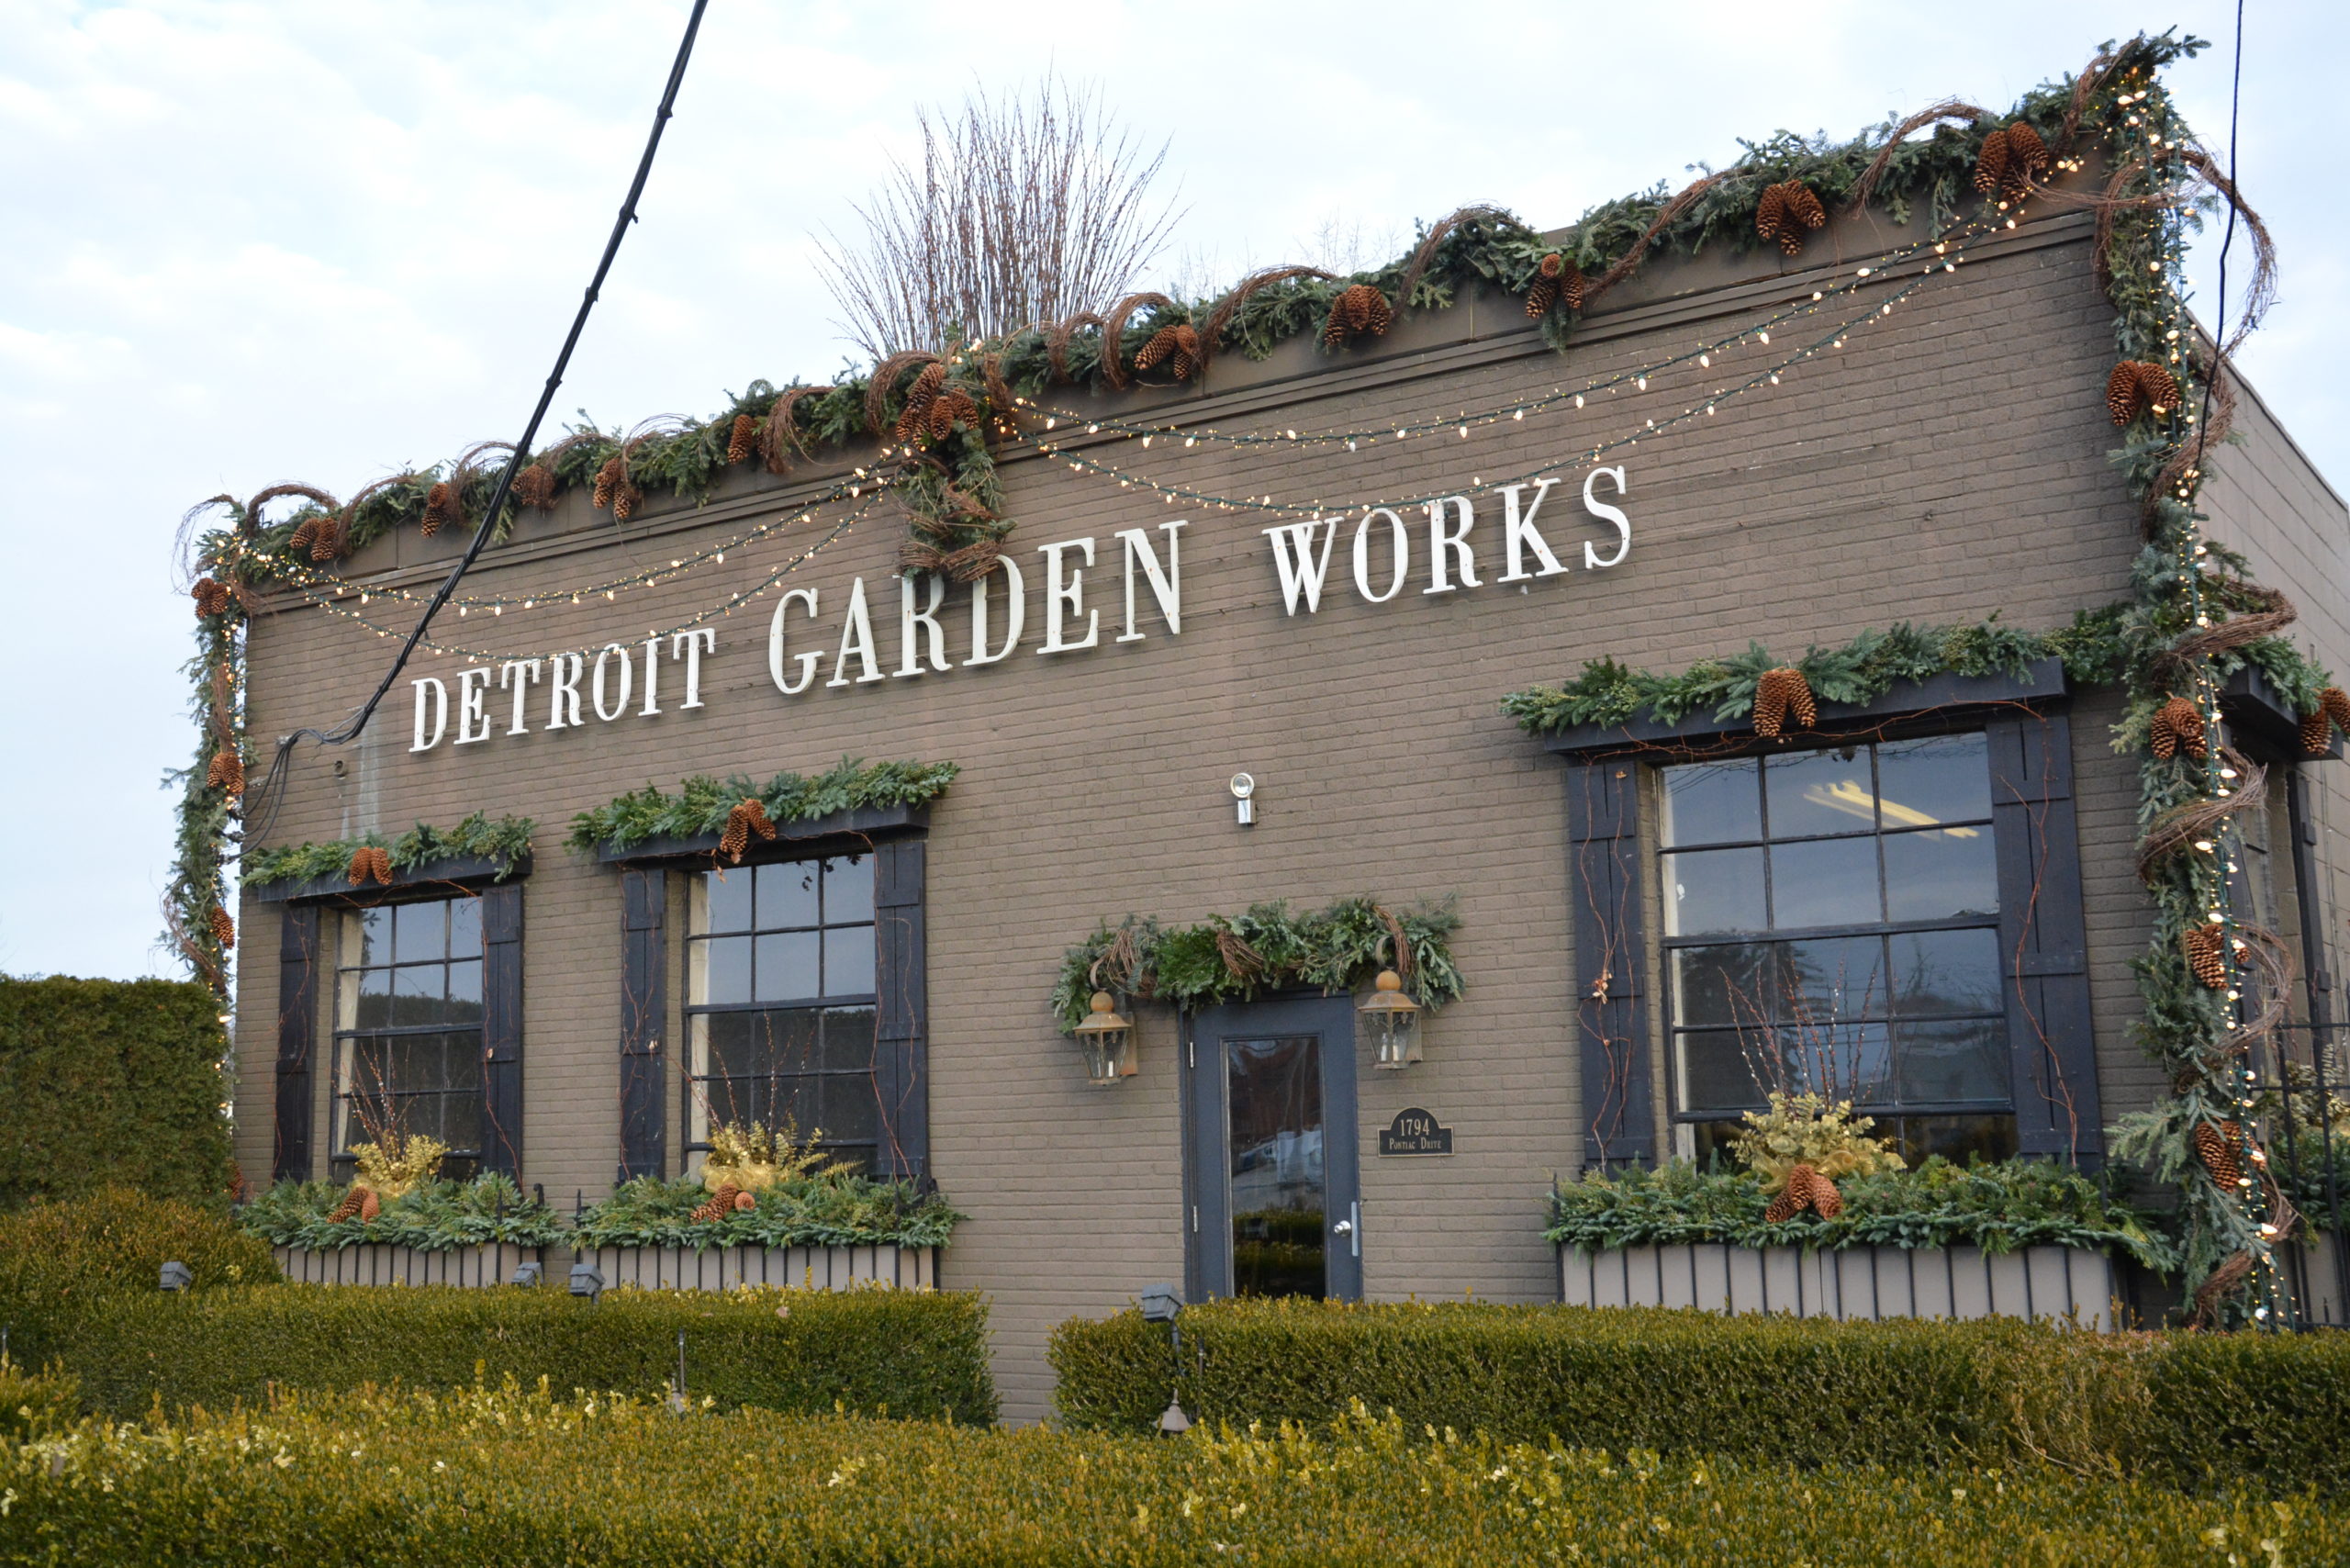
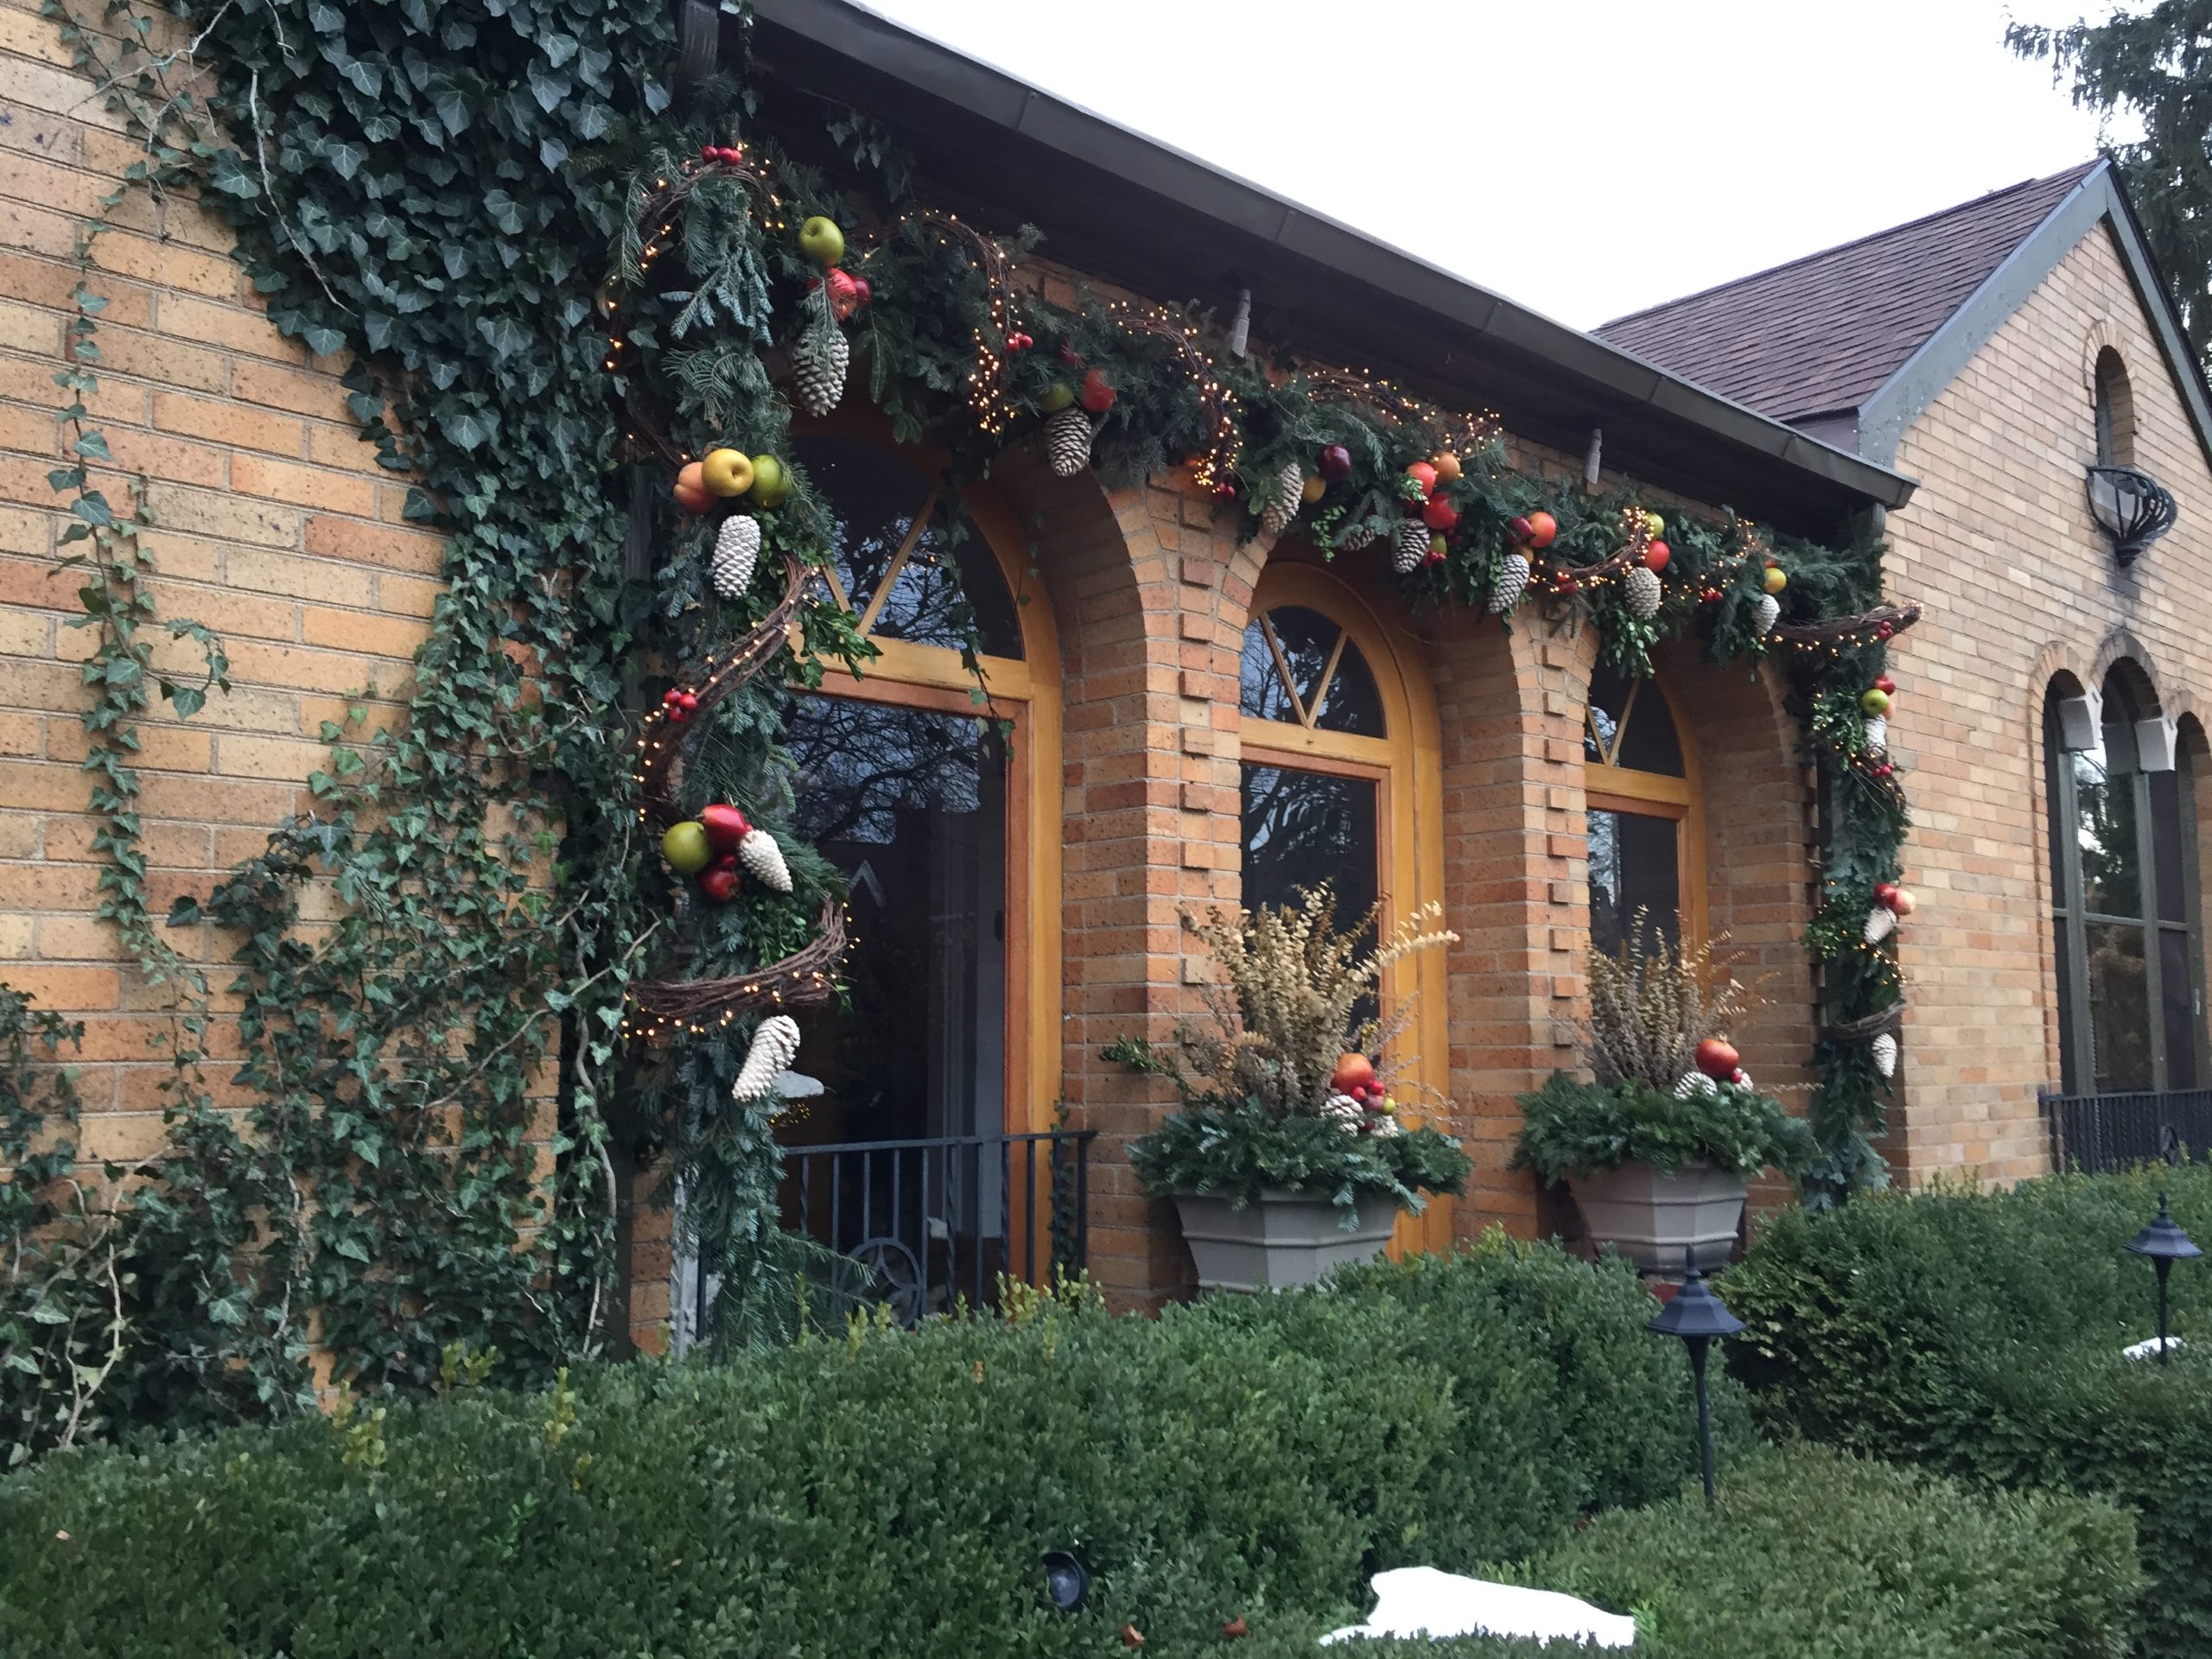
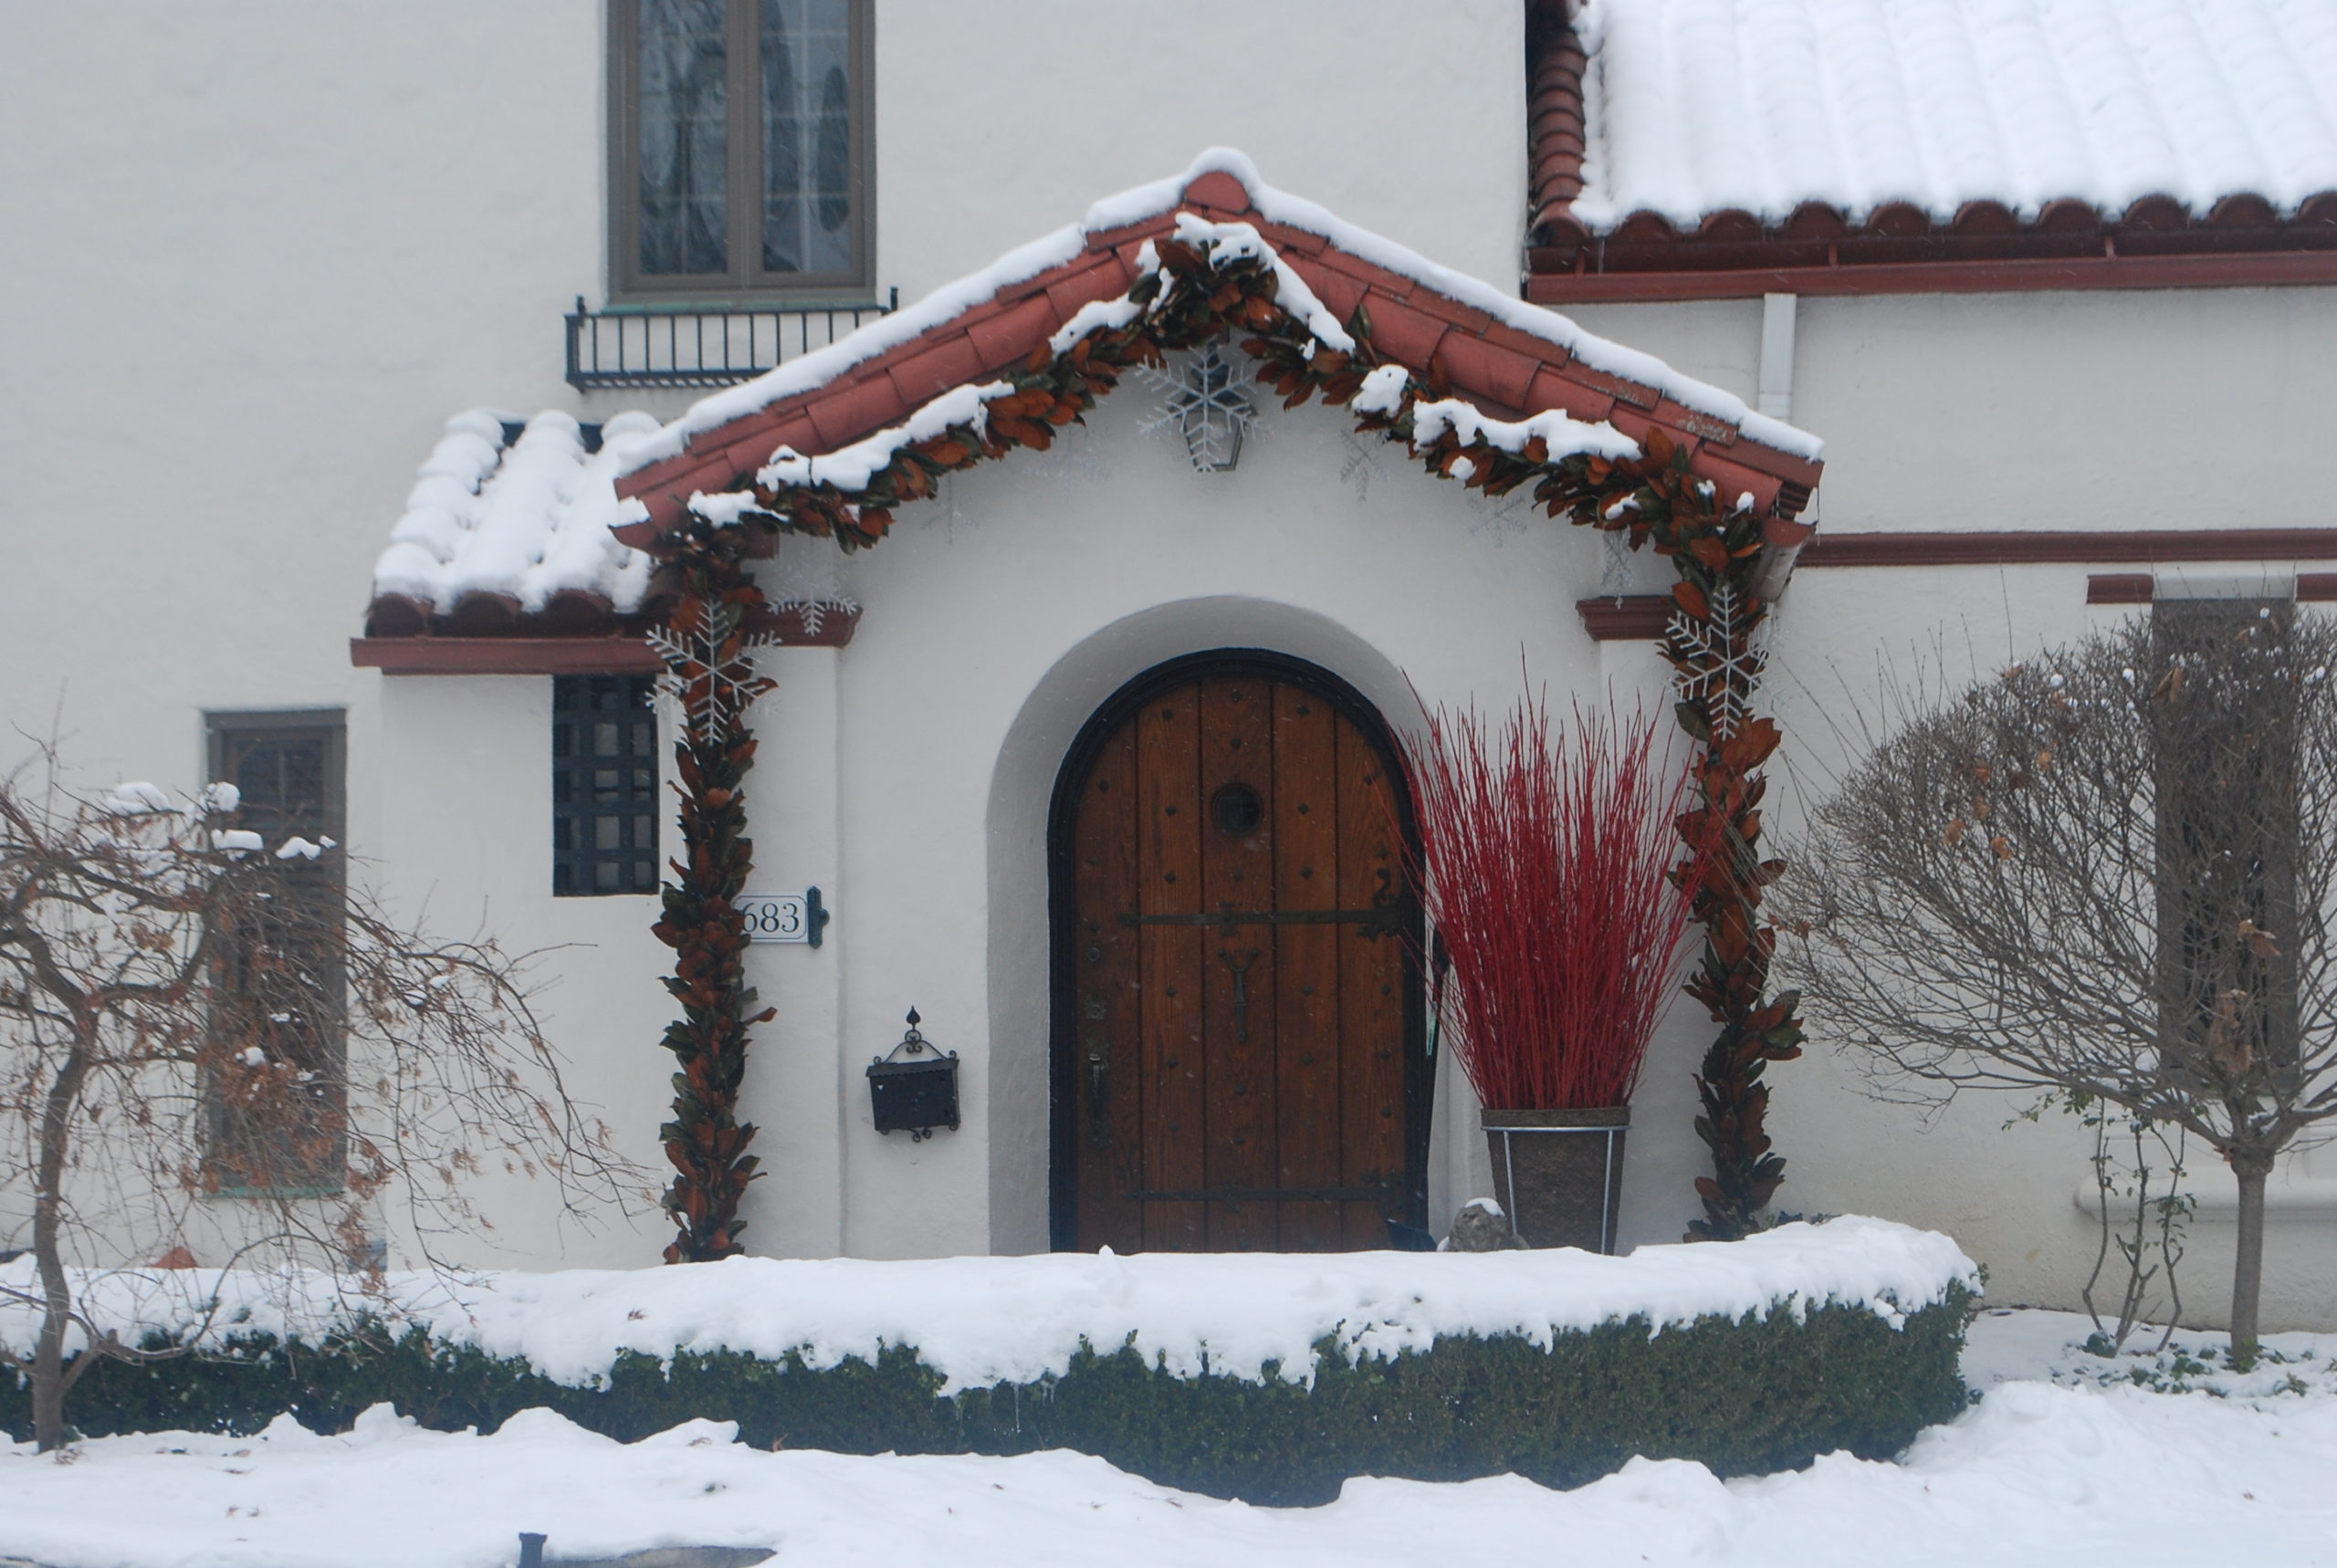
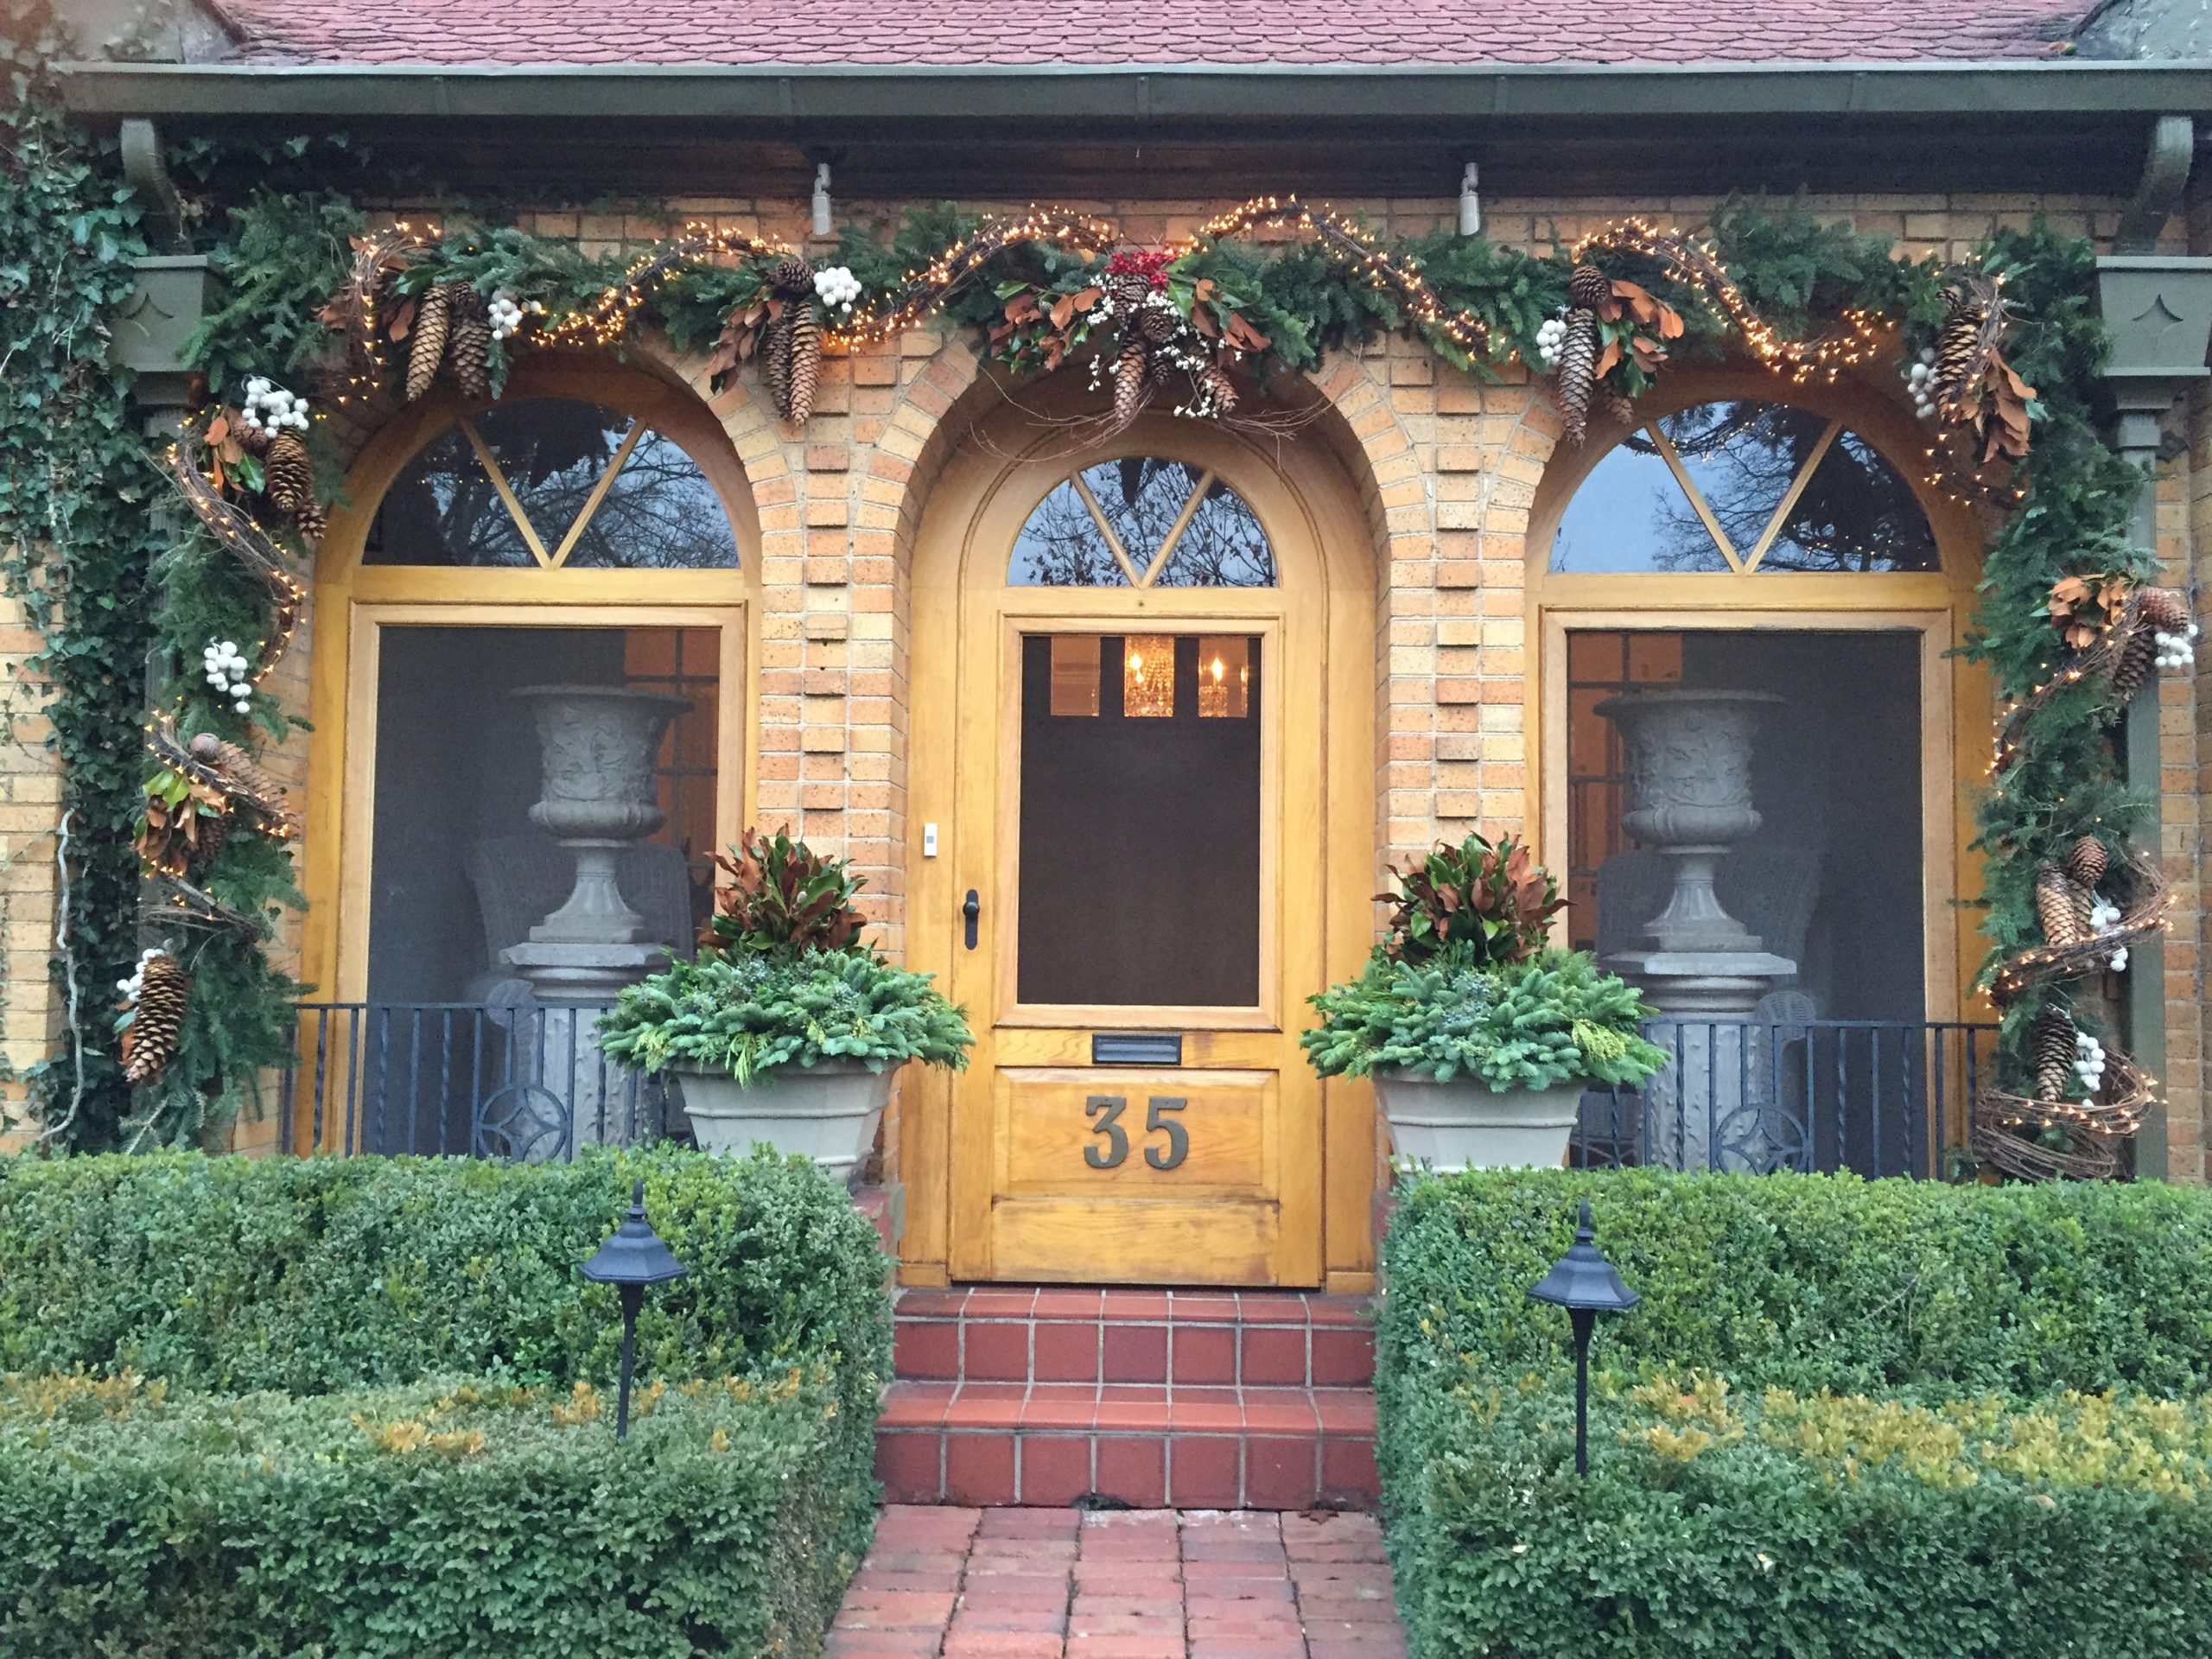
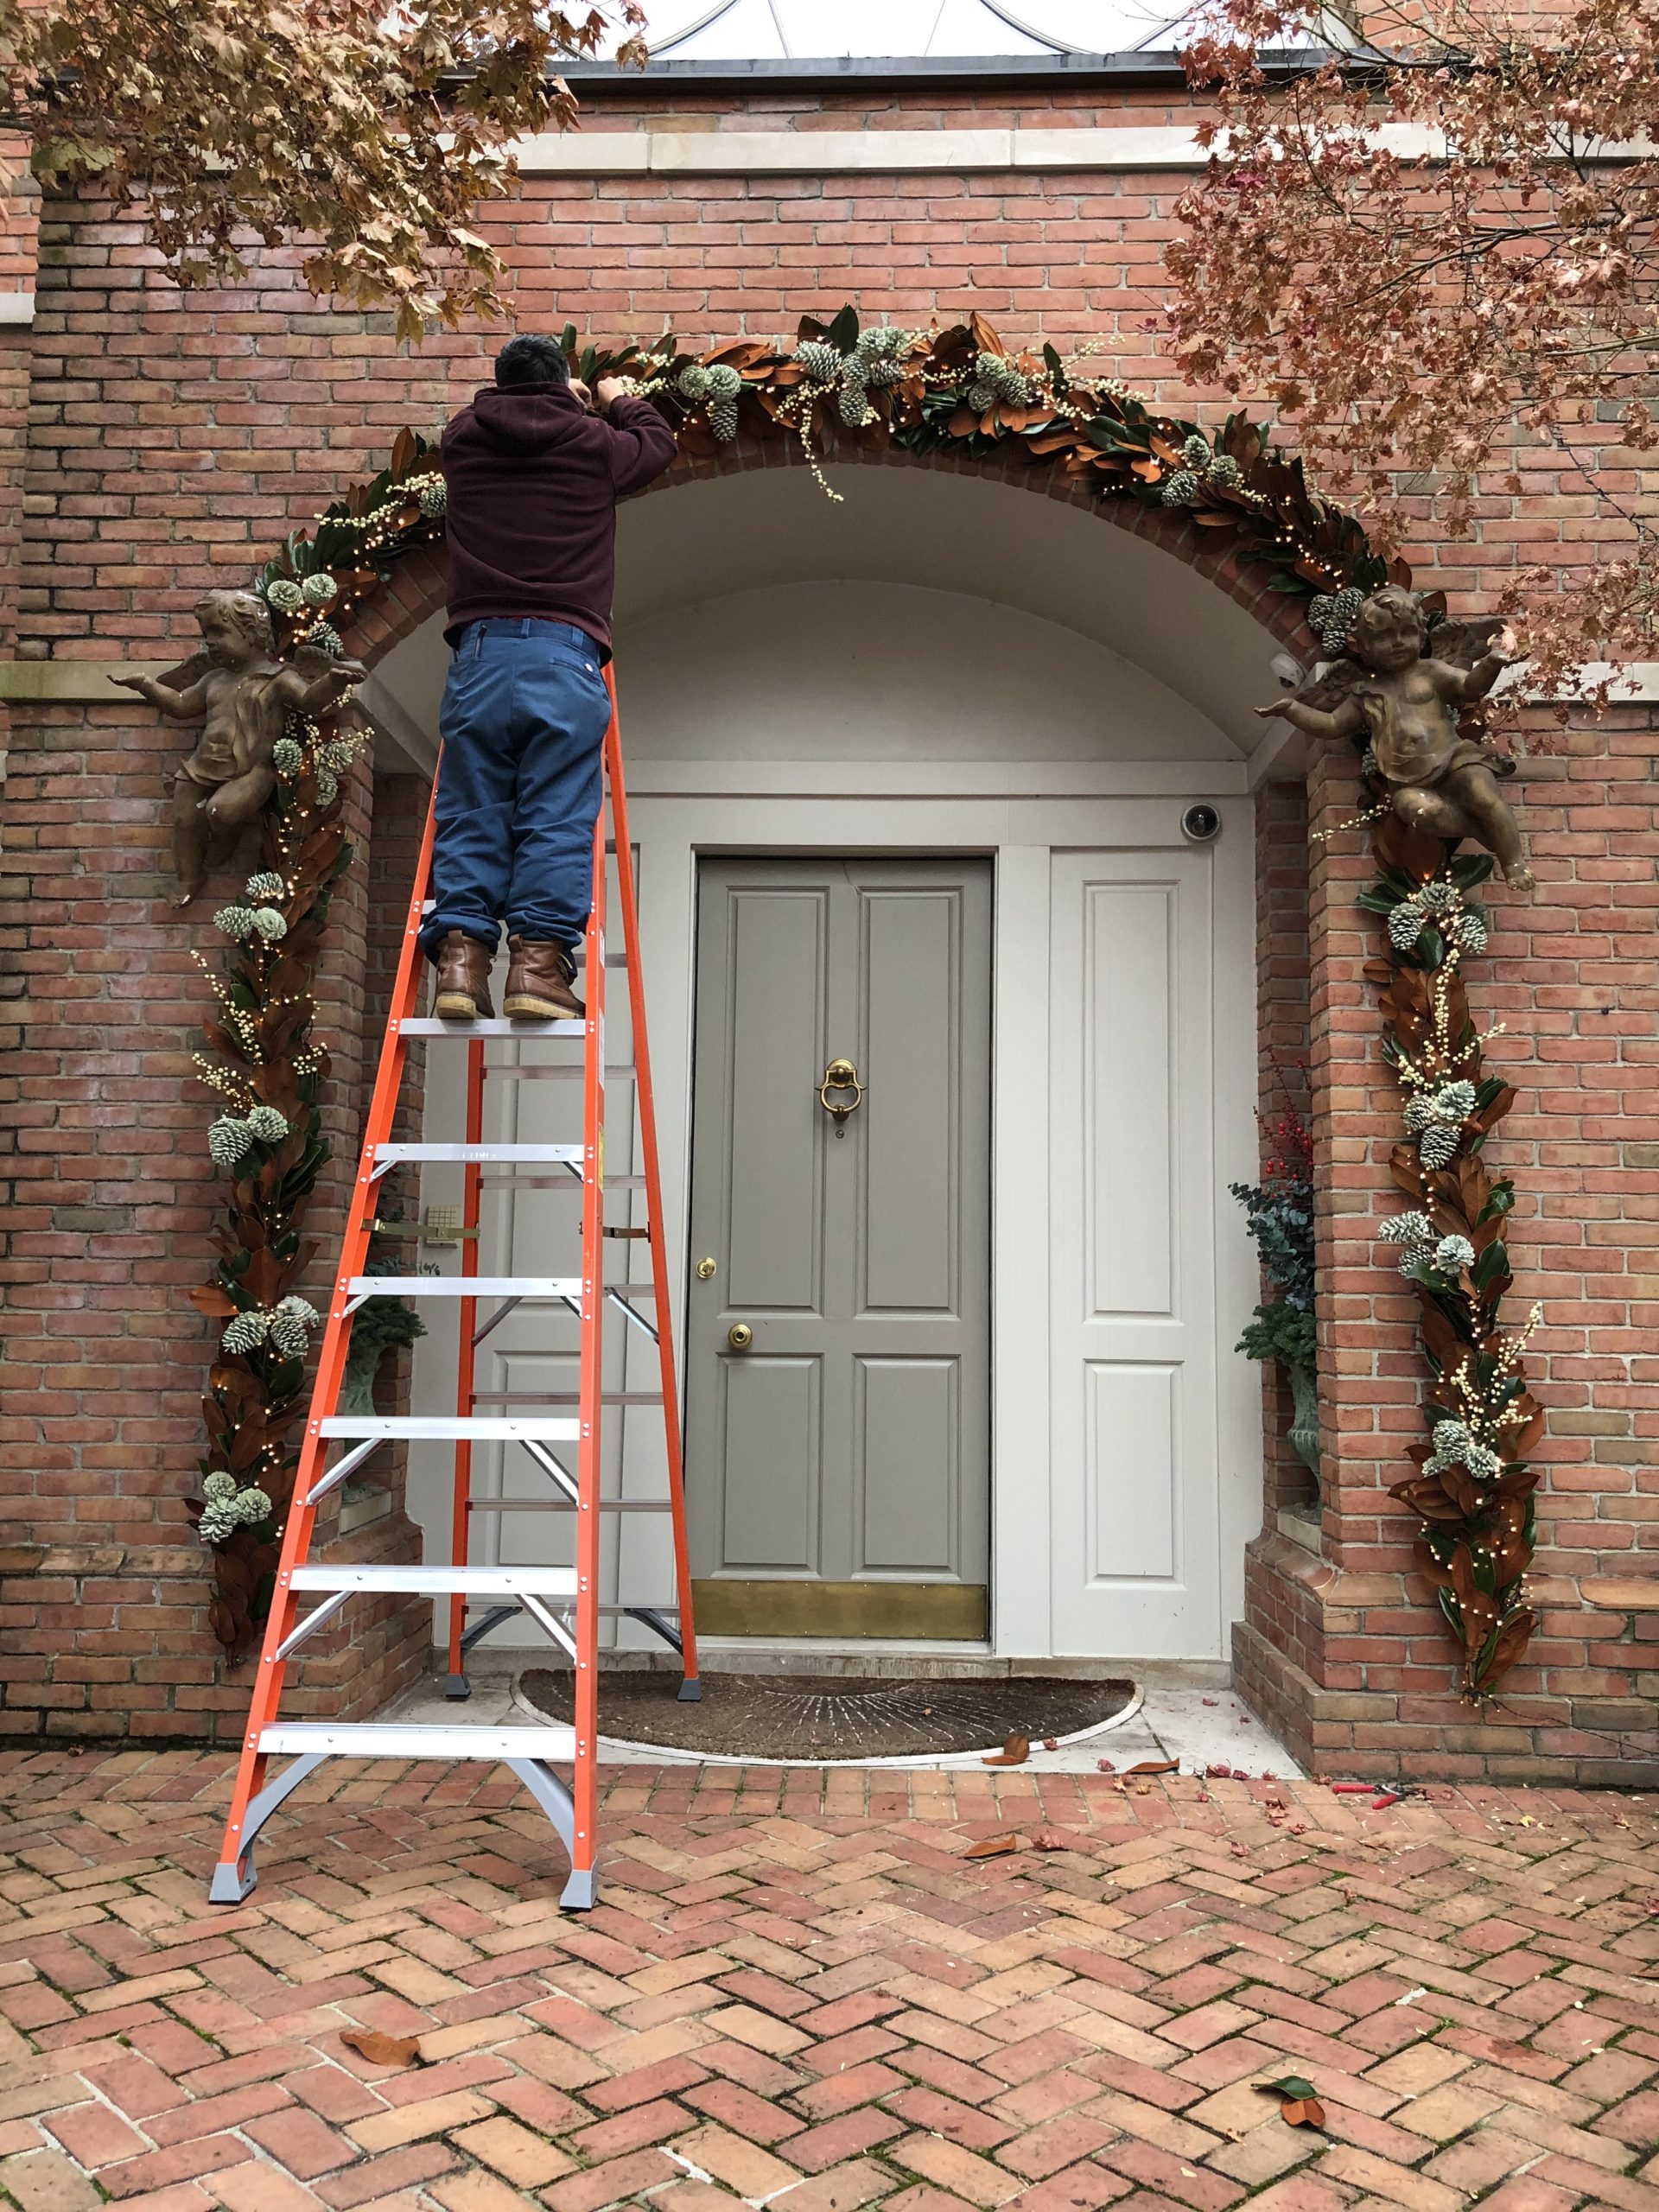
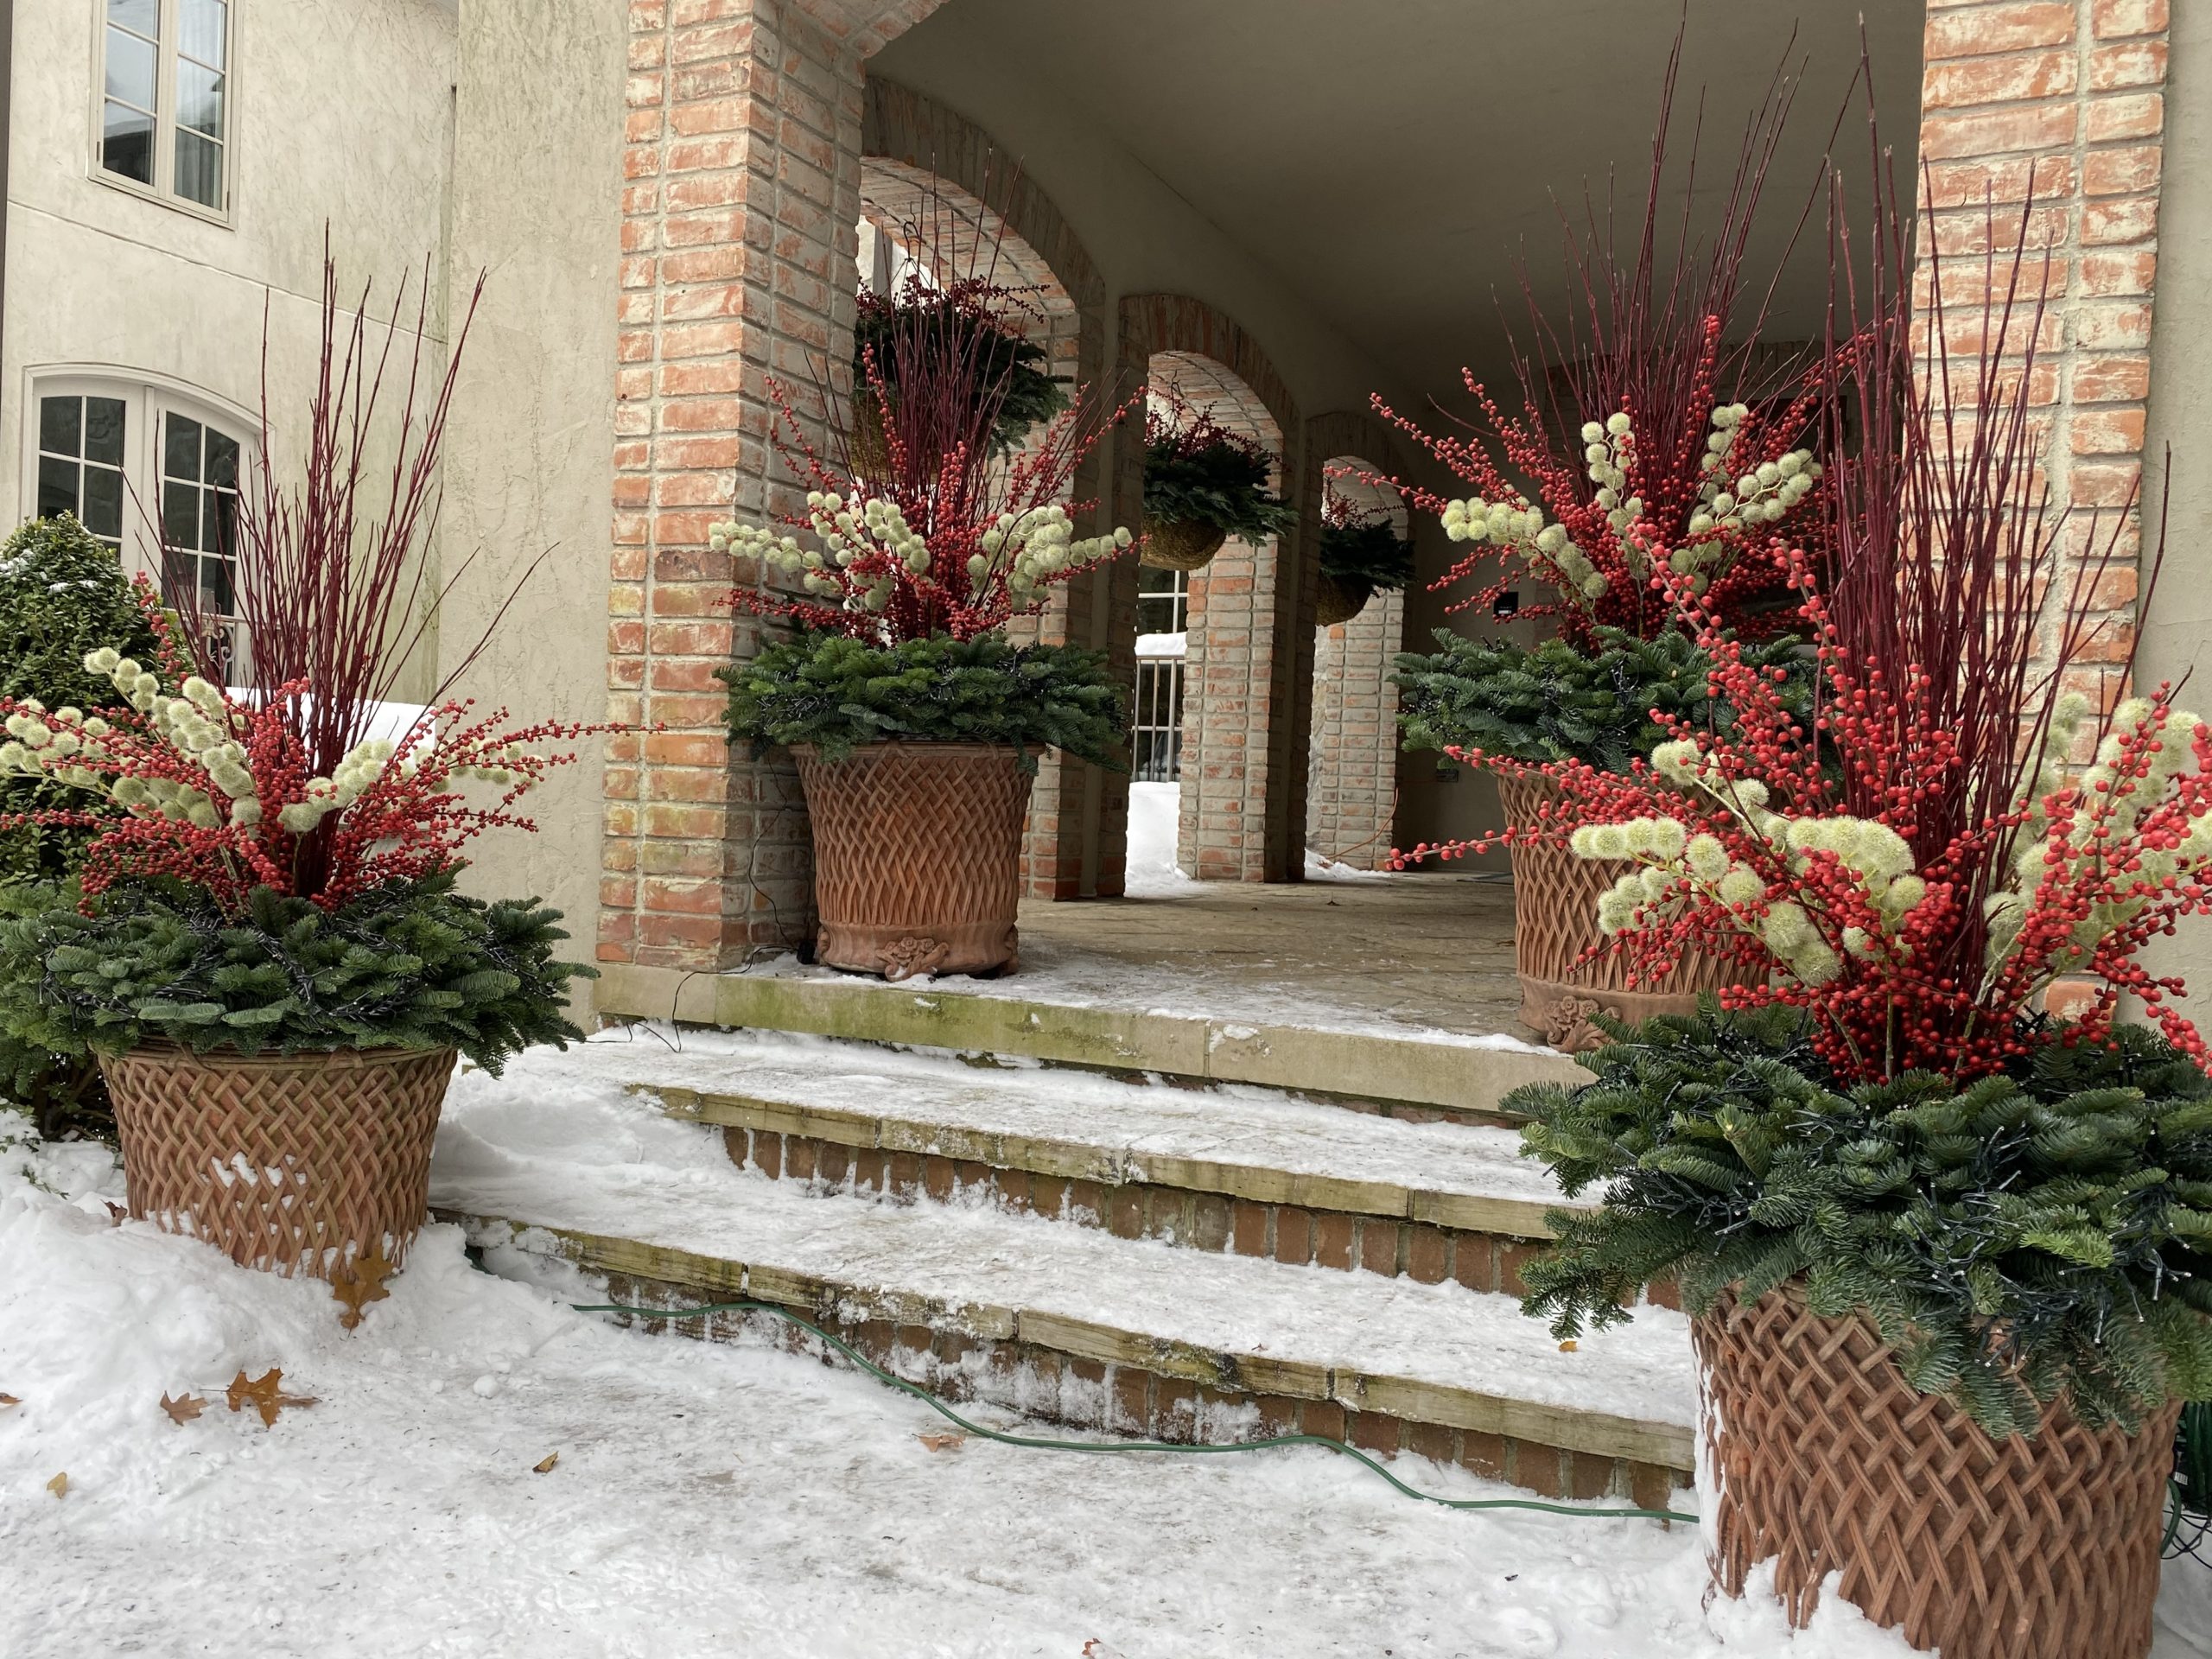
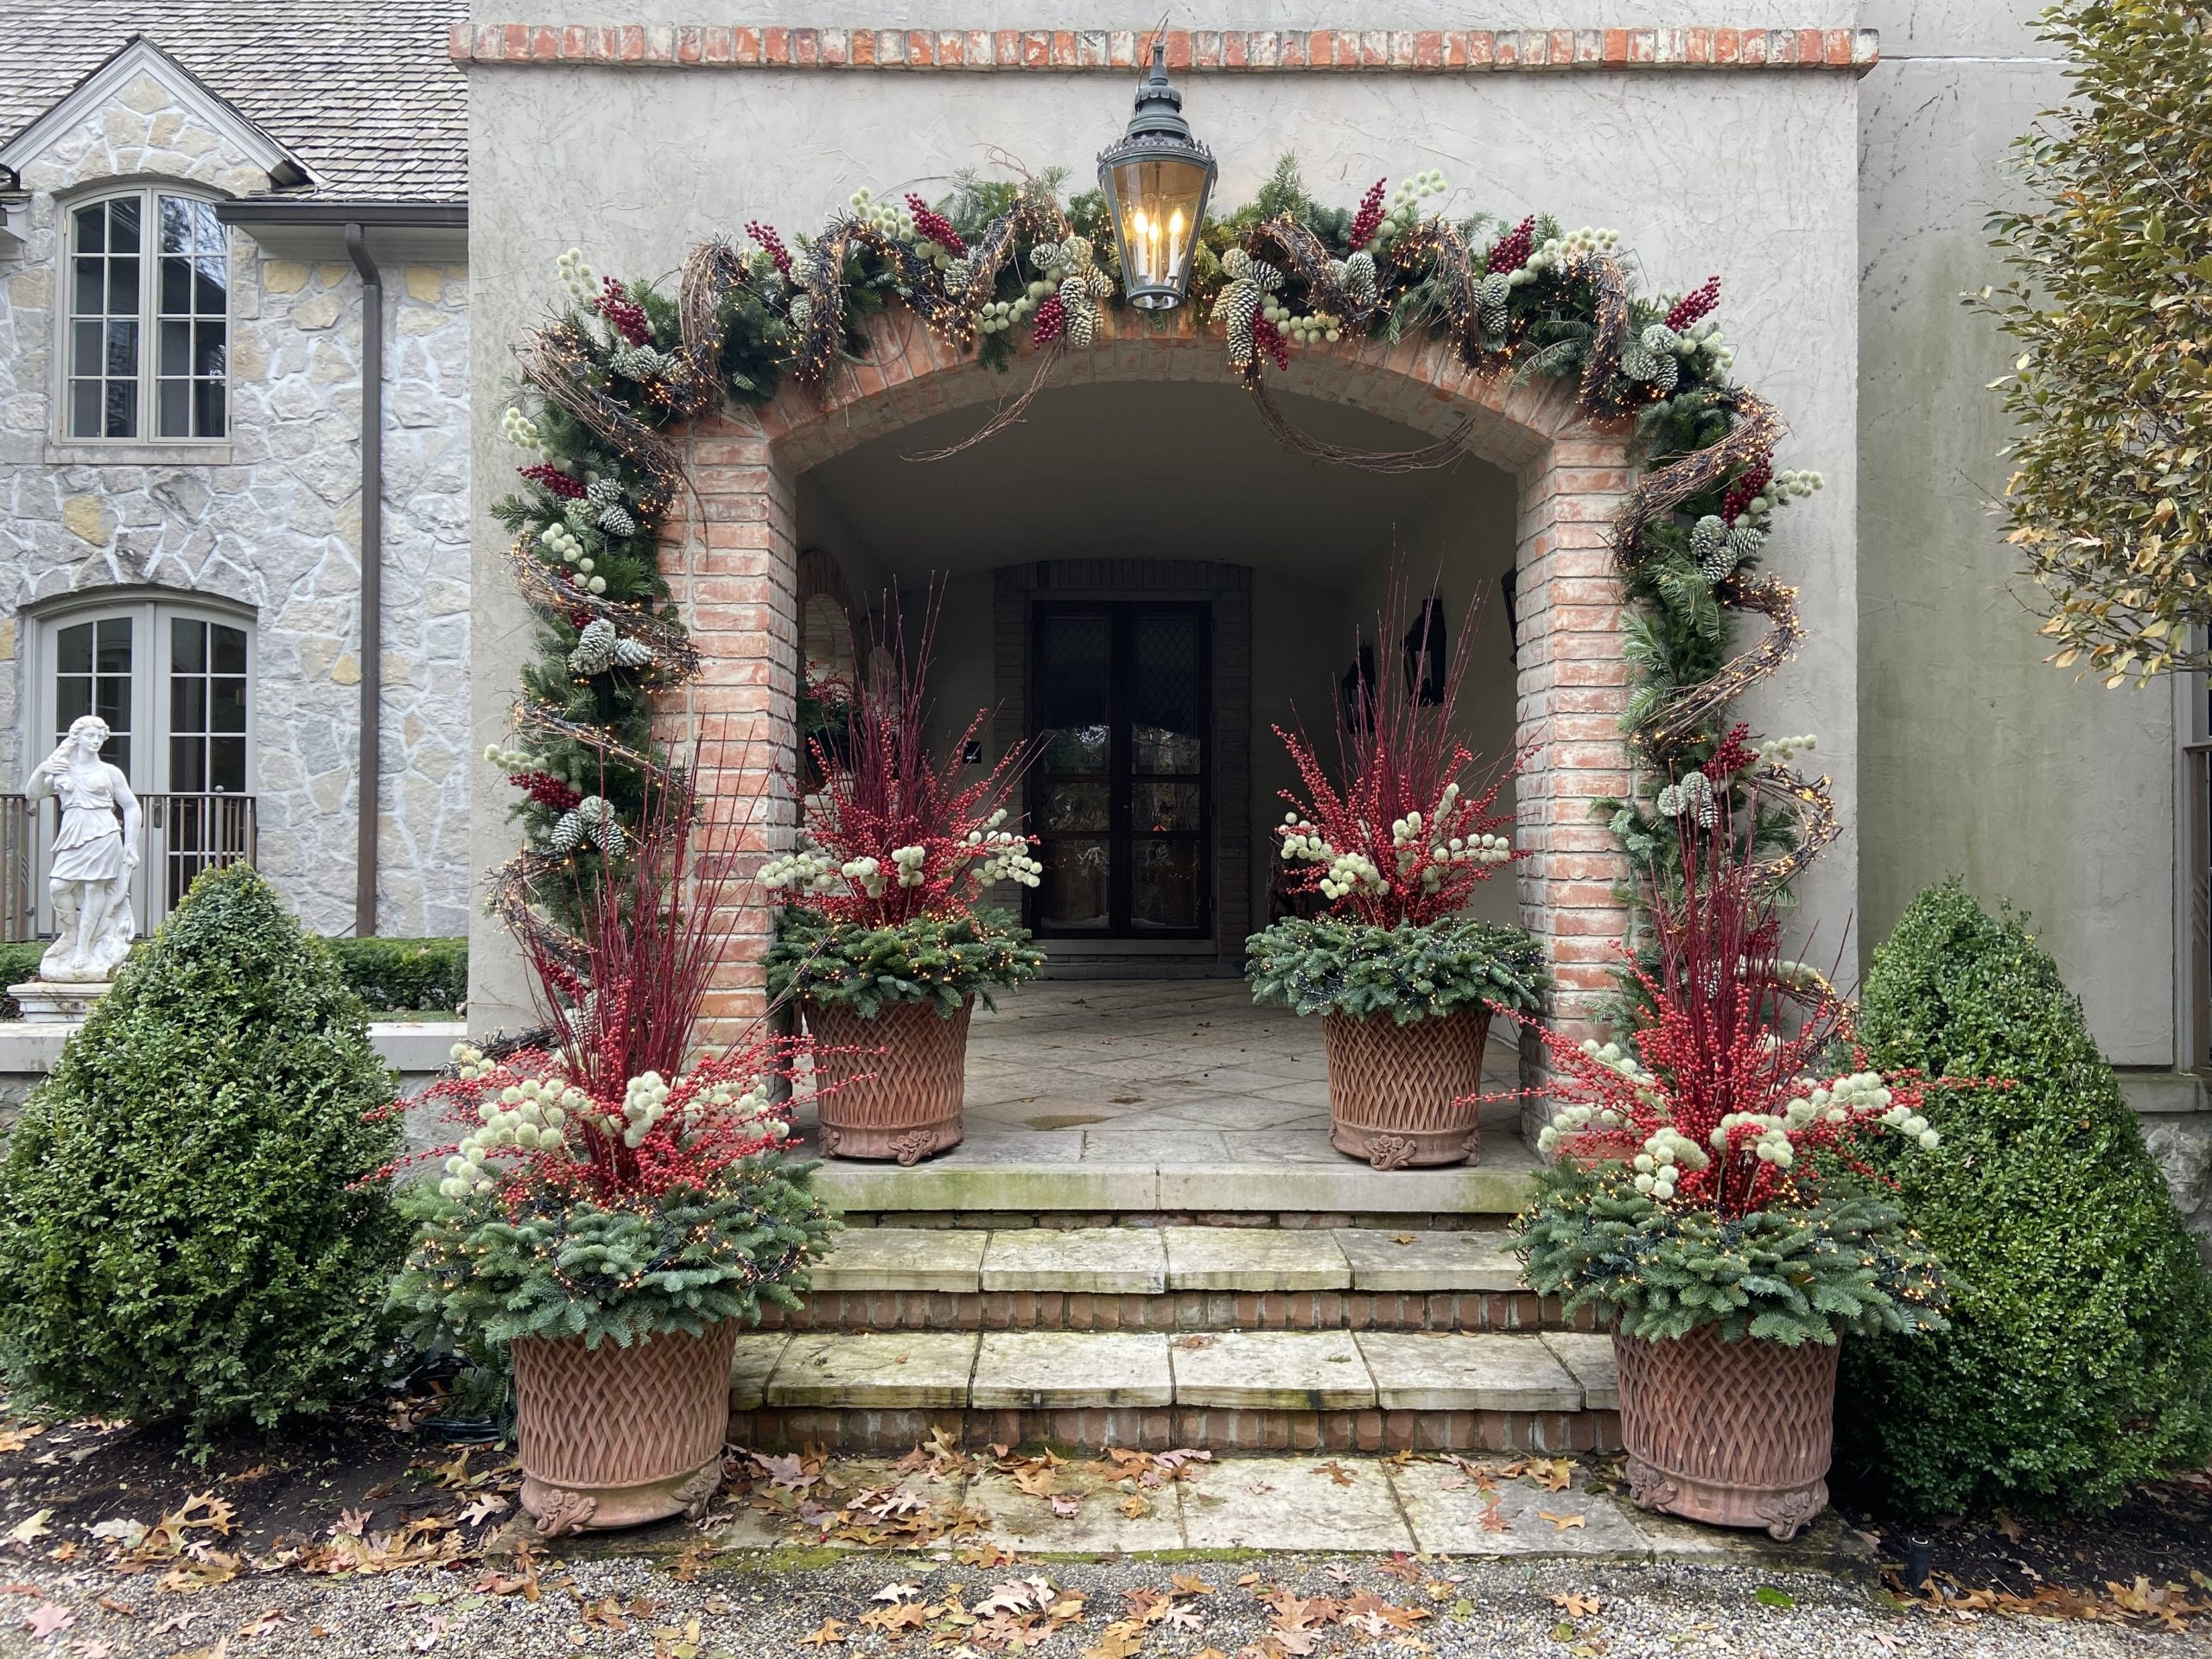
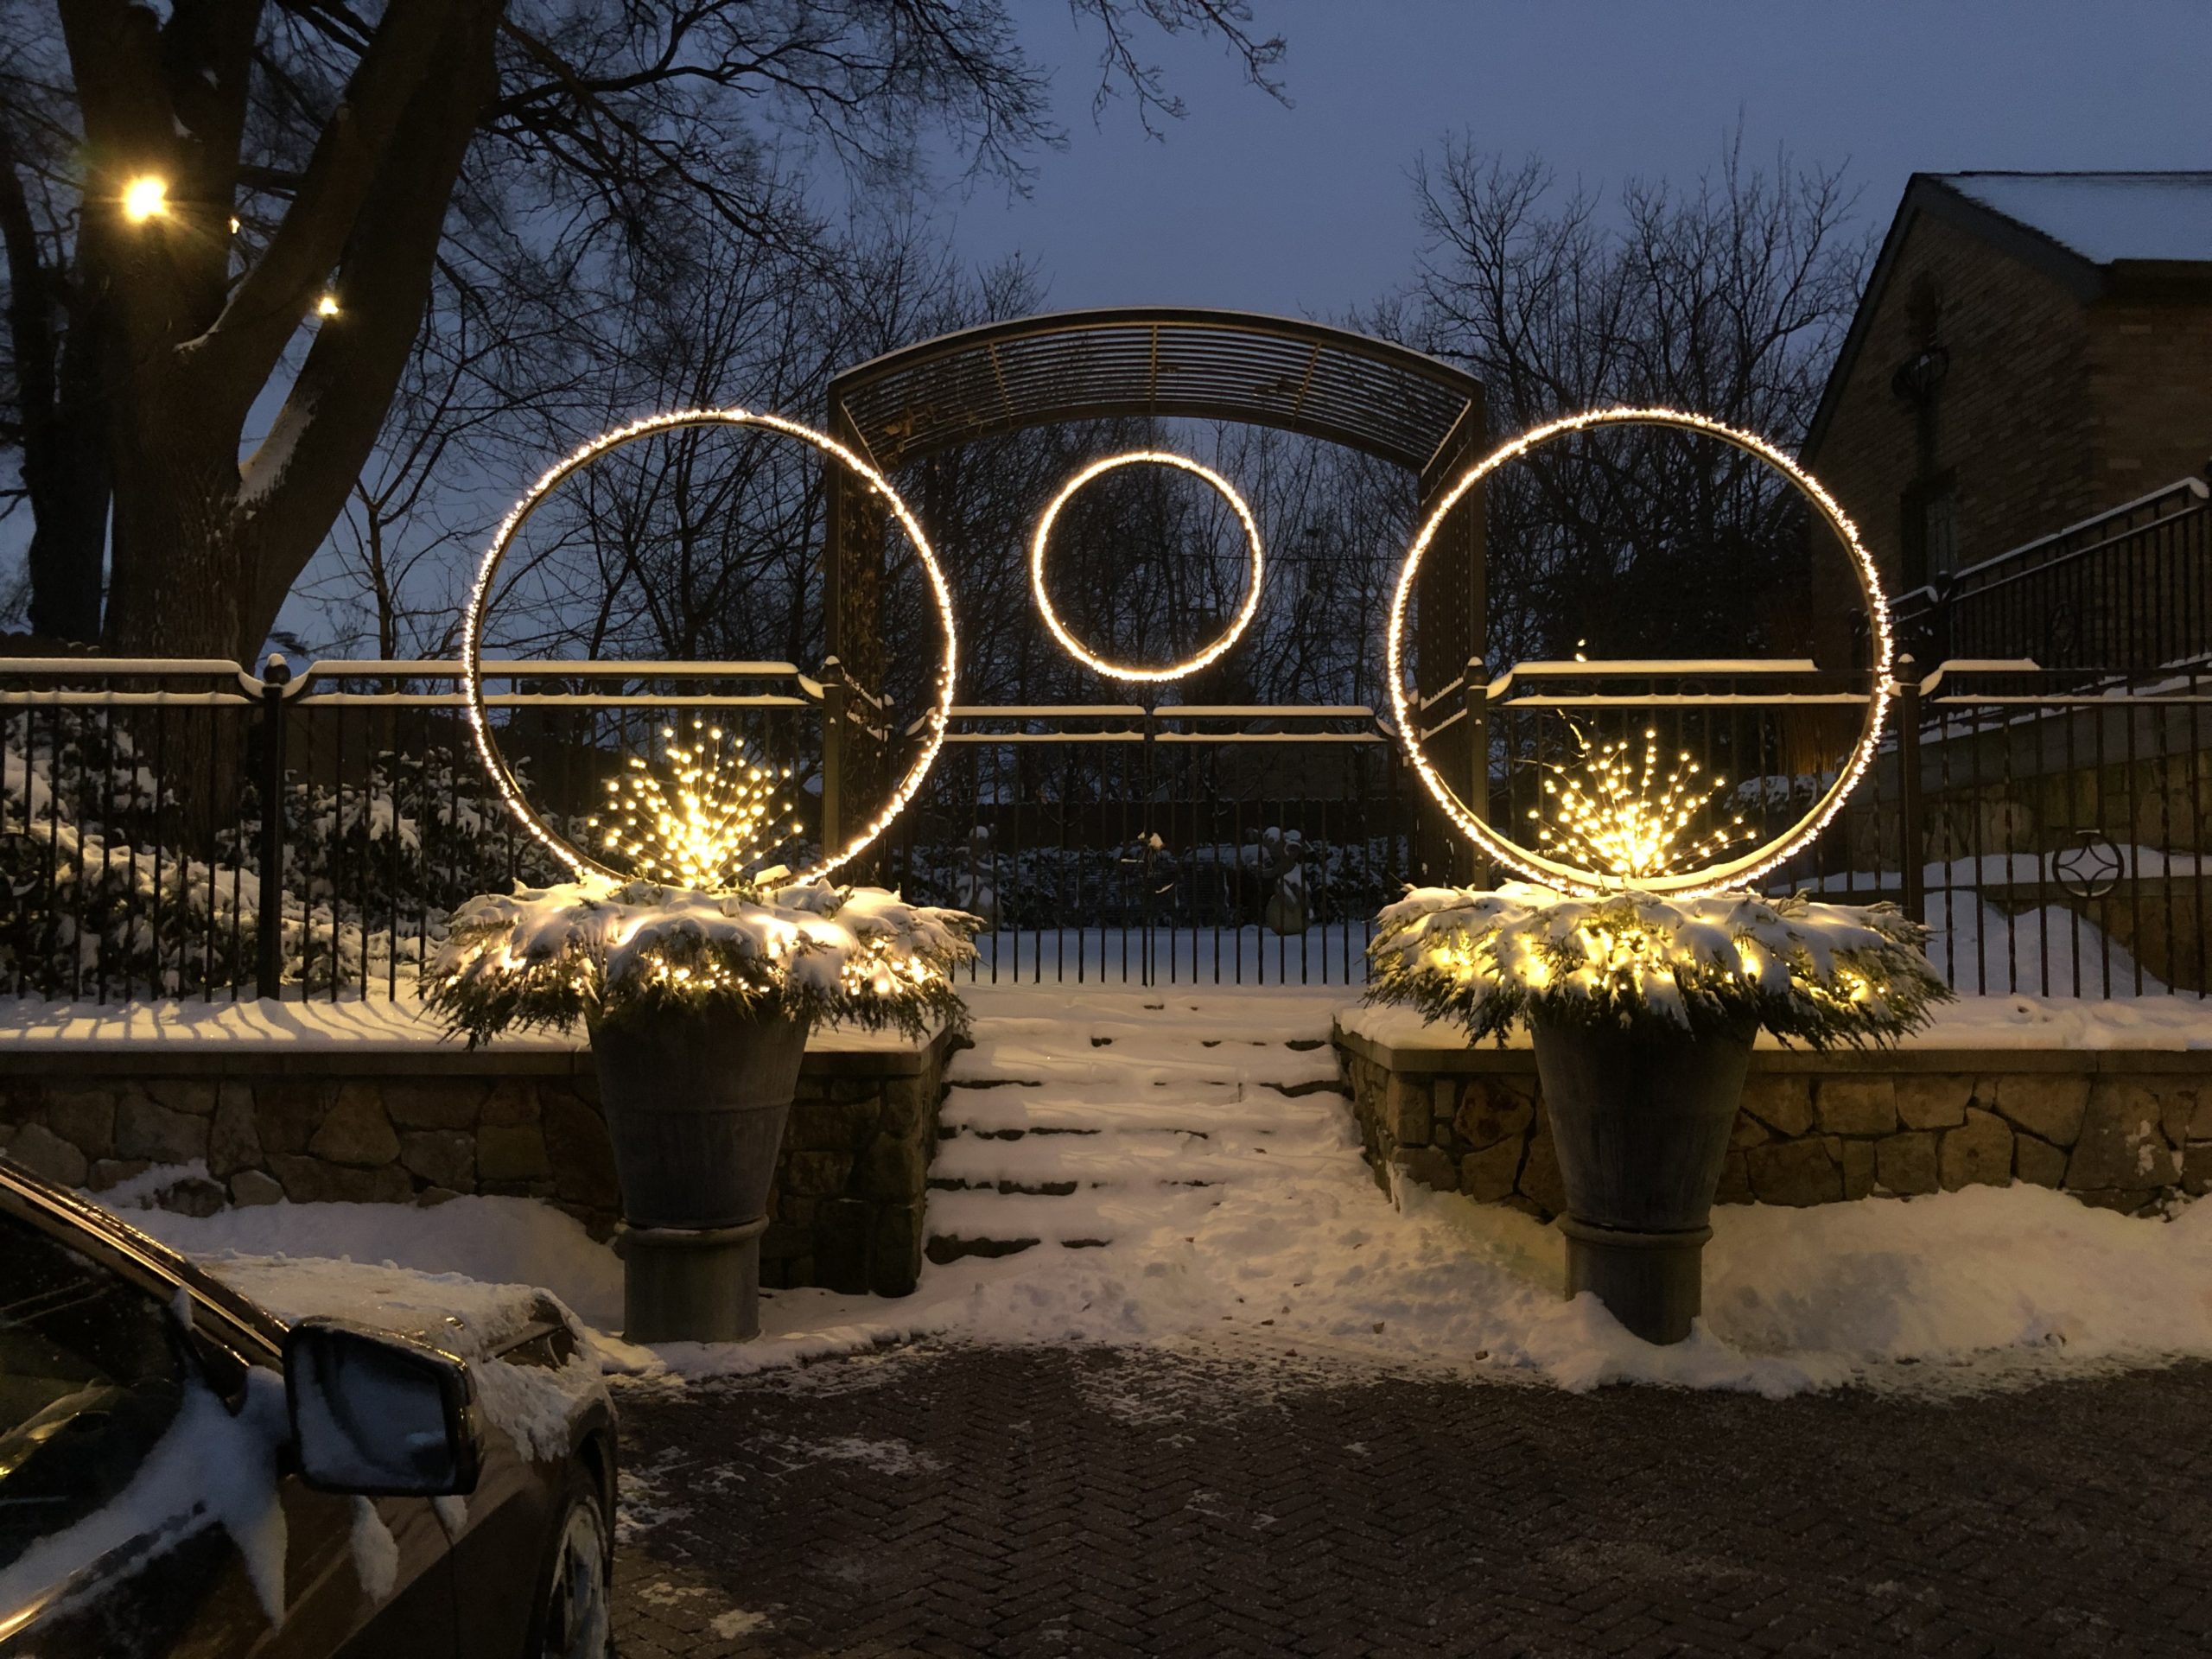
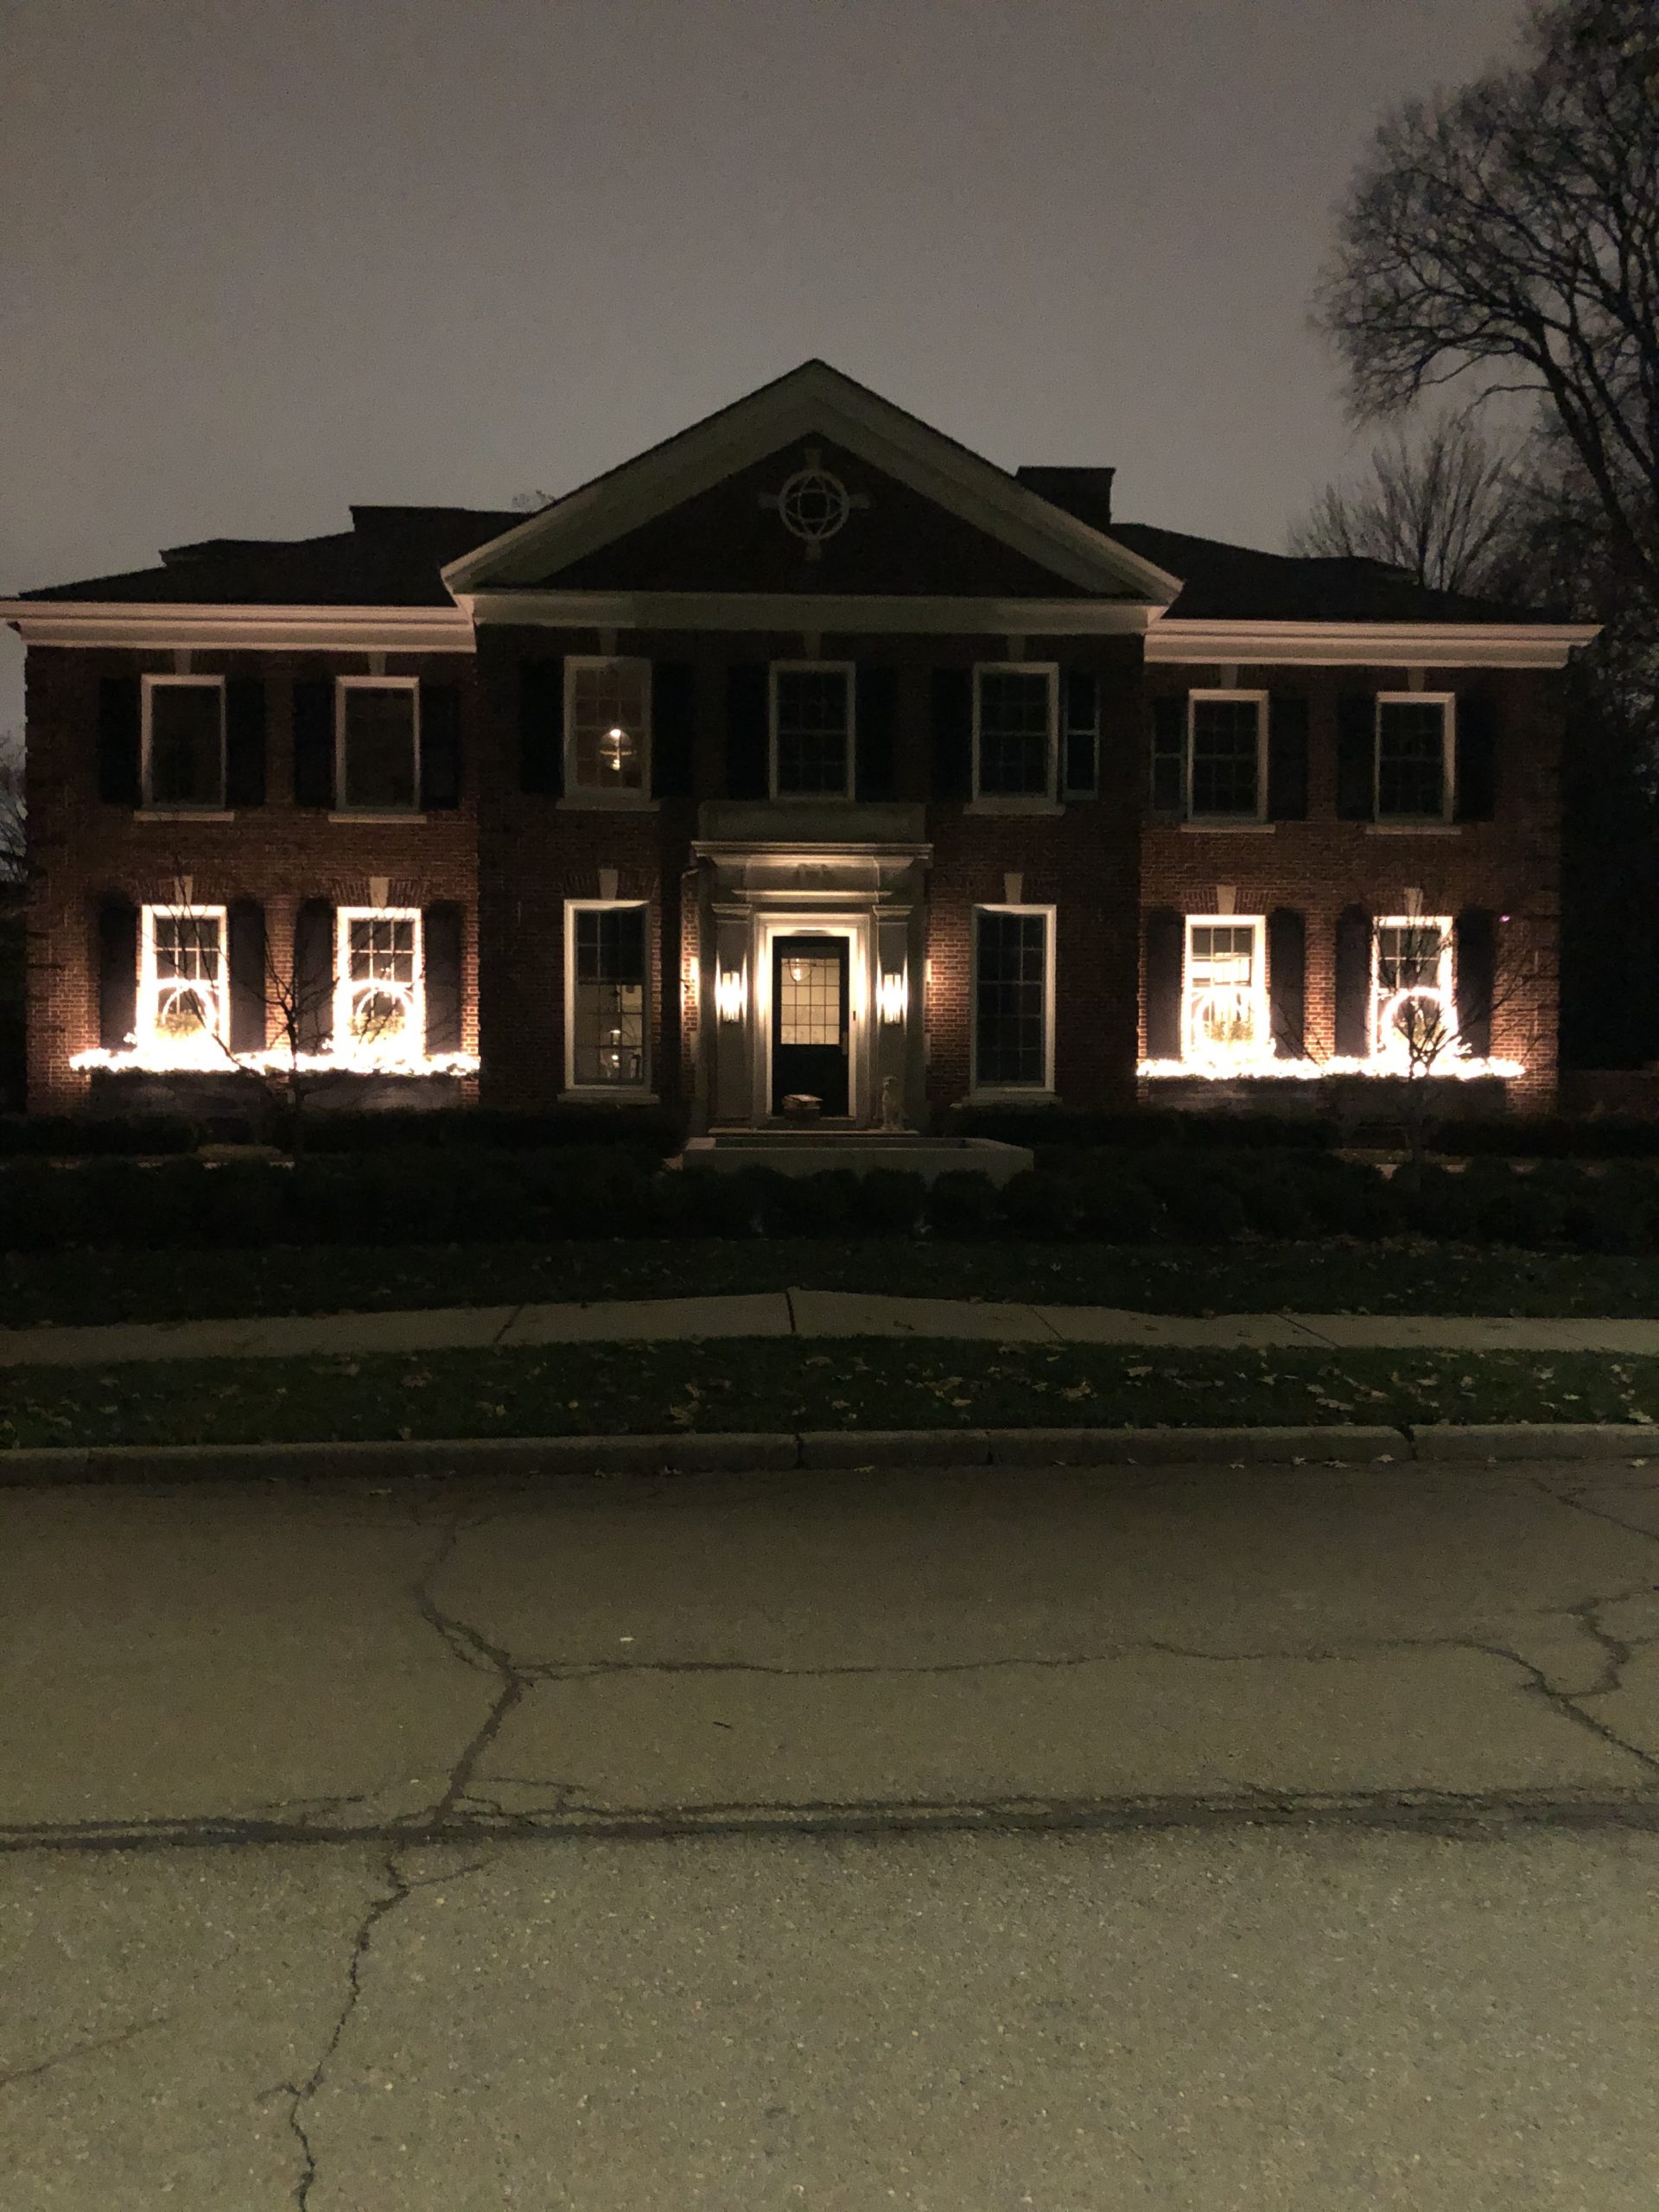
The view from the street is warm and inviting.

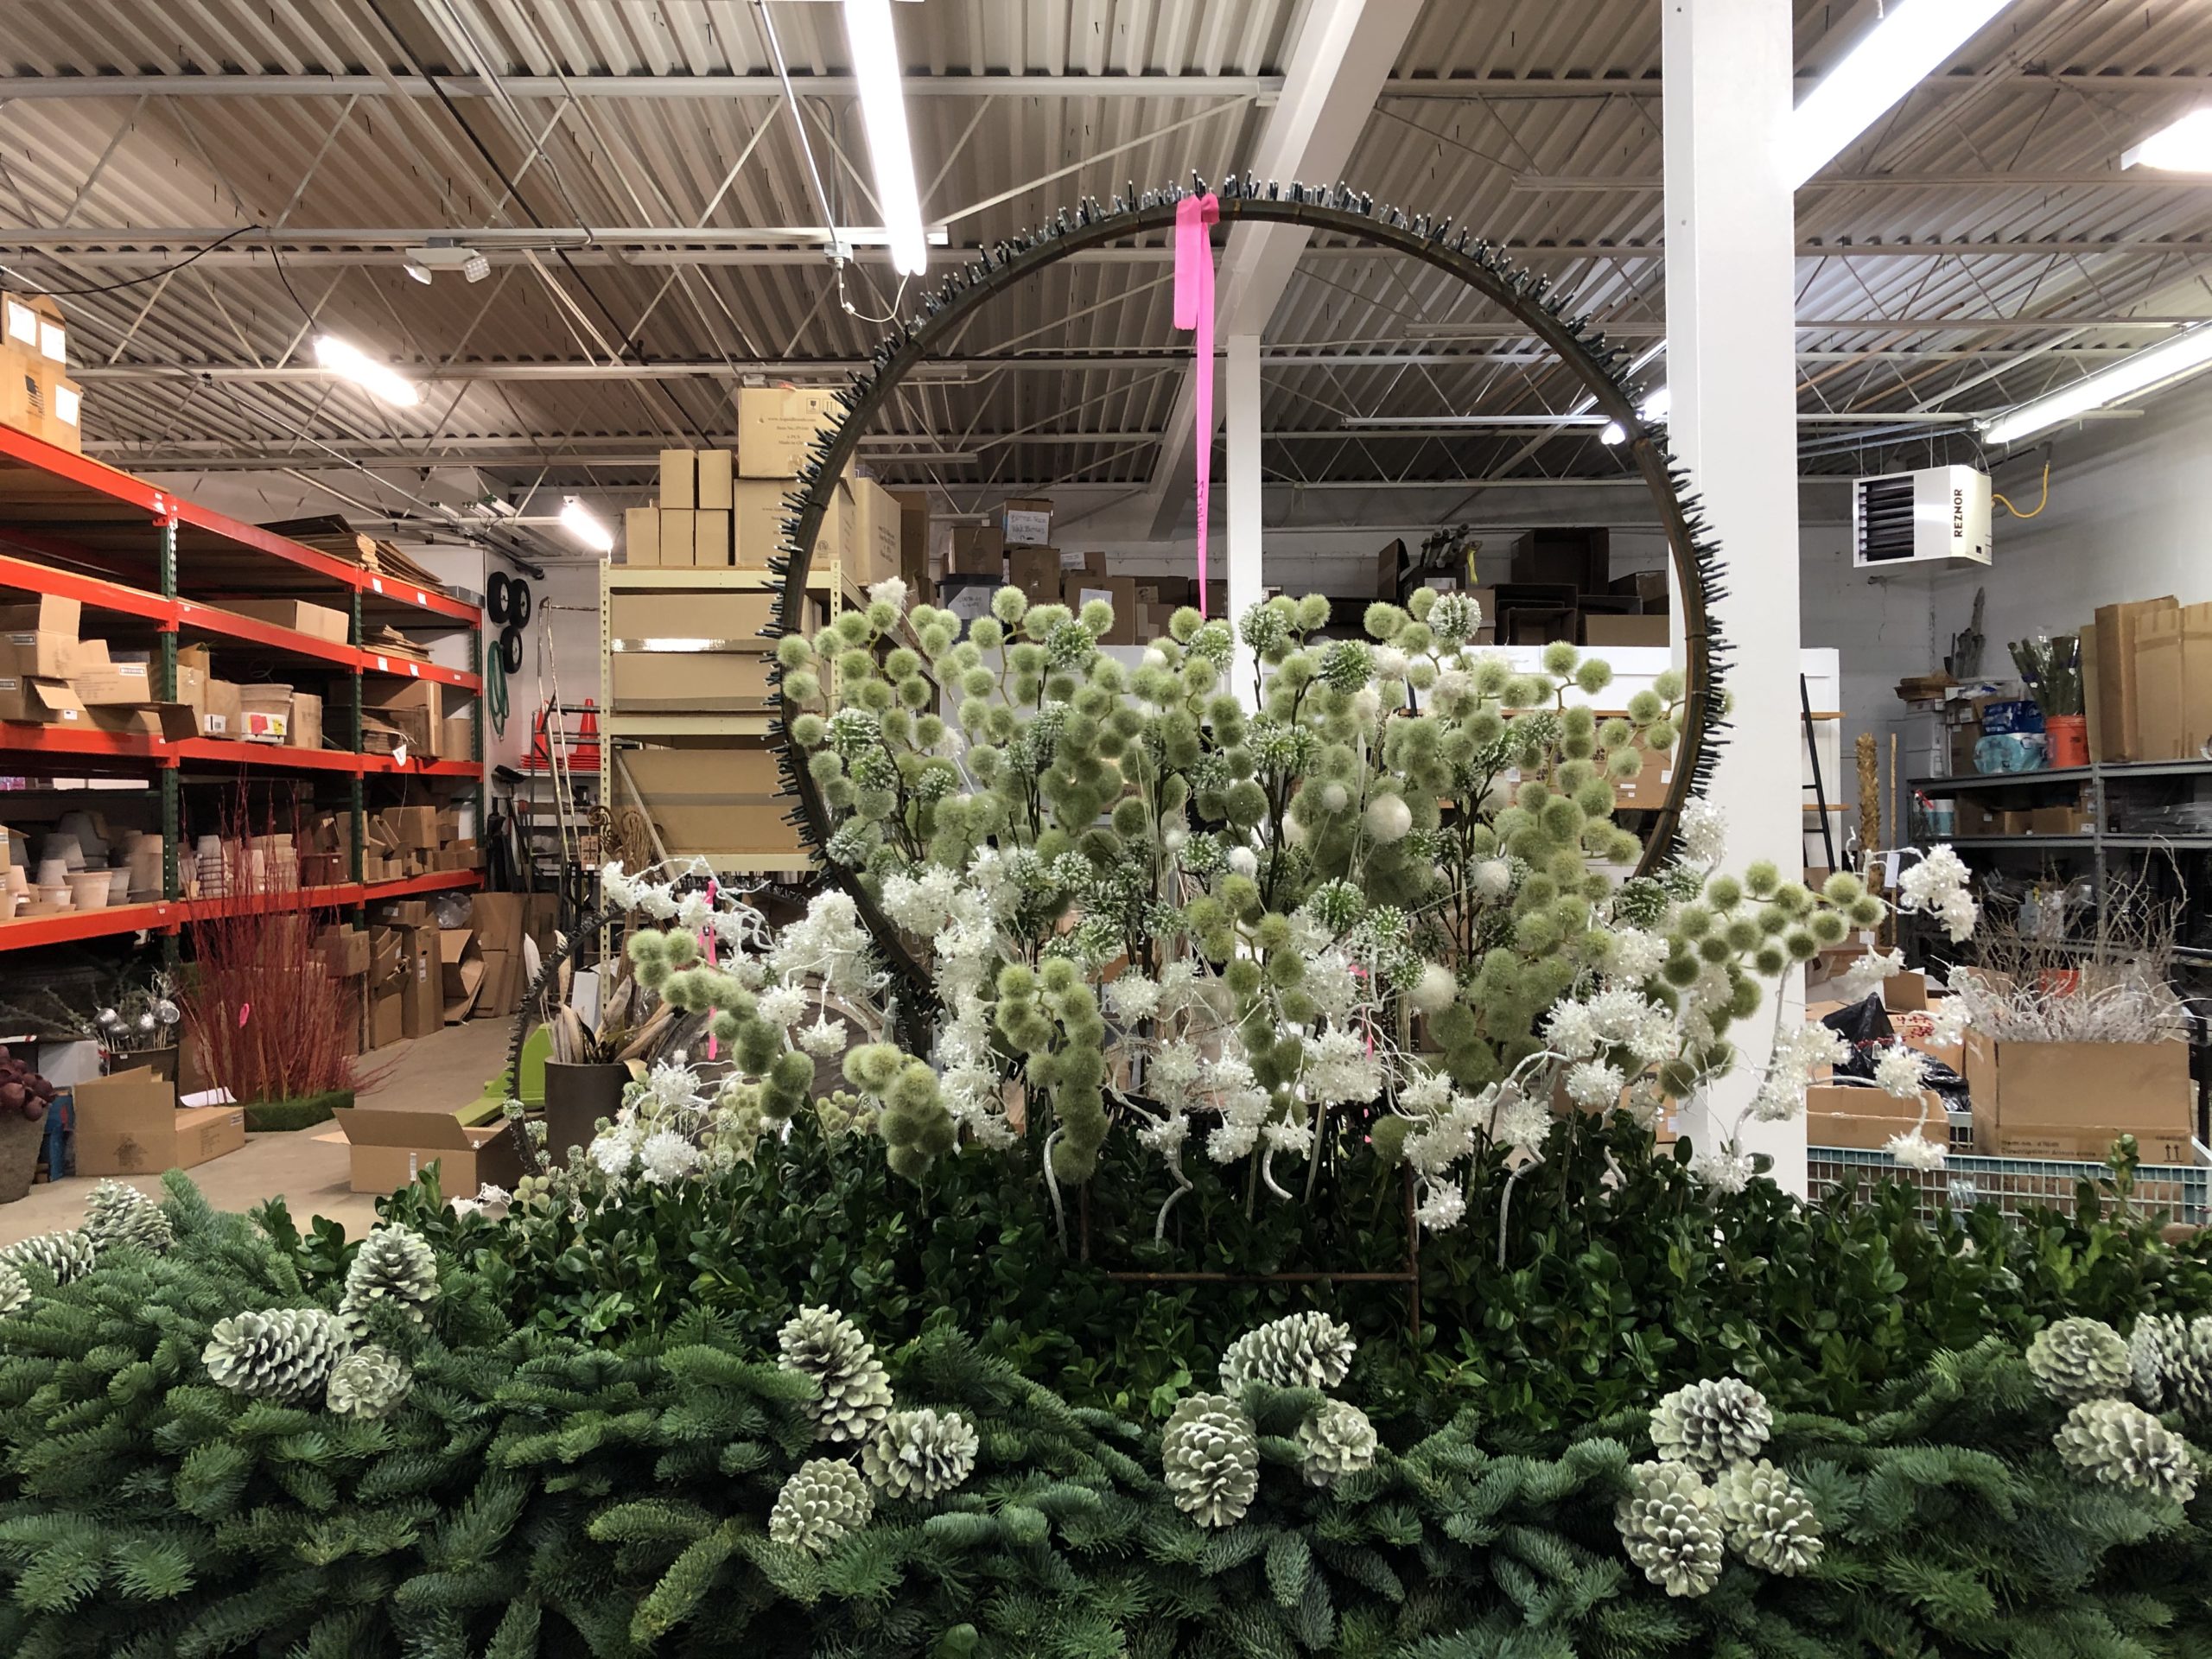
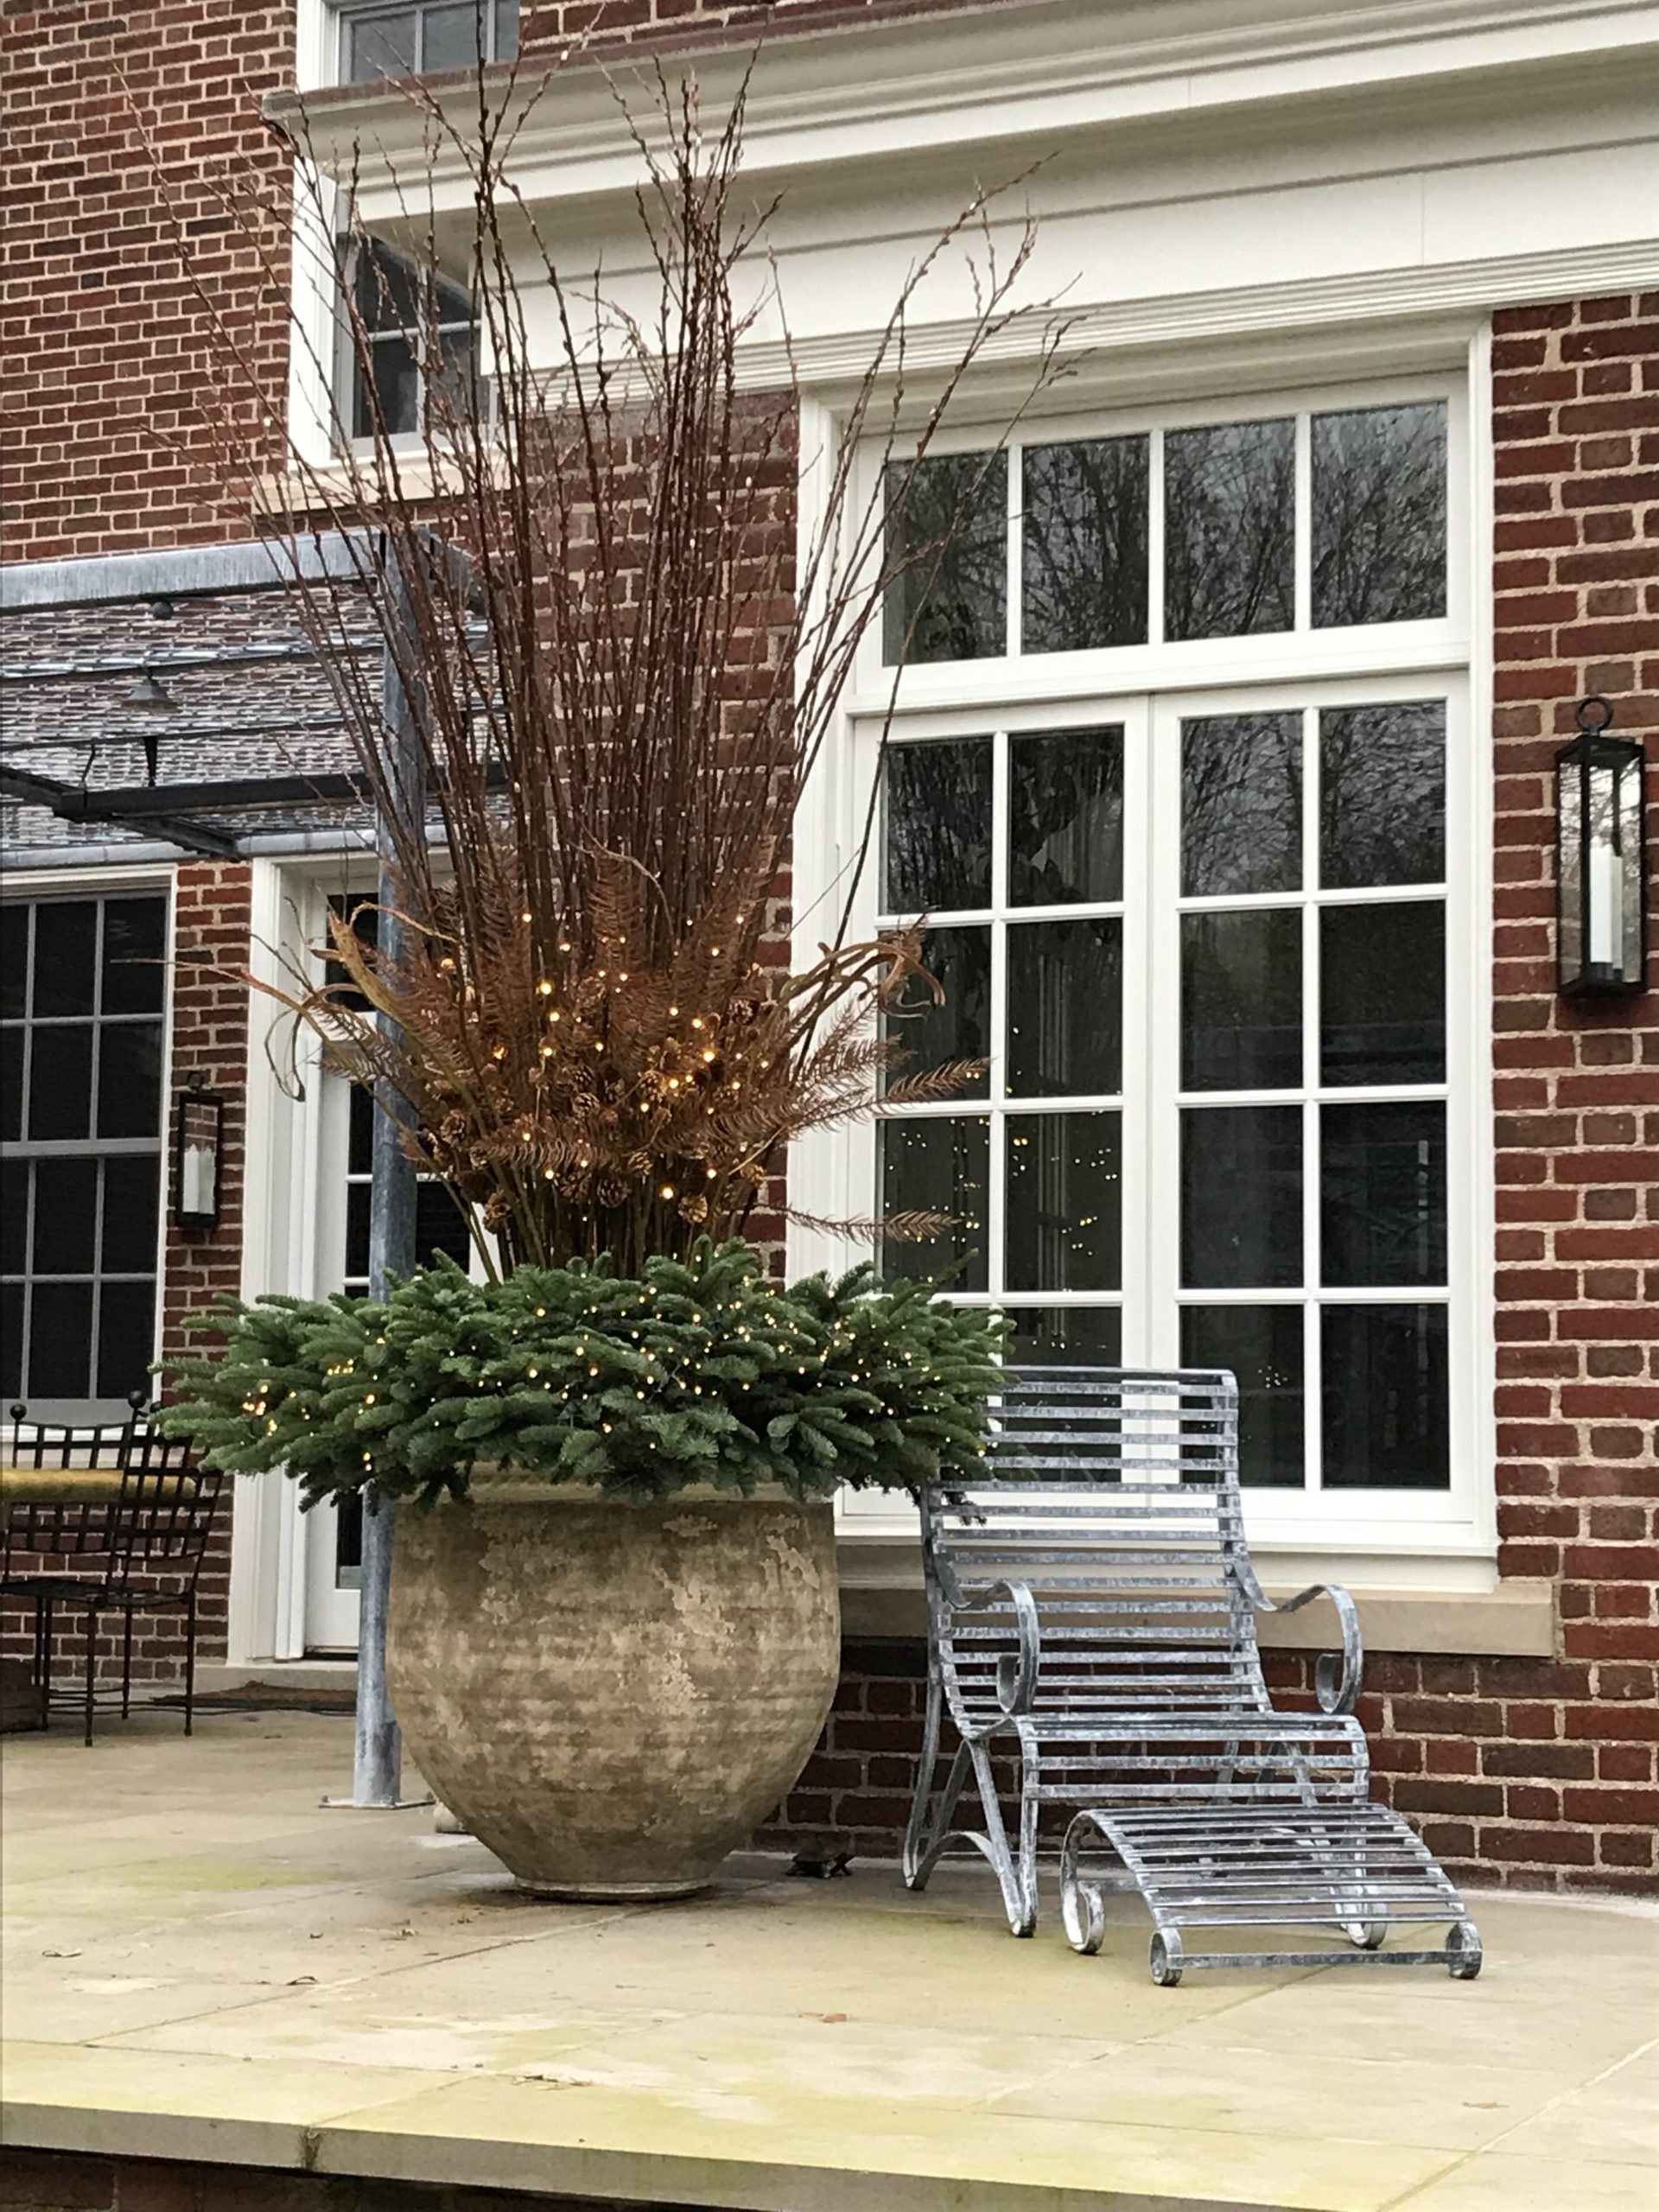
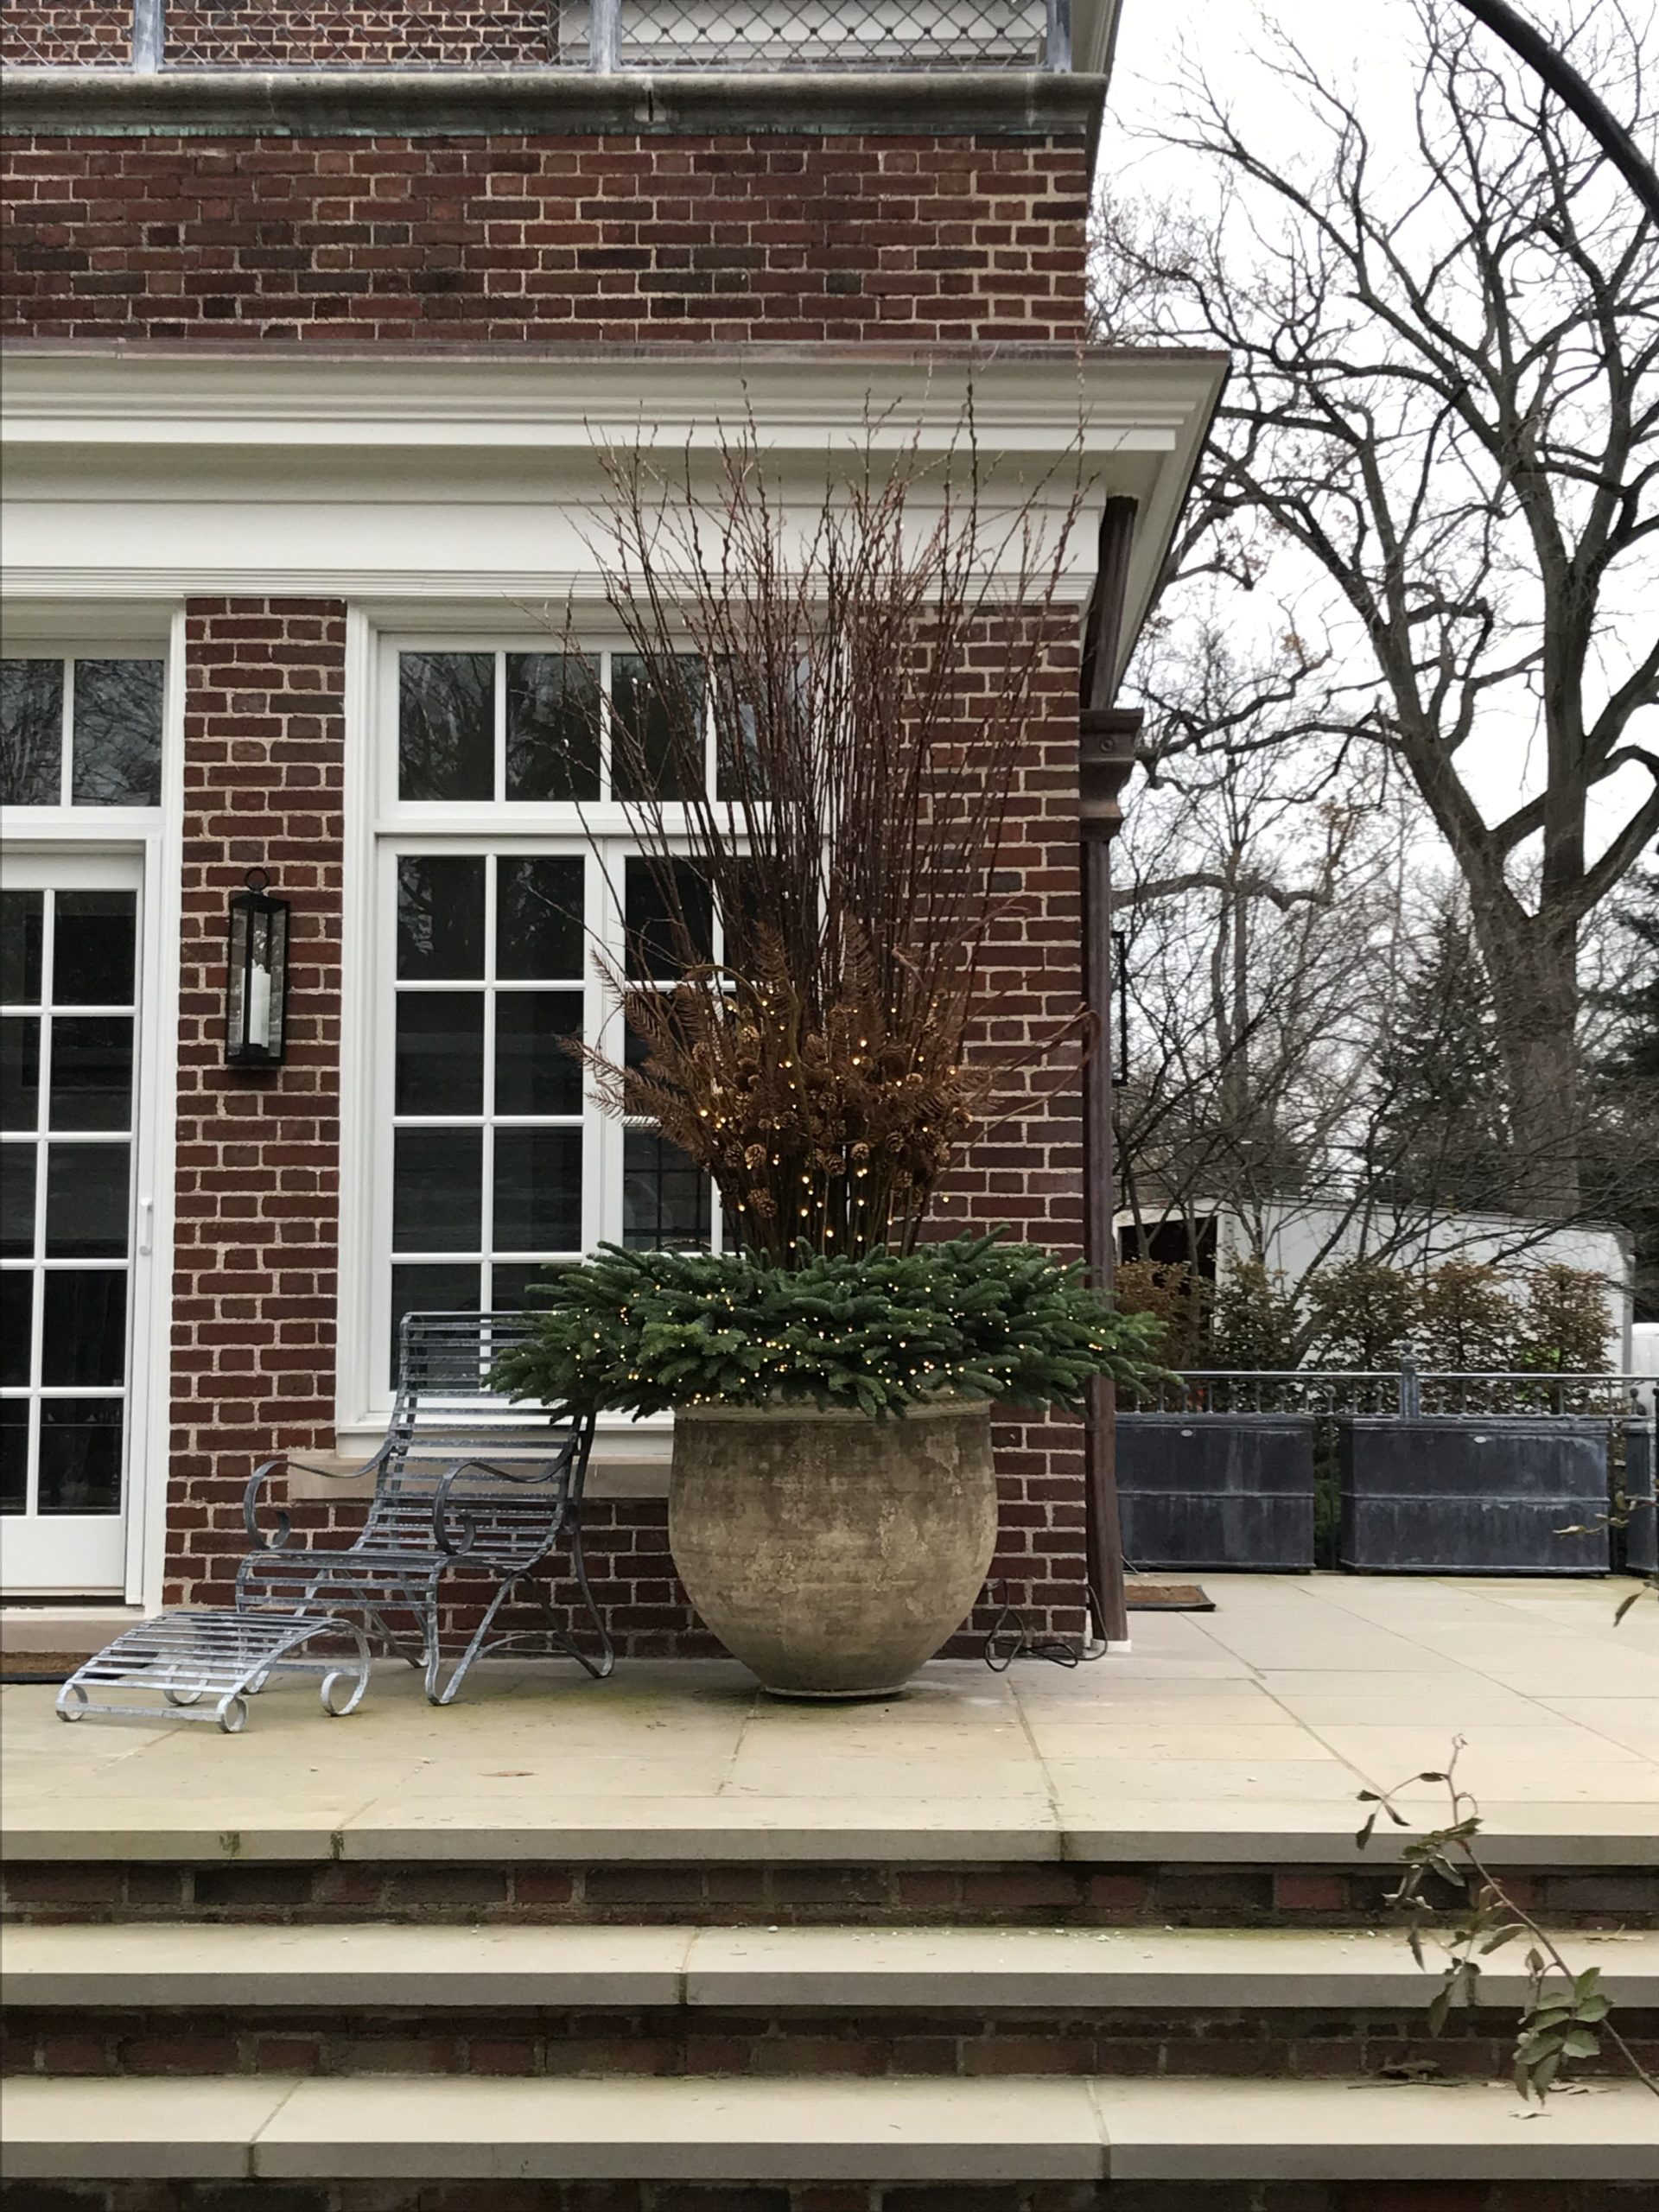
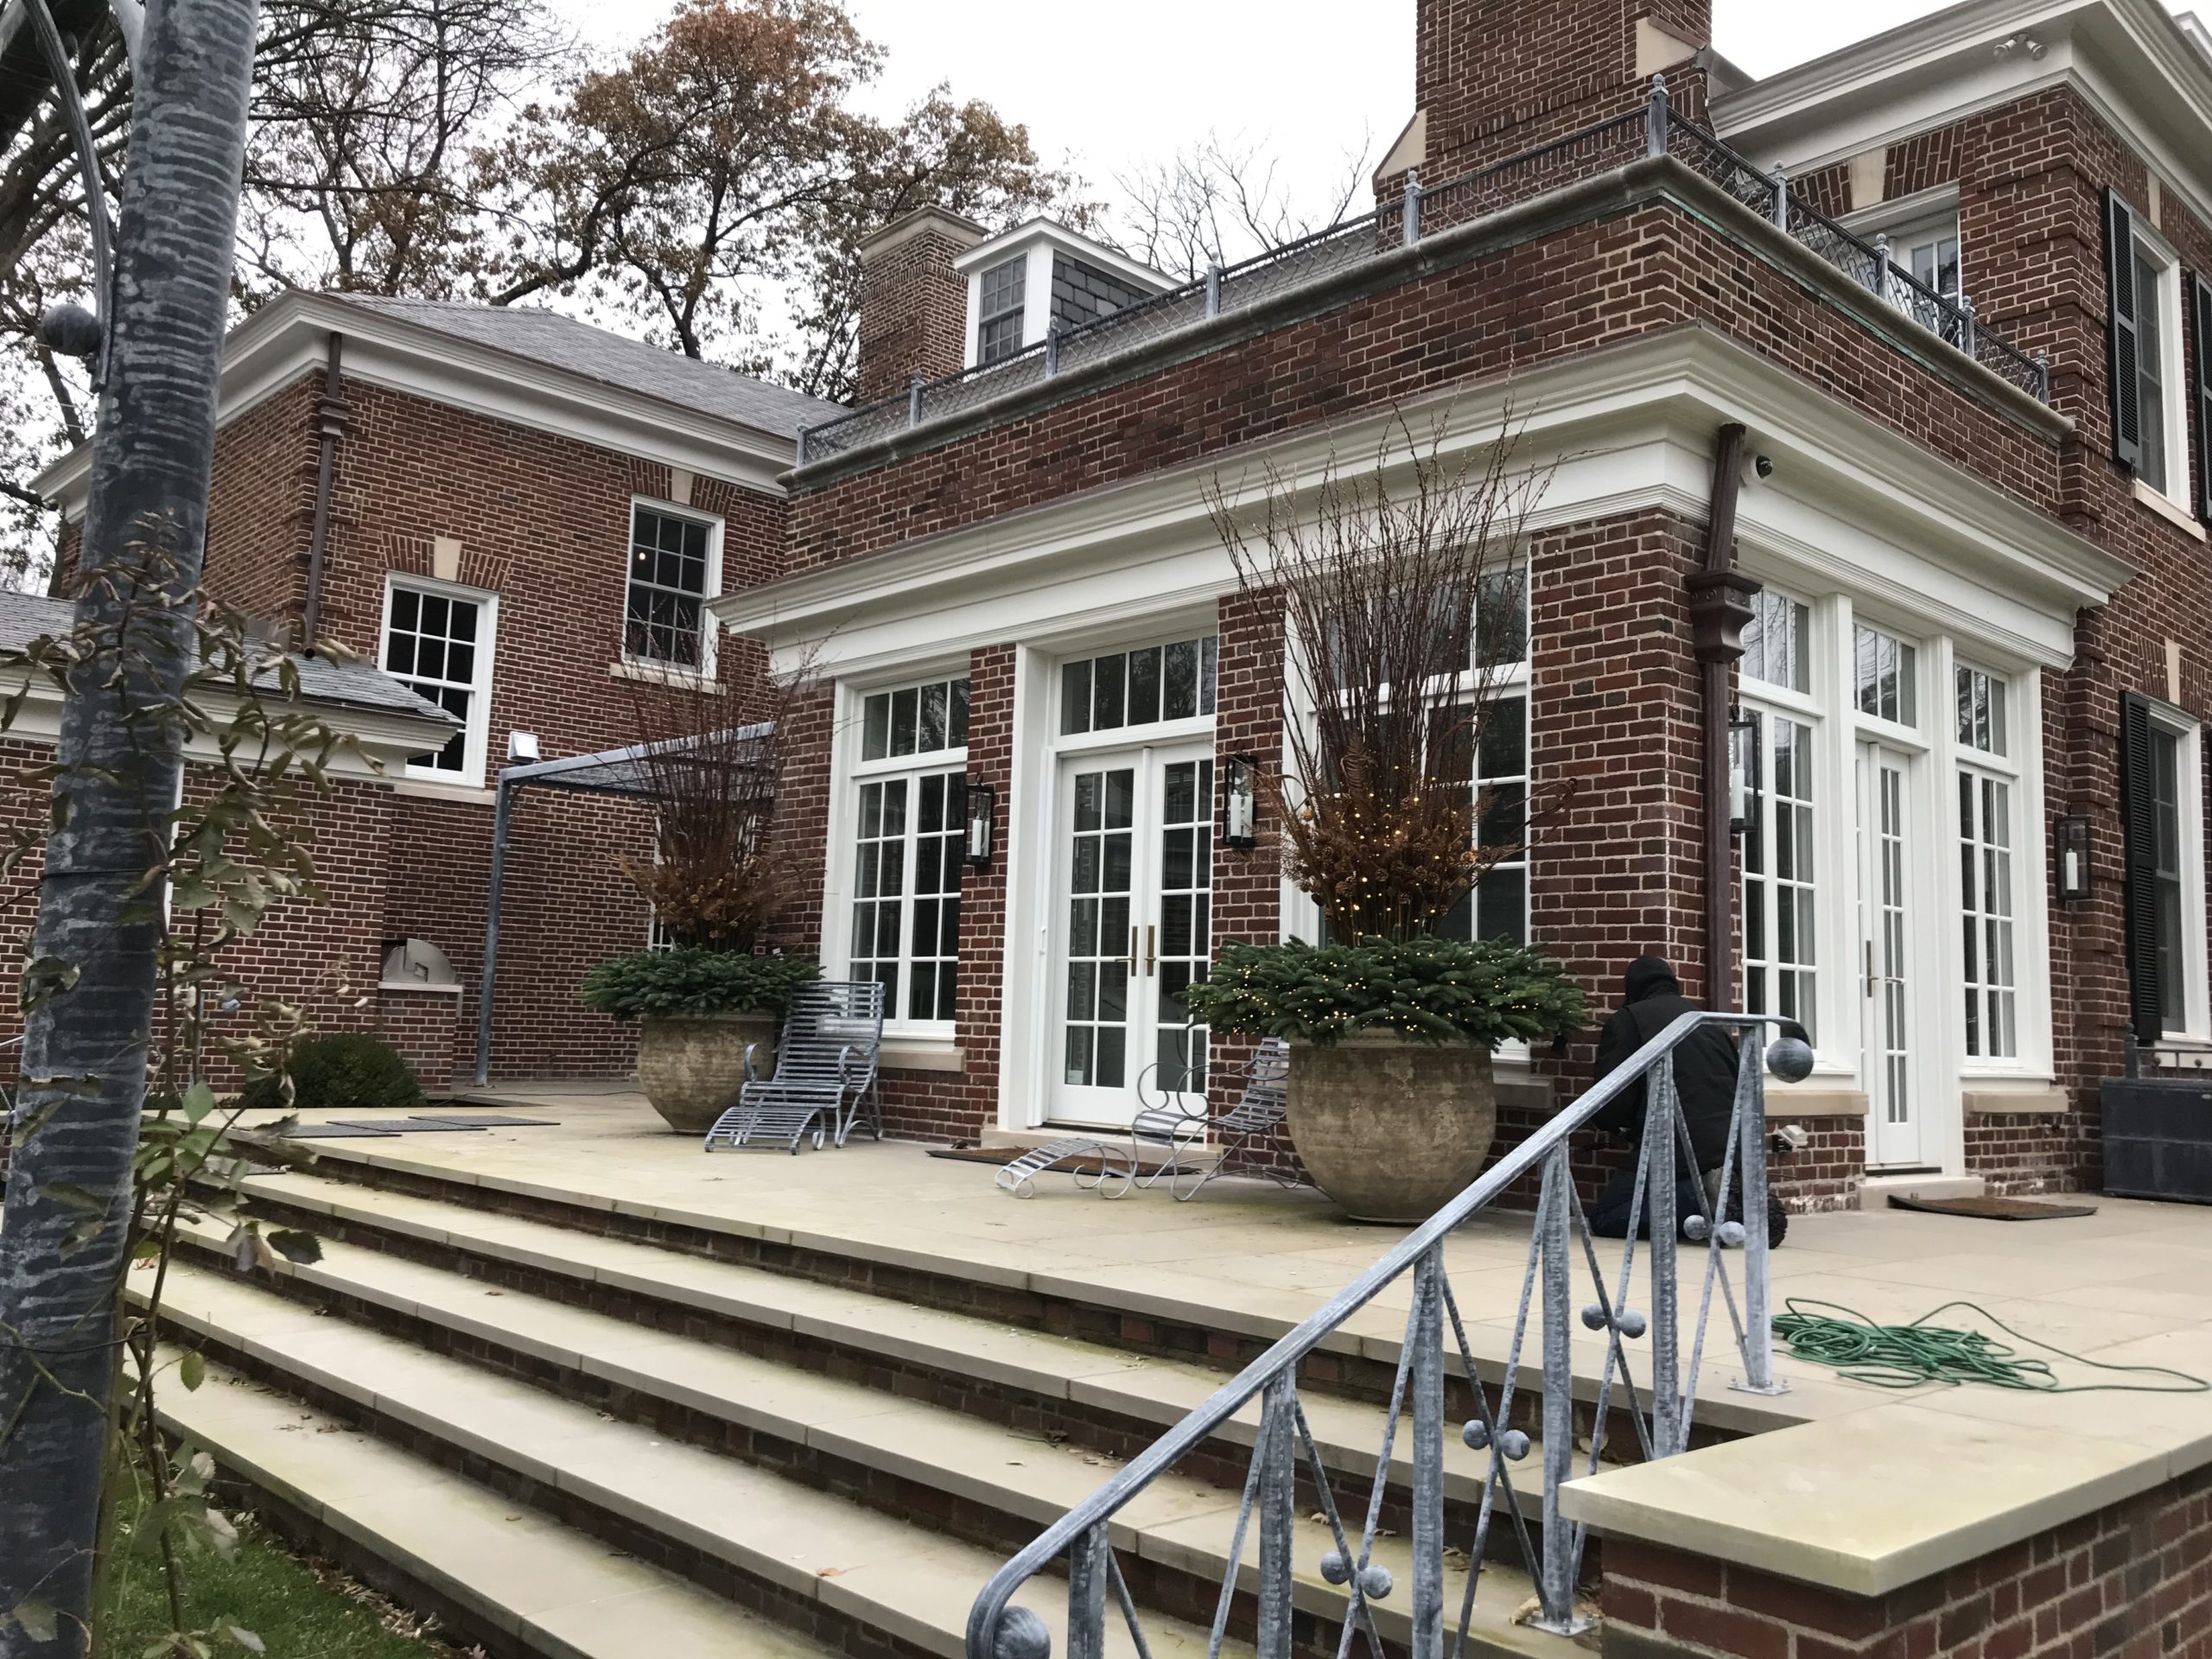
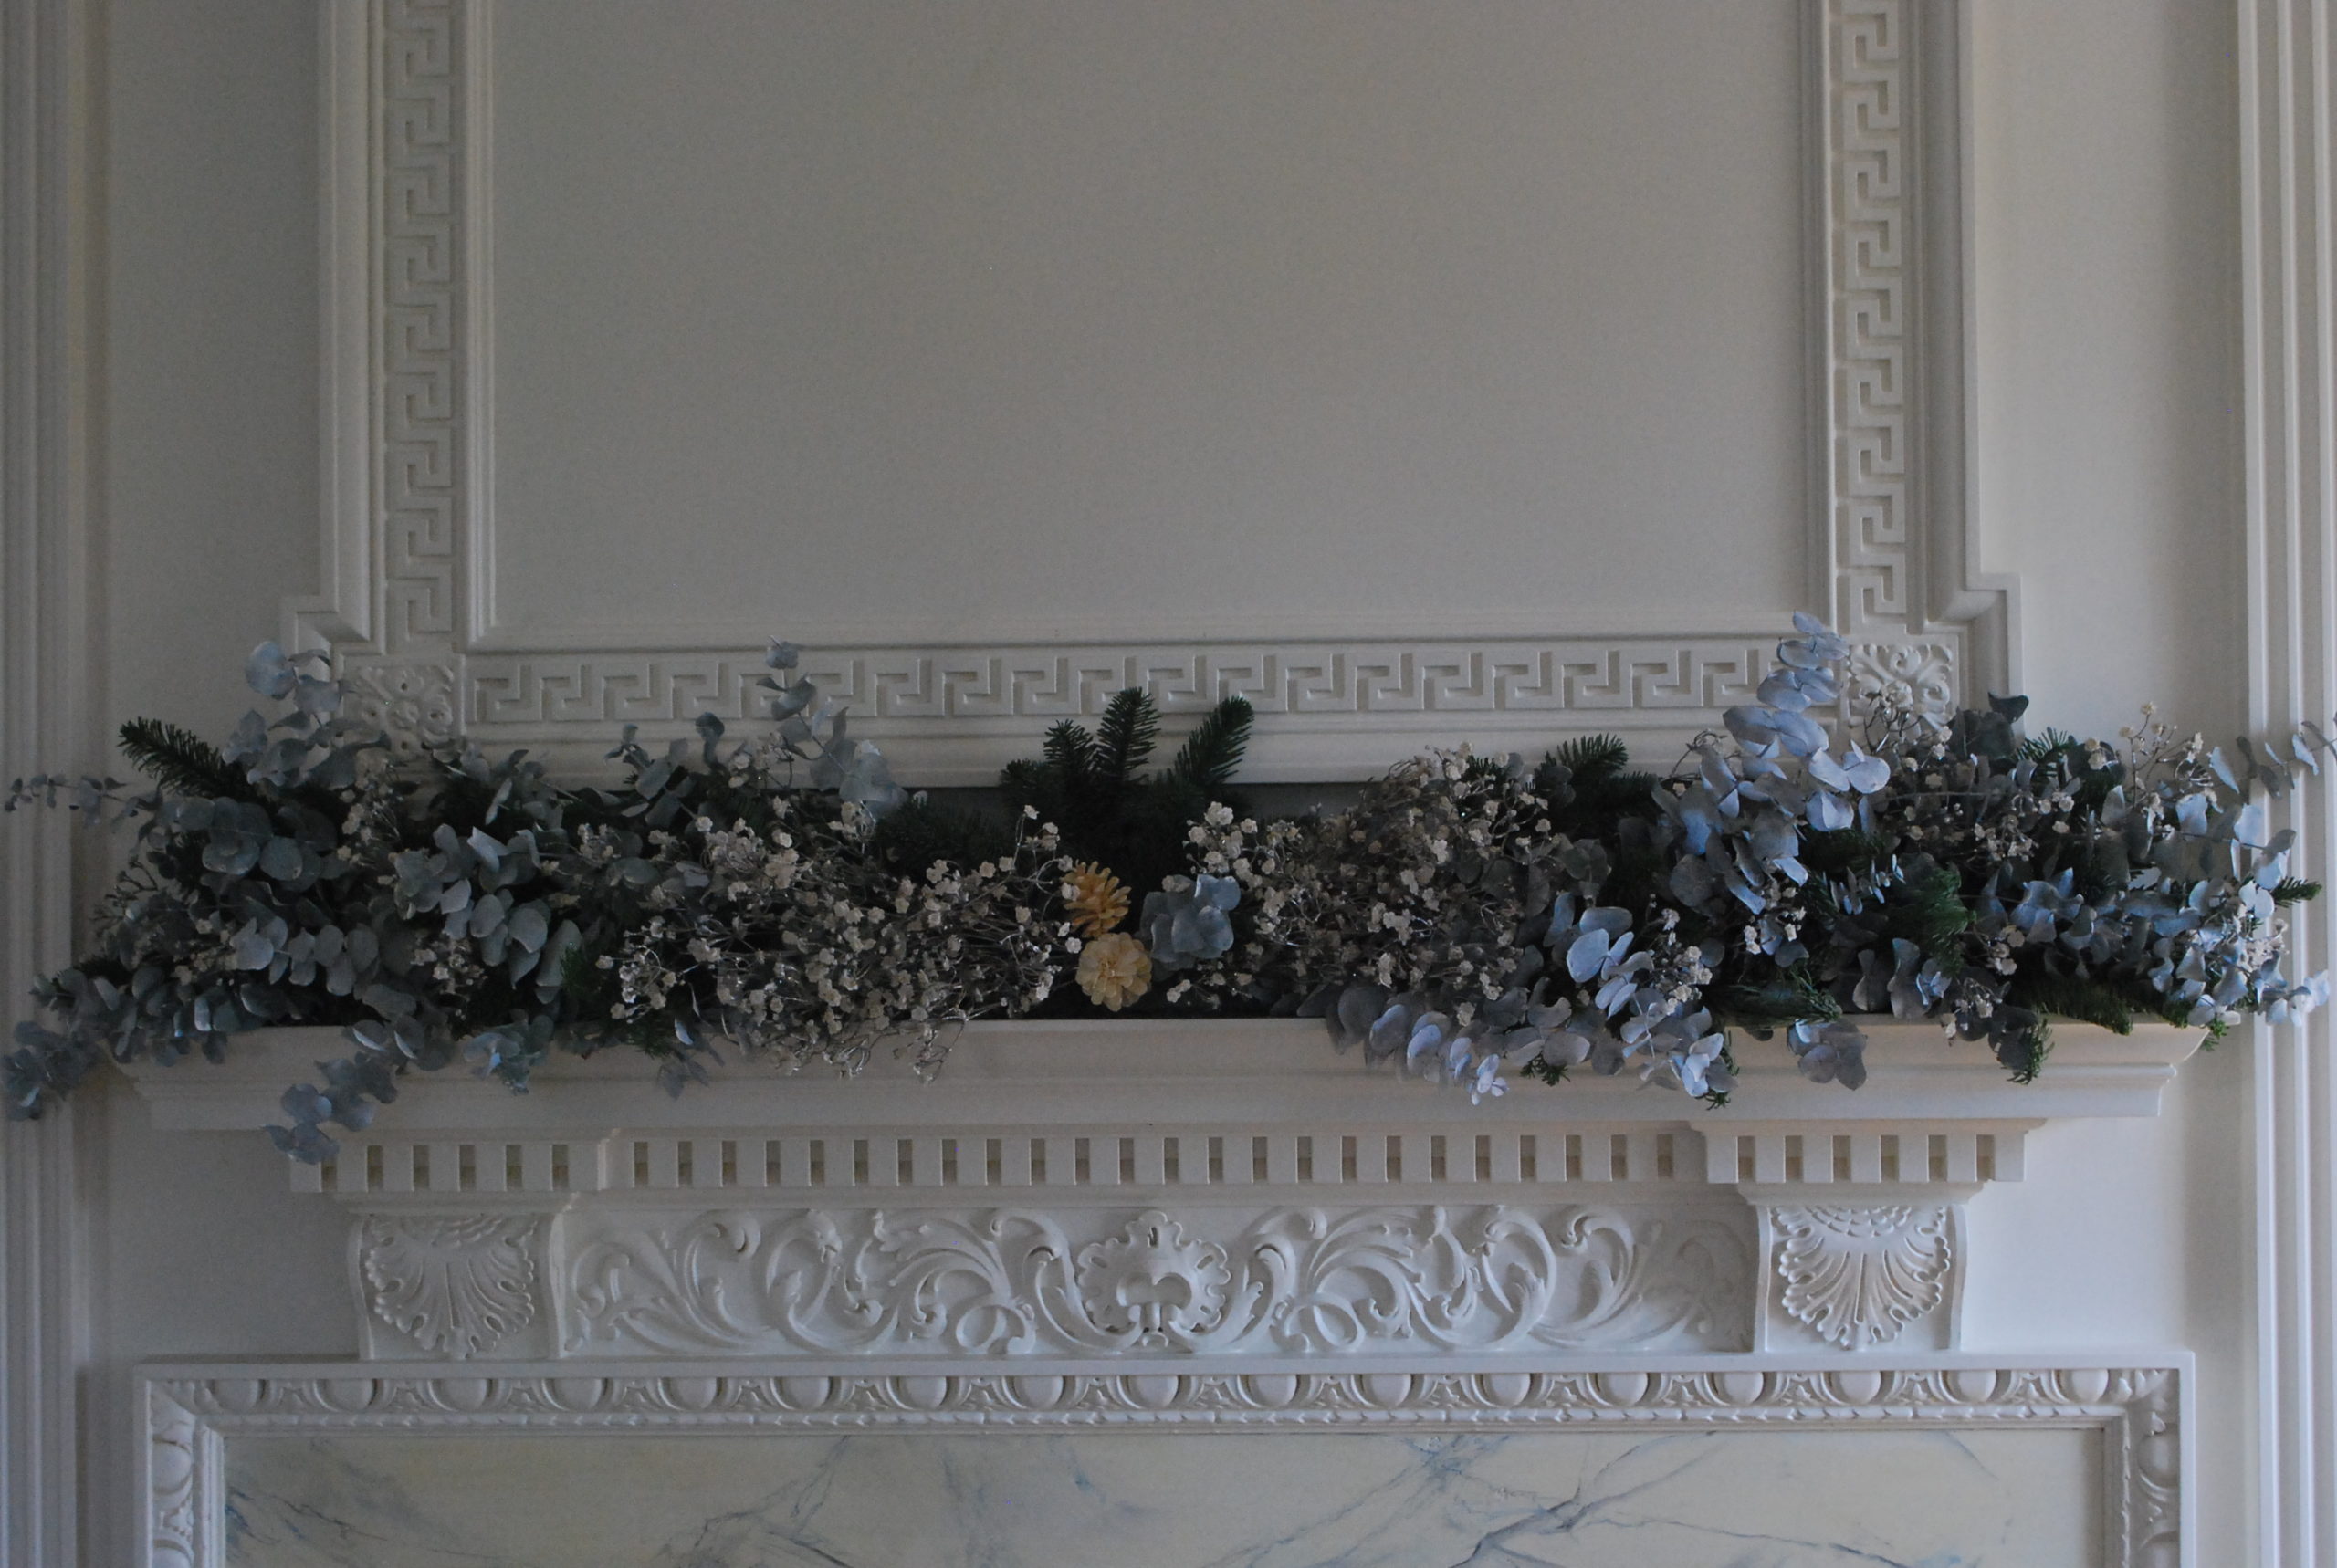
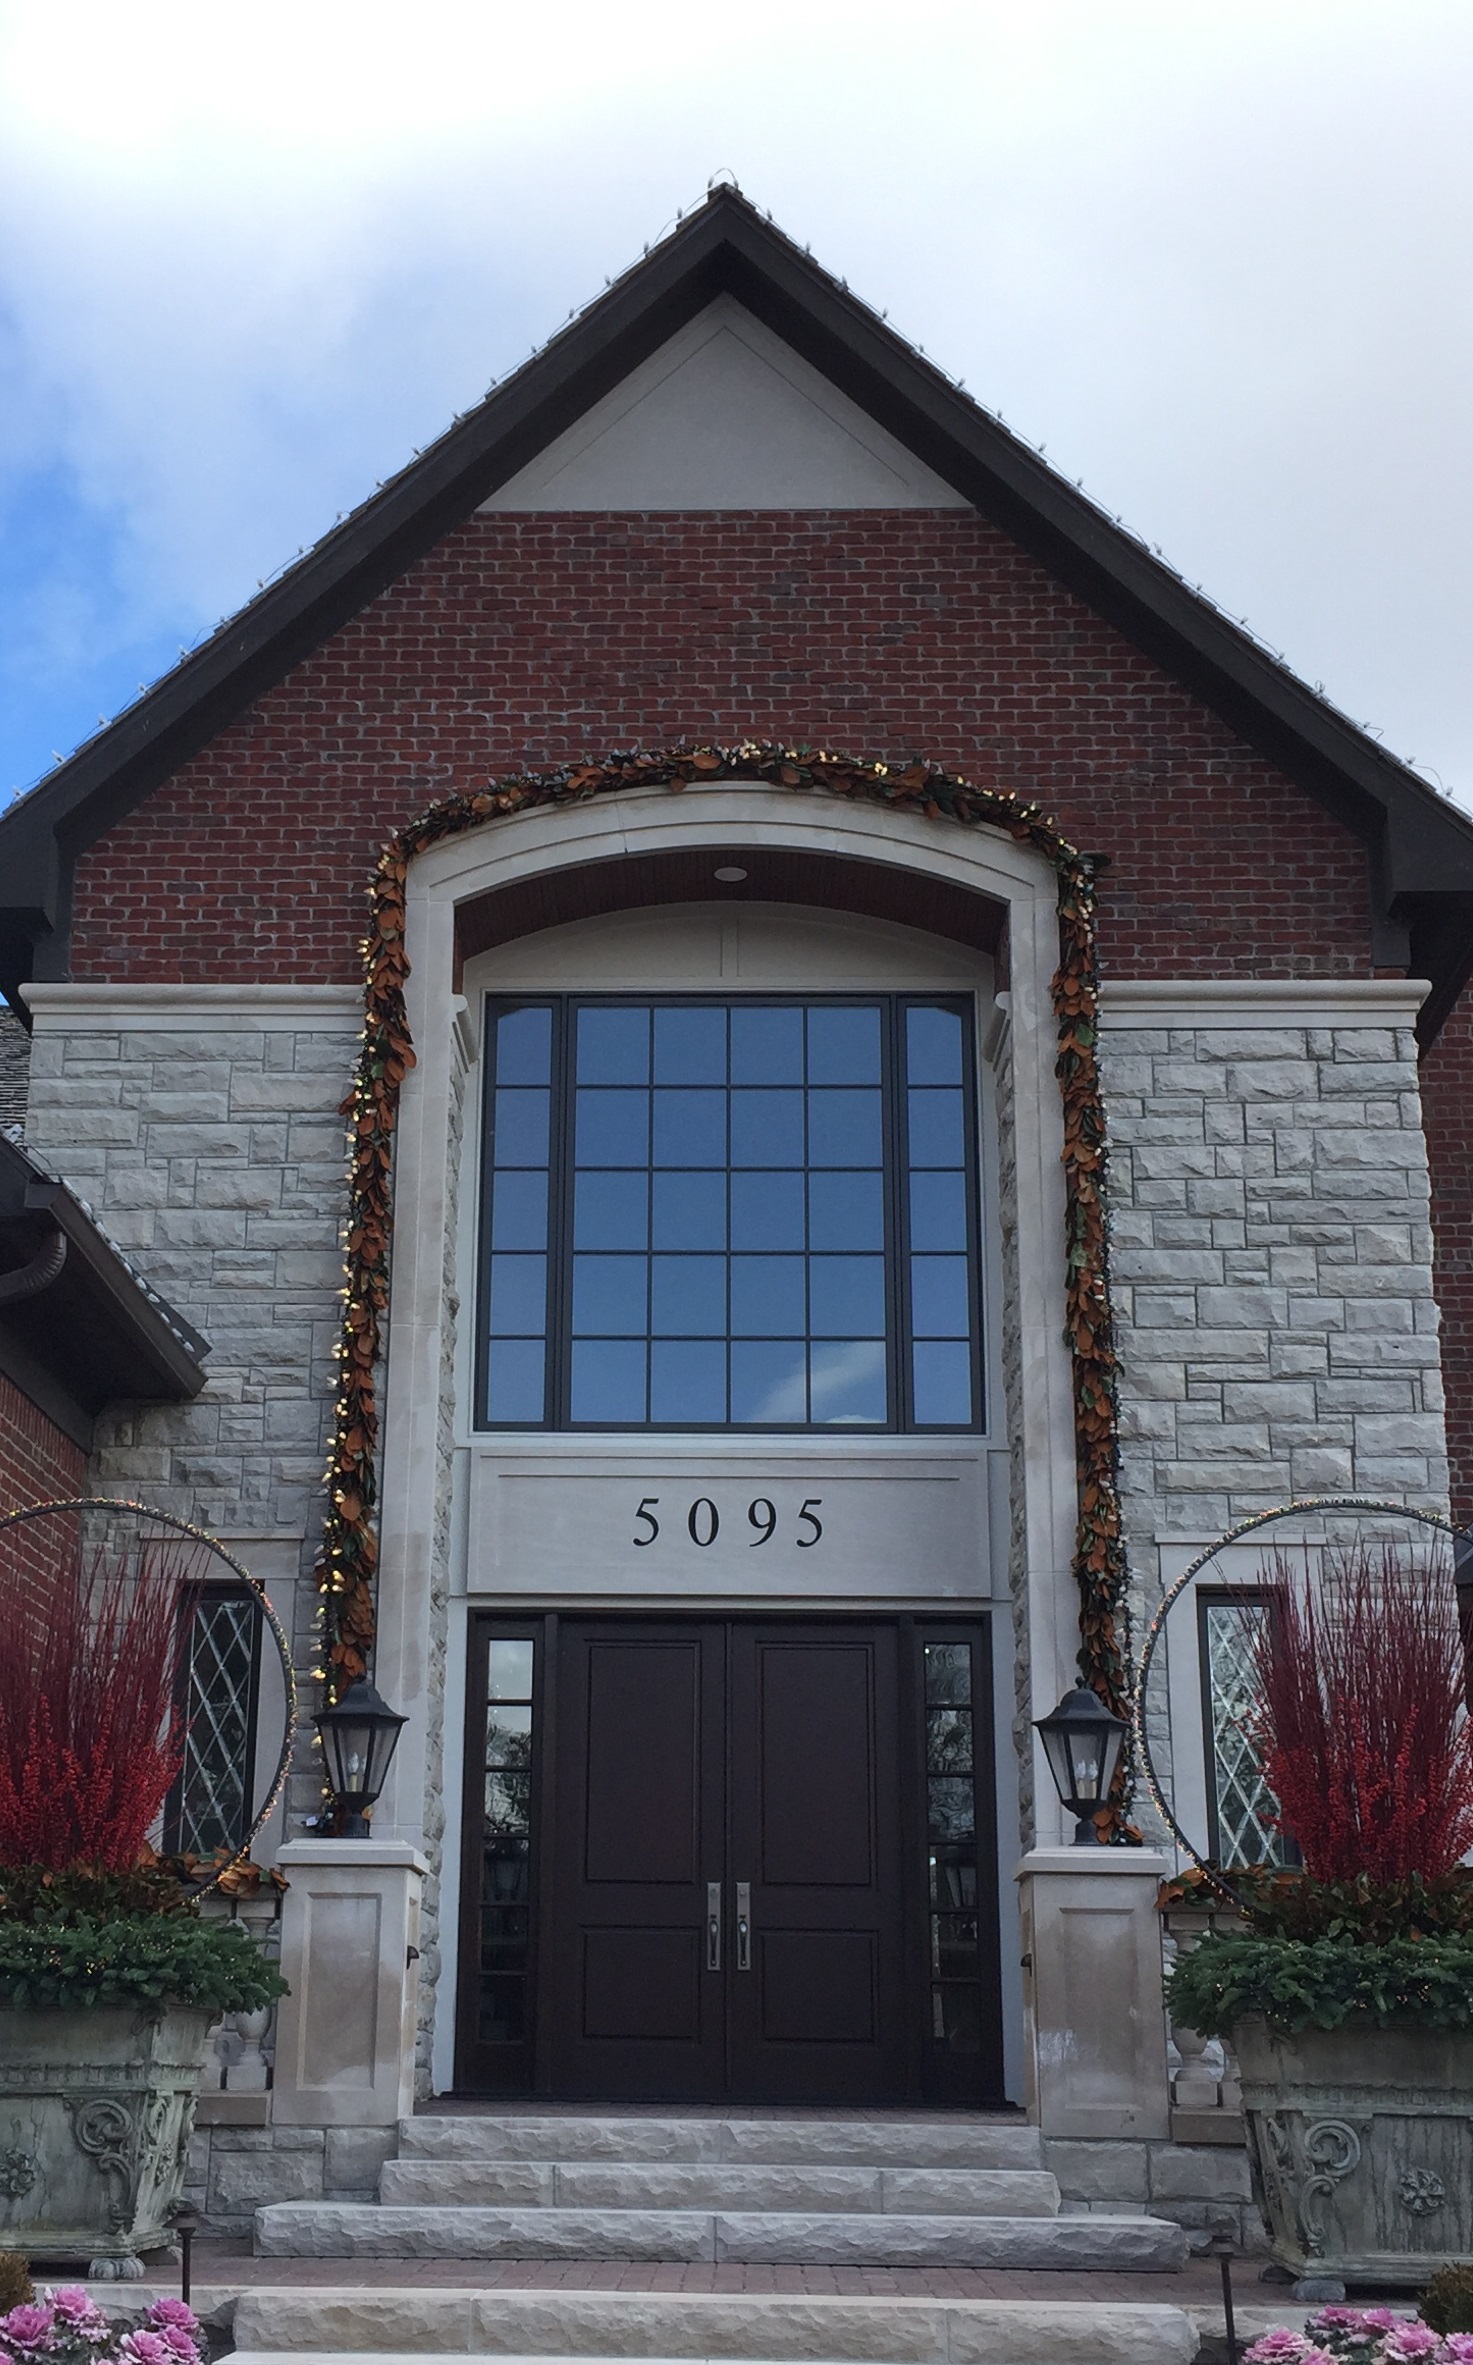
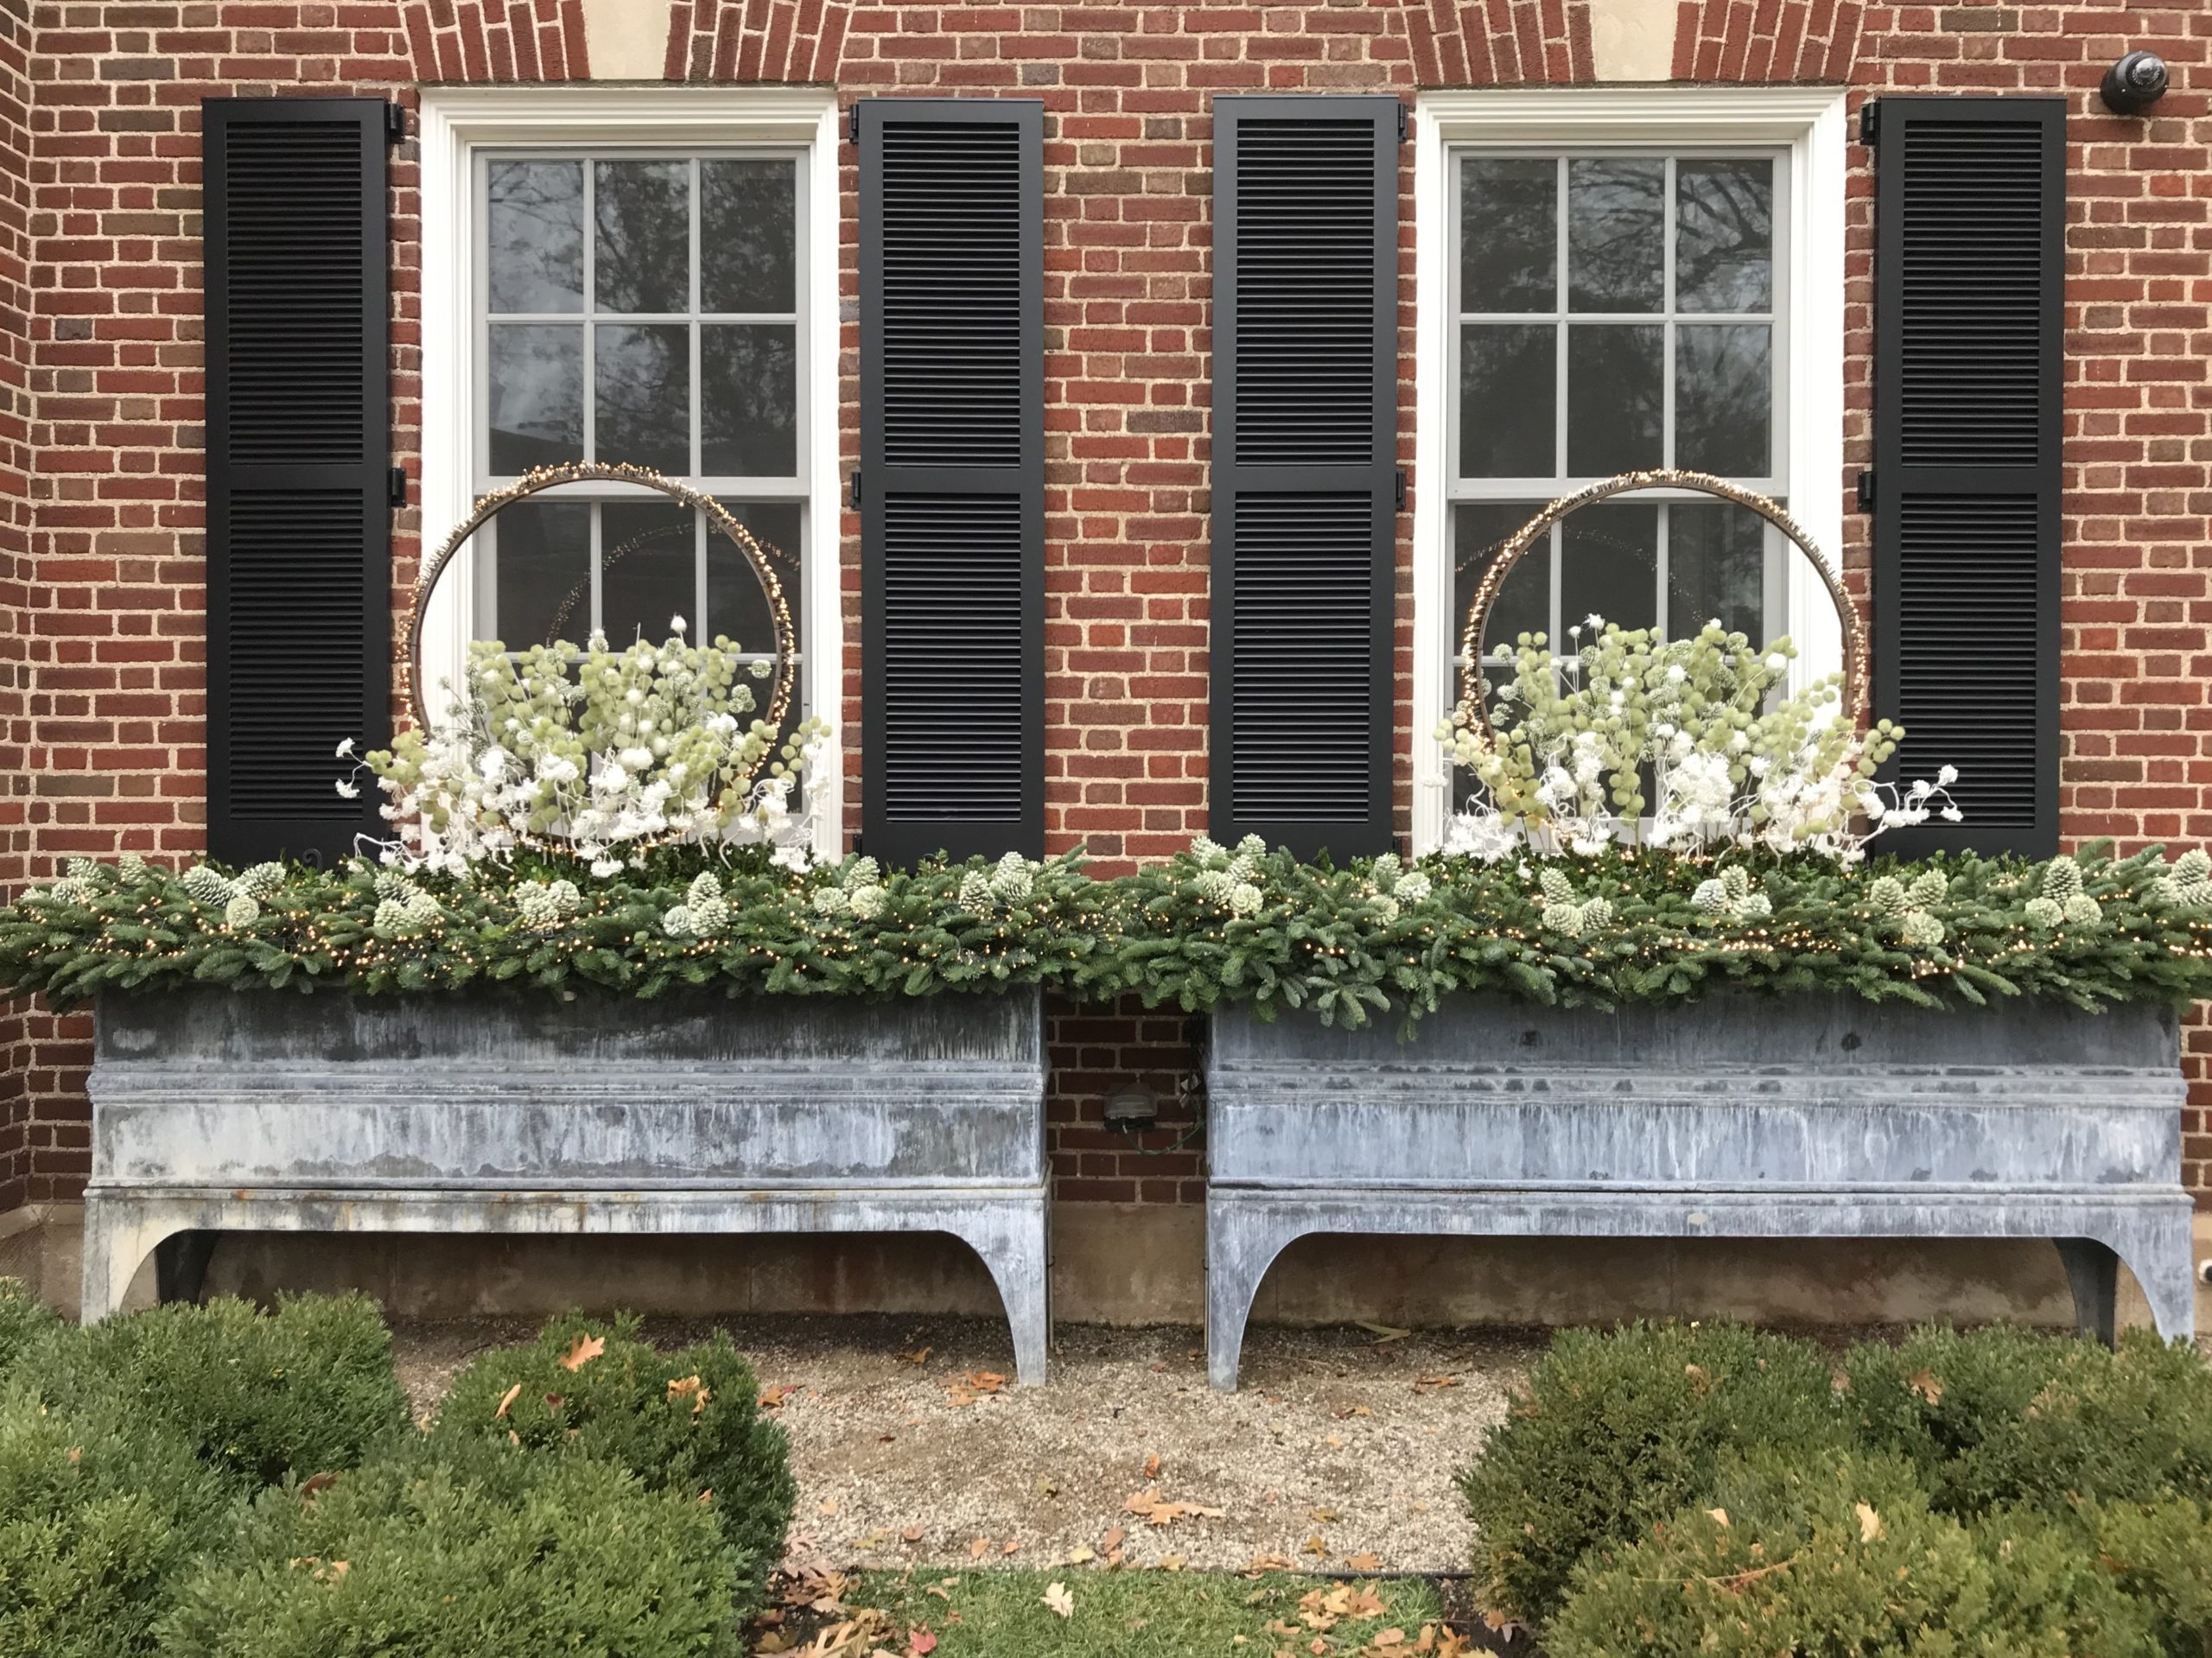
A pair of French pots dressed for winter
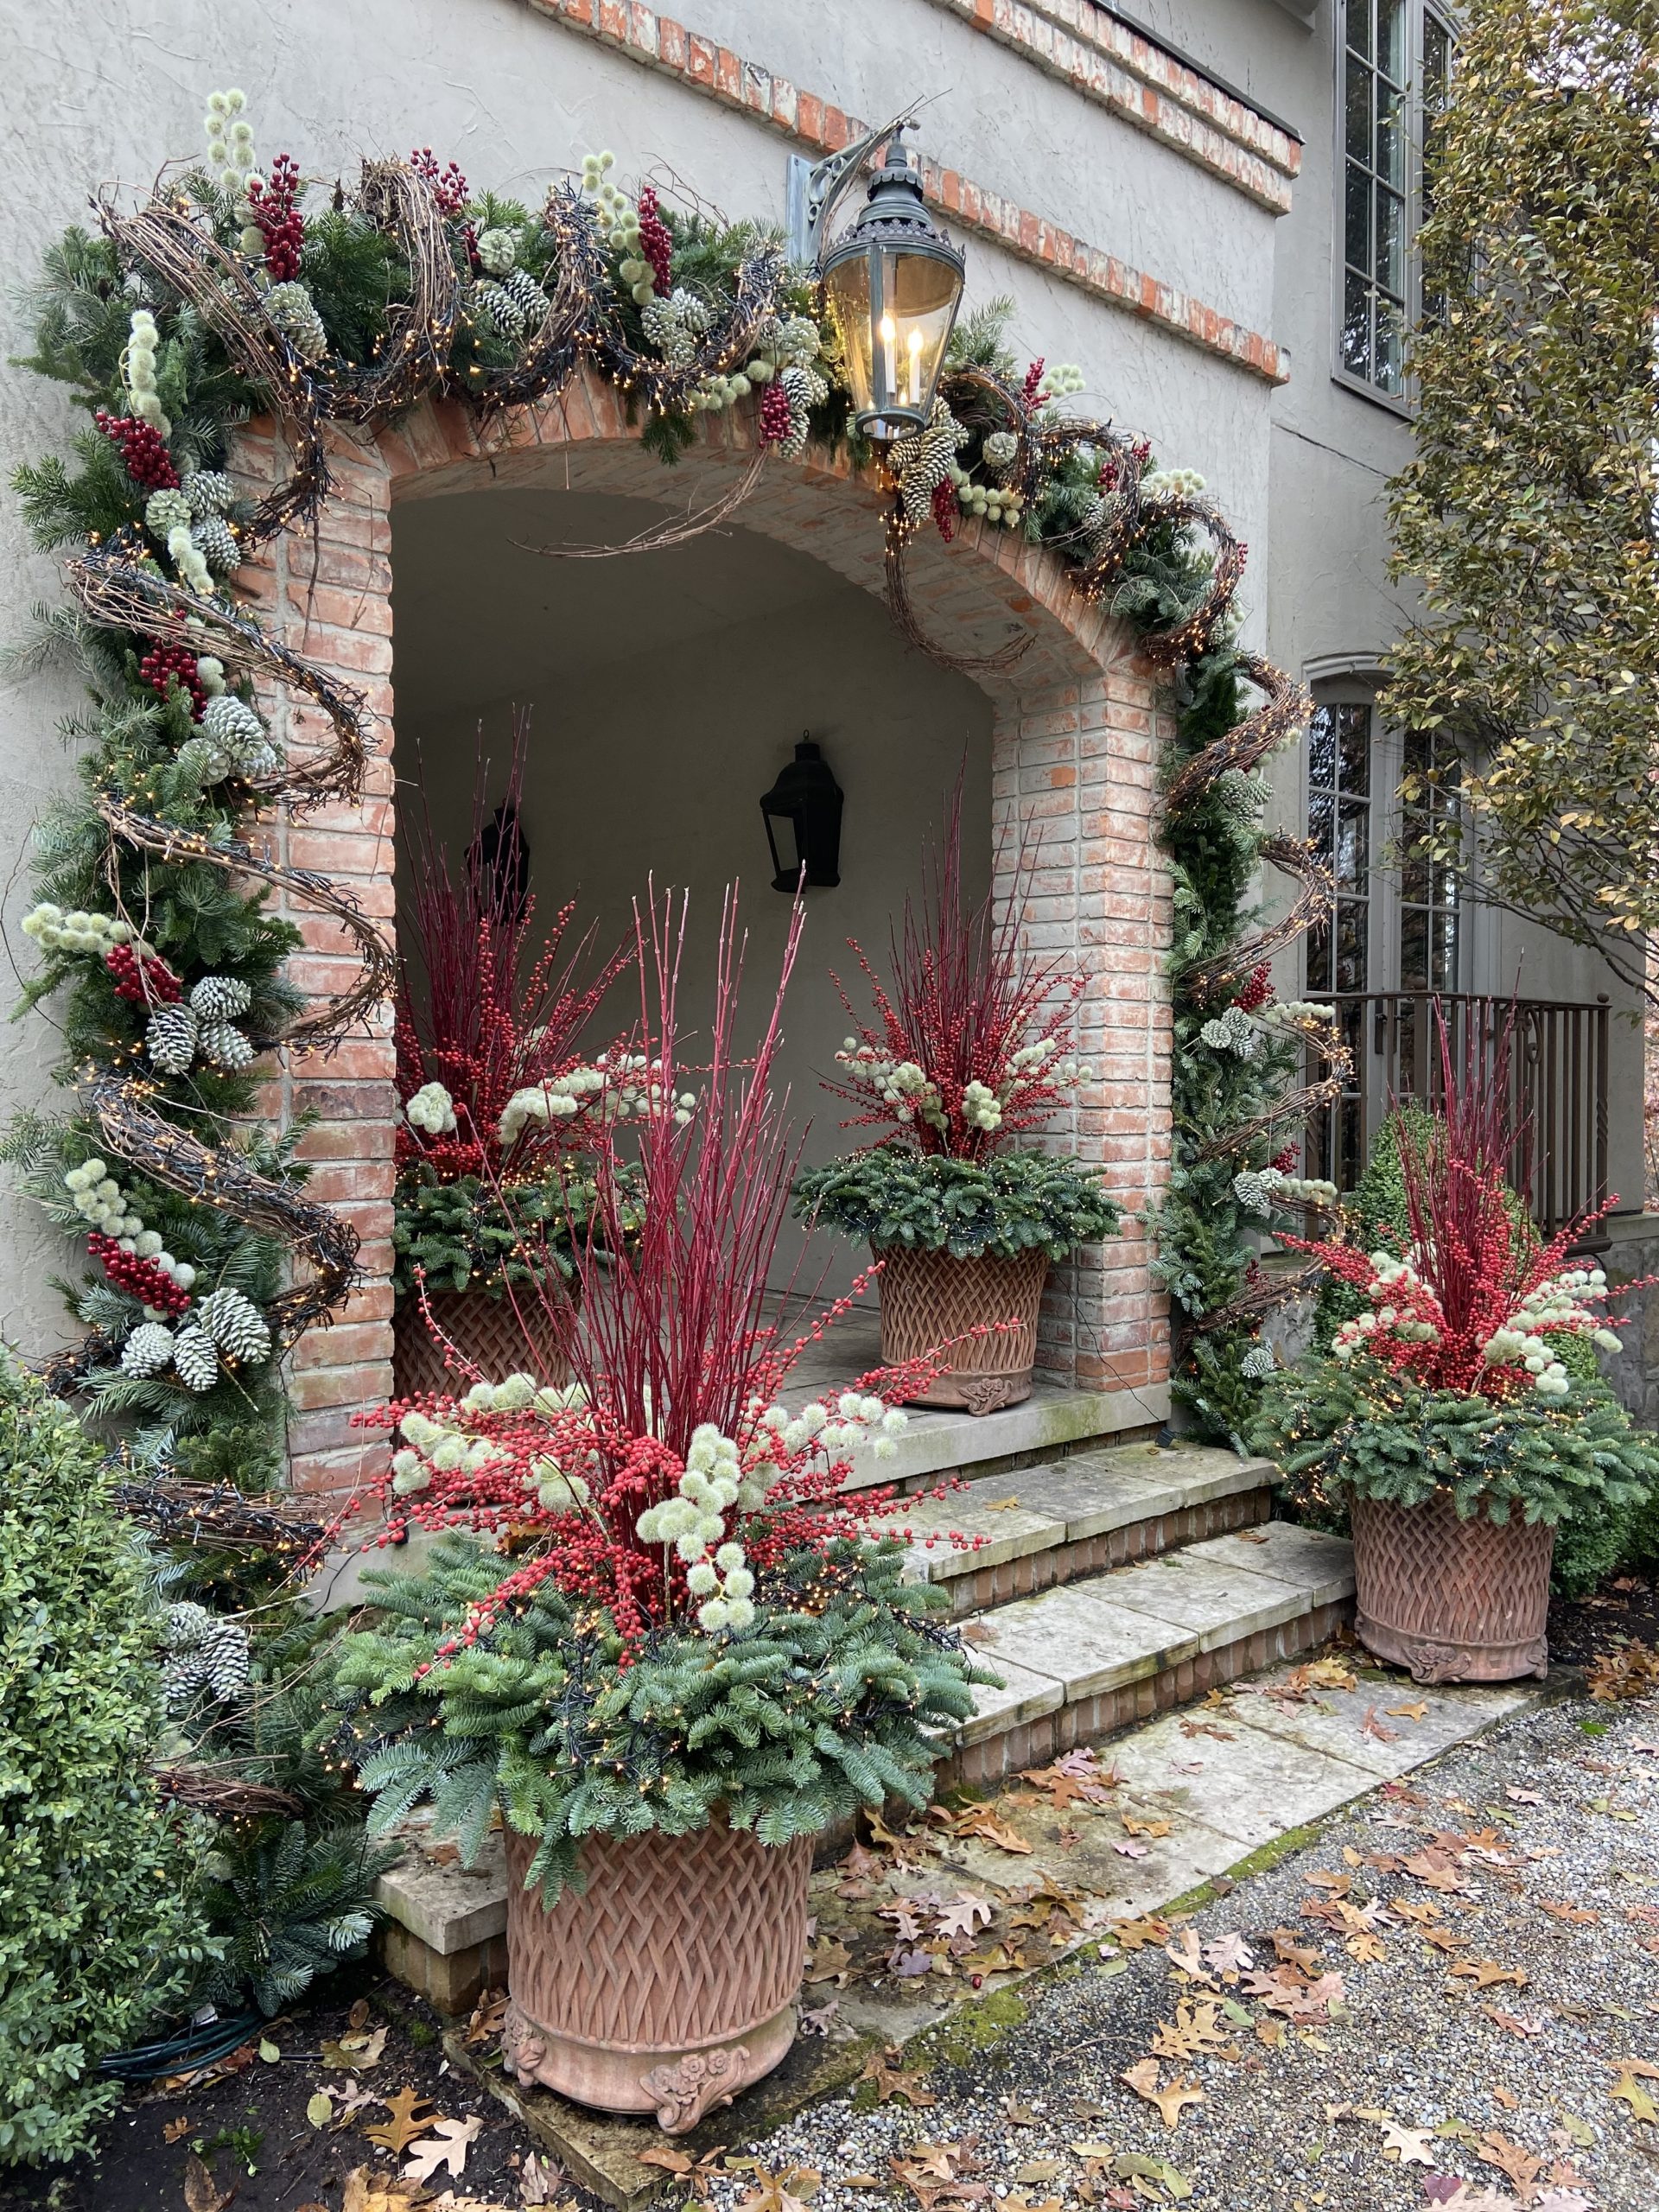
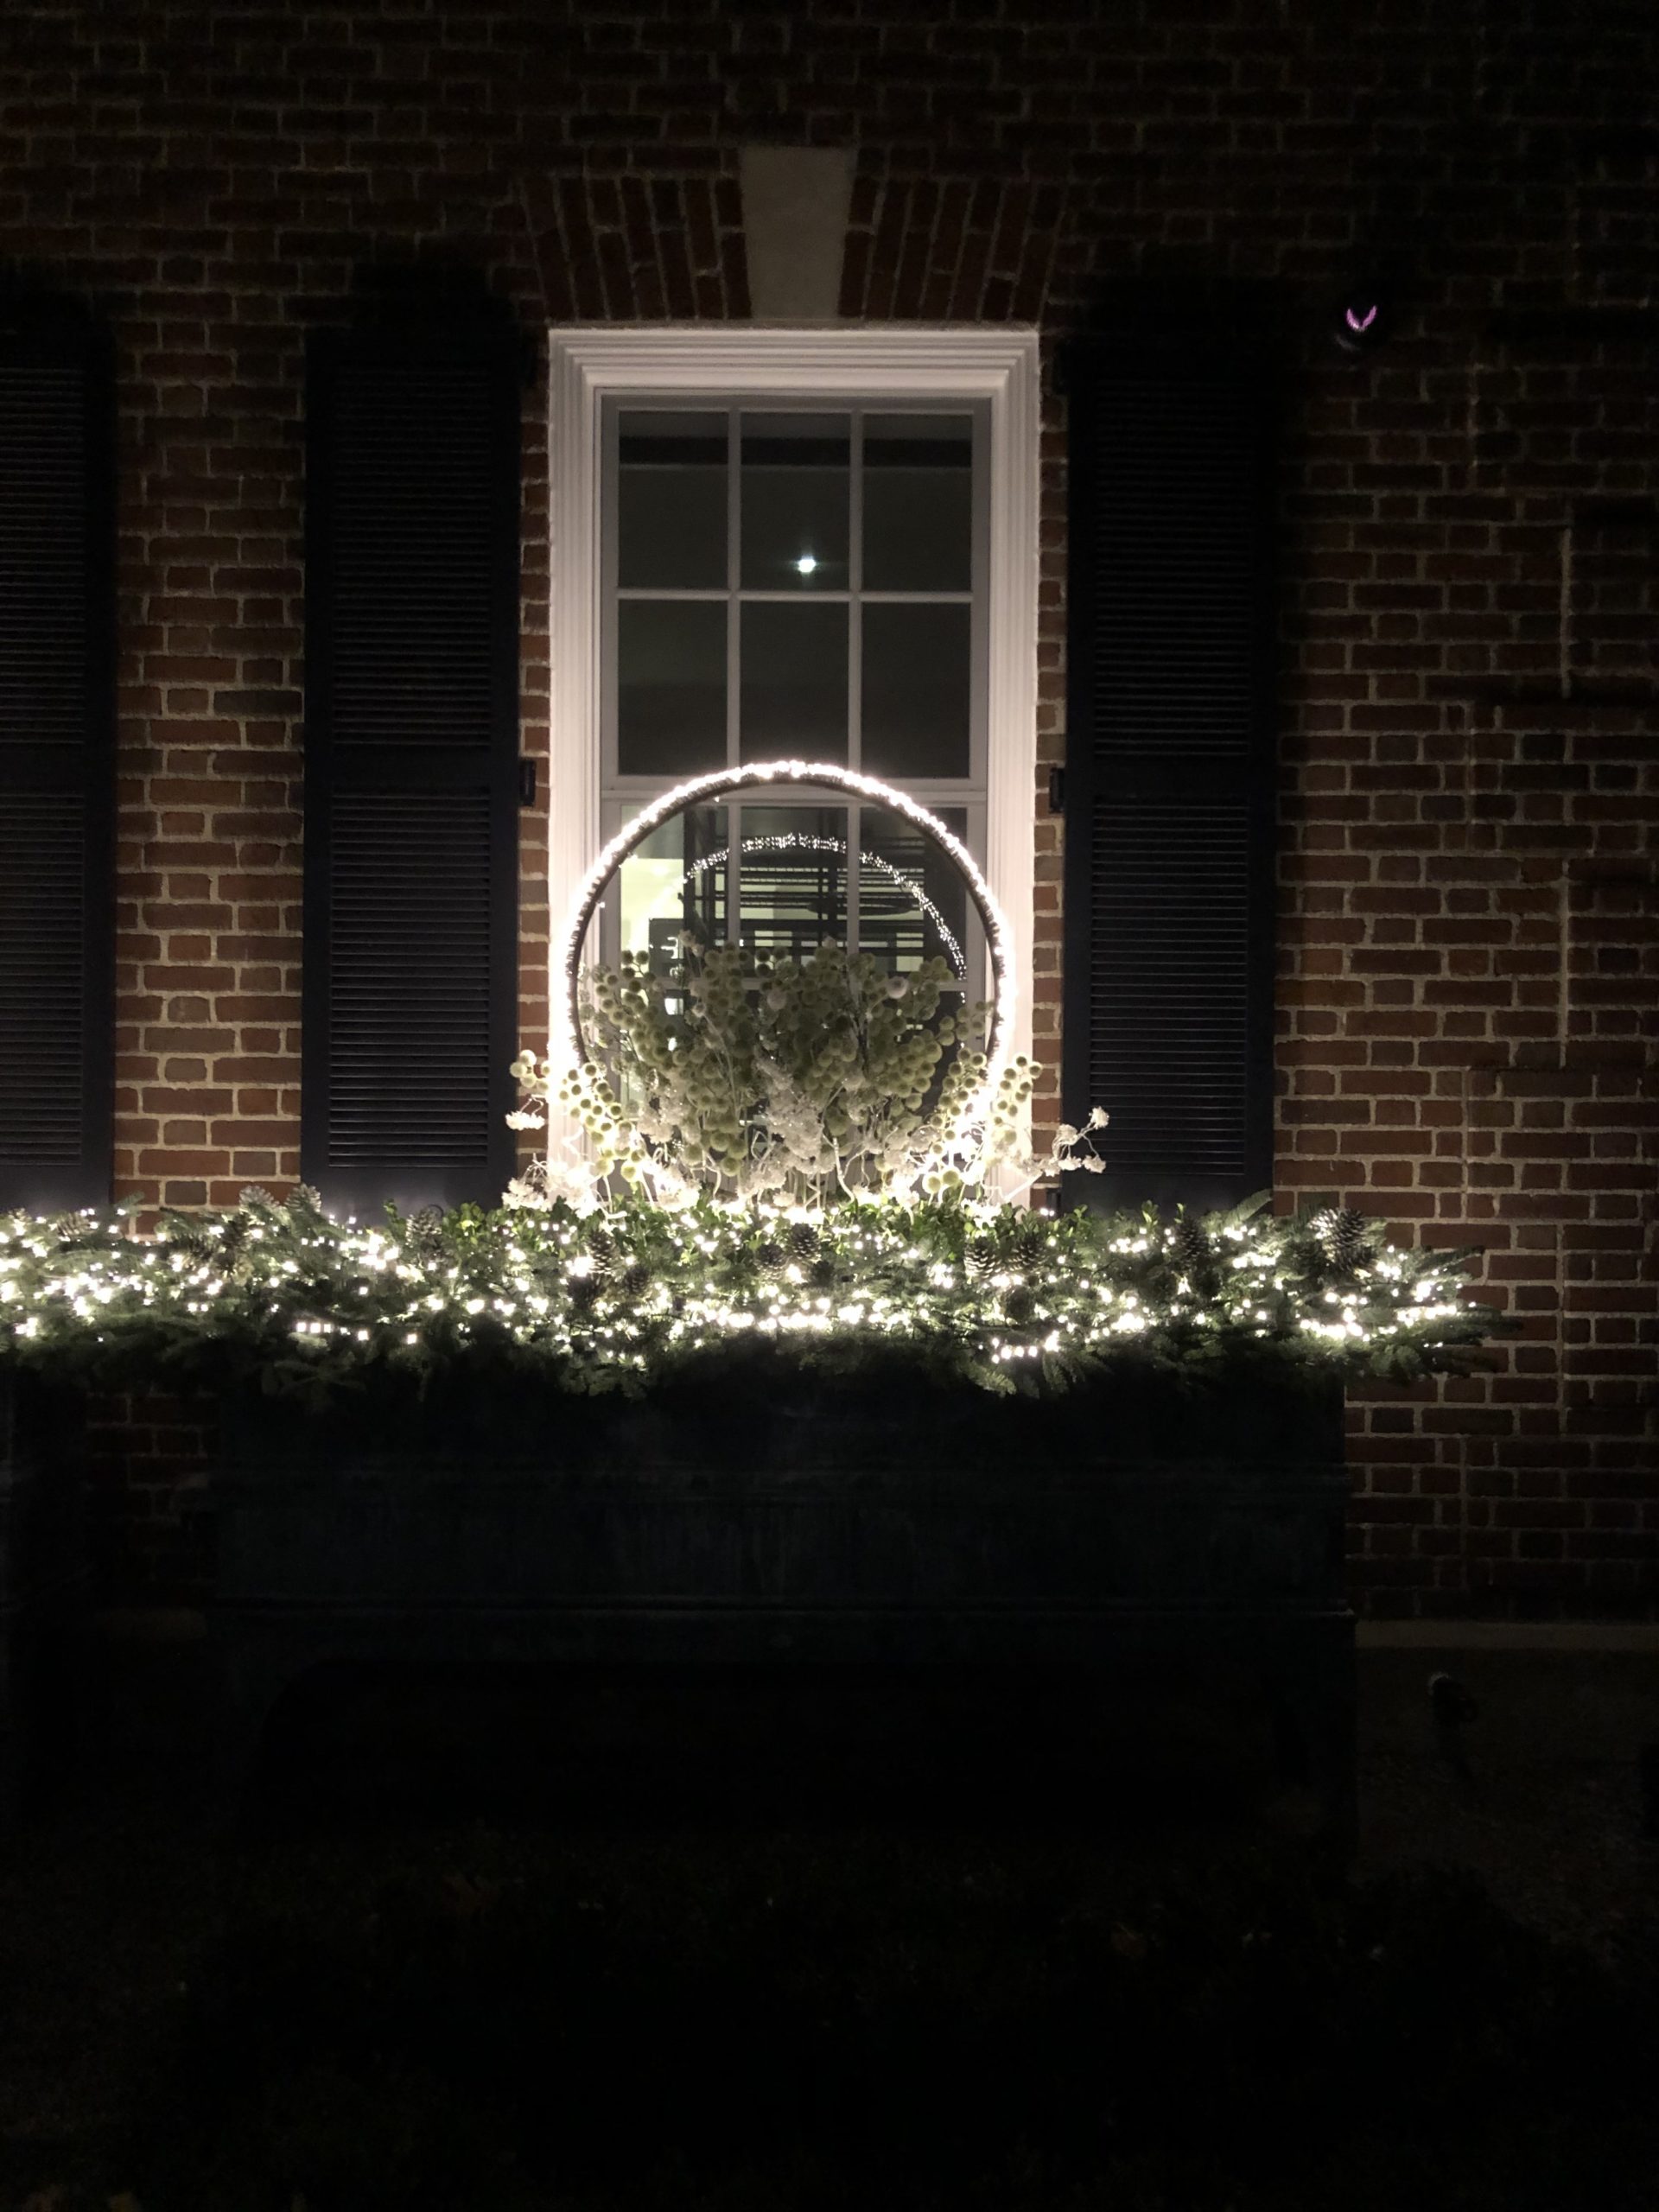
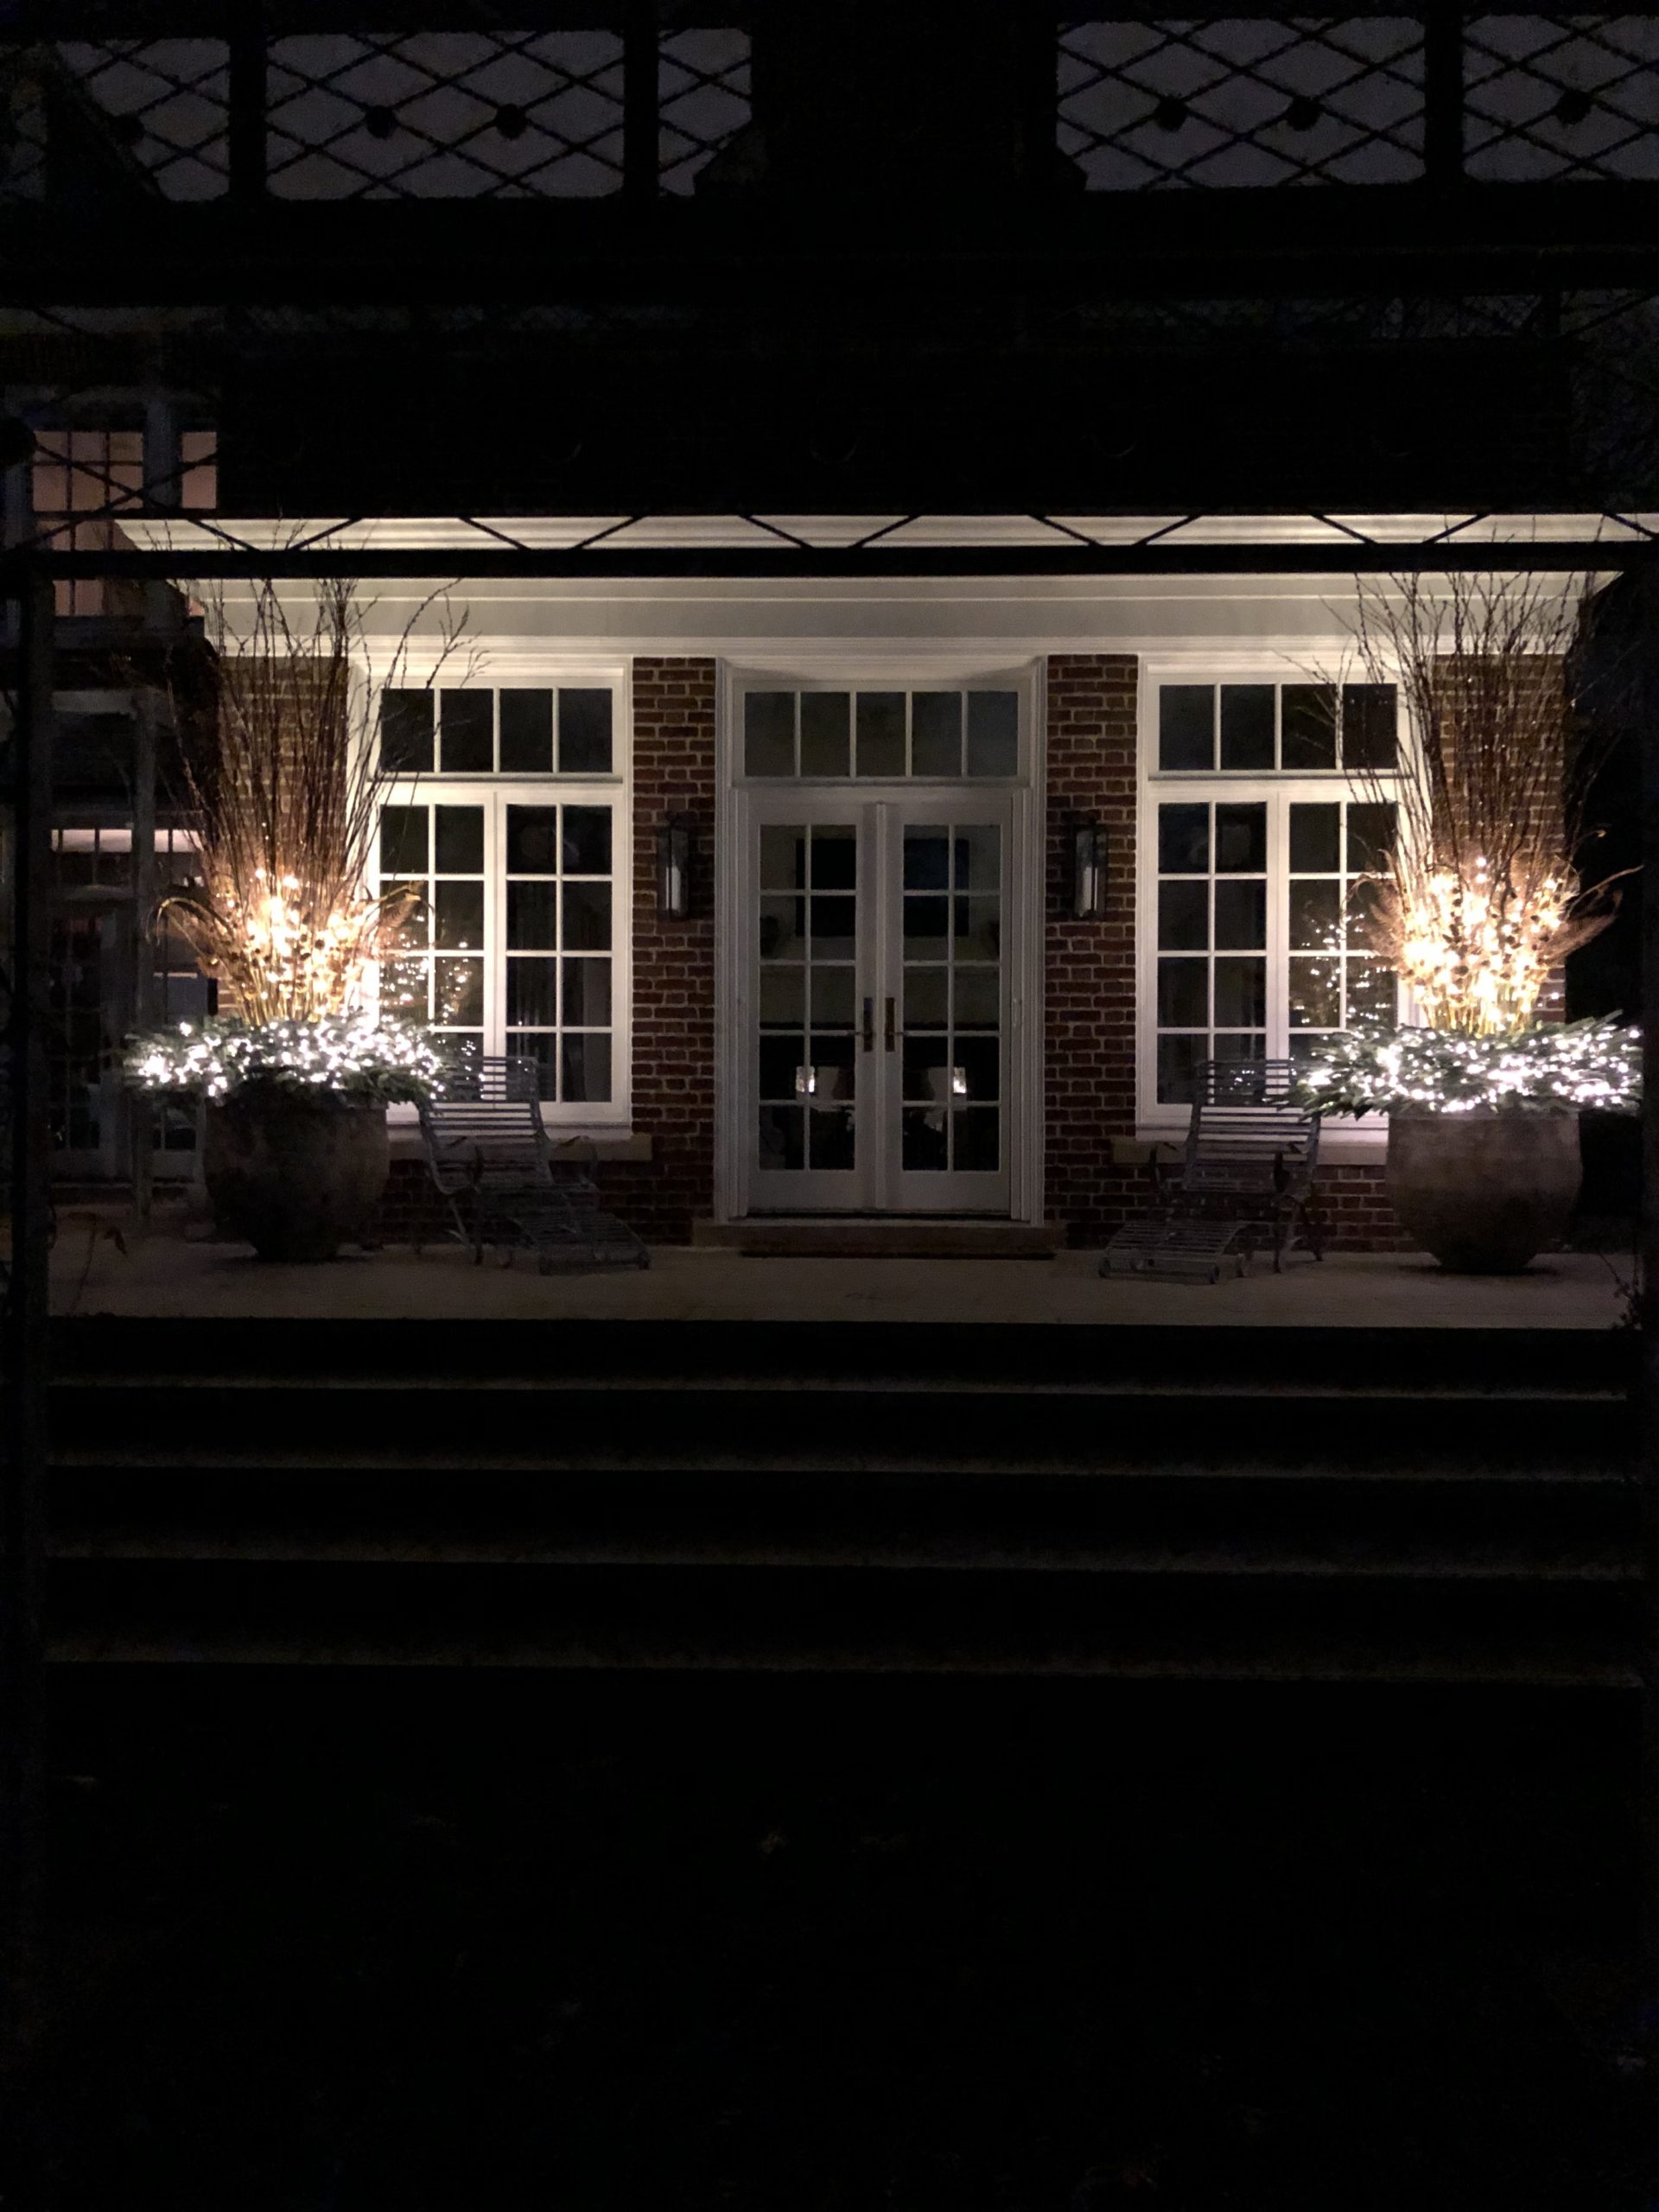
night light

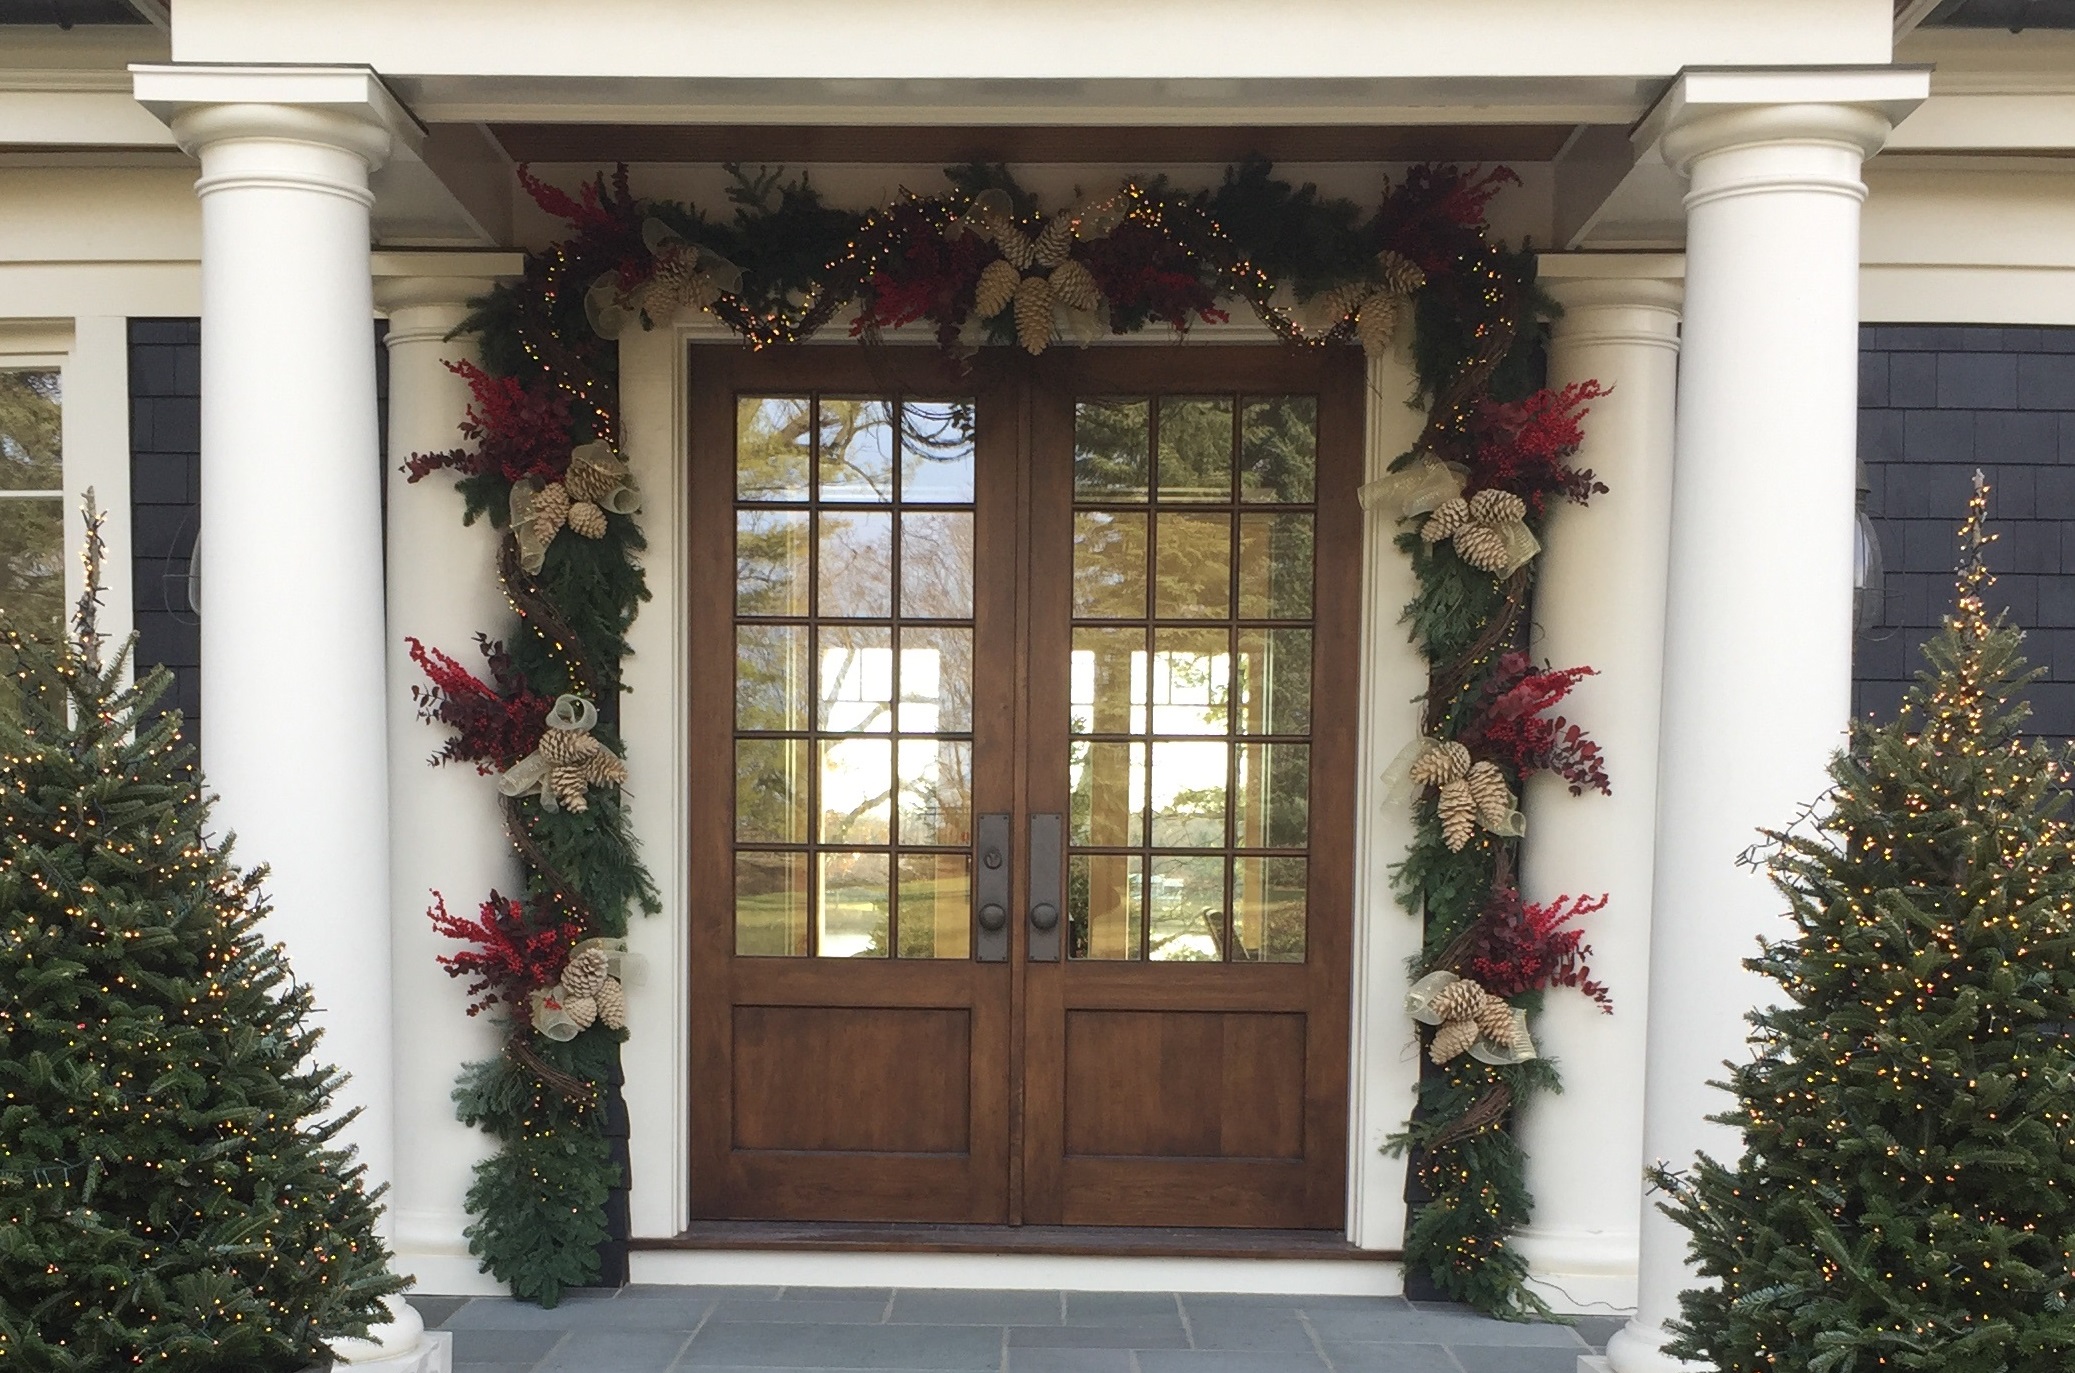
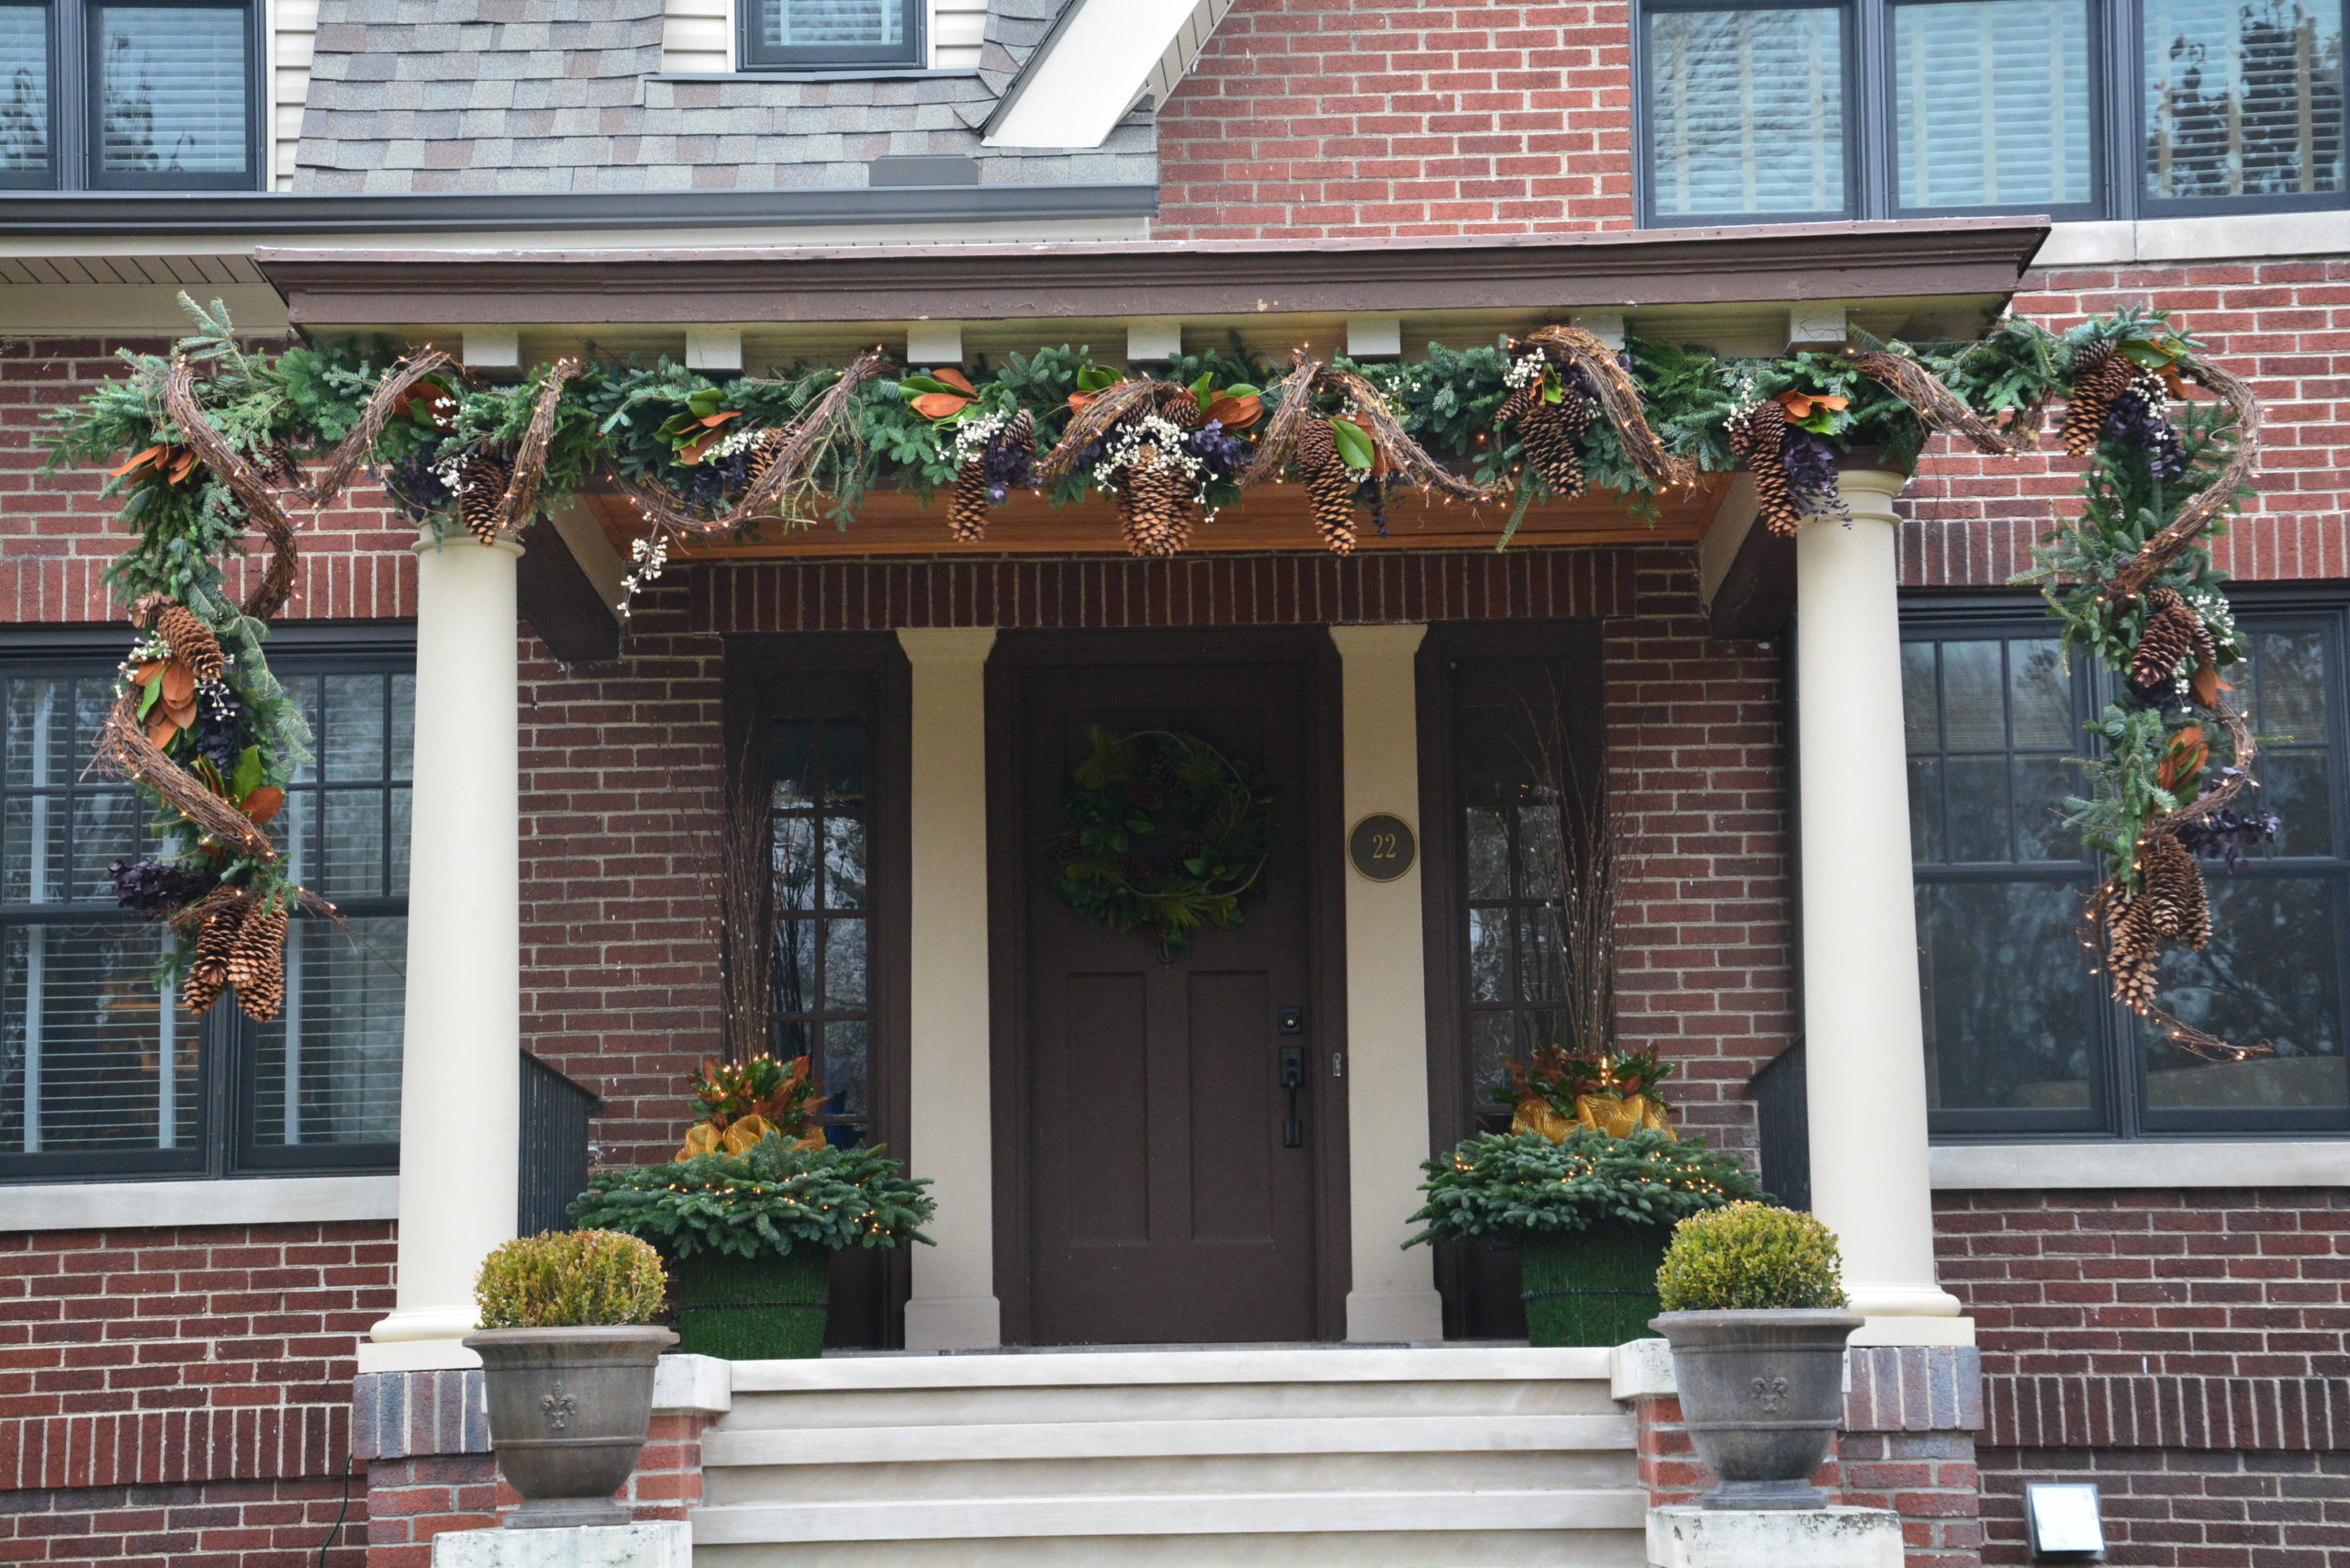
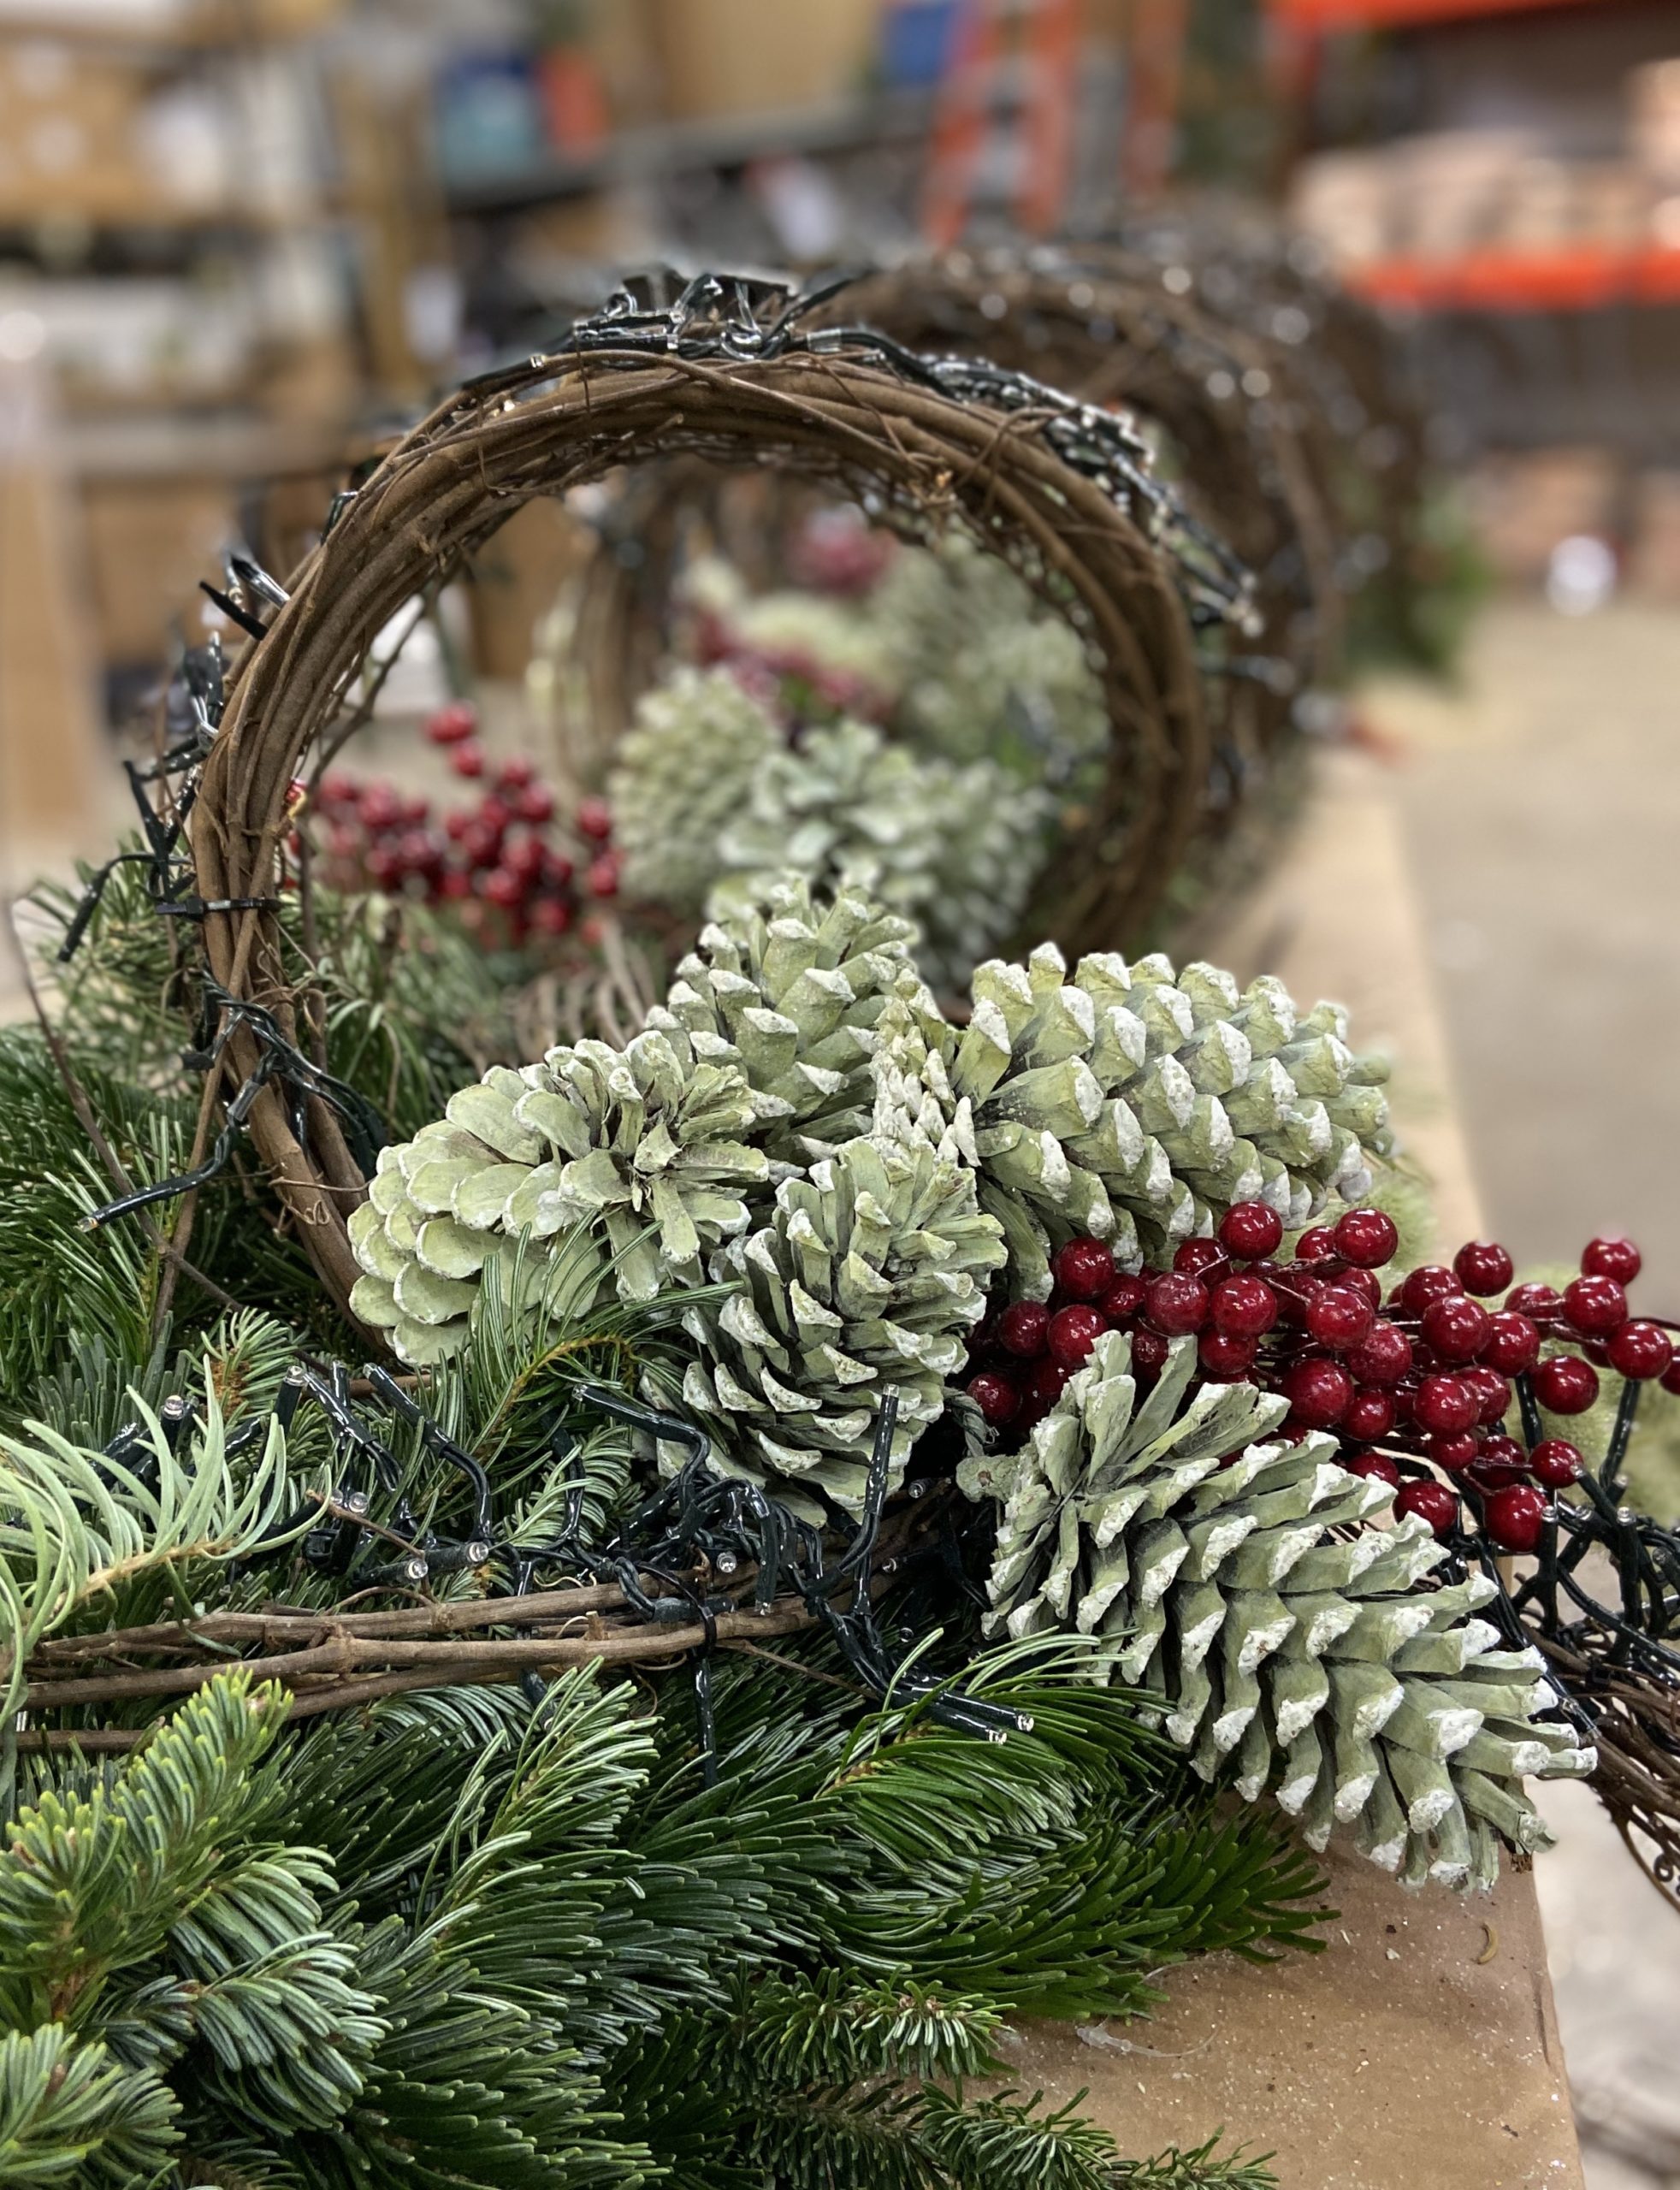
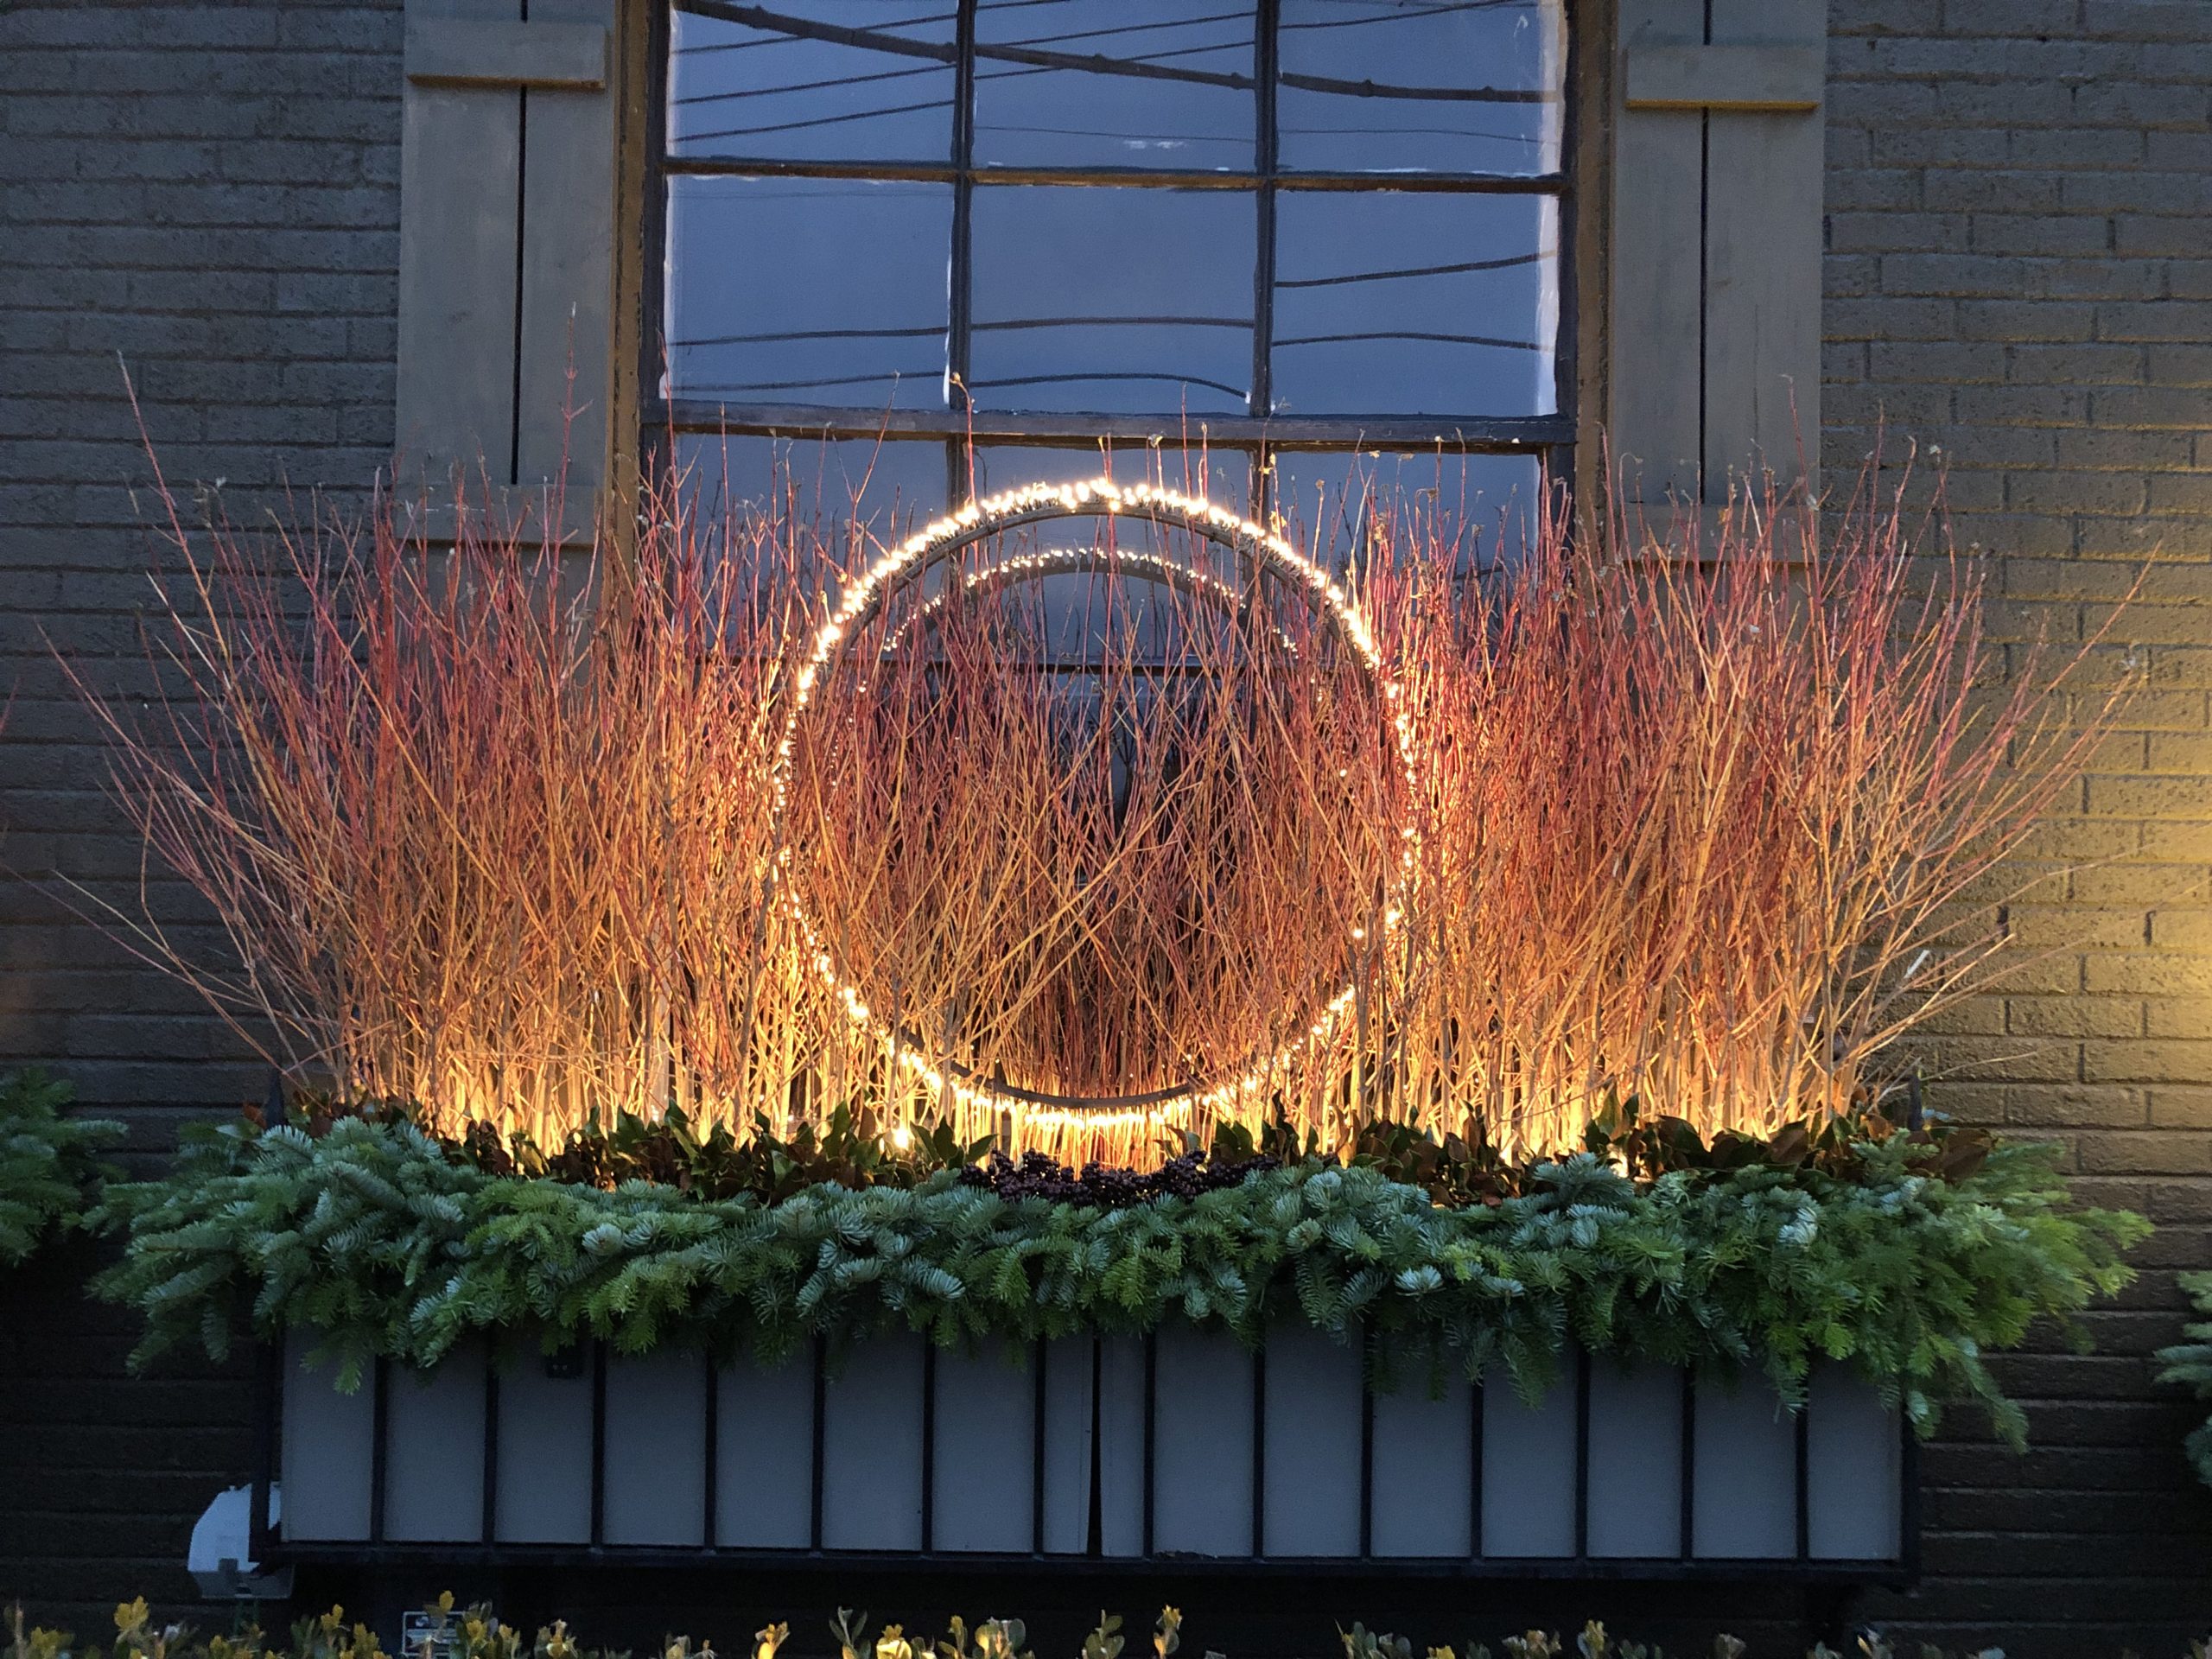
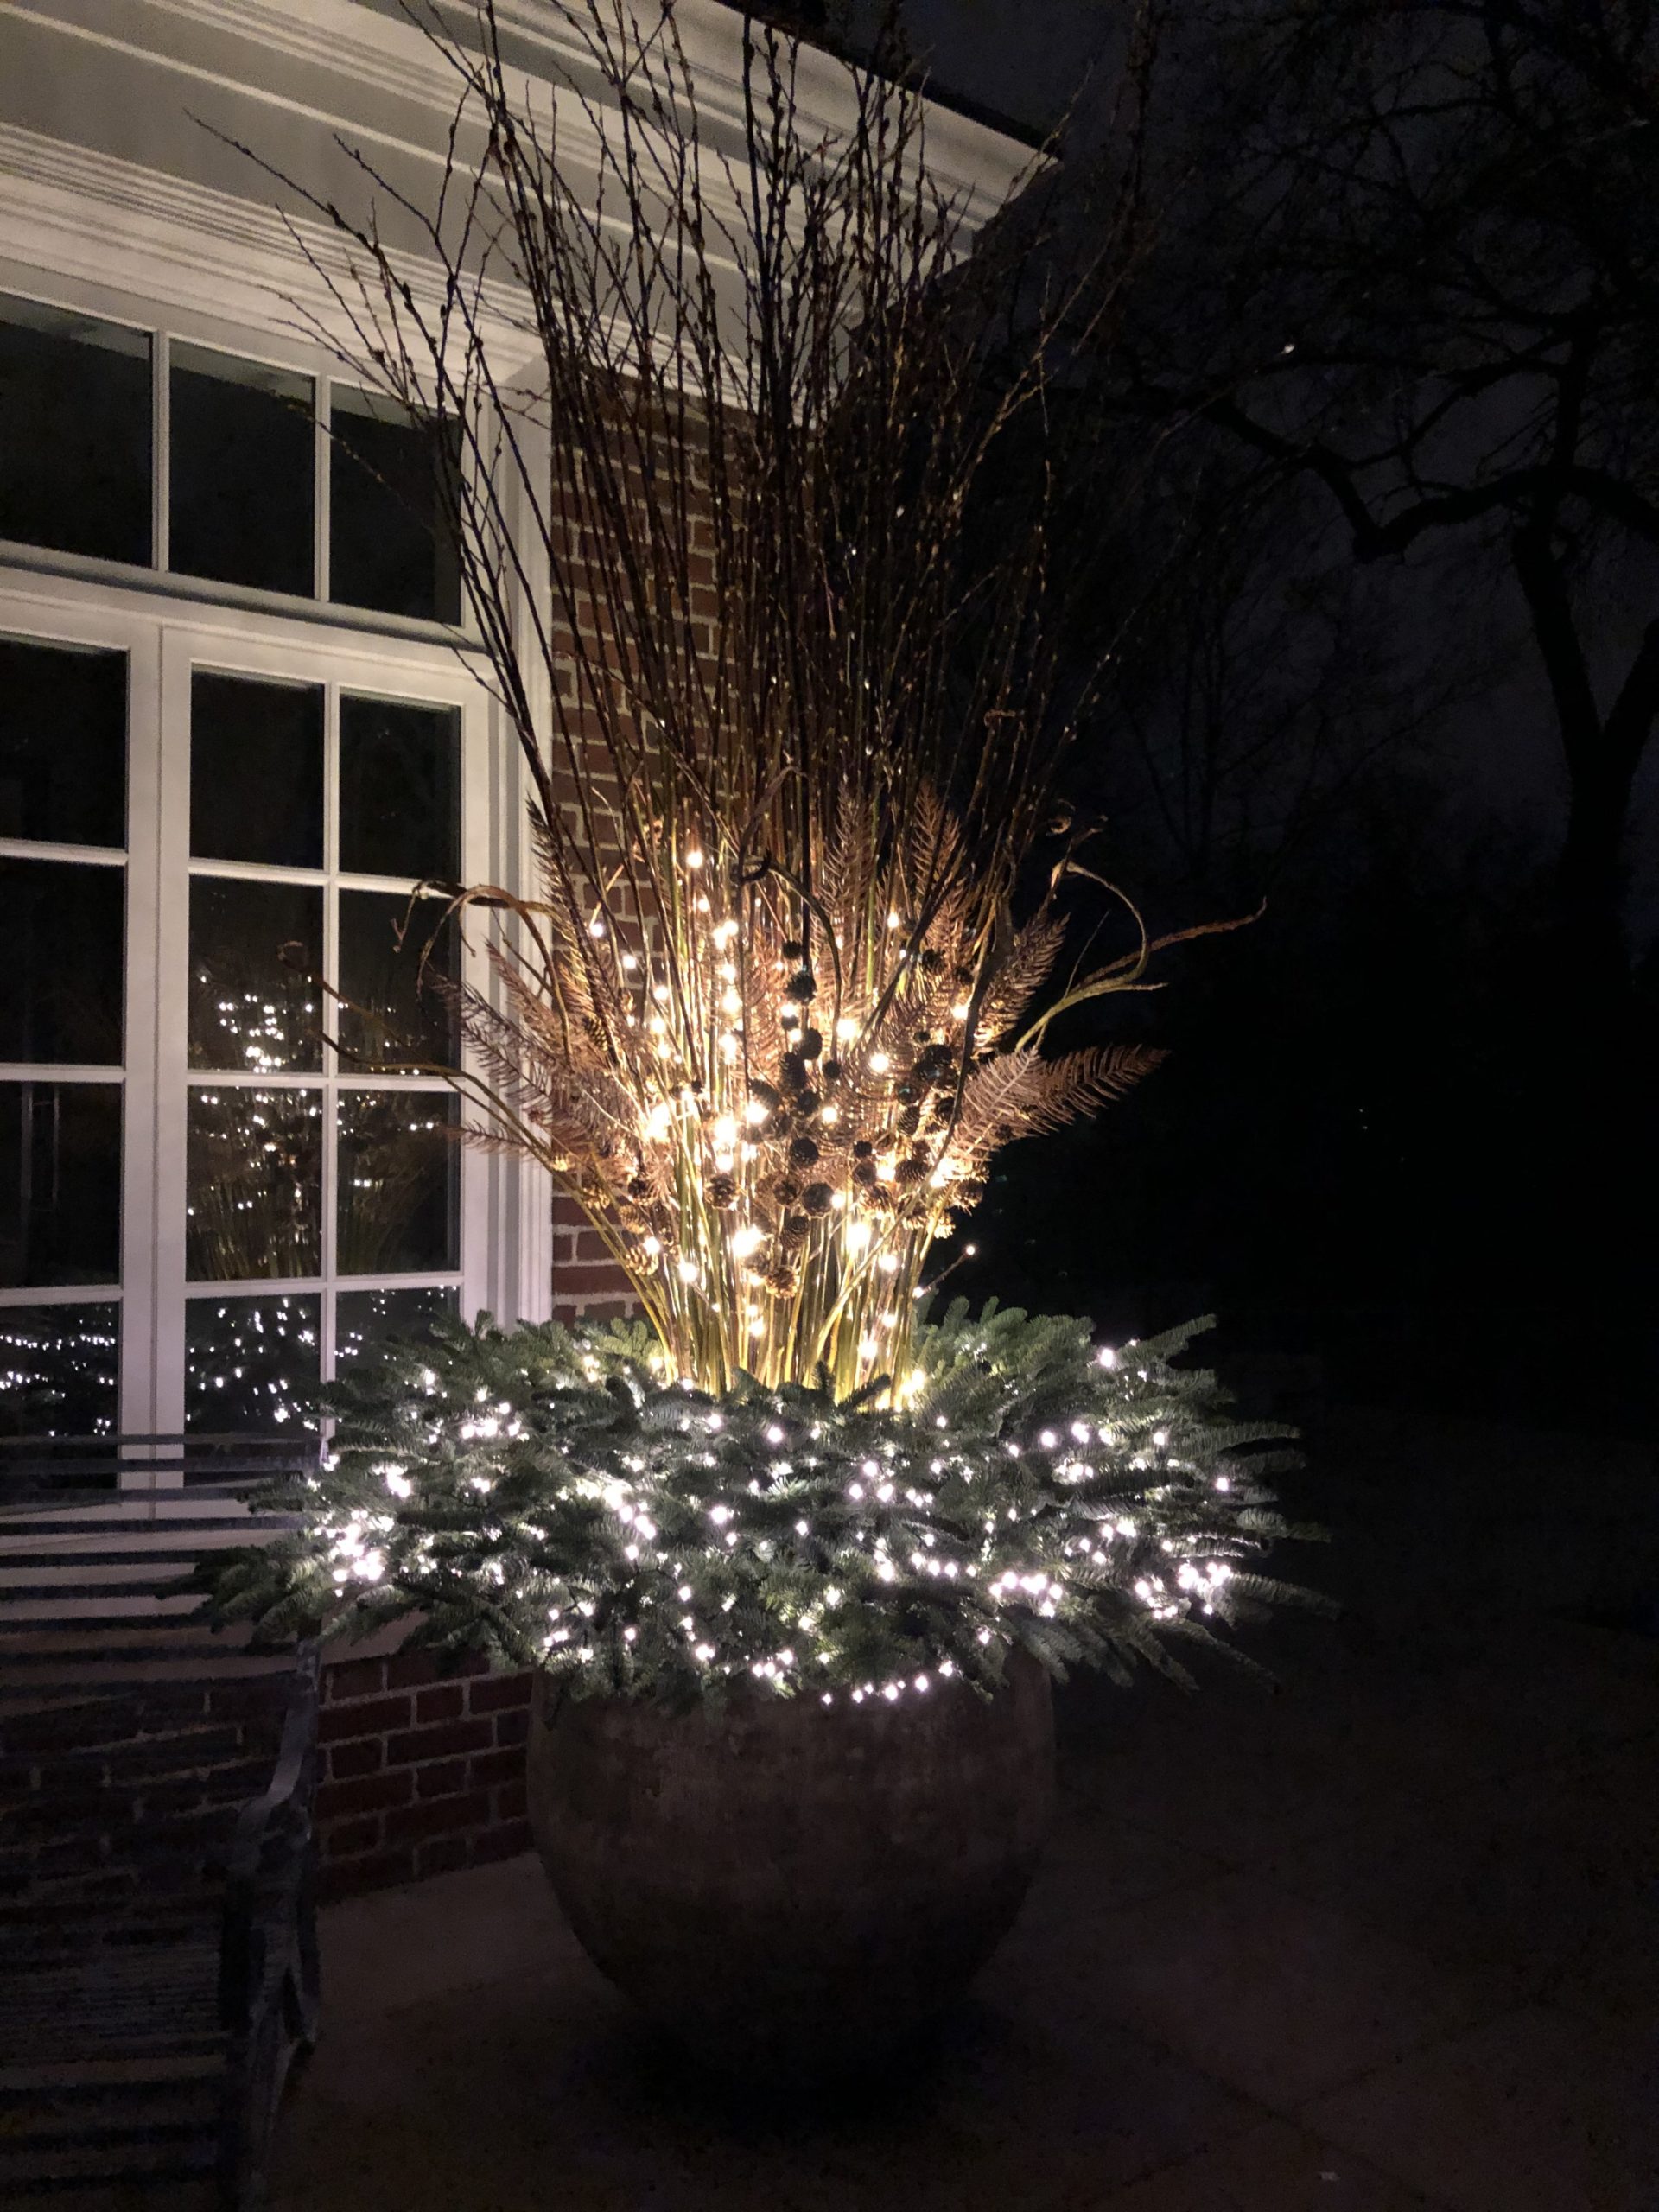
The cooler toned lights in the greens, and the warmer white lights in the pussy willow and pine cone picks is especially effective at dusk.

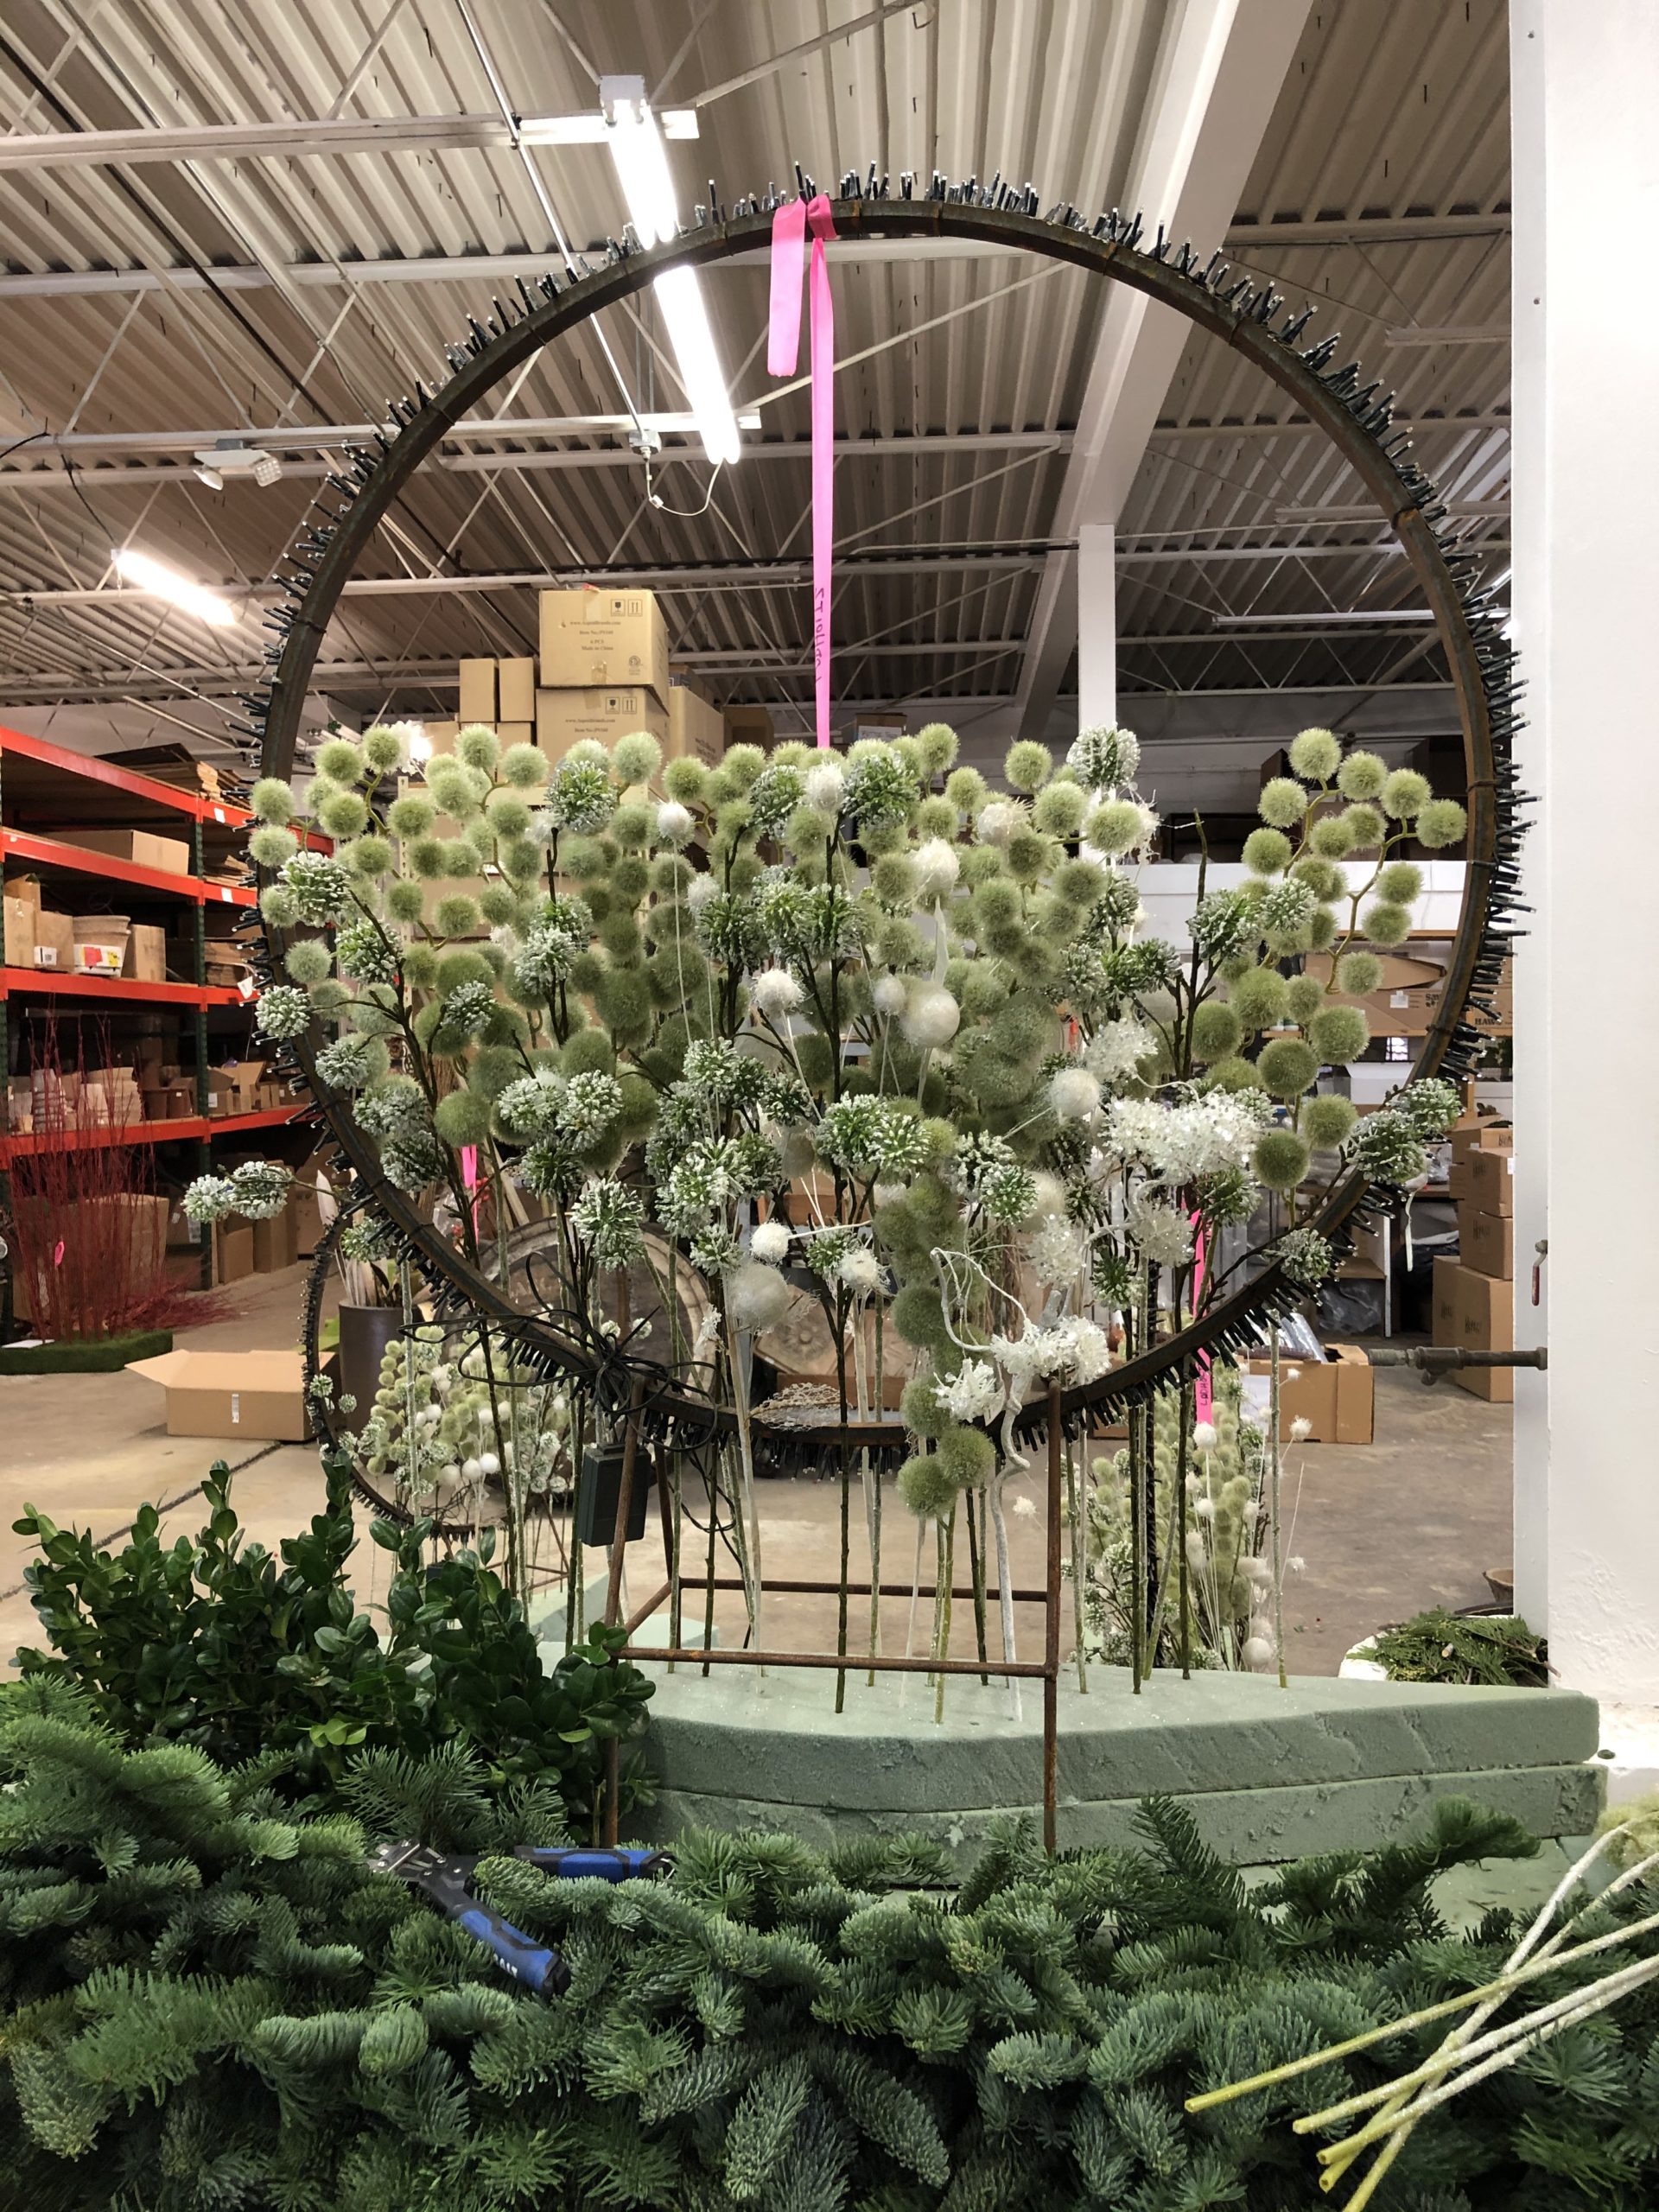
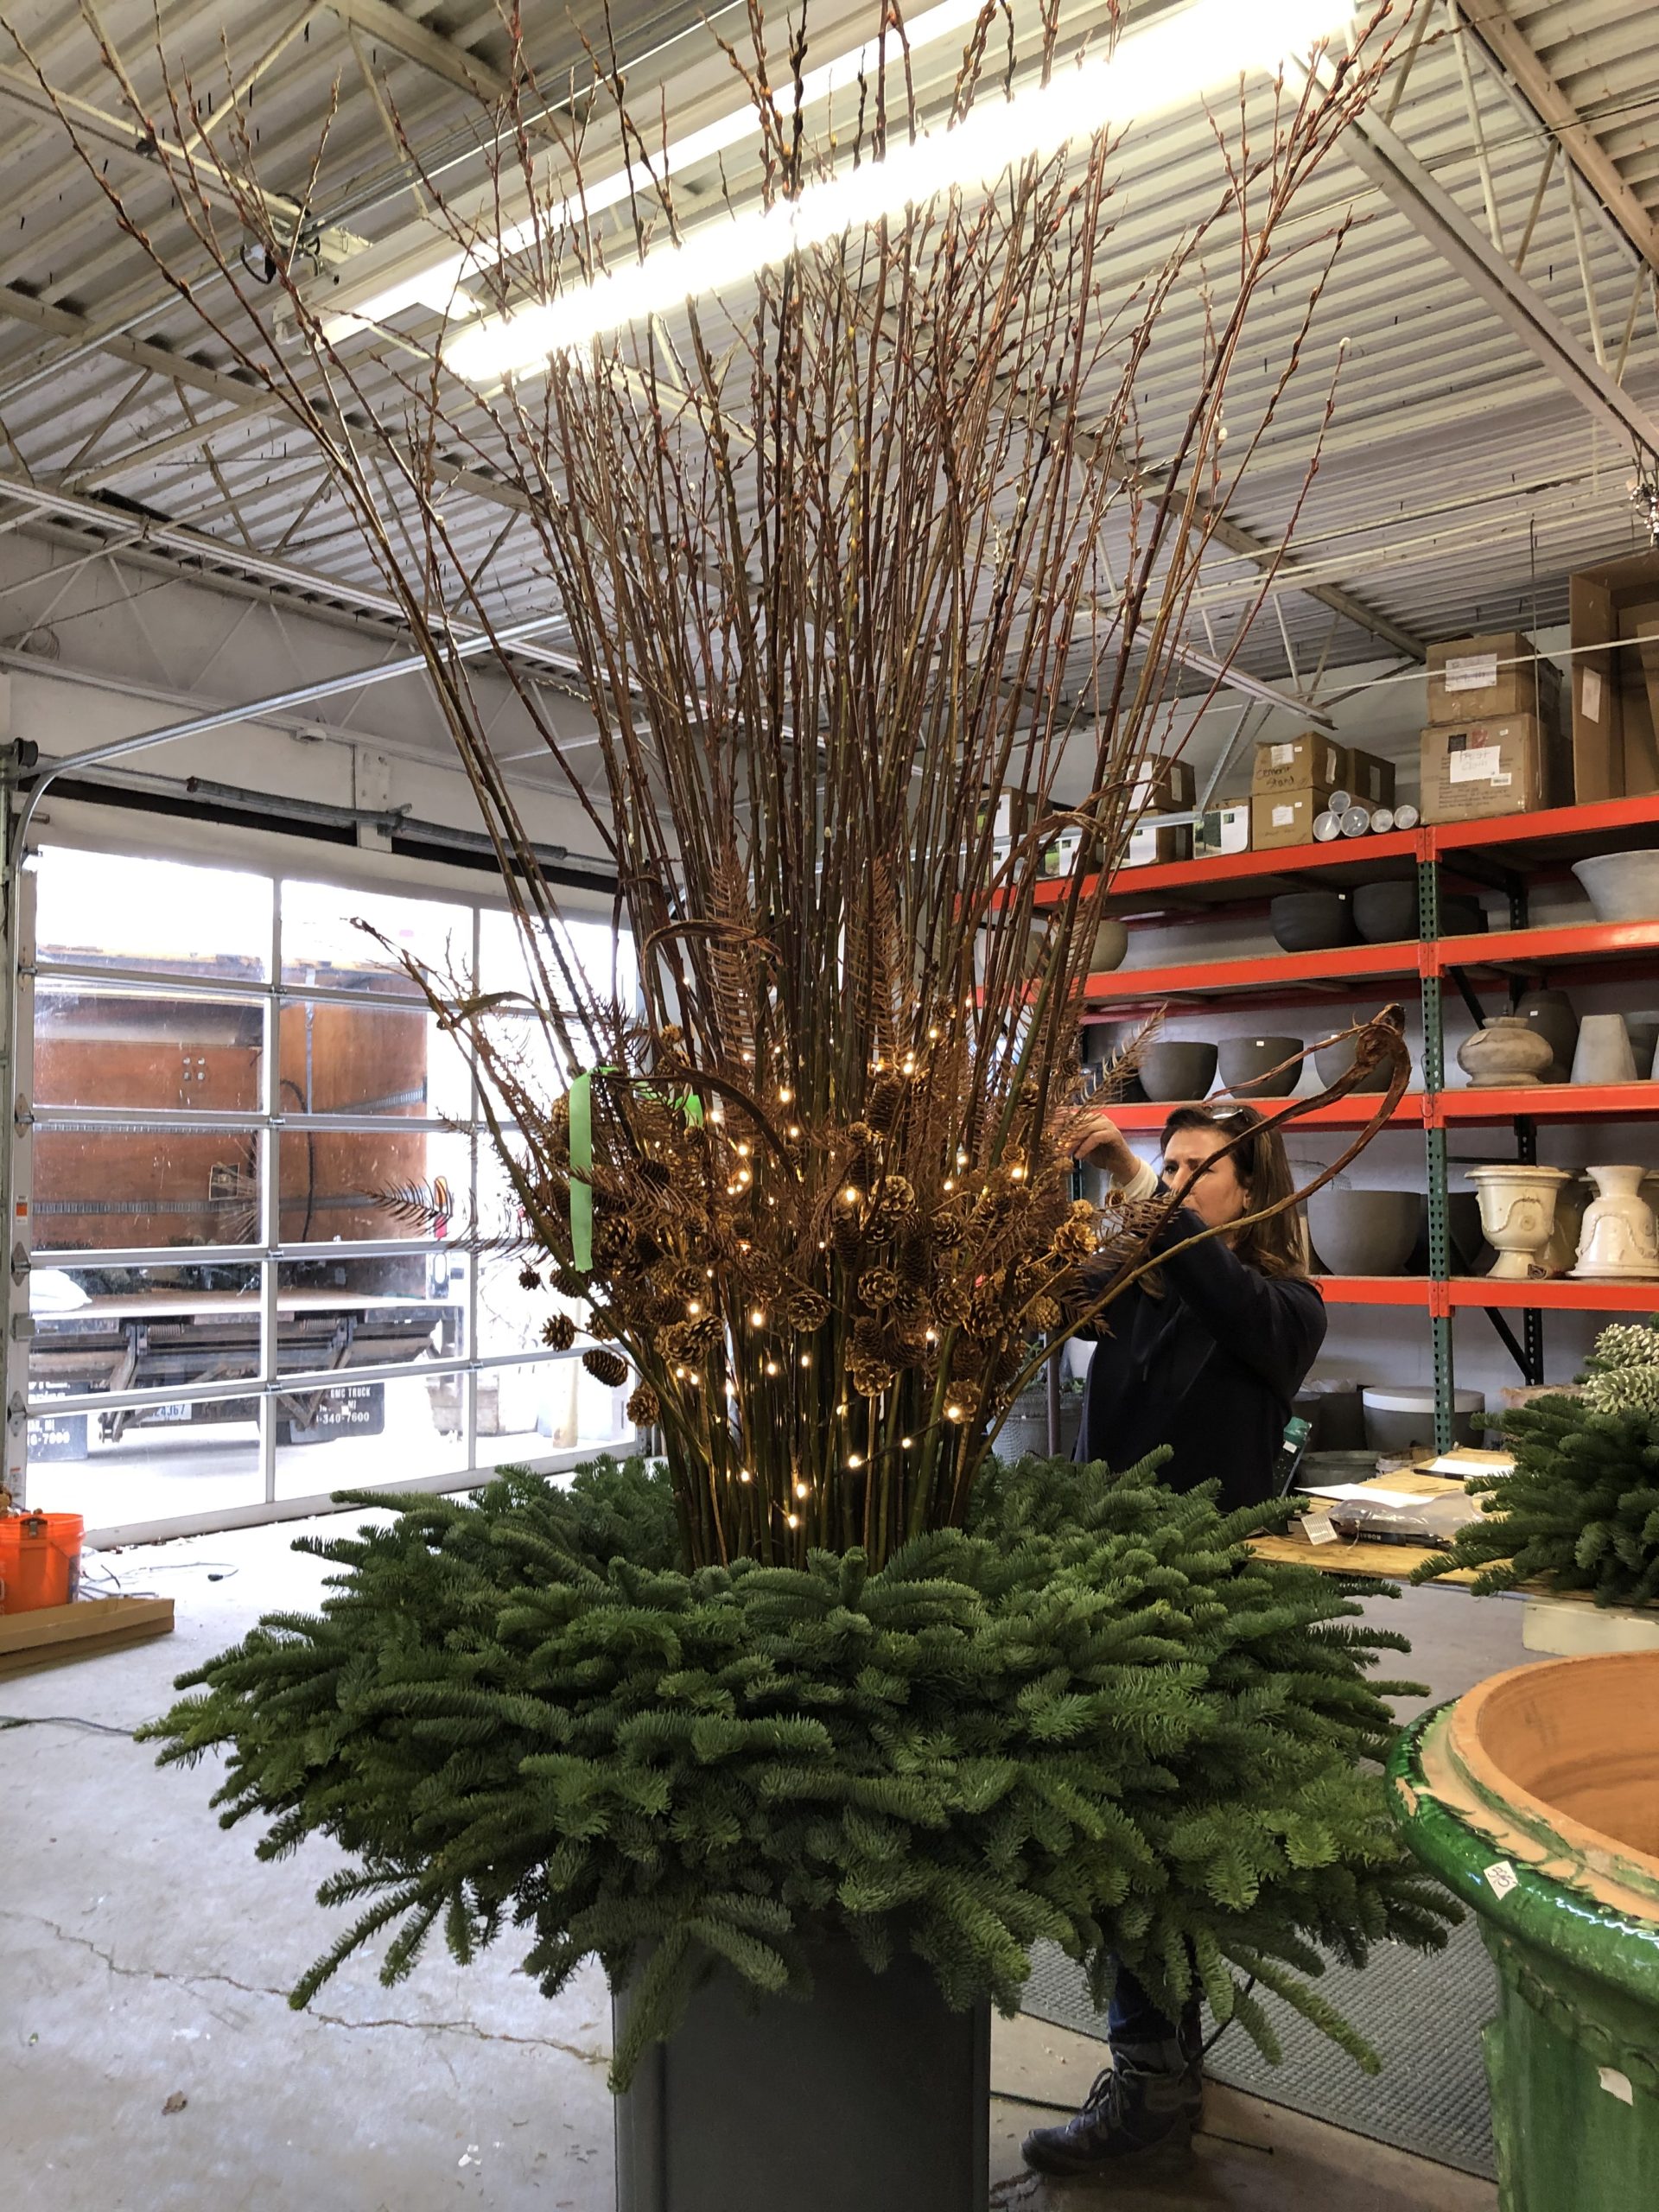
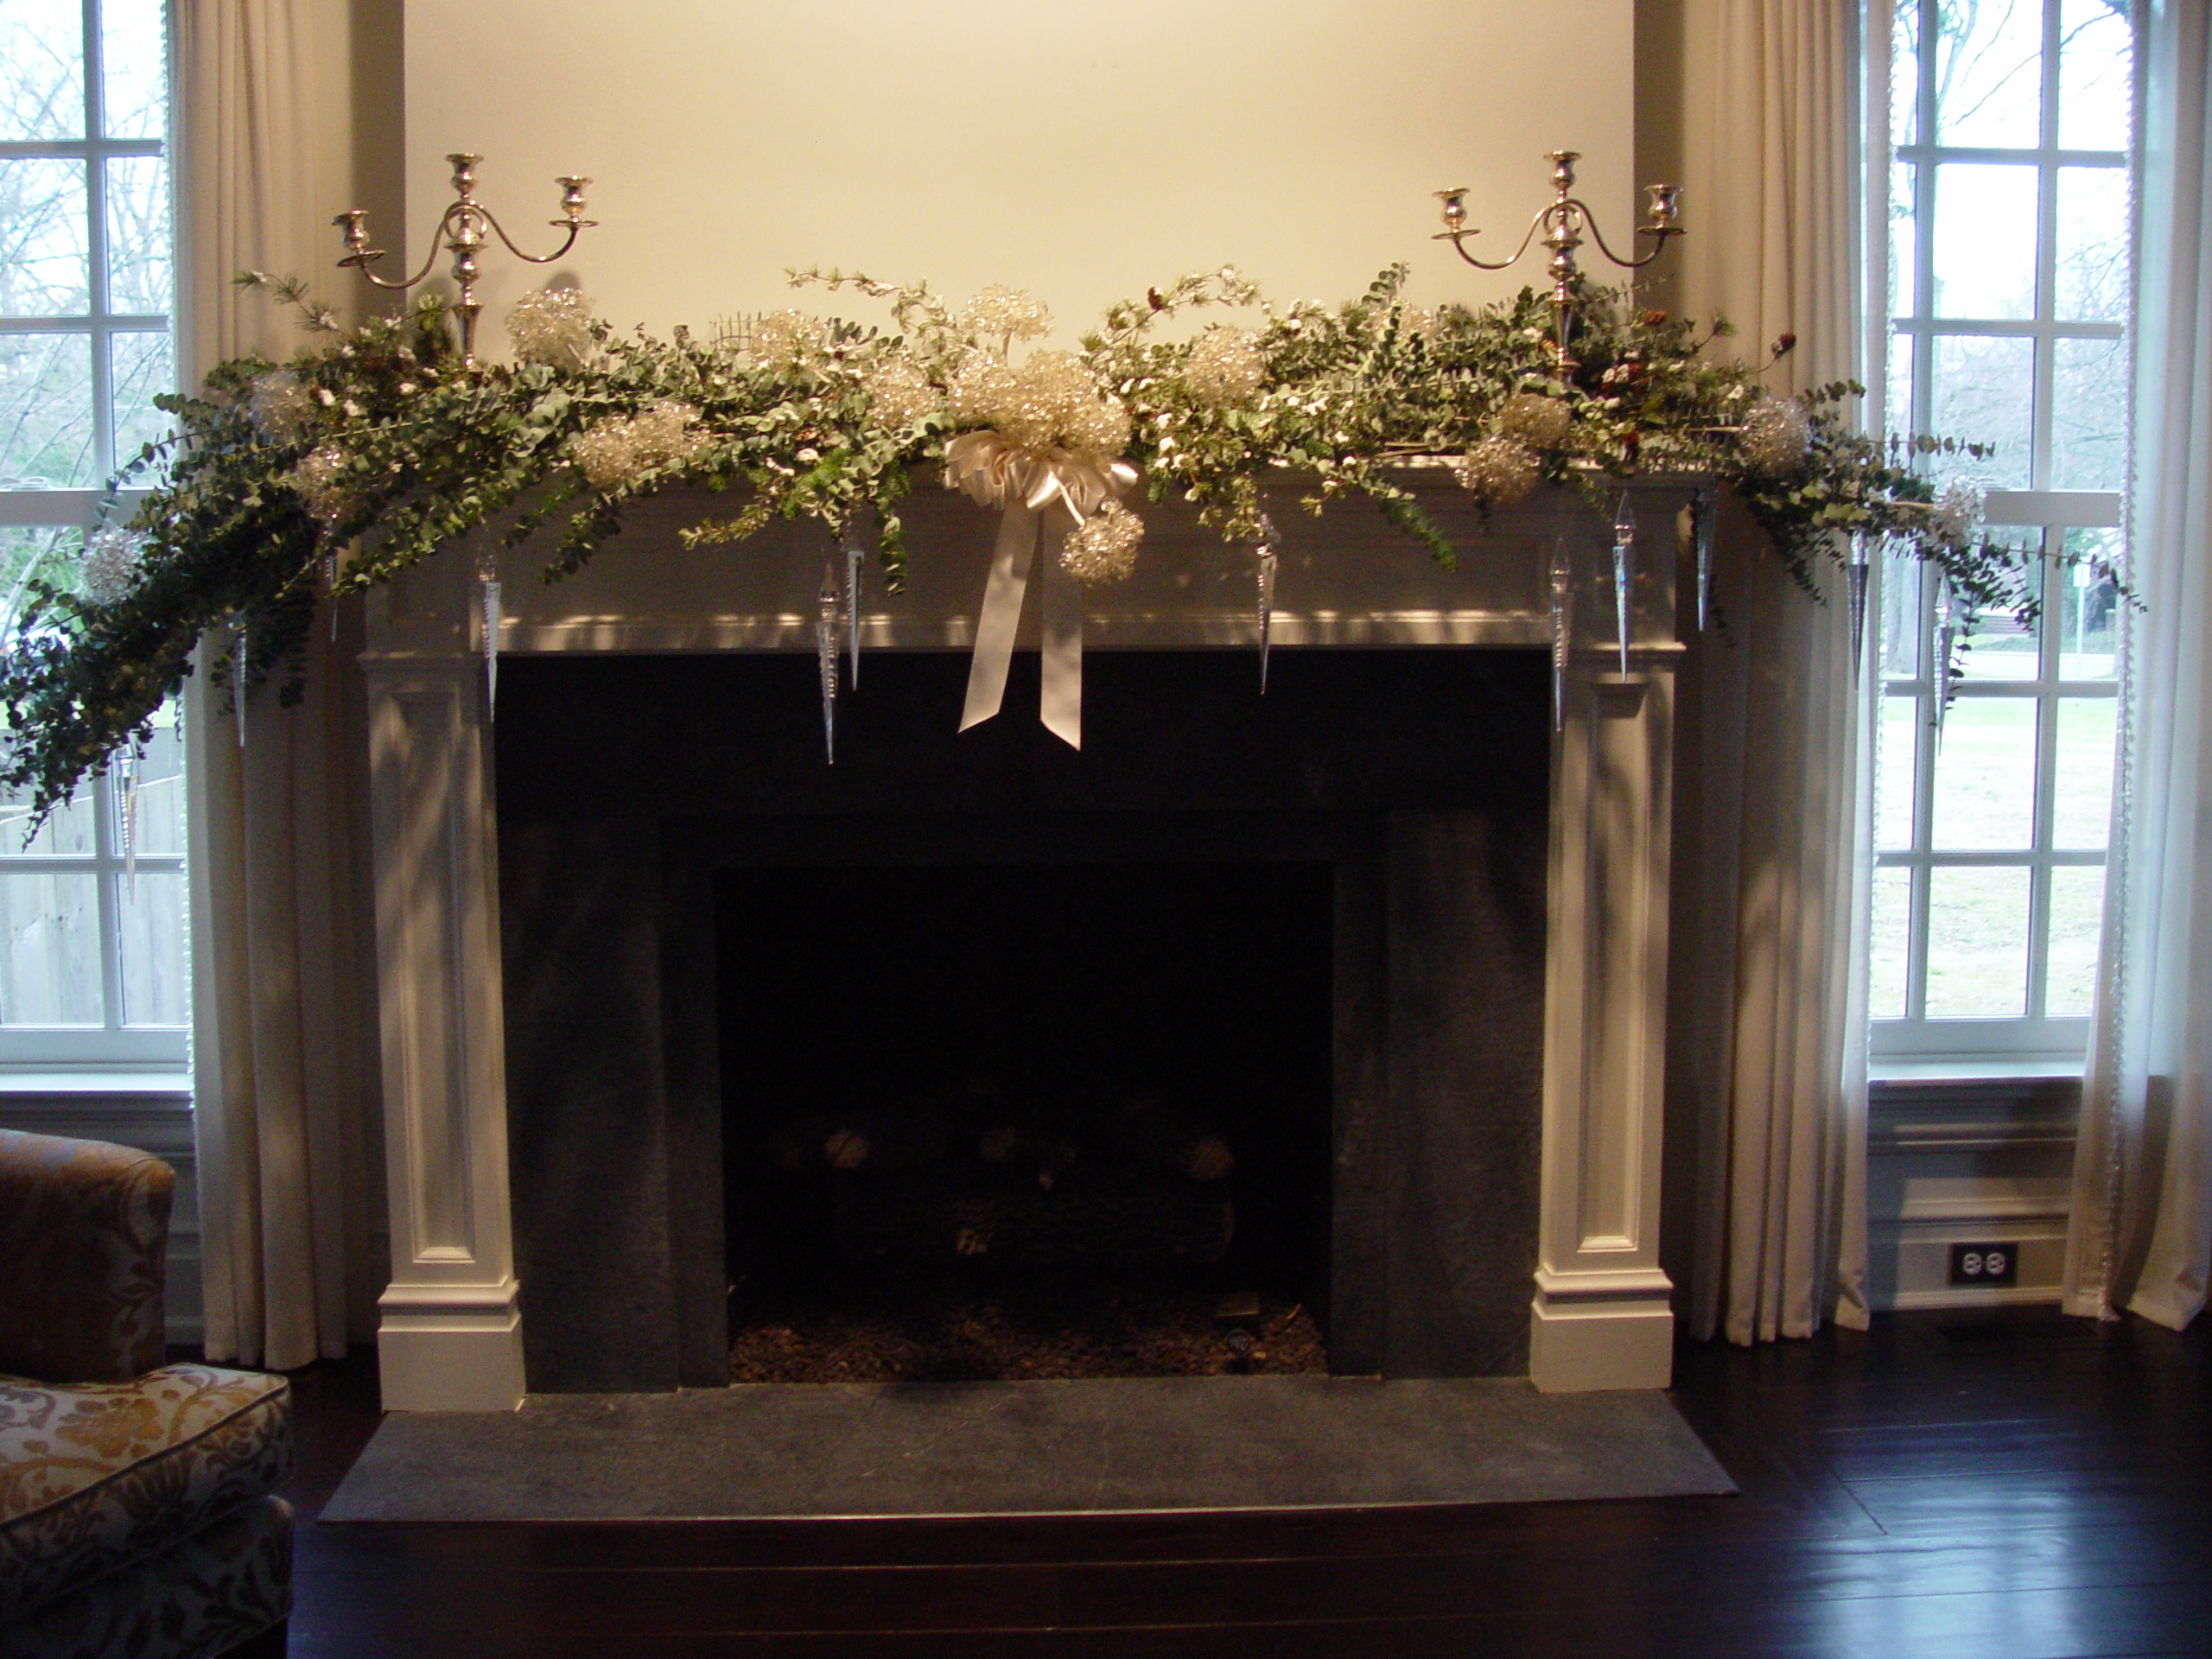
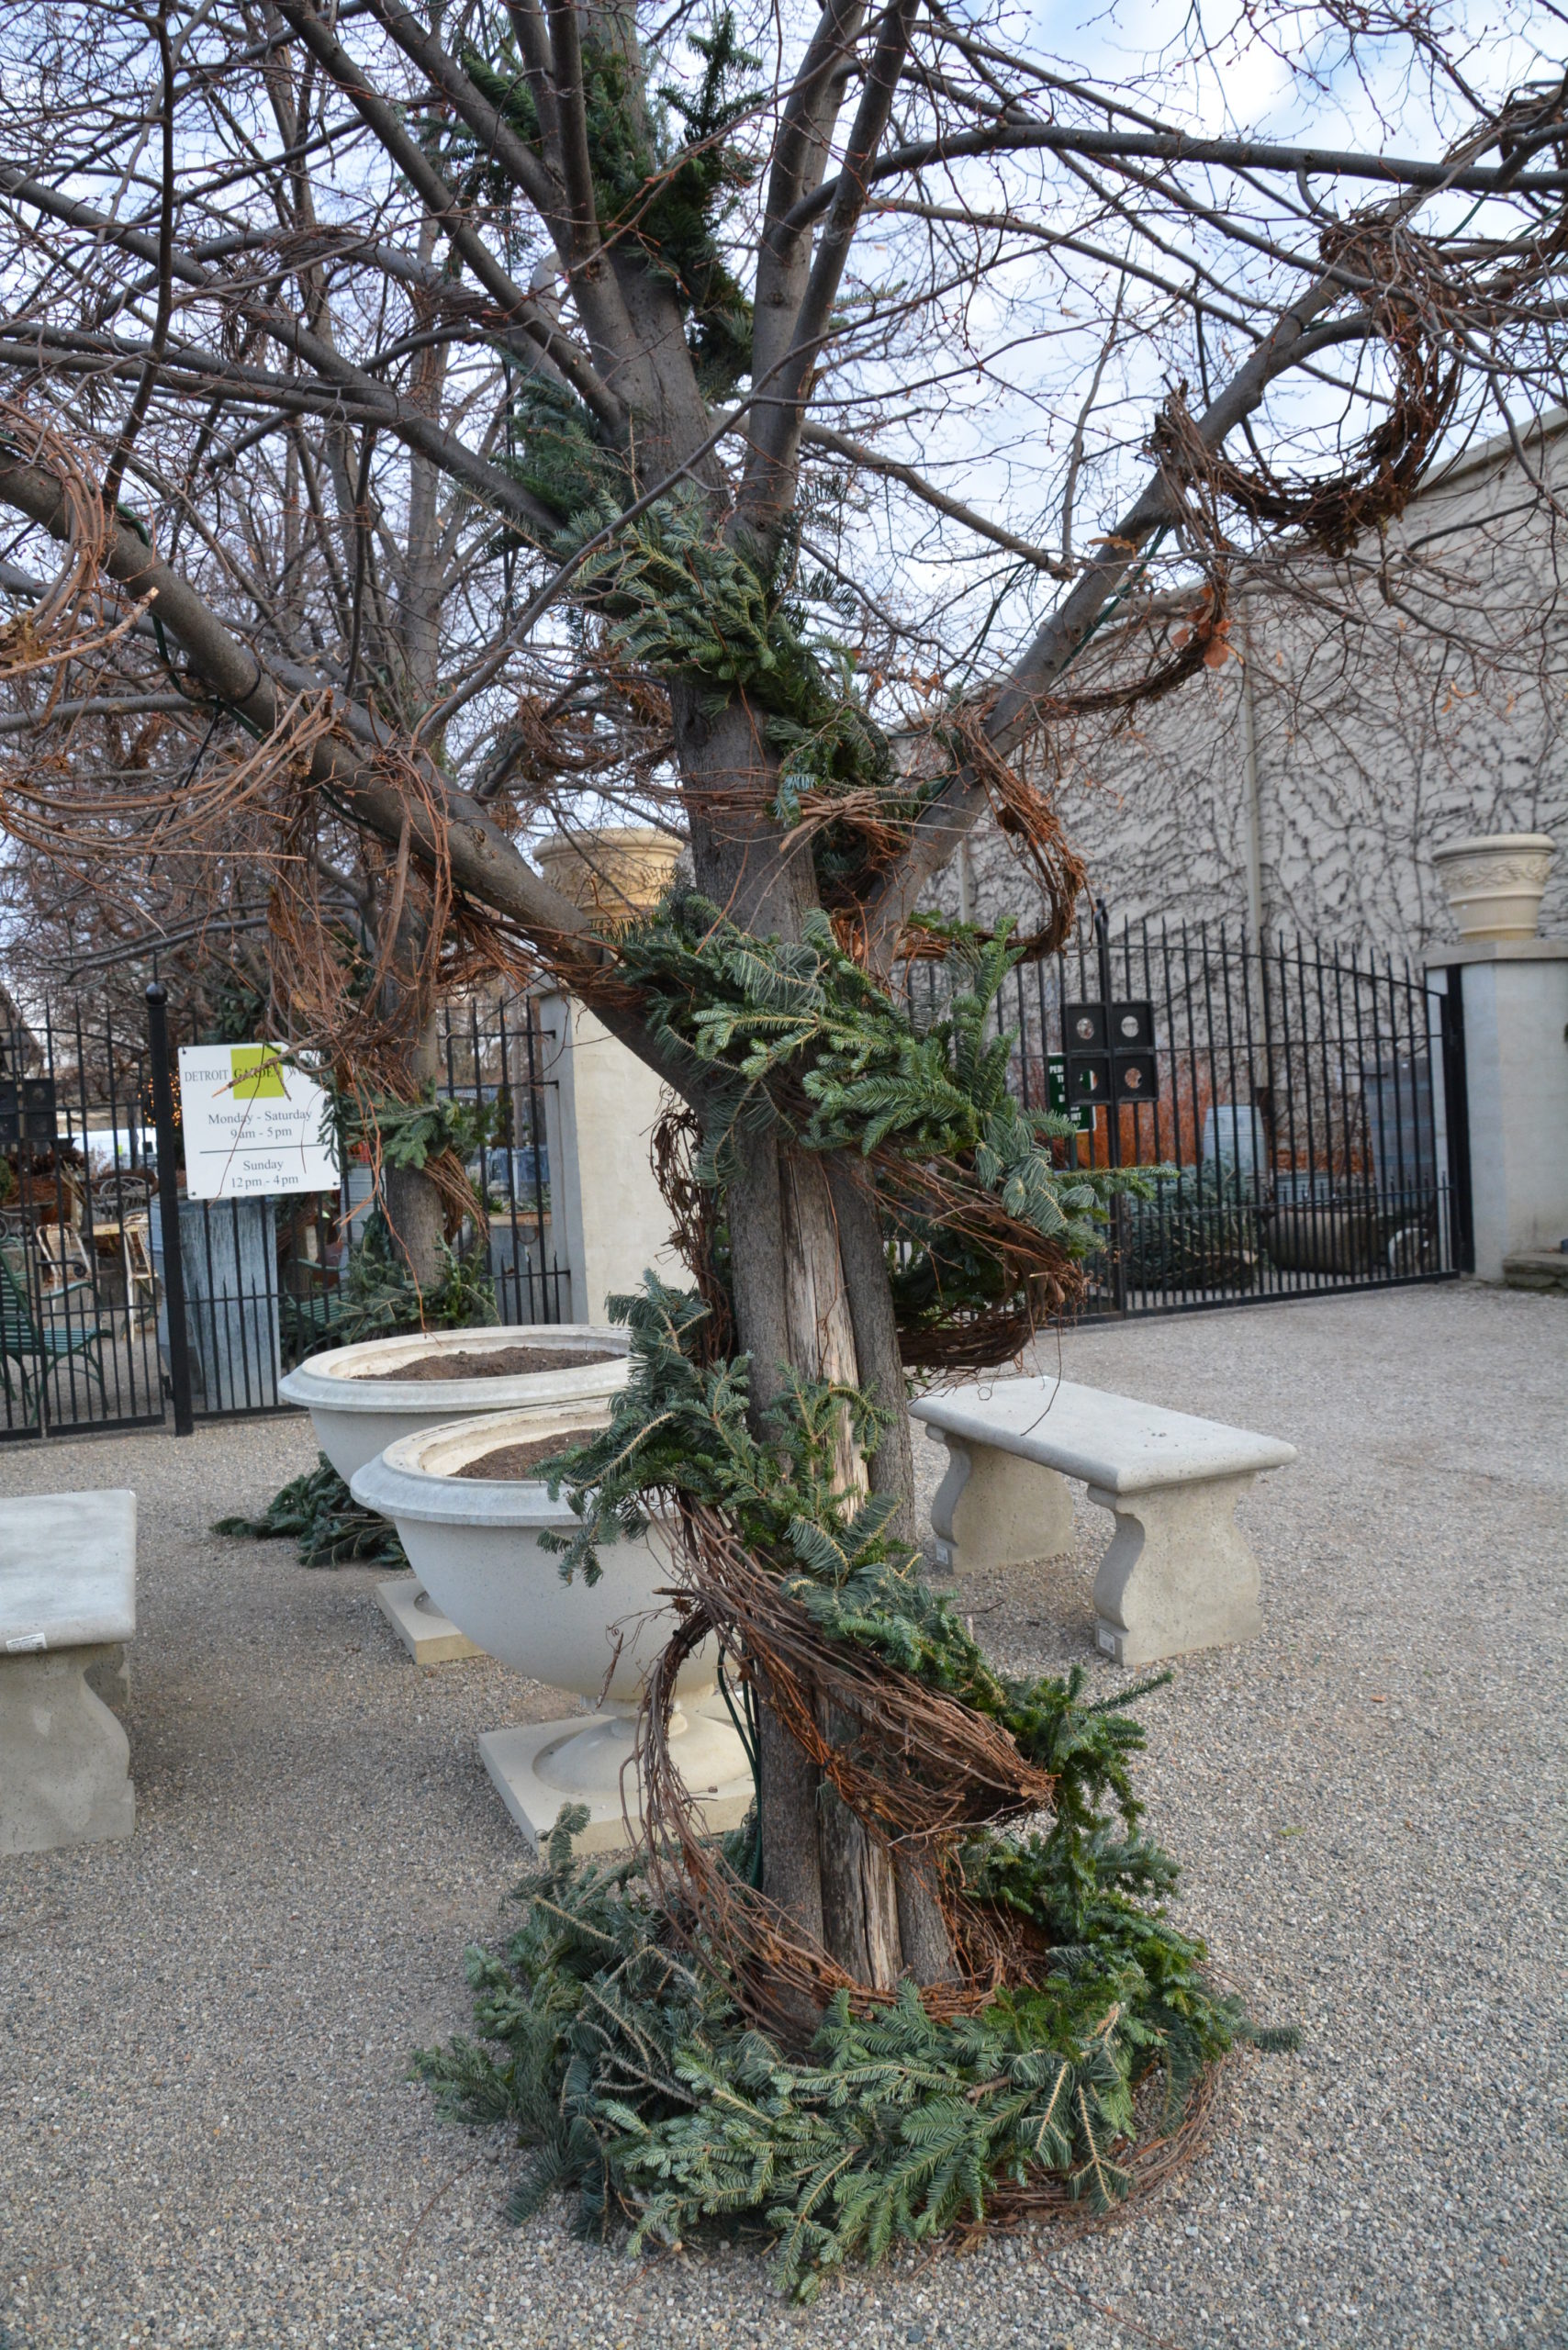
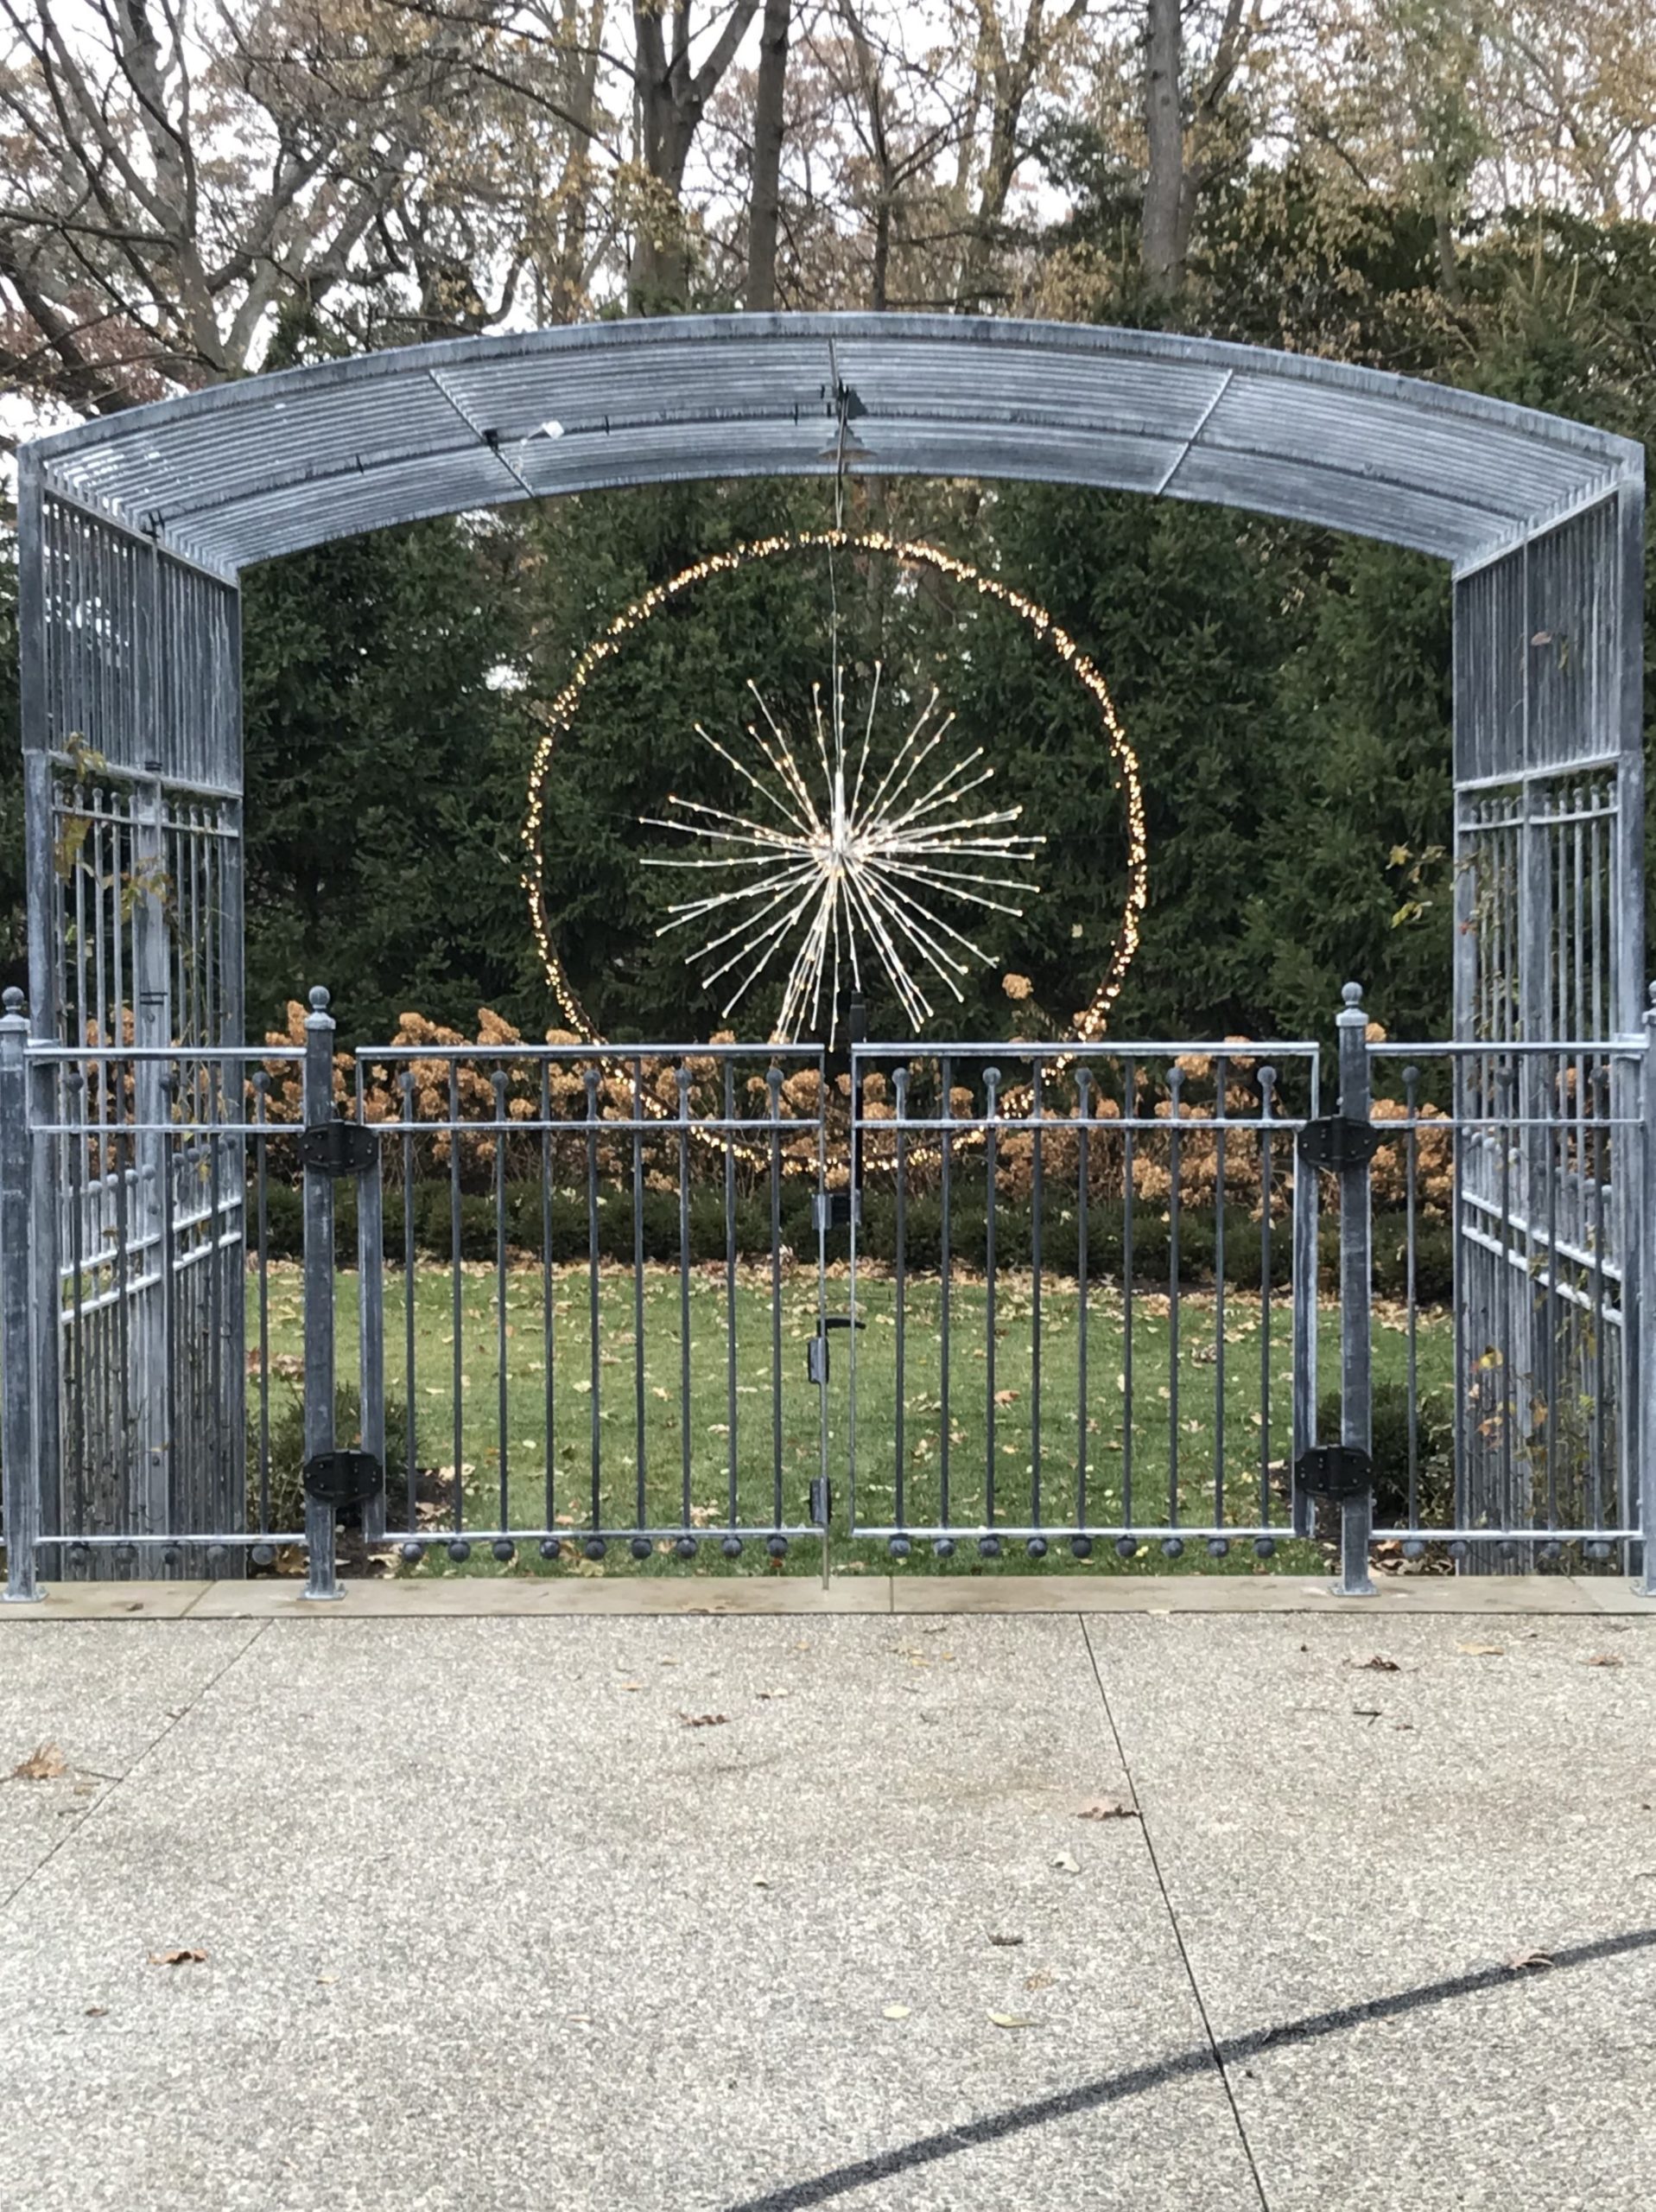
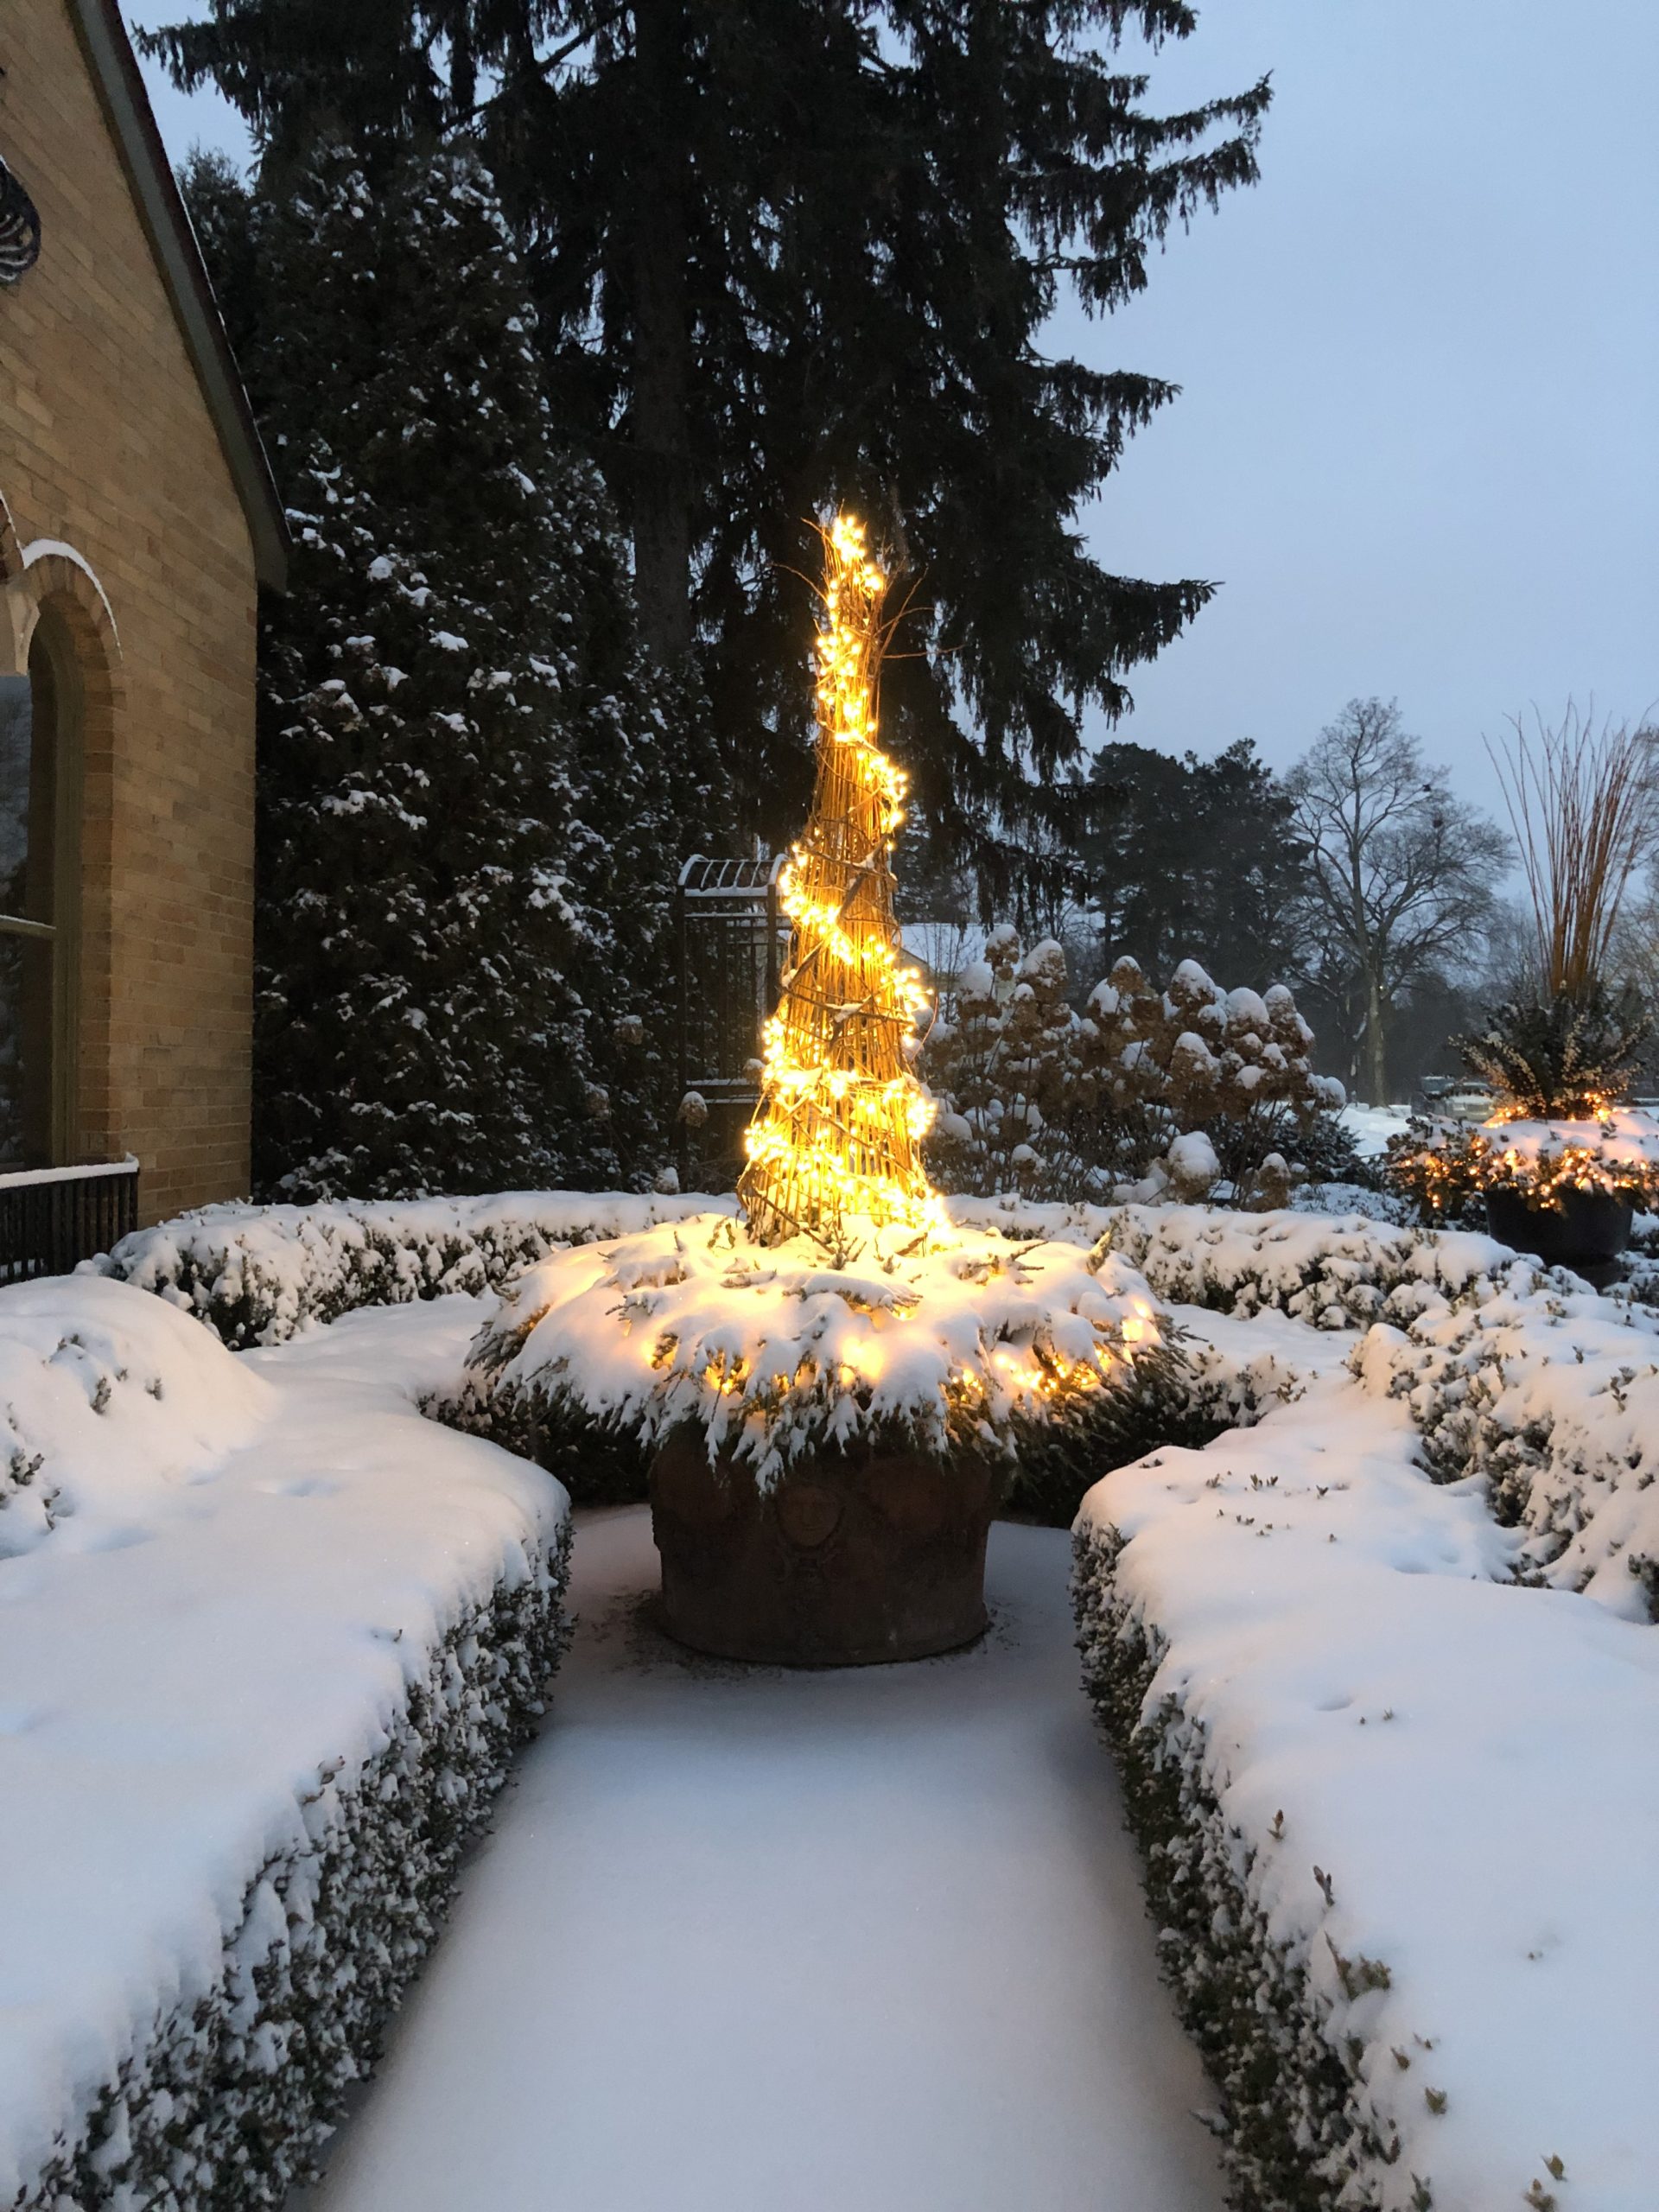
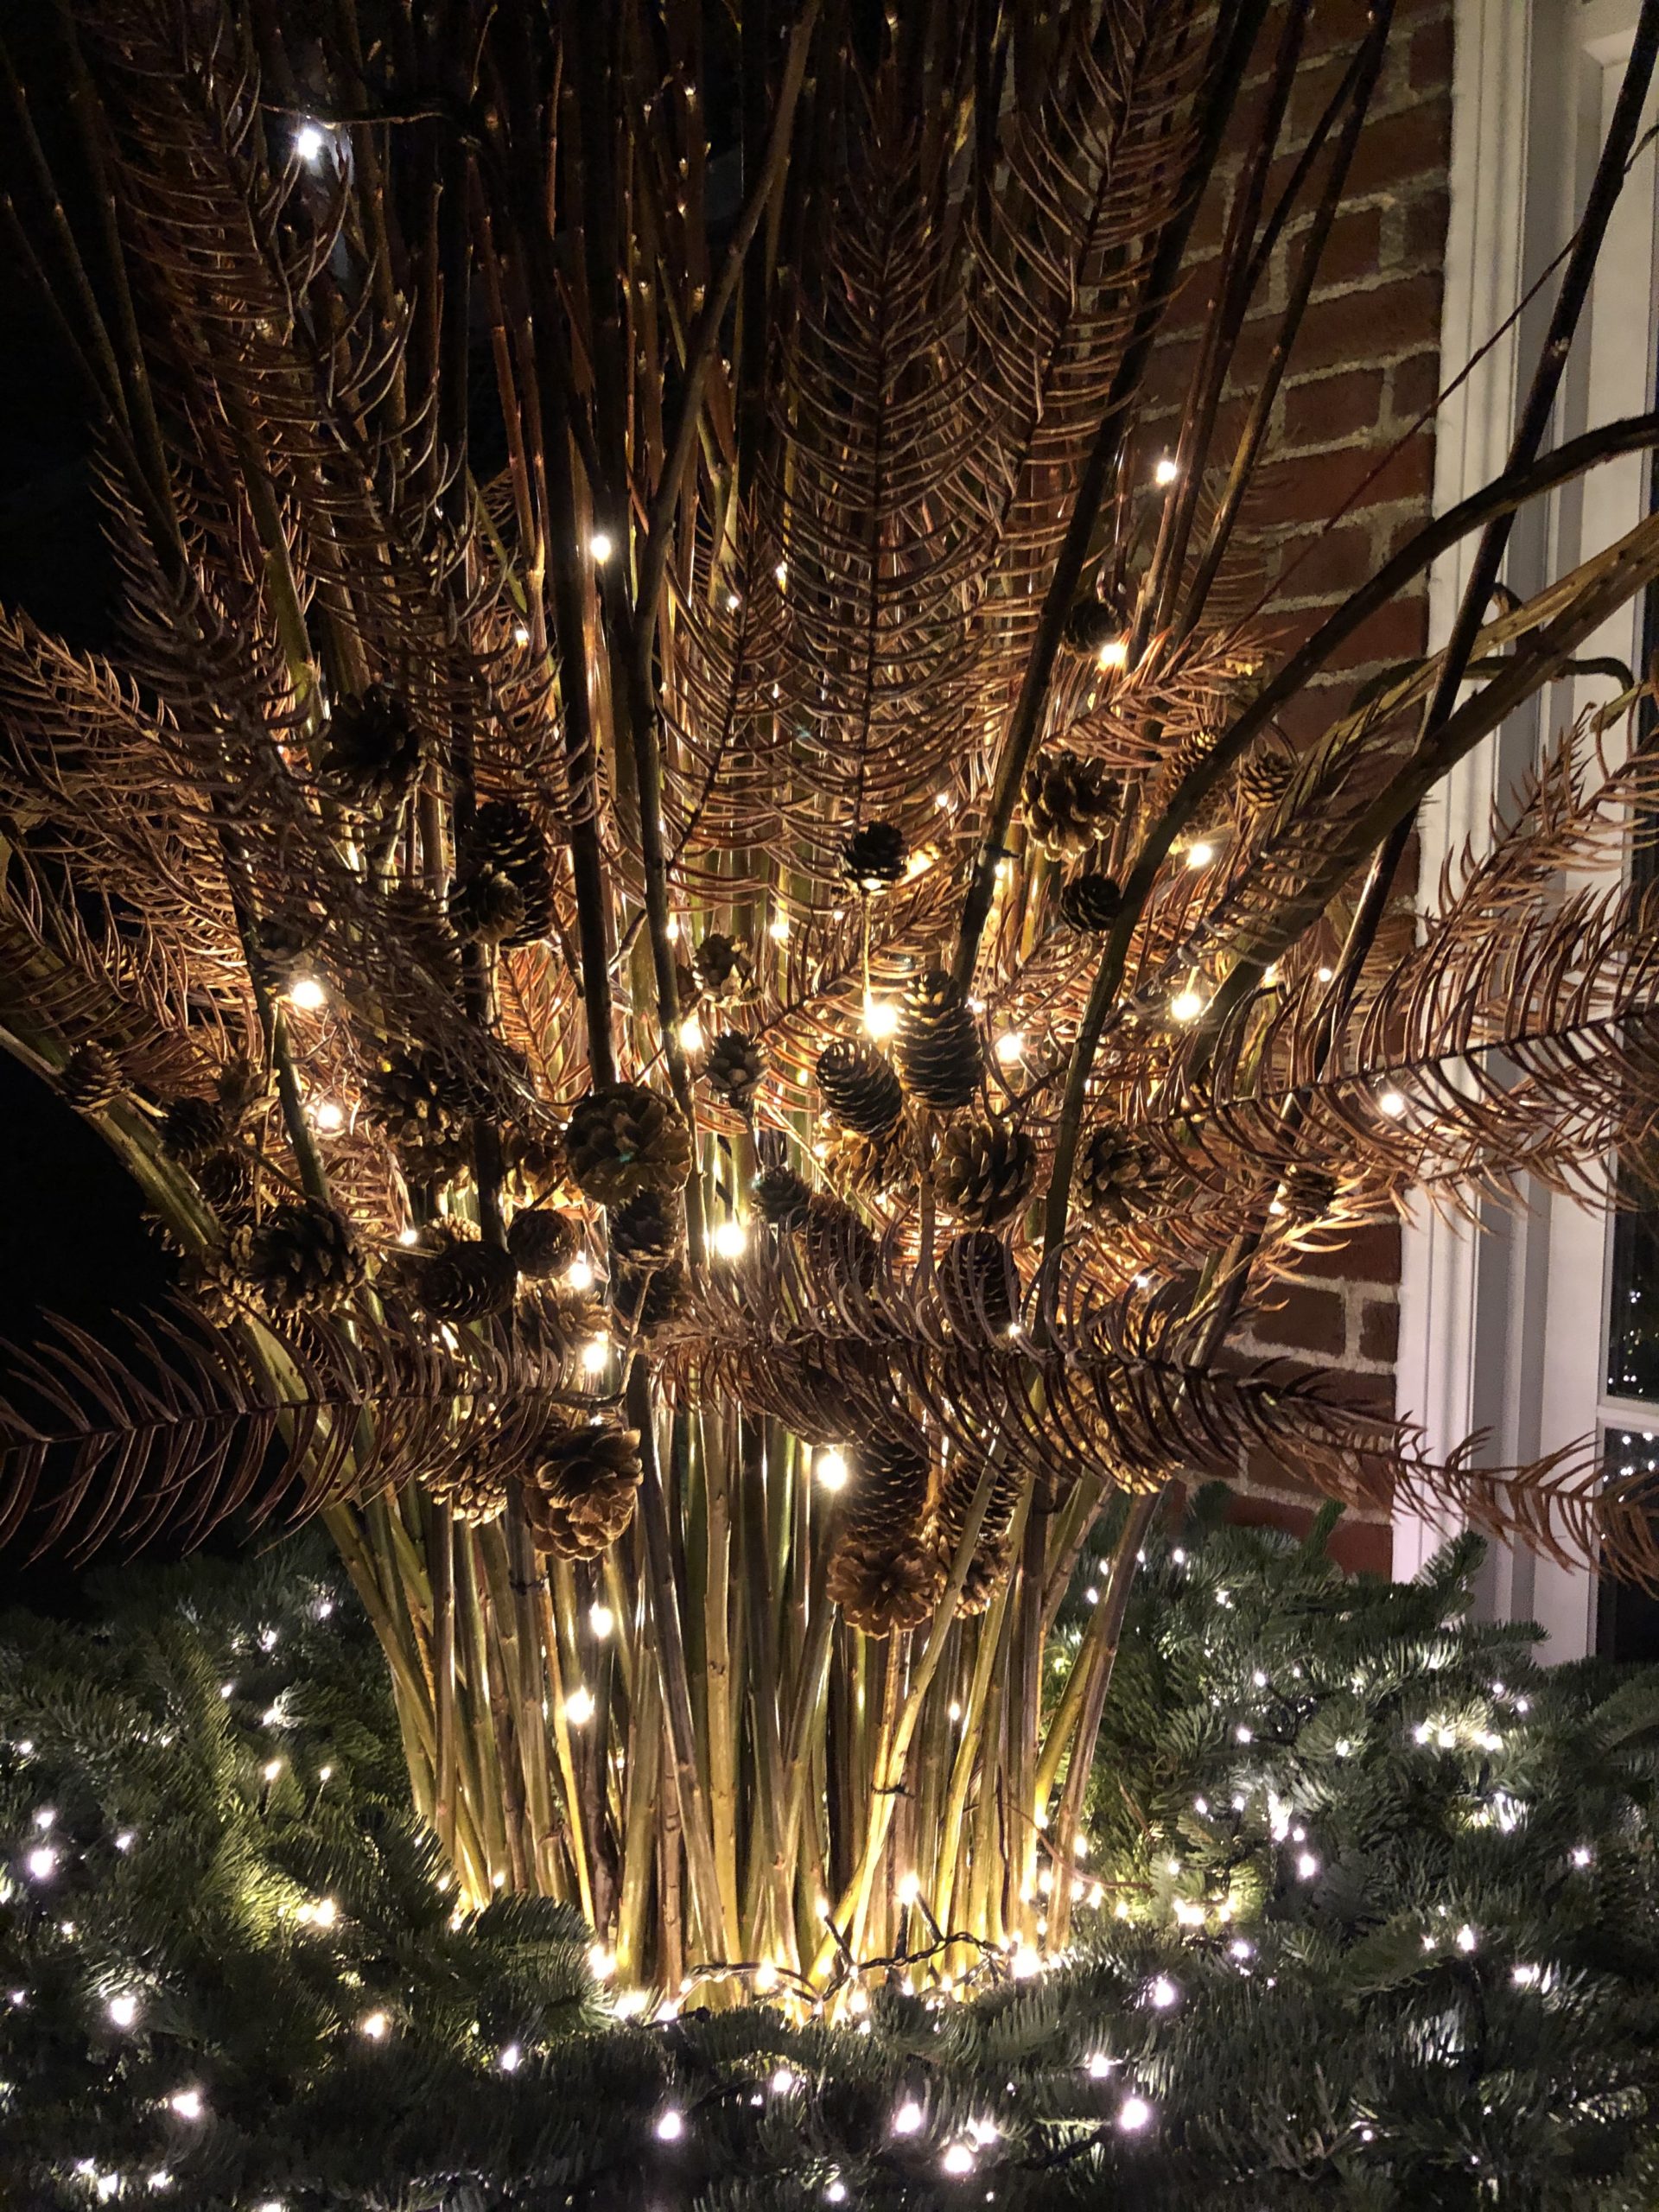
This centerpiece has a 36″ tall light burst inside, which helps to illuminate the branches from within. If you have ever attempted to gracefully run string lights upwards inside a twig bunch, you will appreciate this innovation.
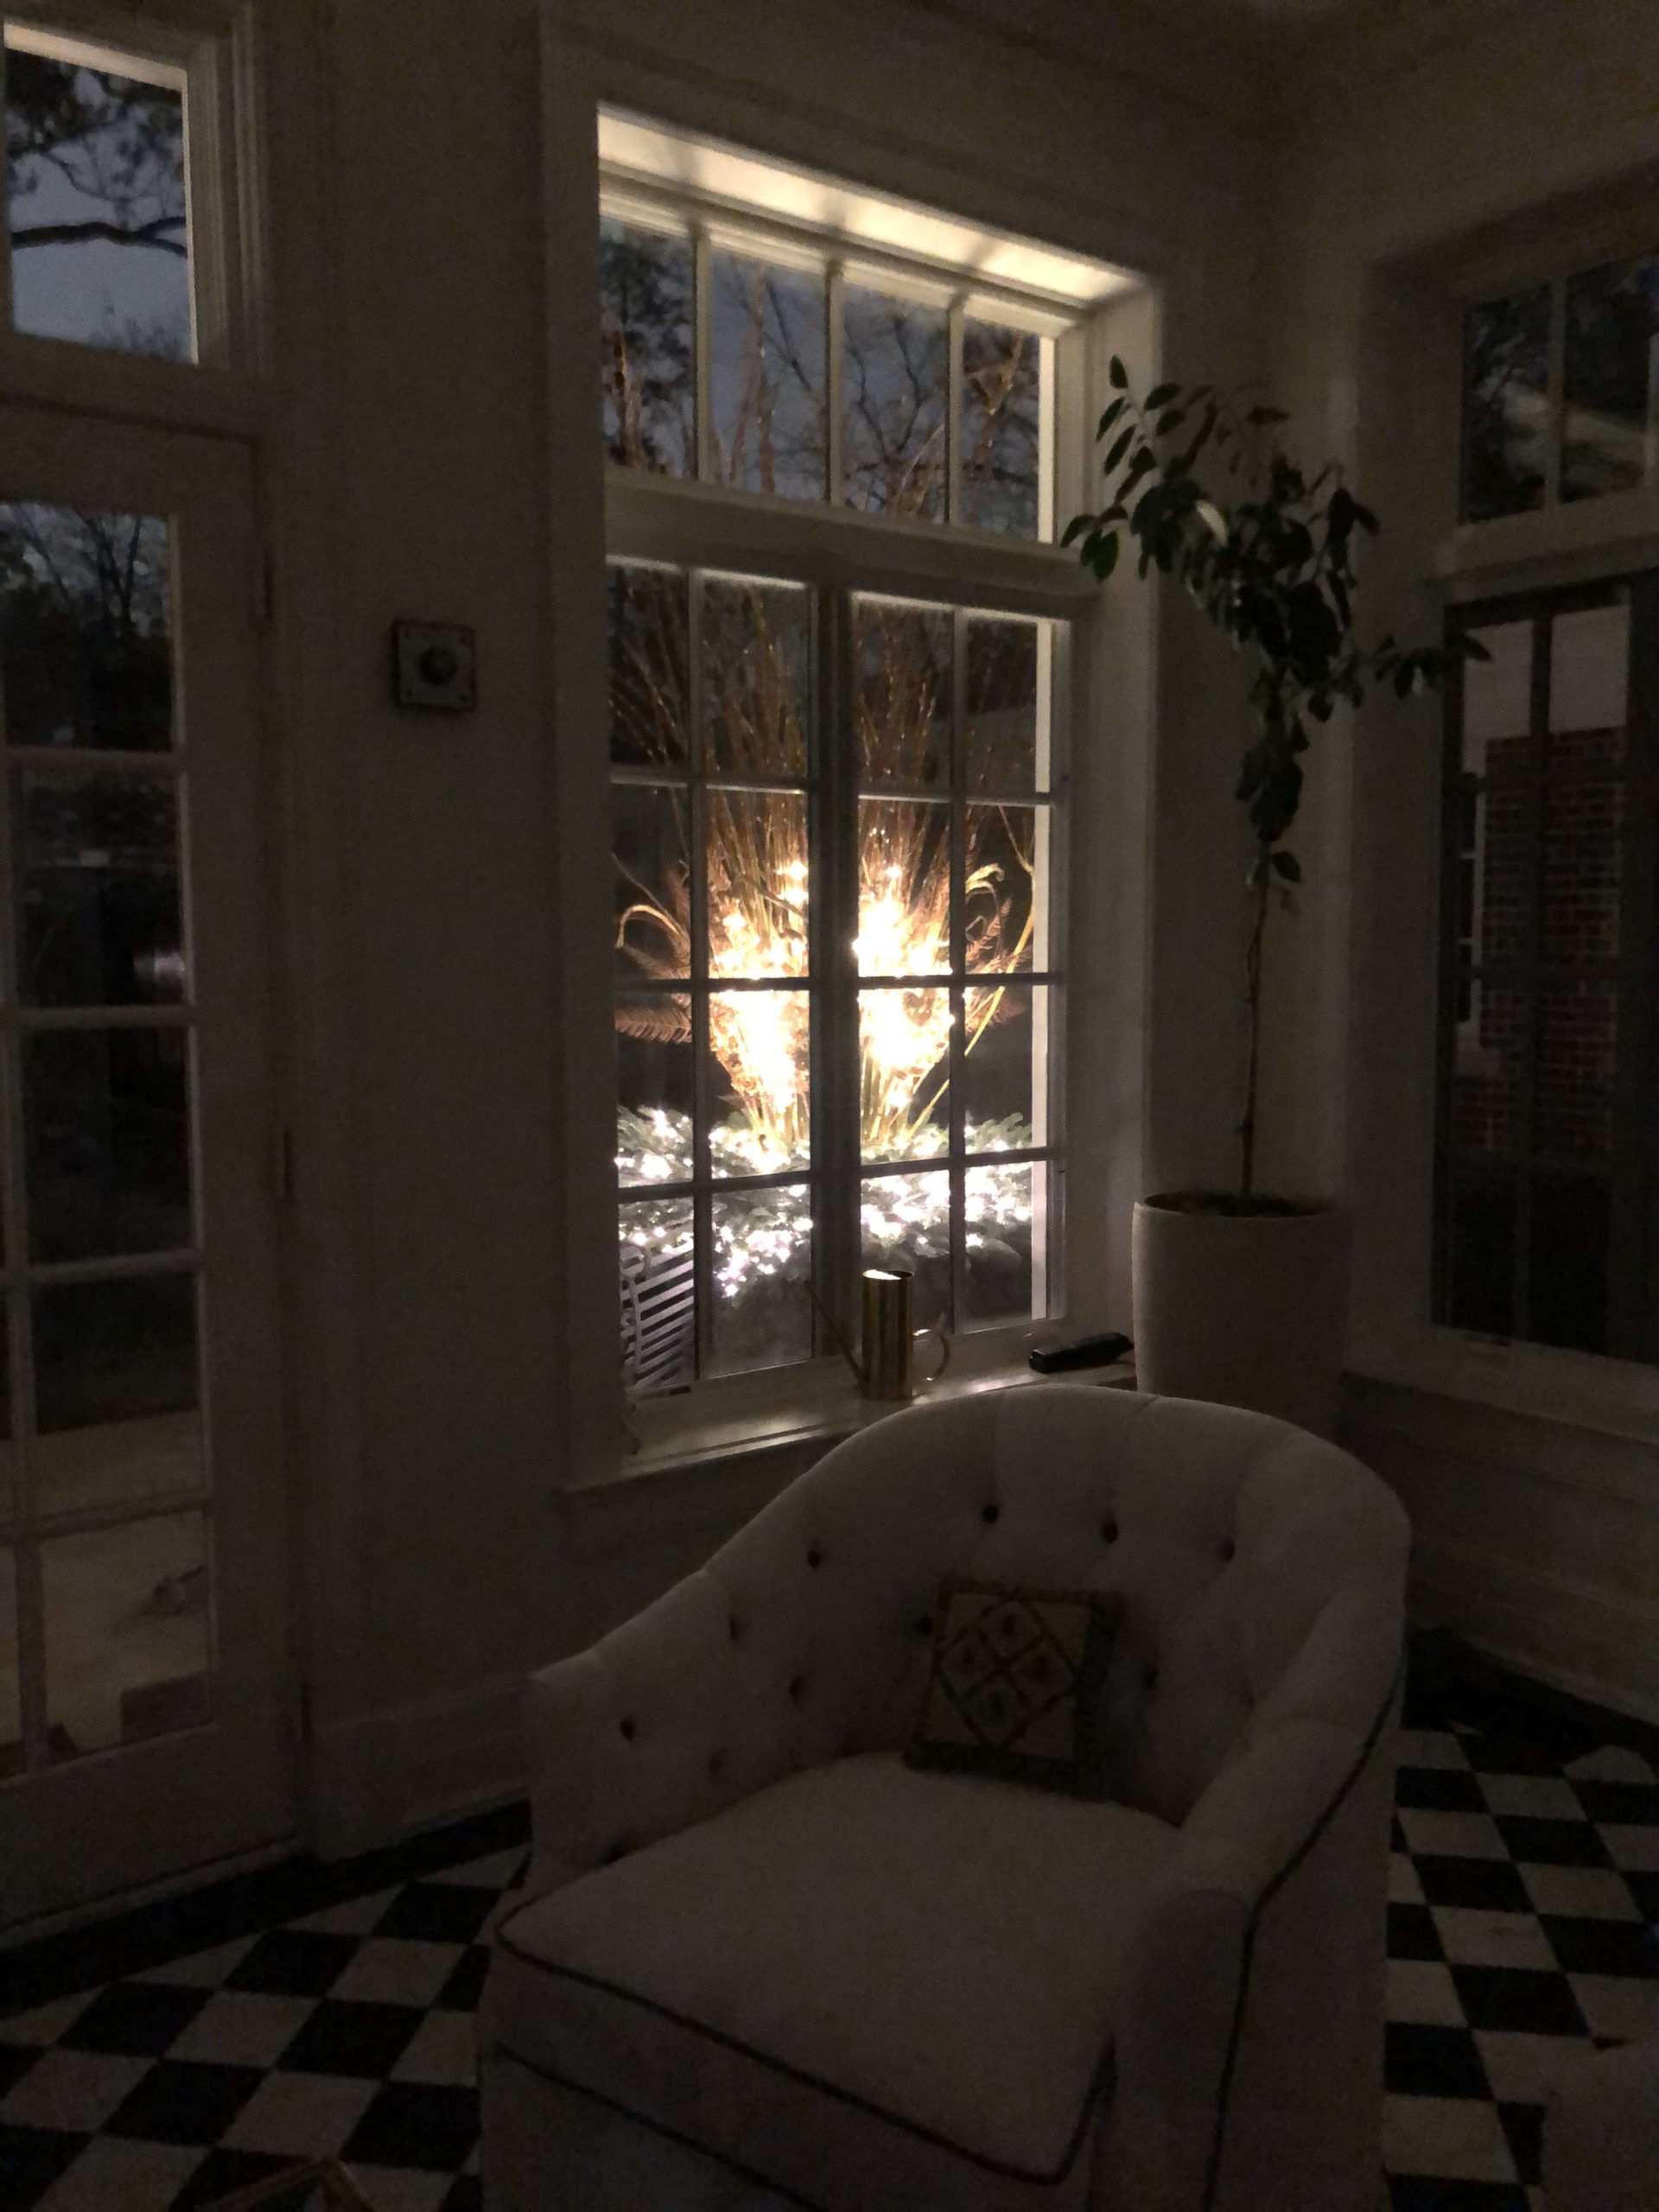
So cozy, this.

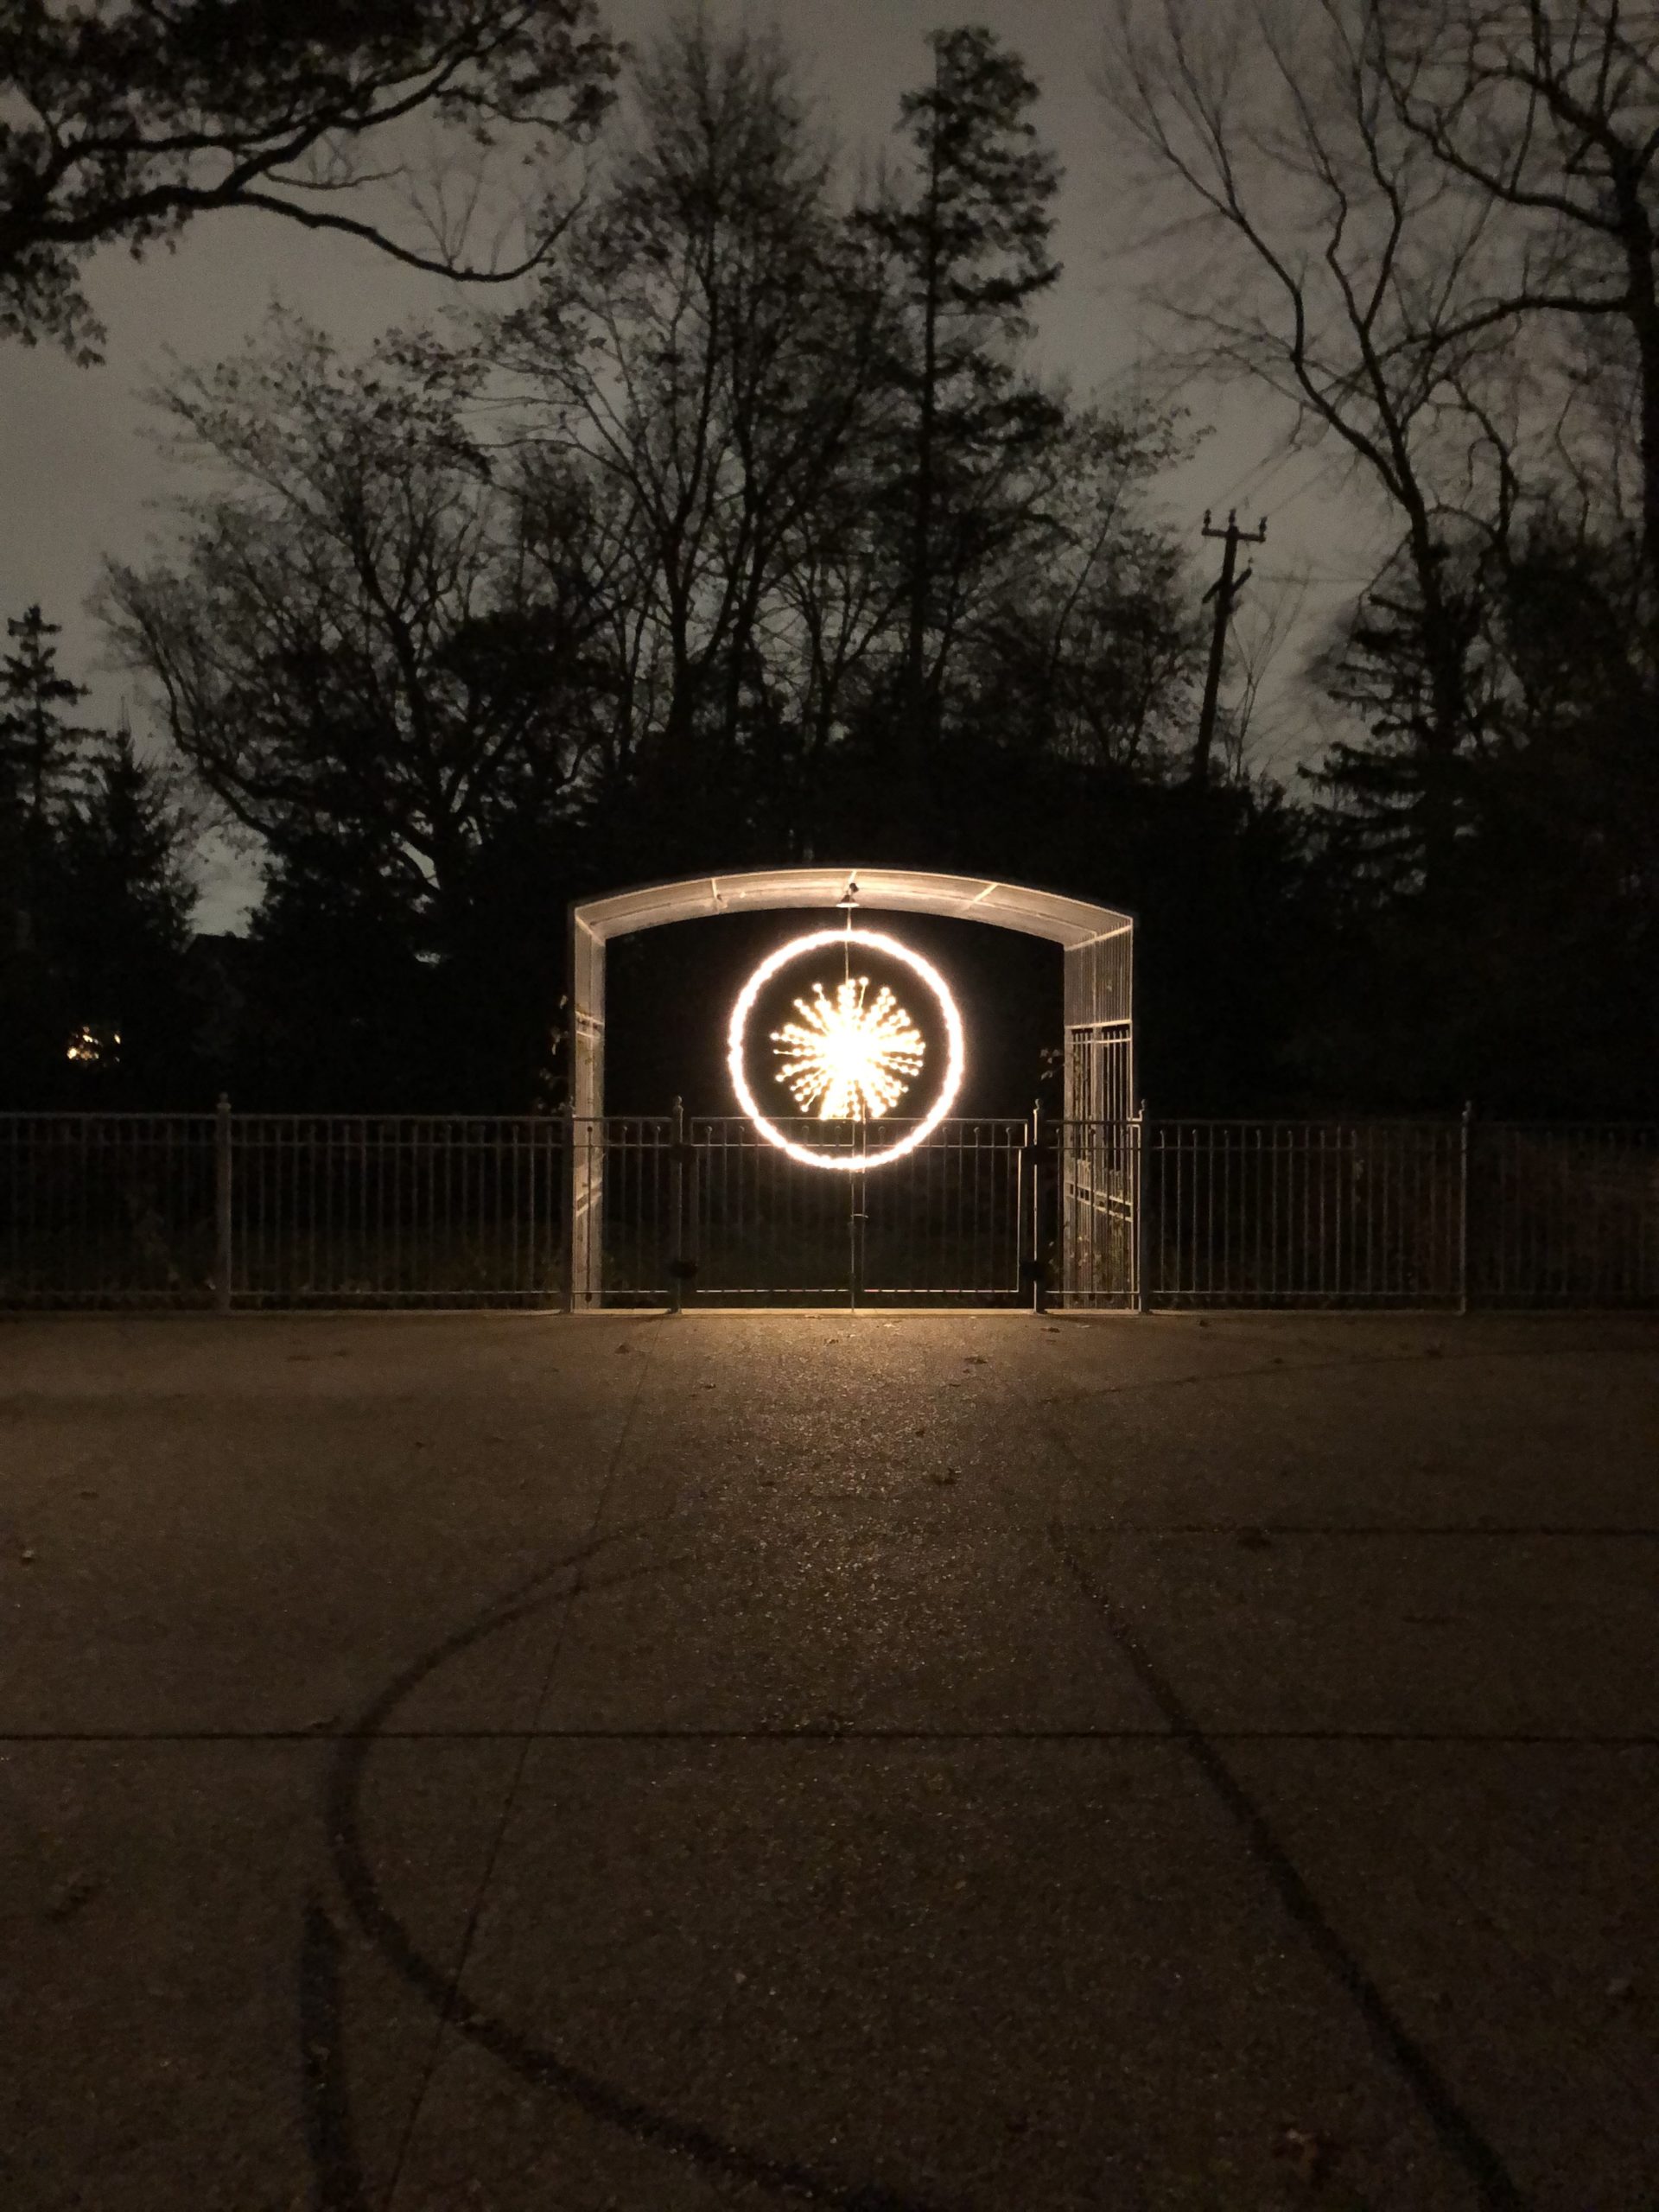
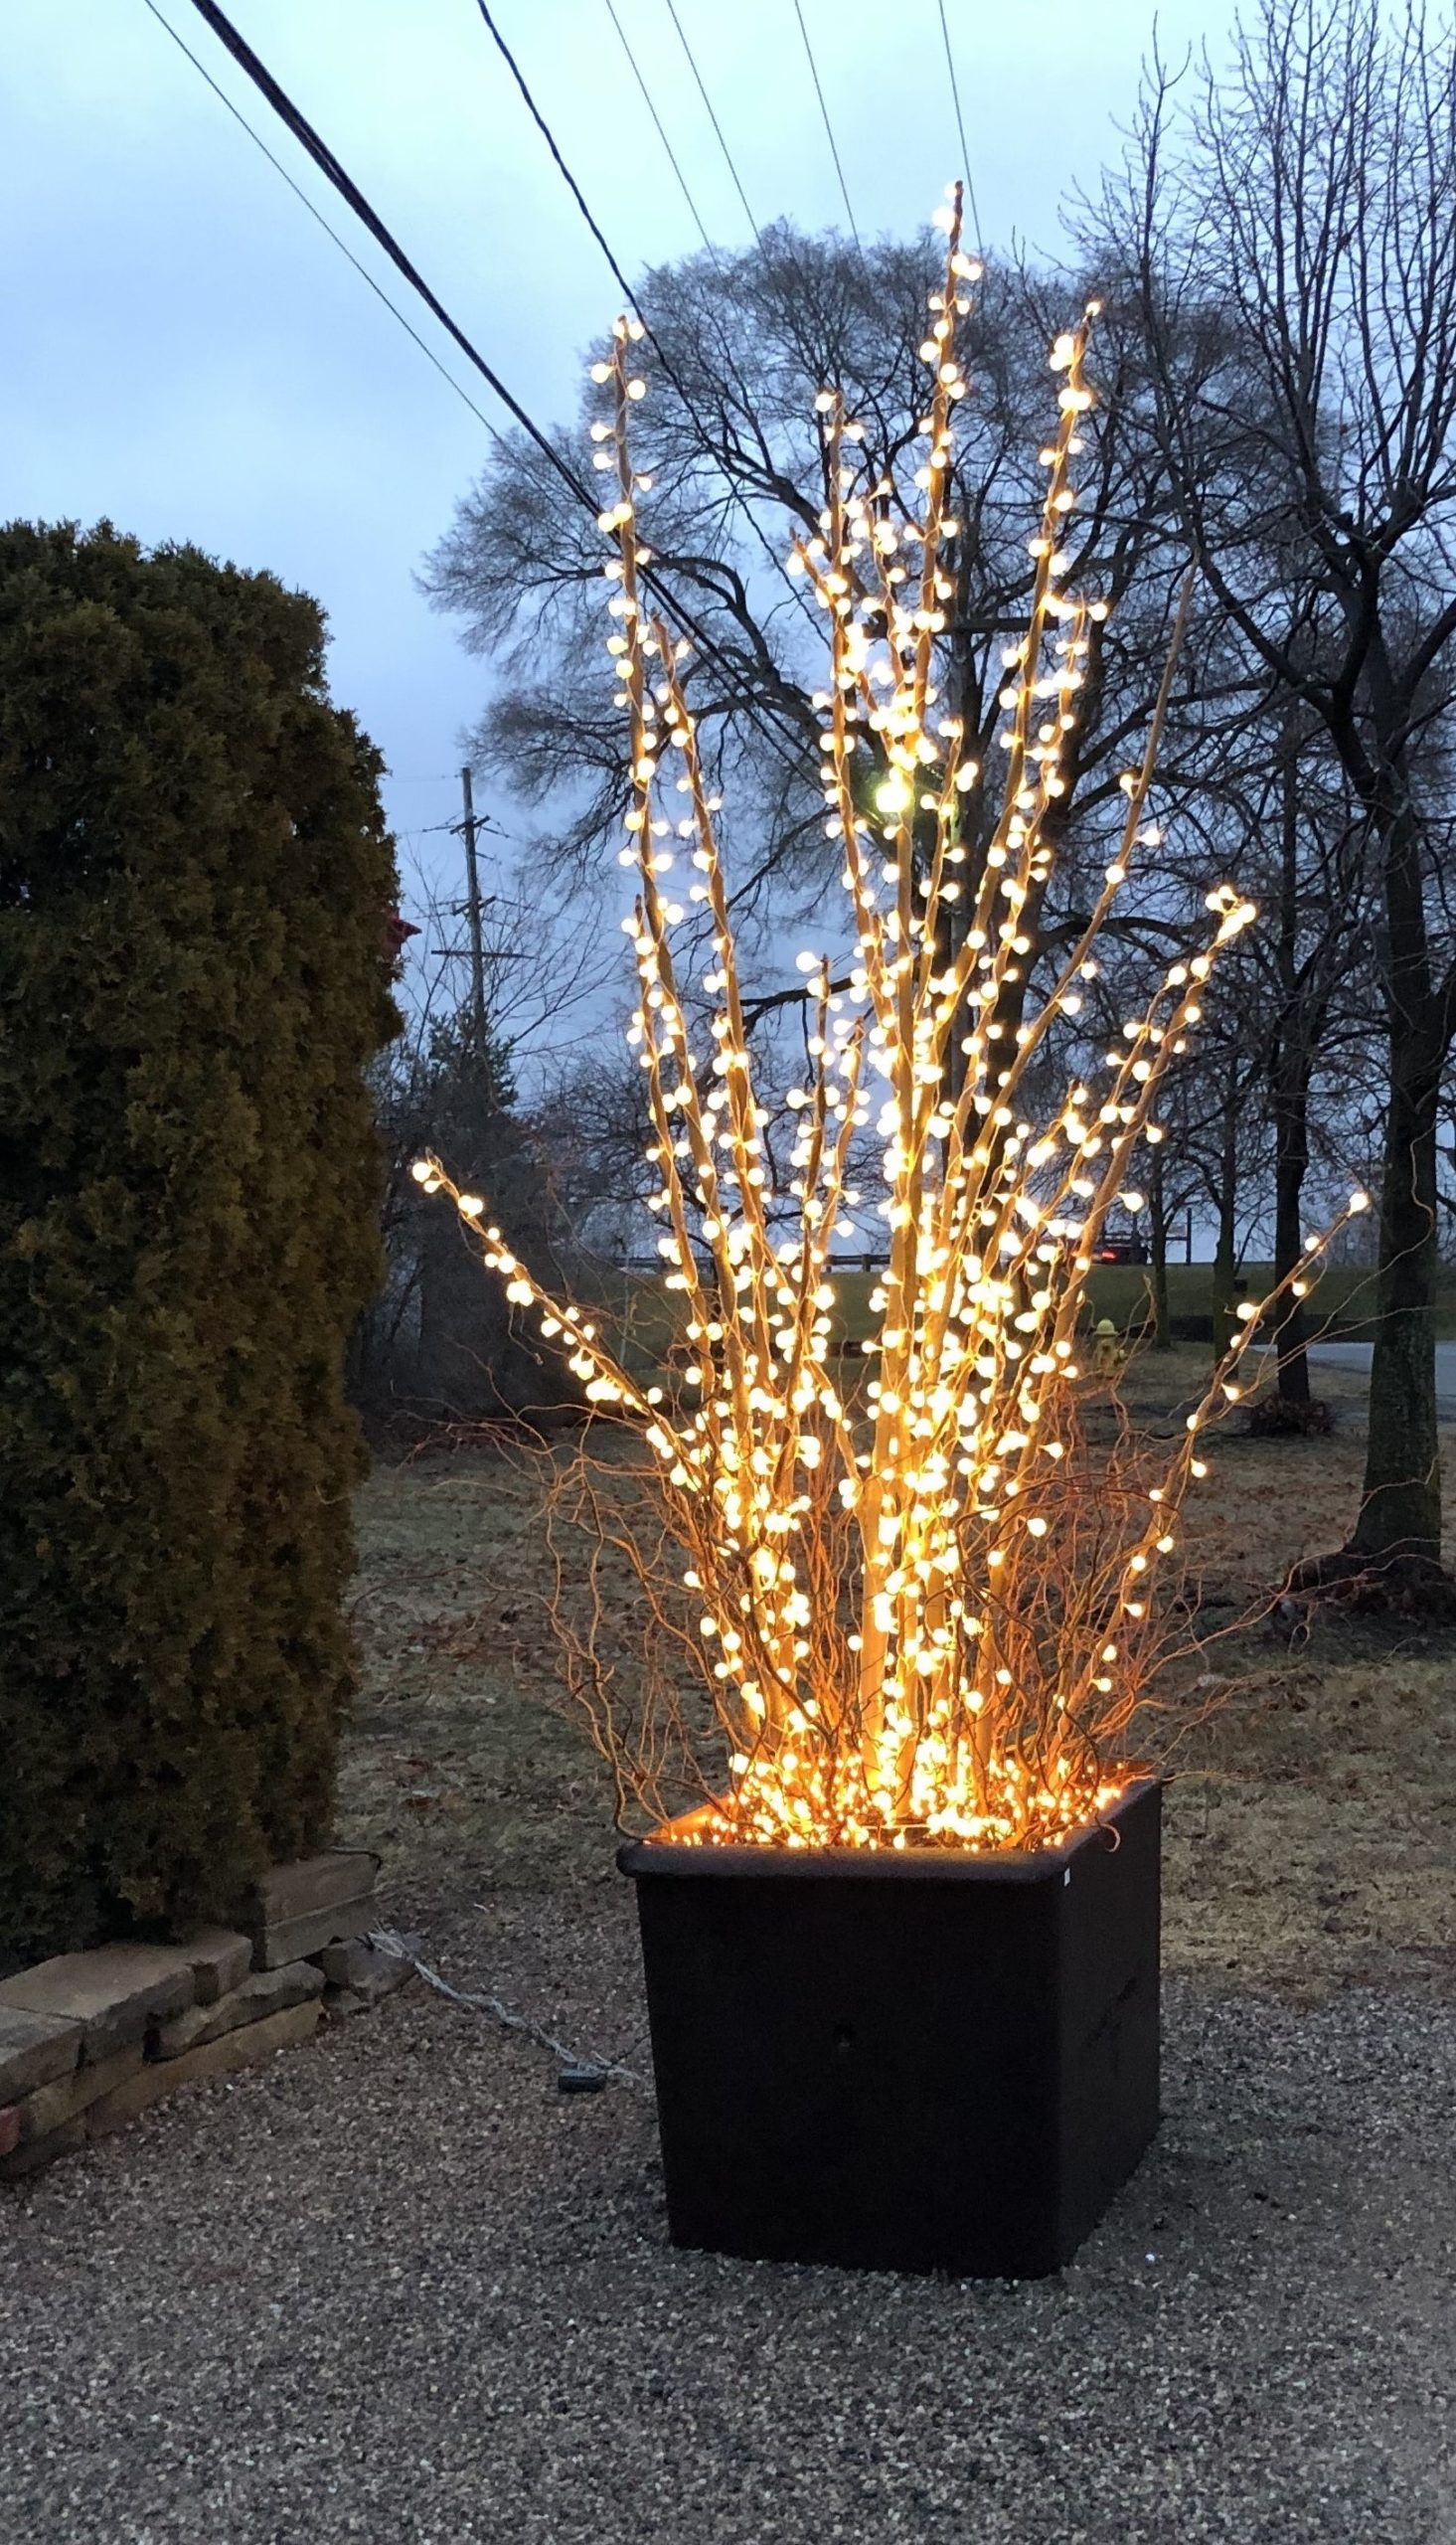
lighted pot at the end of the driveway, 2018

My winter pots are last in line, as they should be. It doesn’t worry me much, as I know I will be driving up to something like what I had in 2018 all winter long.

lighted winter container

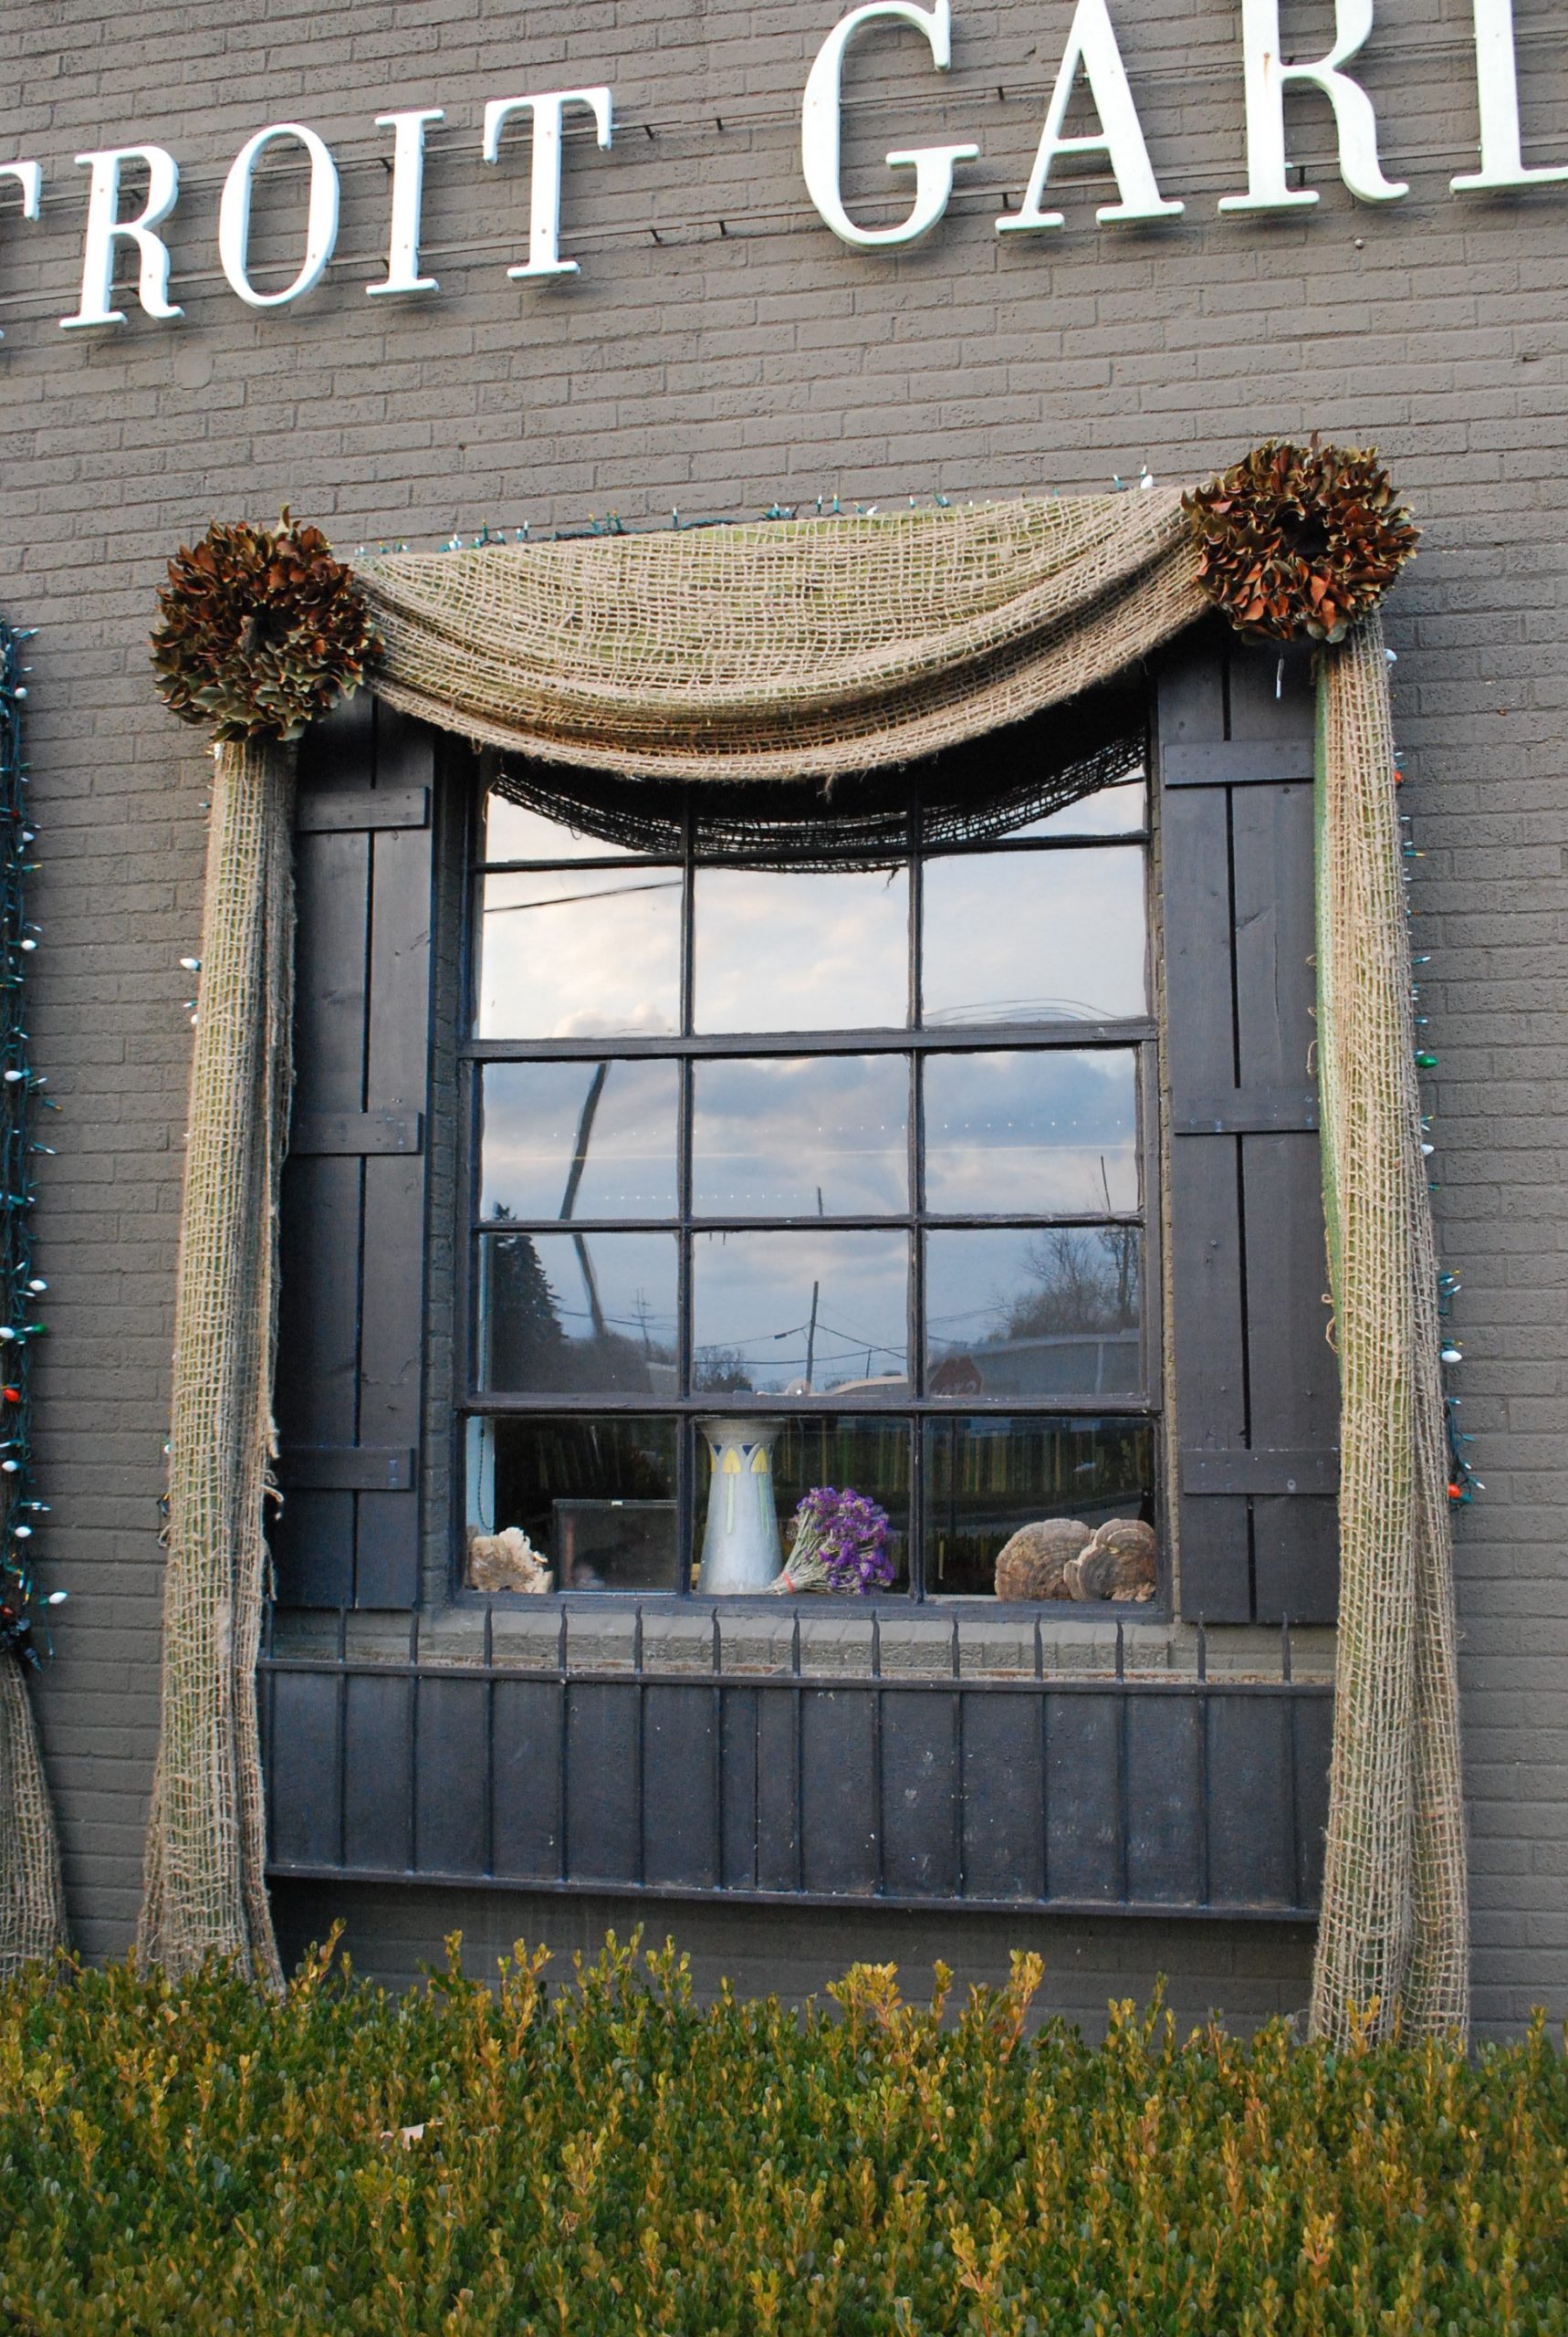
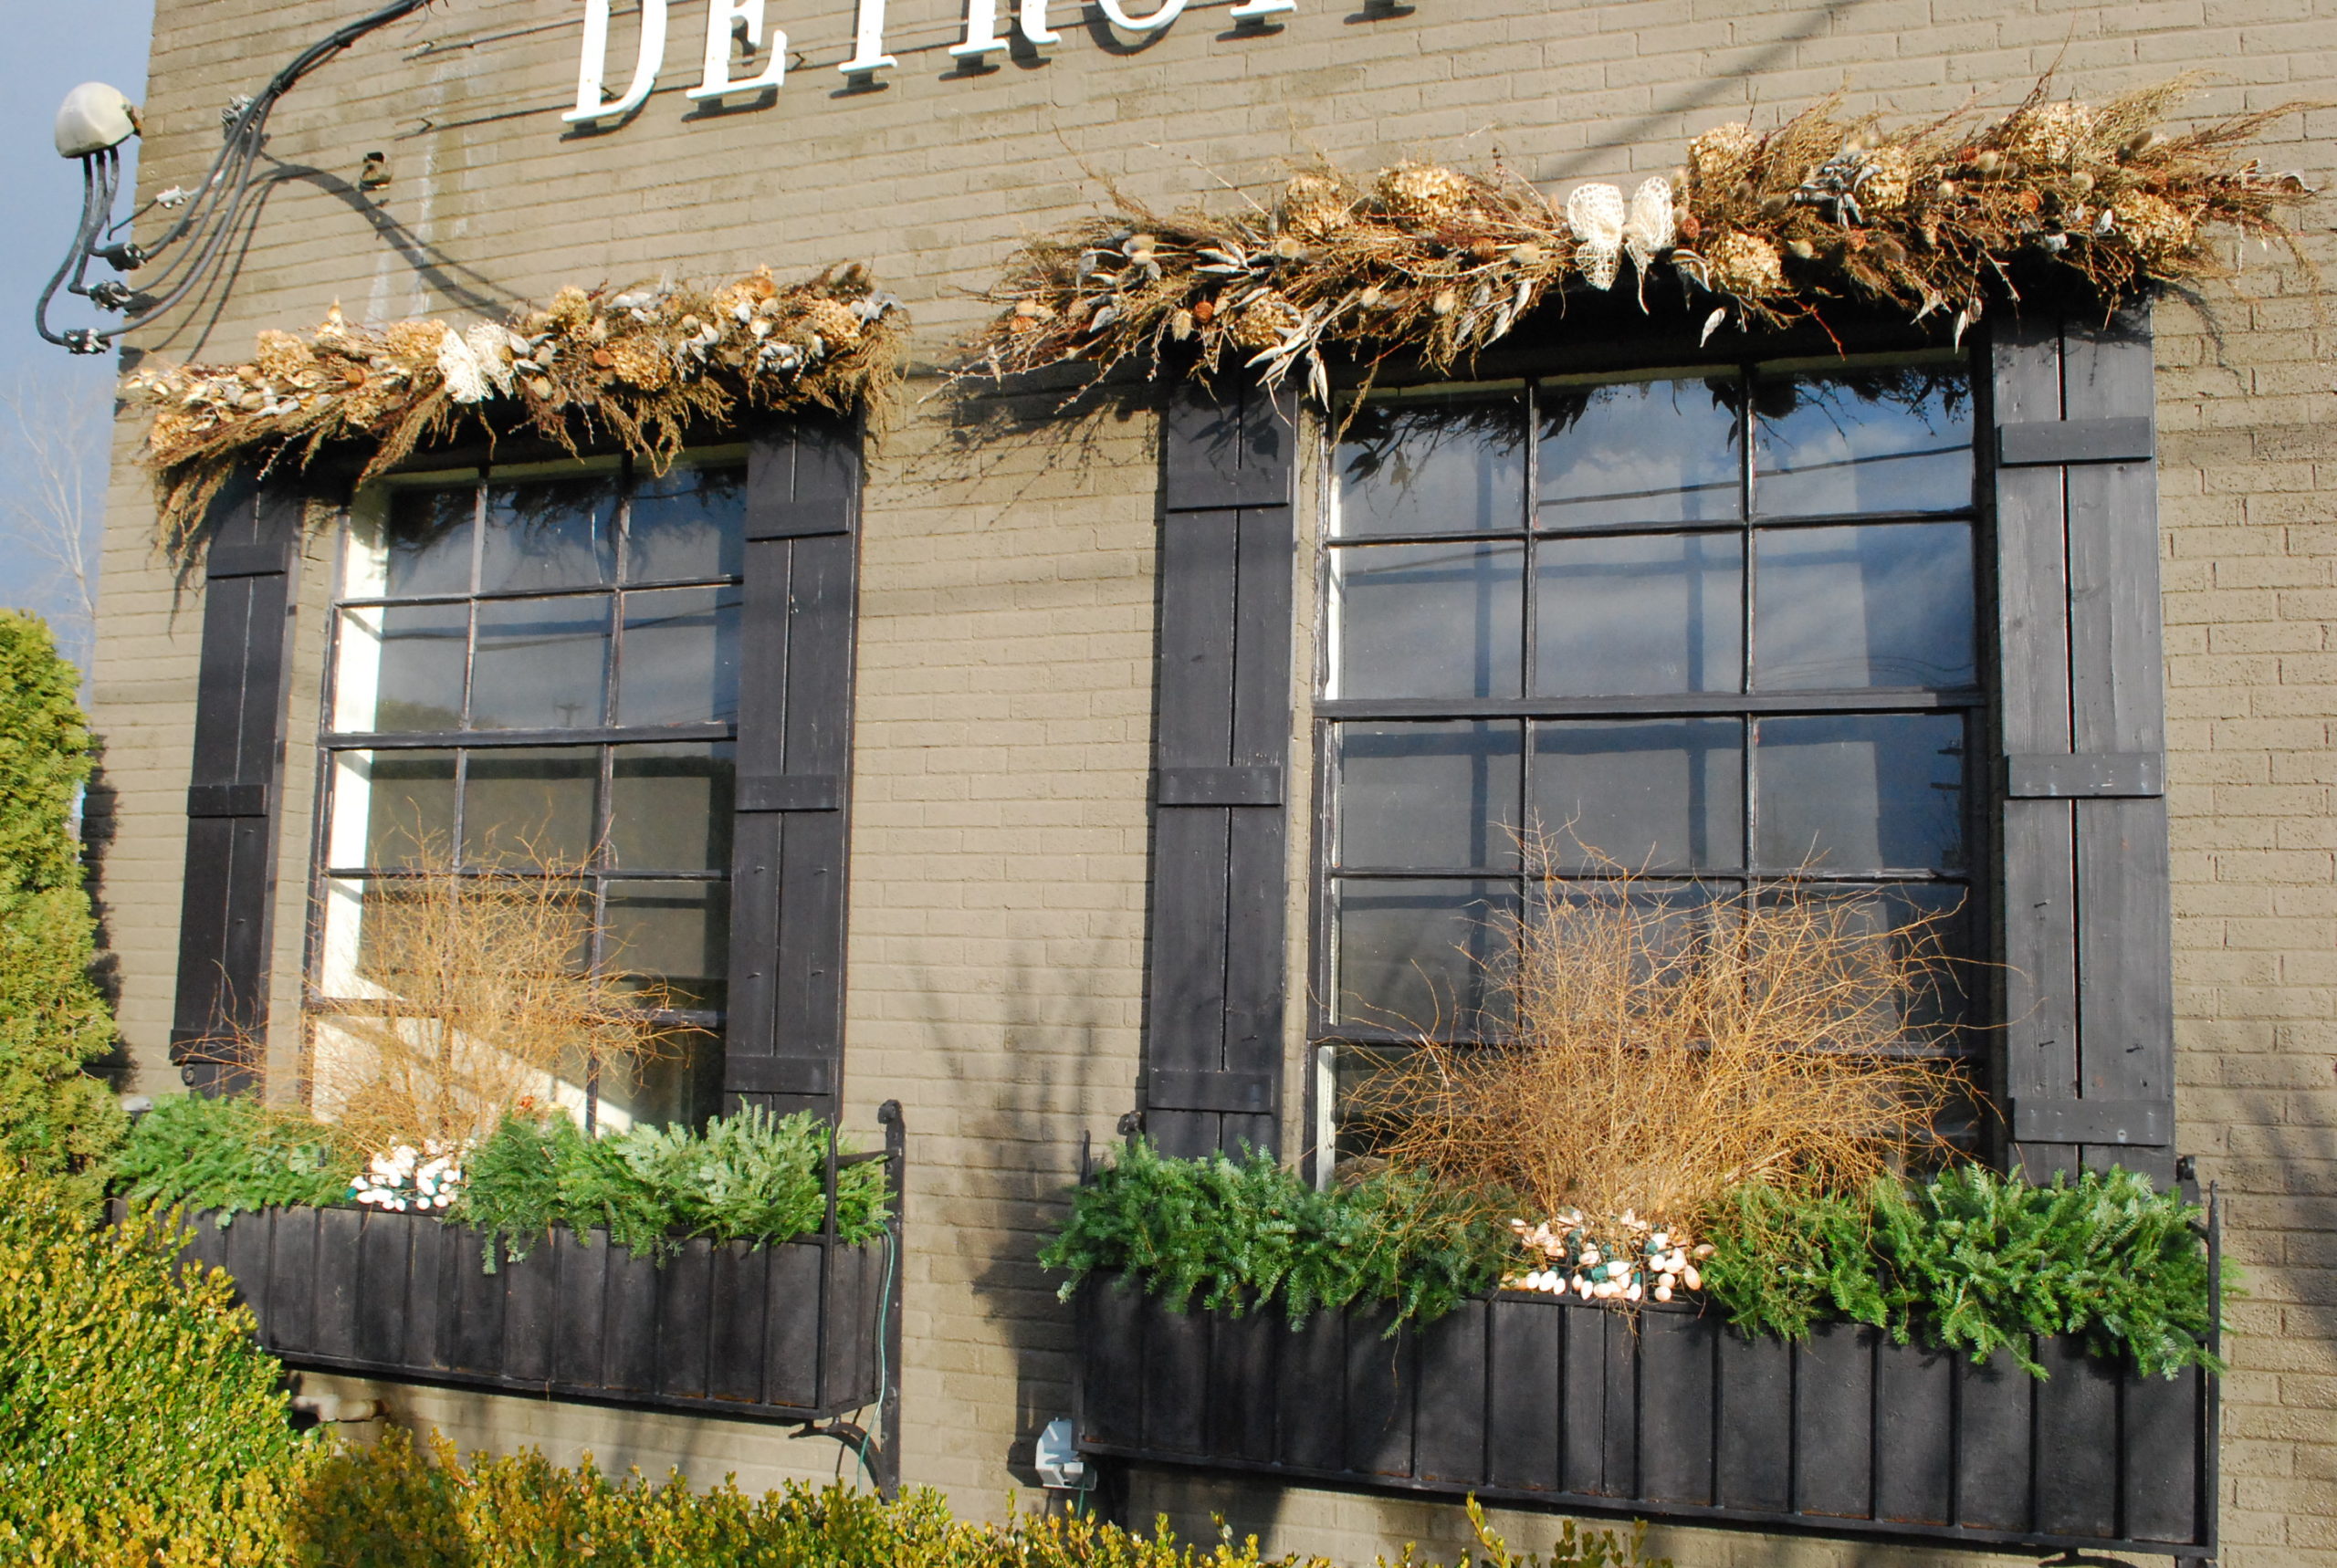
Detroit Garden Works lighted window boxes 2018

It’s the season for a lighted and lively recollection of the garden.


Winter Pots For Ms. H

Every project we do for the winter season begins with a good deal of discussion. The winter containers for Ms. H is the subject of a particular discussion. That astonishing level of discussion on her behalf is simple to understand. We have a big love for her. This year, we had two issues to address. The forms were very long and narrow. This meant there was always the danger, and sometimes the reality that the foam would break in the middle. The fact that all four pots had steel light rings 3 feet in diameter inserted into the forms piled on additional stress. This made for a rather nerve wracking installation. It was a simple matter to split the long forms into two shorter ones. The forms could be stuffed with greens side by side, and labelled as to their position in each pot. In the picture above, Karen is detailing a plan drawing of the most significant innovation-a separate form for the light ring and all of its fixings would be set squarely on top of the spot where the pair of greens forms would meet. The half oval shape drawn on the form above would dictate the position of the light ring form. The widest point of that half oval would just about cover the spot where the two shorter forms come together. The swoop de do would be stuck with German boxwood. The rest of the lower forms would be stuck with Noble fir.  What??

It is much easier to explain this new construction protocol in pictures. I am happy to say it was entirely of David’s invention. He not only constructs winter arrangements, he is an expert at installing them. It took longer than I really want to admit for me to understand what he was proposing, but once I understand, I could appreciate the pure genius of it. The plan called for filling the interior of the ring with various picks. Why not have a separate form for the ring and its fixings? This would provide a stable base for the ring to travel in the truck. None of the picks would be disturbed trying to remove the ring for transport, and putting it back in exactly the right location during installation. The shape of the ring form was determined by the design and arrangement of the picks. The rear prongs of the ring would go through both layers of the mini form. The front prongs would rest on the lower form. If you are still unclear about the plan, don’t feel bad. David had to show me before I fully understood what he wanted to do. See the following picture.

The ring 2 layered form would sit on top of the 2 layered greens forms. That long curved upper form would cover the split forms which would be the bottom layer. Once set on top, the rear legs of the ring would be pushed all the way through both layers of foam and a little bit into the bottom forms. The picks are stable in the top two layers of foam, but they do not provide any structural connection between the two layers of foam, and the bottom two layers. Small diameter green bamboo stakes would be driven through all four layers of foam and into the soil in the pots. That would provide structural stability to the entire affair.

The top of the ring form would be stuck with German boxwood. That same boxwood would be used to cover the face of the upper form.

This rear view tells the story. The lower two layers of foam tell last years story. The very bottom piece of foam is wedged into the pot. The layer immediately above that has holes in it. Those holes are from the greens we stuck in last year. One of the advantages of using large scale evergreen boughs is that it does not take that many stems to create a lush appearance. This is why we are able to reuse the forms for a good many years. The forms are quite strong, as long as no undue stress is put to them.

The other critical design issue is all about the placement of the bottom of the ring. I like it to be set such that the bottom of the ring is visible, both during the day and at night. This placement and finish creates the illusion that the ring is floating. This means that the legs of the rings will need bamboo stakes or rebar zip tied to it, to both prop and keep it up at the desired level. I am not crazy about burying the bottom of the ring in twigs, picks or greens for another reason. Though the light sets are factory sealed, I don’t like them in a situation where water can collect and persist. If there is an electrical problem, I want easy access to the cord and transformer.

Karen does a terrific job of greening the lower forms. How she sticks them creates the illusion of a shrub growing. She does a terrific job of so many facets of the holiday installation.  How I value her work. Thanks, Karen.

The greens are heavy. They are composed of fresh wet wood, and water saturated needles. This explains the need for rocks and bricks to keep the forms from tipping over.

This table top was made from a full 4′ by 8′ sheet of plywood. This table holds 4 forms-enough for two of the four boxes. These lower forms, greened up, and punctuated with pine cones, are all ready to go to the installation phase.

This shop shot taken in process details how much work we do prior to an installation.

Once our fabrication group gets a project to this moment, we know we are ready for an installation.

The installed winter containers boxes to the right of the front door. Perfectly beautiful, to my eye.

The installed containers to the left of the front door. Be advised that we work very hard to keep the construction issues behind the scenes. The finished pots show no signs of what it took to get them to this point. Except the fact that they look deliberately composed, and finished.

Dressing the French pots in the back for the winter season was a new addition to this project. David did a great job of taking on a pair of winter container arrangements that asked for considerable size and scale.

Karen lending a hand securing the picks

A discussion of the transport scheme was lively, but the tops of these fresh cut pussy willow twigs had no problem bending over for the trip across town.

See what I mean?

Set in place, the scale of this winter arrangement works well with in this space. The materials reflect the landscape that can be viewed from this vantage point. The color is very friendly to the color in the glaze of this French bugadier. The pot is filled with gravel, so there is proper ballast to handle the height of the arrangement. The foam form provides another service. As it does not absorb water, it prevents water from getting in to the pot. This form is 6″ thick overall, so the lower 3″ is wedged tightly into the pot.

winter arrangements in the back yard

framed view

There is no doubt a viable, approachable, and beautiful winter season ahead in the garden. Every gardener needs to determine how they will handle that. I garden in every season. The winter pots help speak to that.


At A Glance: More Garlands

If you have been reading this journal for a long time, you may see pictures you have seen before. I find that looking at older work always has a purpose. What you would not want to repeat is obvious, but some work stands up fairly well to the passing of the years, and is worth a second look.  I did not do garland at the shop last year. This picture makes me want to be sure to do it this year.

These interior garlands were done last winter, in response to the most spectacular holiday garland I have ever seen. The British version of Country Living magazine did a great article about it, with lots of pictures. When you see it, you will know why I fell so hard for it. Perhaps when I retire, I will go to Cotehele in the fall, and join in the making. That would be a perfect moment in the garden, indeed. Should you be curious, to follow is a link to my blog post on it from this past March.   the holiday garland at Cotehele

Please enjoy what is to follow on the subject of holiday garlands. In much the same way as I was inspired by the pictures of Cotehele garland, perhaps something you see here will resonate such that you decide to gather materials and build a garland. If you are already in the process of making a garland that will find a home in your garden, bravo.

garland over the door

garland detail

garland with faux fruit, Williamsburg style

Interior wreath and mantel garland

The above picture is a garland detail with orange faux fruit and preserved pink eucalyptus. This was my garland at home one year. I rather enjoy creating something from those materials no one else spoke for. That pink eucalyptus was glaringly unattractive in the shop.  But in this garland, it had its beautiful moment.

The swag and drape over this window is a loose weave burlap ordinarily used to cover grass seed.  The corner medallions?  24″ diameter magnolia wreaths.

My partner Rob is a big fan of light garlands. These light garlands of his were the highlight of this holiday season.

garland for a mantel

This garland was zip tied to a large diameter bamboo pole so it would stay straight across this long horizontal run above the door. No matter what you make, or how you make it, gravity will rule.

plain magnolia garland swooping below a tile roof

garland for a tree trunk. I cannot really explain in words why I love this so much. But no doubt it has to do with the incomparable beauty of a tree.

formal mantel garland

garland on bamboo poles with wings

light garland designed, fabricated and hung by Rob. How it terminates into a small stone cistern is so beautiful.

magnolia and lime green lichen garland

evergreen garland with a top garland of grapevine

two story tall magnolia and light garland

garland hats over the windows of dry hydrangeas and various dry stems from the perennial garden. The stems in the center of the window boxes are cut weed skeletons from the field next door. Beautiful garland can be made with cut materials at hand right outside a gardener’s door.

My advice? Express your past season with the garden over your door or on your mantel. That making will keep you company all winter long.

This is one way that an expression of a delight for the garden can wrap you up and keep you warm, all winter long.


A Holiday Garland

A holiday garland over the front door or mantel is undoubtedly a special yet familiar expression of the joy marking the turning of the season from fall to winter. Representing equal parts pageantry, goodwill, and a love of nature and natural materials, a garland is a hand worked expression of the garden appropriate to display for the winter season. I will leave mine up all winter, and be all the happier for having it to look at. Friends and family who view and pass under that garland have been invited to celebrate the beauty of nature and what that adds to everyone’s life before they step inside the door. I find this activity is satisfying for the gardener in me who has had to put their gardening ways away for the winter. These ideas are what energize the design and fabrication of every garland I make.

Our garland always begin with a collection of evergreen boughs that have been wired together in a long flexible length. I have also seen garlands made from boughs attached one after another to a stout rope. We hand make the garland if it is fairly short and manageable, but I usually purchase them premade from a mix of fir boughs at my local farmer’s market. Concolor fir, Douglas fir, Nordmann fir, noble fir and fraser fir will maintain their fresh appearance inside and out for a long time. Magnolia garlands have a sumptuous look that dries beautifully if used indoors. The first order of business is to determine the direction of the boughs. We arrange the boughs in an upward position from the bottom left, and up and over to the top/center. In a traditional garland, the right hand overhead portion and drop needs to mirror the left hand side. A traditional garland is bilaterally symmetrical. If the garland purchased is a long one, it will need to be cut in the center, and flipped end to end, and reattached at the top/center. For this reason, I order my garlands in 15′ lengths. A pair of this shorter length garlands can be easily be attached at the center point with the boughs running in opposite directions. I always run the boughs upwards, so gravity fans them out as the branches dry. Branches hung in a downward position close up and shrink in width as they dry. 15 footers are easy to handle, and any excess greens can be cut off the bottoms. The 30′ foot garland under construction was perfect for 2 15′ garlands overlapped and attached in the middle. We usually add more of our cut greens over the top of the garlands we buy, so the garland is thick and substantial.

What gets added to that branchy base is a matter of personal preference. Dried and preserved natural bits, branches and seed heads look great attached to a garland. Dry hydrangea flowers shrug off winter in a way that surprises me.  Faux berries and picks can provide both color and drama. I do not value one material over the other, nor do I value one style over another. What is of great value is the process of creating and making. There are so many things that contribute to that moment when a thought or idea takes on a life, and the making begins. That transition from an idea to the making is a perfect moment. My advice? Make something.

Positioning the work to make it convenient to work on is crucially important.  We set this garland on a collection of cardboard boxes set end to end. They are not really tall enough for me, although Natasha did not seem to mind hovering over the work. Her back is 50 years younger than mine, so there you have it.  If I work on a garland, an old office chair on casters puts me at exactly the right height to work. I can roll from one end to the other. The box tops holds all of the necessary tools and materials. It supports the work in a way that makes it easy to work.

This particular garland is traditional in its materials, so it features a secondary garland of grapevine. We buy grapevine garland in rolls 35′ long. Grapevine garlands are notoriously hard to handle, but properly arranged and secured around the evergreen garland, they add a reference to nature as much as they add volume and air.

I would be remiss if I did not say that winding a grapevine garland around an evergreen garland is hard. It takes at least two people to handle the under and over. In the aftermath, my hands look like I have scrubbed them with a cheese grater. Ha. The work of it is worth it. We attach the lighting for the garland to the grapevine. That light that stands proud of that evergreen garland will endow it’s night view with a warm glow. Of course we light our garlands.

My treasured staffer Natasha took the lead on the construction of this garland. She did a great job of insuring a solid construction. She went on to make sure that every gesture she made was beautiful. I was so pleased to see her taking ownership, and seeing both the art and the construction through to the finish. She has great hands, a great heart, and a will to be that I admire.

loading the garland

loading the garland 2

loaded up


We had already installed the holiday container arrangements. The garland would be a roof over all.

My membership in that group that nature organizes over the the garden and landscape means I have plenty of perfect moments. This was one of them.

A perfect moment in the garden may come at any time. And not necessarily when we expect it.

Beautiful, this. Best regards, Natasha.